2009 BMW M5 SEDAN navigation
[x] Cancel search: navigationPage 207 of 266

Mobility
205Reference
At a glance
Controls
Driving tips
Communications
Navigation
Entertainment
Observe all national and local maximum speed
limits, otherwise violations of the law could
occur.
Tire identification marks
Knowledge of the labeling on the side of the tire
makes it easier to identify and choose the right
tires.
Tire sizeSpeed letter
Q = up to 100 mph/160 km/h
T = up to 118 mph/190 km/h
H = up to 131 mph/210 km/h
V = up to 150 mph/240 km/h
W = up to 167 mph/270 km/h
Y = up to 186 mph/300 km/h
Z = over 150 mph/240 km/h
Tire Identification Number
Tires with DOT codes meet the guidelines of
the U.S. Department of Transportation.
DOT code:
Tire age
The manufacturing date of tires is contained in
the tire coding: DOT ... 1008 indicates that the
tire was manufactured in week 10 of 2008.
Tire sizePressure specifications in psi/kPa
Traveling speeds up
to max. of 100 mph/
160 km/hTraveling speeds including those exceed-
ing 100 mph/160 km/h
All pressure specifications
in the table are indicated in psi/
kilopascal with cold tires.
Cold = ambient temperature
245/45 R 18 100 V XL M+S 35/240 38/260 35/240 38/260 41/280 46/320
255/40 ZR 19 36/250 - 36/250 - 41/280 -
285/35 ZR 19 - 36/250 - 36/250 - 46/320
More details on the permissible load and weights can be found on page239.
e.g.
Nominal width in mm
Aspect ratio in Ξ
Radial belt construction
Rim diameter in inches
Load rating,
(not on ZR tires)
Speed code letter (in
front of the R on ZR tires)
245/45 R18100 V
285/35 ZR19
e.g.
Manufacturer code
for tire make
Tire size and tire design
Tire ageDOT xxxx xxx 1008
Page 209 of 266

Mobility
207Reference
At a glance
Controls
Driving tips
Communications
Navigation
Entertainment
suitable for winter conditions. For the sake of
safety, new tires should be installed.
Wear indicators at the tread-groove base, refer
to arrow, are distributed over the tire's circum-
ference and are marked on the side of the tire
with TWI – Tread Wear Indicator. If the tire tread
has been driven down to the wear indicators, a
tread depth of 0.063 in/1.6 mm has been
reached.
Wheel/tire damage
Please note that low-profile tires cause wheels,
tires and suspension parts to be more suscep-
tible to road hazards and consequential dam-
ages.
Unusual vibrations encountered during normal
vehicle operation can indicate tire failure or
some other vehicle defect. This can, for exam-
ple, be caused by driving over curbs. These
kinds of problems may also be signaled by other
changes in vehicle response, such as a strong
tendency to pull to the left or right.
In these cases, reduce speed immedi-
ately and have wheels and tires thor-
oughly checked. To do so, drive carefully to the
nearest BMW center or tire shop that works
according to BMW repair procedures with cor-
respondingly trained personnel. If necessary,
have the vehicle towed there. Otherwise, tire
damage can be extremely dangerous to vehicle
occupants and other road users.<
New wheels and tires
Have new wheels and tires installed only
by your BMW center or tire shop that
works according to BMW repair procedures with correspondingly trained personnel. If this
work is not carried out properly, there is a dan-
ger of subsequent damage and related safety
hazards. Make sure that the new wheels are bal-
anced.<
Retreaded tires
BMW does not recommend that you use
retreaded tires, as driving safety may be
impaired. The causes for this include the possi-
bly different tire casing structures and the often
wide variations in their age, which can result in a
limited service life.<
The right wheels and tires
BMW recommends that you use only
wheel and tire combinations that BMW
has tested and approved for your particular
vehicle. Variations in factors such as manufac-
turing tolerances mean that even wheels and
tires with identical official size ratings could
actually have different dimensions than the
approved units – these differences could lead to
body contact, and with it the risk of severe acci-
dents. When selecting the tires, also ensure
that they have a sufficient load-carrying capac-
ity. If non-approved wheels and tires are used,
BMW cannot evaluate their suitability, and
therefore cannot be held liable for driving
safety.<
You can inquire about the right wheel/tire com-
bination at your BMW center.
The correct wheel/tire combination also affects
various systems whose function would other-
wise be impaired, e.g. ABS or DSC.
To maintain good handling and vehicle
response, use only tires of a single tread config-
uration from a single manufacturer. Following
tire damage, have the original wheel and tire
combination remounted on the vehicle as soon
as possible.
Wheels with electronics for
TPM Tire Pressure Monitor
When mounting new tires or converting from
summer to winter tires or vice versa, only use
wheels with TPM electronics, otherwise the
Page 211 of 266

Mobility
209Reference
At a glance
Controls
Driving tips
Communications
Navigation
Entertainment
state. To do this, reinitialize the system, refer to
After changing wheels/tires.<
Page 213 of 266

Mobility
211Reference
At a glance
Controls
Driving tips
Communications
Navigation
Entertainment
Engine compartment
1Filler neck for engine oil, refer to
Adding engine oil, page214
2Expansion tank for coolant, refer to
page215
3Starting-aid terminal, refer to page232
4Body ground/negative terminal
5Filler neck for washer fluid of the headlamp
and windshield cleaning systems, refer to
page65
Page 215 of 266

Mobility
213Reference
At a glance
Controls
Driving tips
Communications
Navigation
Entertainment
Fast measurement
In addition to the automatic measurement, you
can also determine the current oil level manu-
ally, e.g. after adding engine oil, but with a lower
degree of measuring accuracy.
1.With the engine at operating temperature,
i.e. after at least 6 miles/10 km of uninter-
rupted driving, park the vehicle in a horizon-
tal position.
2.Allow the engine to run at idle.
3.Press the BC button on the turn signal lever
repeatedly until the oil level display is
shown in the instrument cluster.
4.Press the BC button for at least 2 seconds.
The oil level is determined. A clock symbol
is displayed during the measurement.
5.After approx. 1 minute the current oil level is
displayed.
Displaying via iDrive
iDrive, for operating principle refer to page16.
1.Press the button.
This opens the start menu.
2.Press the controller to open the menu.
3.Turn the controller until "Info sources" is
selected and press the controller.
4.Turn the controller until "Service Info" is
selected and press the controller.5.Change to upper field if necessary. Turn the
controller until "Service requirements" is
selected and press the controller.
6.Change to the second field from the top if
necessary. Turn the controller until "Engine
oil level" is selected and press the control-
ler. The oil level is displayed.
Possible messages
>"Engine oil level O.K."
>"No measurement available: Updating
engine oil level measurement...":
The engine oil level is measured. This pro-
cess can take approx. 1 minute when
stopped on a level surface with the engine
running and approx. 5 minutes while driv-
ing.
If the engine oil has been topped off, the
measurement of the oil level can take up to
30 minutes.
>"Oil level at the minimum! Refill with 1 quart
of engine oil.":
Add a maximum of 1 US quart/1 liter of
engine oil at the next opportunity, refer also
to Adding engine oil below. Add at least
0.5 US quart/0.5 liters of oil; otherwise, the
oil level check cannot reliably display the
new oil level.
If the oil level displayed is below minimum,
add engine oil immediately. Failure to do so
may lead to engine damage.
>"Engine oil level too high"
*:
Have the vehicle checked immedi-
ately, otherwise engine damage may
result if too much oil has been added.<
>"Please observe recalculated service inter-
val for engine oil":
Page 217 of 266

Mobility
215Reference
At a glance
Controls
Driving tips
Communications
Navigation
Entertainment
Coolant
Do not add coolant to the cooling system
when the engine is hot. Escaping coolant
can cause burns.<
Coolant is composed of equal parts water and a
coolant additive. Not all commercially available
additives are suitable for your BMW. Ask your
BMW center for suitable additives.
Only use suitable additives, otherwise
engine damage may result. The additives
present a health hazard; observe the instruc-
tions on the containers.<
Comply with the appropriate environ-
mental protection regulations when dis-
posing of coolant additives.<
Checking coolant level
1.Do not open the hood until the engine has
cooled down.
2.Turn the cap of the expansion tank counter-
clockwise to allow any accumulated pres-
sure to escape, then continue turning to
open.
3.The coolant level is correct when the upper
end of the float rod is at the same height as
the upper edge of the filler neck, also refer
to the drawing next to the filler neck.
4.If the coolant is low, slowly add coolant up to
the specified level – do not overfill.
5.Turn the cap until there is an audible click.
6.Have the reason for the coolant loss elimi-
nated as soon as possible.
Page 219 of 266

Mobility
217Reference
At a glance
Controls
Driving tips
Communications
Navigation
Entertainment
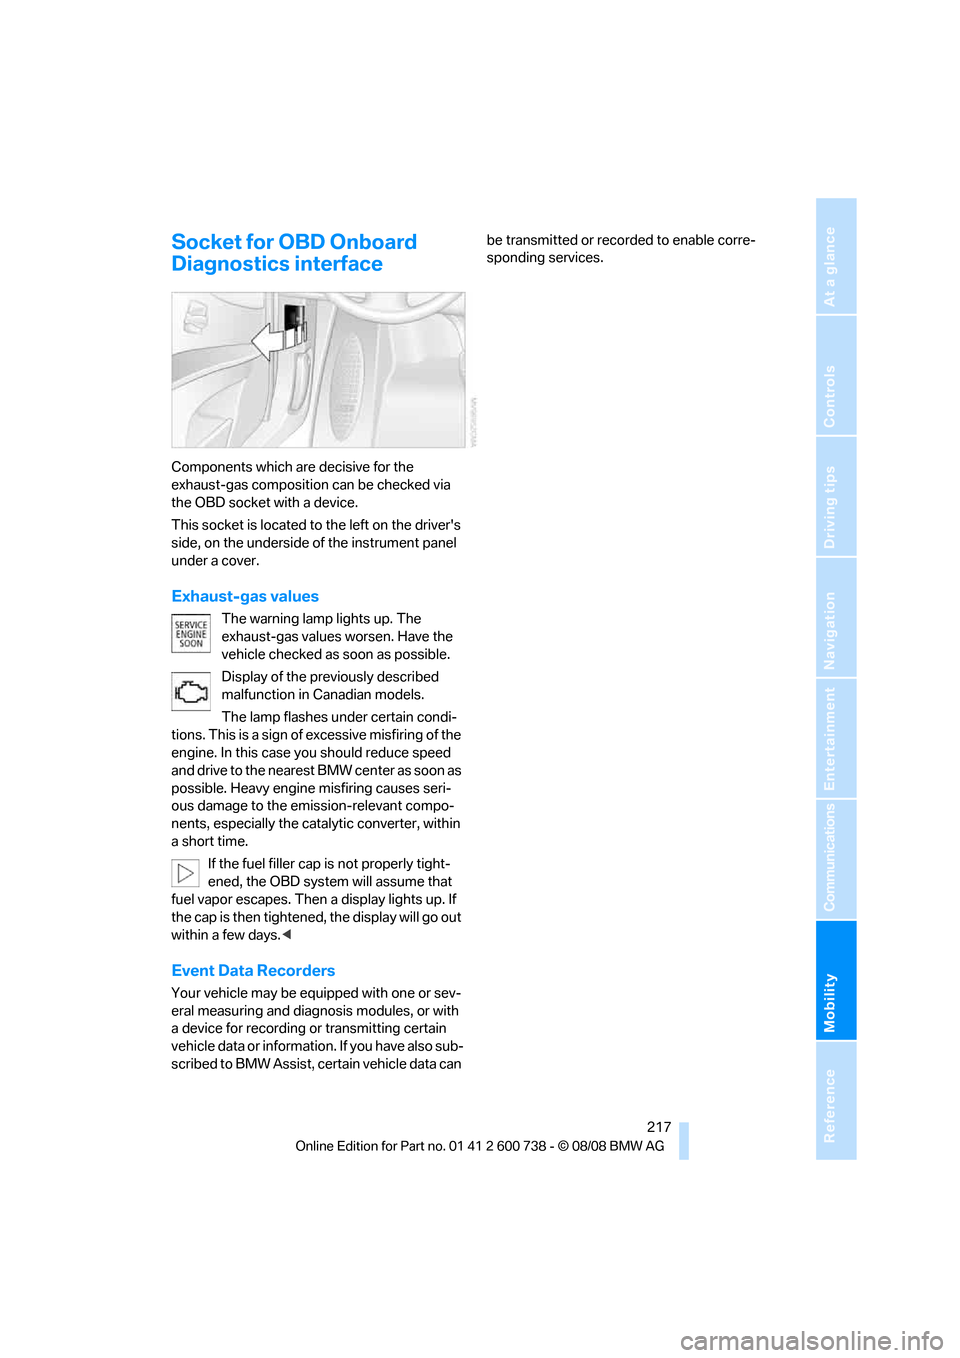
Socket for OBD Onboard
Diagnostics interface
Components which are decisive for the
exhaust-gas composition can be checked via
the OBD socket with a device.
This socket is located to the left on the driver's
side, on the underside of the instrument panel
under a cover.
Exhaust-gas values
The warning lamp lights up. The
exhaust-gas values worsen. Have the
vehicle checked as soon as possible.
Display of the previously described
malfunction in Canadian models.
The lamp flashes under certain condi-
tions. This is a sign of excessive misfiring of the
engine. In this case you should reduce speed
and drive to the nearest BMW center as soon as
possible. Heavy engine misfiring causes seri-
ous damage to the emission-relevant compo-
nents, especially the catalytic converter, within
a short time.
If the fuel filler cap is not properly tight-
ened, the OBD system will assume that
fuel vapor escapes. Then a display lights up. If
the cap is then tightened, the display will go out
within a few days.<
Event Data Recorders
Your vehicle may be equipped with one or sev-
eral measuring and diagnosis modules, or with
a device for recording or transmitting certain
vehicle data or information. If you have also sub-
scribed to BMW Assist, certain vehicle data can be transmitted or recorded to enable corre-
sponding services.
Page 221 of 266

Mobility
219Reference
At a glance
Controls
Driving tips
Communications
Navigation
Entertainment
12 in/30 cm from sensors, e.g. Park Distance
Control sensors or radar sensors.<
Hand washing
When washing the vehicle by hand, use plenty
of water and car washing shampoo. Clean the
vehicle with gentle pressure using a sponge or a
washing brush.
Before cleaning the windshield, deacti-
vate the rain sensor or switch off the igni-
tion to prevent unwanted wiper operation.<
Follow local guidelines for washing vehi-
cles by hand.<
Headlamps
Do not rub dry and never use abrasives or
strong solvents to clean the covers.
Loosen dirt, e.g. insects, with shampoo or
insect remover and wash away with plenty of
water.
Use a window de-icer to remove accumulated
ice and snow, not a scraper.
Windows
Use a glass cleaner to clean the inside and out-
side surfaces of the windows and the glass sur-
faces of the mirrors.
Do not use quartz-containing cleansers
to clean glass surfaces of the mirrors.<
Wiper blades
Clean with soapy water and replace regularly to
prevent streaking.
The presence of wax and sealant residues
and dirt on the windows leads to streaking
during wiper operation and results in premature
wear on wiper blades as well as interference
with the rain sensor.<
Caring for the vehicle finish
Regular care helps your vehicle retain its value
and protects the paint from the long-term
effects of aggressive substances.
Regionally occurring environmental factors can
affect and damage vehicle finish. It is therefore important to tailor the frequency and extent of
your car care accordingly.
Immediately remove particularly aggressive
substances such as spilled fuel, oil, grease,
brake fluid, tree resin, or bird droppings; other-
wise, they may damage your paint.
Repairing paint damage
Repair stone damage or scratches imme-
diately, depending on the severity of the
damage, to prevent the formation of rust.<
BMW recommends having paint damage pro-
fessionally repaired using Genuine BMW finish
materials in accordance with factory guidelines.
Waxing
Sealant is required when water no longer beads
on the clean surface of the paint. Use only prod-
ucts that contain carnauba wax or synthetic wax
to seal your finish.
Rubber gaskets
Treat only with water or a rubber care product.
To avoid noise or damage, do not use
products that contain silicone to care for
rubber gaskets.<
Chrome components
Particularly after exposure to road salt, thor-
oughly cleanse parts like the radiator grille, door
handles, or window frames with plenty of water
with shampoo added to it. For additional treat-
ment, use chrome polish.
Alloy wheels
Depending on your system, braking can gener-
ate dust, which settles on the light-alloy wheels.
Remove this dust regularly with acid-free wheel
cleaner.
Do not use aggressive, acid-containing,
strongly alkaline, or coarse cleansers and
do not use steam cleaners at temperatures
greater than 1407/606; otherwise you may
damage your vehicle.<