2009 BMW 528I XDRIVE phone
[x] Cancel search: phonePage 24 of 294

iDrive
22
Switching assistance window off/on
1.Move the controller to the right to change to
the assistance window and press the con-
troller.
2.Select "Assist. window off" and press the
controller.
To switch on, change to the assistance window
and press the controller.
Switching Control Display
off/on
1.Press the button.
This opens the start menu.
2.Press the controller to open the menu.
3.Select "Display off" and press the control-
ler.
To switch on, press the controller.
Programmable memory
buttons
You can save and request certain functions of
iDrive on the programmable memory buttons:
>Destinations of navigation>Telephone, phone numbers
>Entertainment:
>radio station
>CD
>CD compartment of CD changer
*
>AUX
>USB-audio interface
*
The assignment of the programmable buttons
is stored for the remote control currently in use.
Saving function
Destinations of navigation
1.Select navigation destination, e.g. in the
destination list or the address book.
2.Press the ... button longer
than 2 seconds.
Special features:
>With the destination guidance system and
the map view started, the current destina-
tion is stored.
>During destination entry via a map, the
coordinates at the cursor are stored, not the
current destination.
Telephone, phone numbers
1.Enter the phone number or select it in a list
of the stored phone numbers, e.g. of the A-
Z list.
2.Press the ... button longer
than 2 seconds.
If a name is assigned to the phone number, the
name will also be stored.
Entertainment
In the Entertainment menu, the sound source
currently heard, e.g. a radio station, is stored,
regardless of the selection on the Control Dis-
play.
1.Select the desired function, e.g. radio sta-
tion or CD.
2.Press the ... button longer
than 2 seconds.
Page 25 of 294
At a glance
23Reference
Controls
Driving tips
Communications
Navigation
Entertainment
Mobility
If the vehicle is equipped with two drives,
the current track is stored for CDs with
compressed audio files.<
Running function
Press the ... button.
When selecting a phone number, the connec-
tion is also established, or the destination guid-
ance is started when a navigation destination is
selected.
Displaying button assignment
You can display the assignment of the buttons
by touching them with your finger. Please do
not wear gloves when doing so. Touching with
an object, e.g. a pen, does not function.
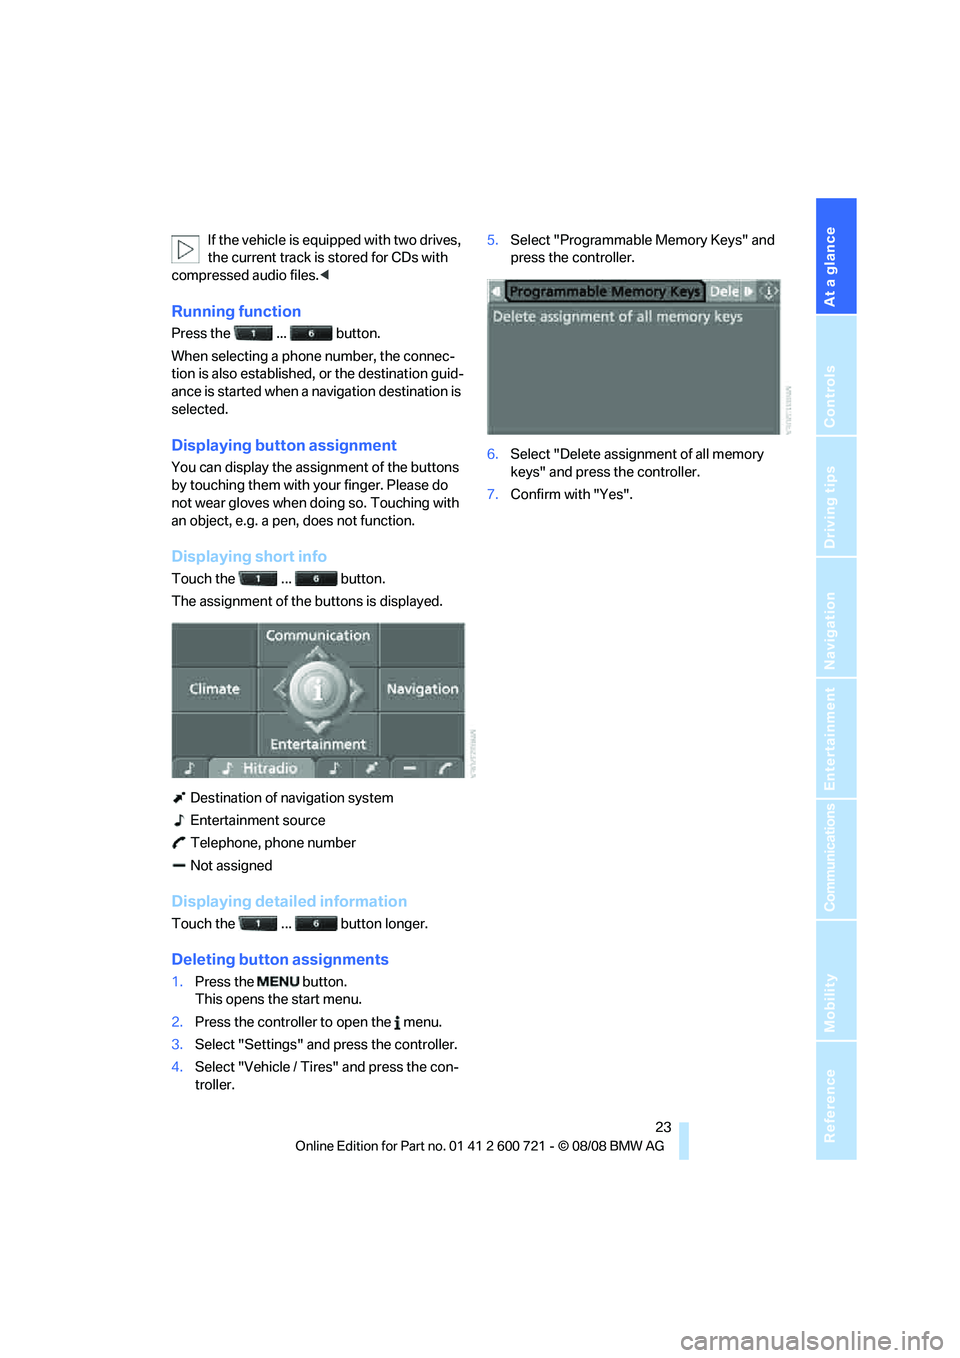
Displaying short info
Touch the ... button.
The assignment of the buttons is displayed.
Destination of navigation system
Entertainment source
Telephone, phone number
Not assigned
Displaying detailed information
Touch the ... button longer.
Deleting button assignments
1.Press the button.
This opens the start menu.
2.Press the controller to open the menu.
3.Select "Settings" and press the controller.
4.Select "Vehicle / Tires" and press the con-
troller.5.Select "Programmable Memory Keys" and
press the controller.
6.Select "Delete assignment of all memory
keys" and press the controller.
7.Confirm with "Yes".
Page 26 of 294
Voice command system
24
Voice command system
The concept
The voice command system allows you to con-
trol operation of various vehicle systems with-
out taking your hands off the steering wheel.
Individual menu items on the Control Display
can be spoken as commands. This frees you of
having to use the controller.
The voice command system transforms your
oral commands into control signals for the
selected systems and provides support in the
form of instructions or questions.
The voice command system uses a special
microphone located in the area of the interior
rearview mirror, refer to page14.
Precondition
Via iDrive, set the language that applies for the
voice command system in order to enable iden-
tification of the spoken commands. To set the
language of iDrive, refer to page89.
Symbols in Owner's Manual
Voice commands
Activating voice command system
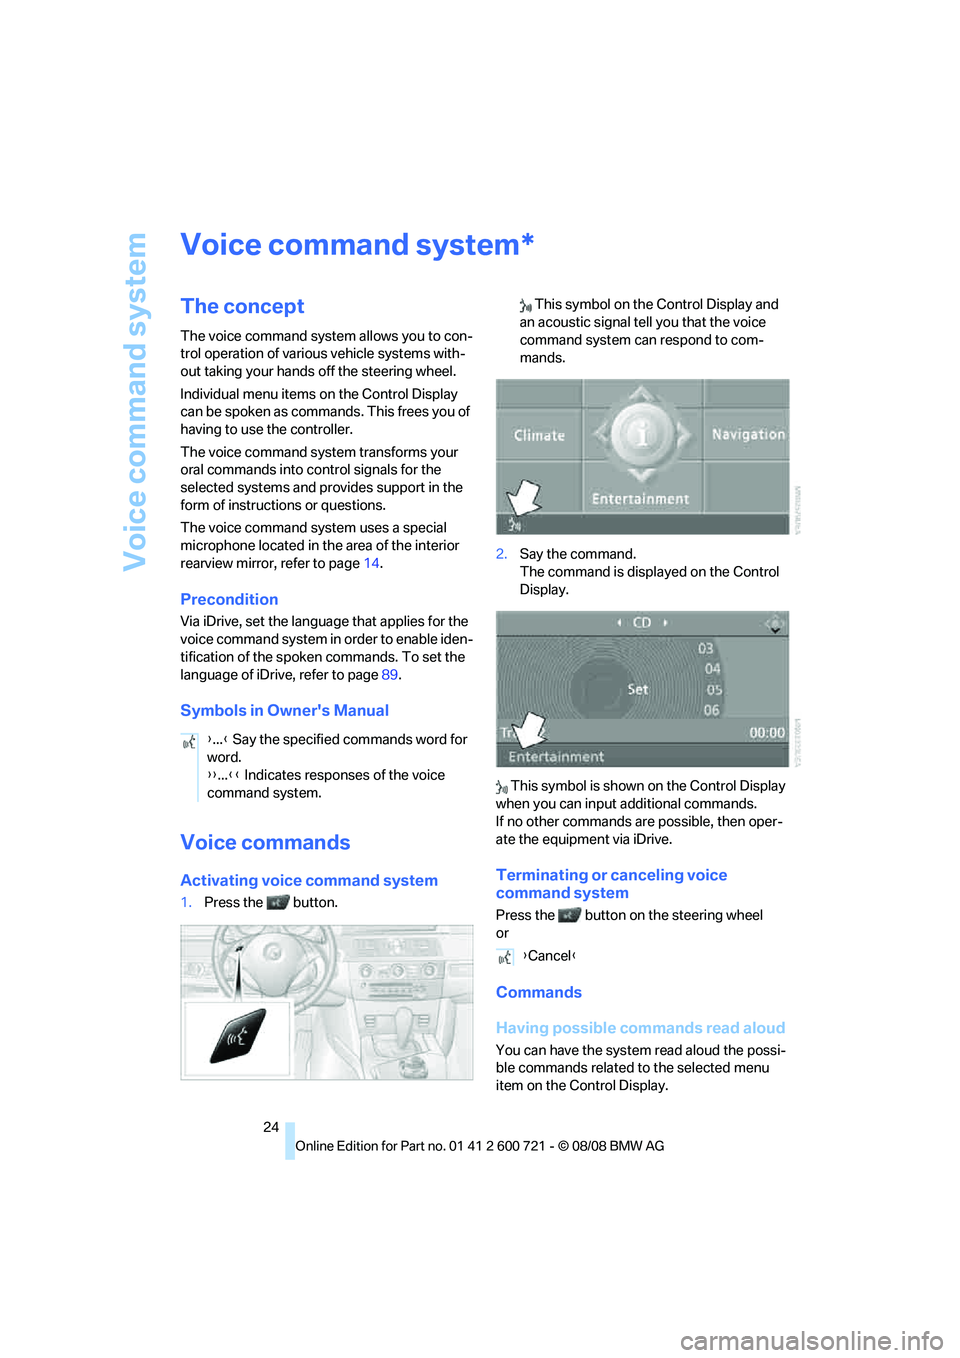
1.Press the button. This symbol on the Control Display and
an acoustic signal tell you that the voice
command system can respond to com-
mands.
2.Say the command.
The command is displayed on the Control
Display.
This symbol is shown on the Control Display
when you can input additional commands.
If no other commands are possible, then oper-
ate the equipment via iDrive.
Terminating or canceling voice
command system
Press the button on the steering wheel
or
Commands
Having possible commands read aloud
You can have the system read aloud the possi-
ble commands related to the selected menu
item on the Control Display.
*
{...} Say the specified commands word for
word.
{{...}} Indicates responses of the voice
command system.
{Cancel}
Page 28 of 294
Voice command system
26
Notes
The mobile phone can also be operated
with voice commands, refer to
page205.<
For voice commands, bear the following in
mind:
>Say the commands and numbers smoothly
and at normal volume, avoiding excessive
emphasis and pauses. This also applies to
spelling when entering the destination.
>Always issue commands in the language of
the voice command system.
>When selecting a radio station, use the
common pronunciation of the station name.
>For entries in the voice-activated phone
book, only use names in the language of the
voice command system and do not use
abbreviations.
>Keep the doors, windows and glass sun-
roof
* or panorama glass sunroof* closed to
prevent interference from ambient noise.
>Avoid making other noise in the vehicle
while speaking.
Page 34 of 294
Opening and closing
32 >Radio:
>Display of stored stations, refer to
page172
>Switching RDS Radio Data System on/
off
*, refer to page175
>Phone: volume setting, refer to page200
Central locking system
The concept
The central locking system functions when the
driver's door is closed.
The system simultaneously engages and
releases the locks on the following:
>Doors
>Luggage compartment lid or tailgate and
rear window
>Fuel filler door
Operating from outside
>Via the remote control
>Using door lock
>With comfort access
* via the door handles
In addition, it the remote control is used, the
welcome lamps, the interior lamps and the
courtesy lamps
* are switched on or off. The
alarm system
is armed/disarmed at the same
time.
You can find more detailed information on the
alarm system
on page39.
Operating from inside
Via the button for central locking, refer to
page35. The fuel filler door is not locked.
In the event of a sufficiently severe accident, the
central locking system unlocks automatically. In
addition, the hazard warning flashers and inte-
rior lamps come on.
Opening and closing:
Using remote control
Persons or animals left unattended in a
parked vehicle can lock the doors from
the inside. Always take along the remote control
when leaving the vehicle so that the vehicle can
then be opened from the outside.<
Unlocking
Press the button.
The interior lamps, the courtesy lamps
*, and
the welcome lamps are switched on.
Setting unlocking behavior
You can set whether the first press of the button
unlocks only the driver's door or the entire vehi-
cle.
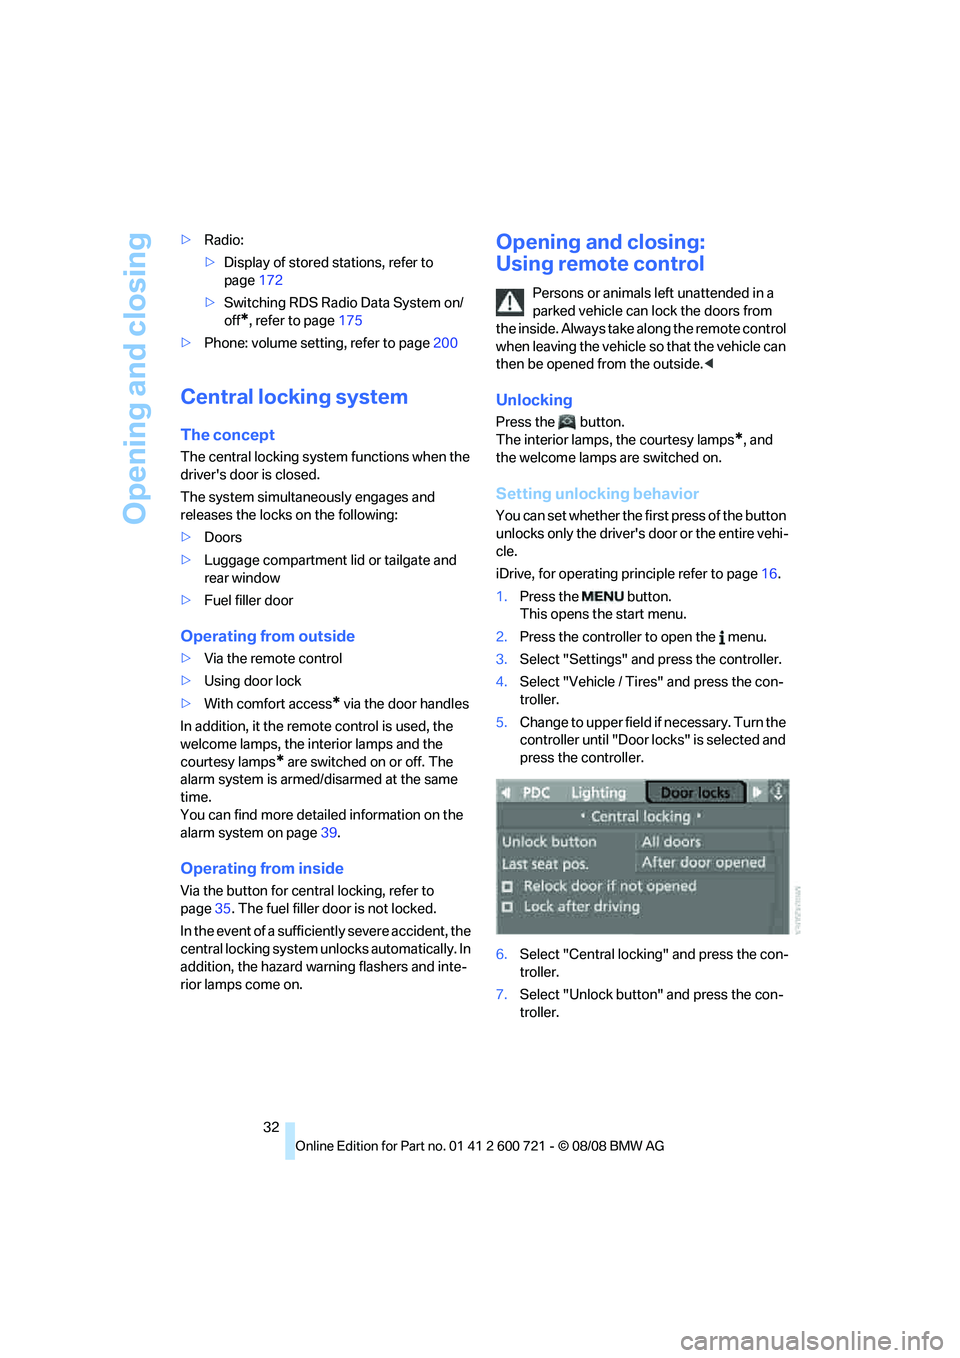
iDrive, for operating principle refer to page16.
1.Press the button.
This opens the start menu.
2.Press the controller to open the menu.
3.Select "Settings" and press the controller.
4.Select "Vehicle / Tires" and press the con-
troller.
5.Change to upper field if necessary. Turn the
controller until "Door locks" is selected and
press the controller.
6.Select "Central locking" and press the con-
troller.
7.Select "Unlock button" and press the con-
troller.
Page 59 of 294
Controls
57Reference
At a glance
Driving tips
Communications
Navigation
Entertainment
Mobility
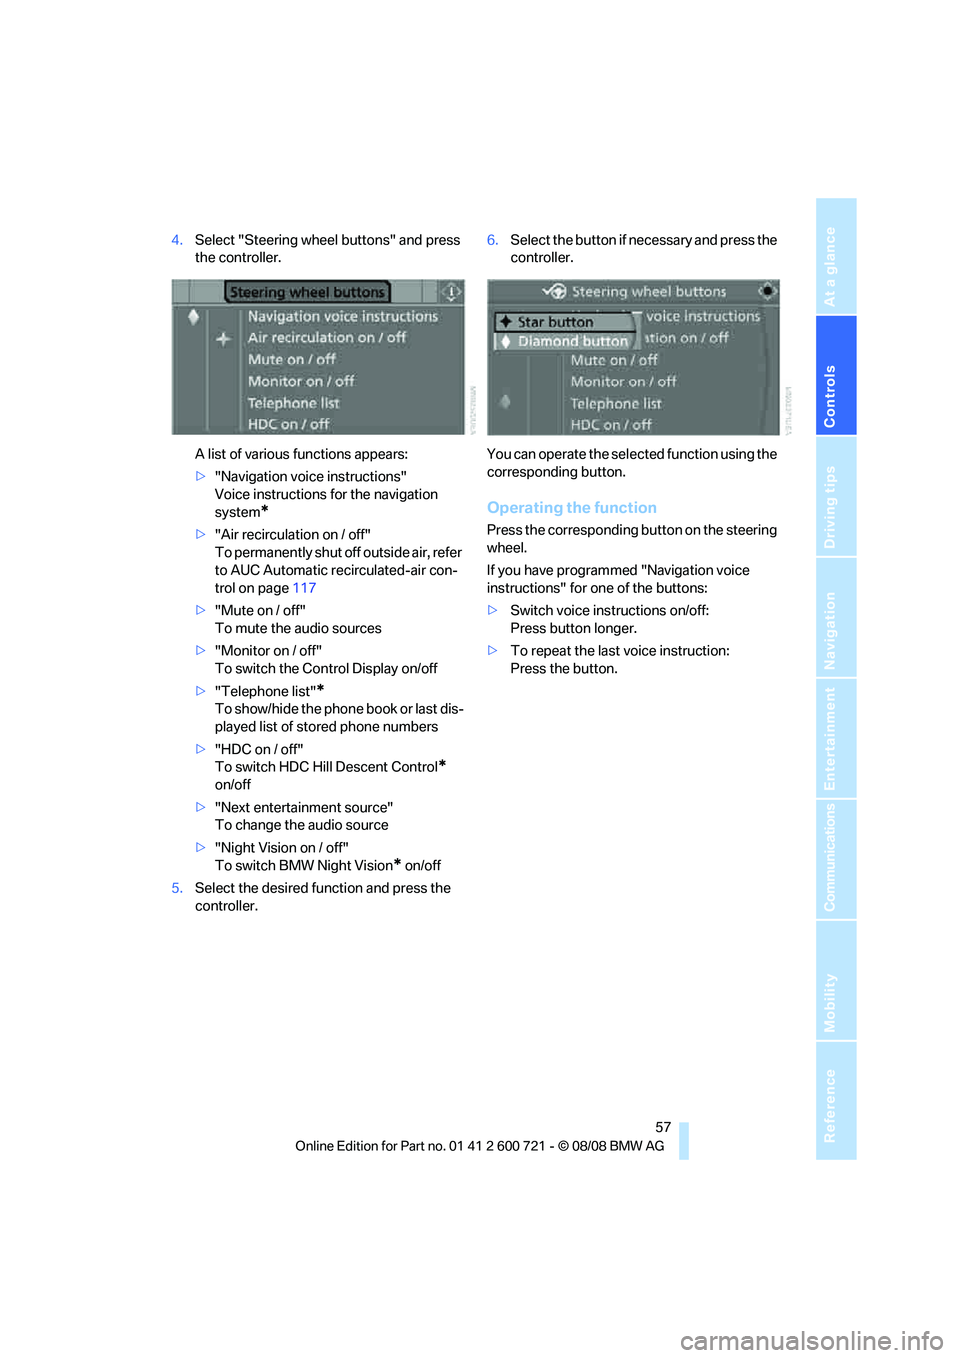
4.Select "Steering wheel buttons" and press
the controller.
A list of various functions appears:
>"Navigation voice instructions"
Voice instructions for the navigation
system
*
>"Air recirculation on / off"
To permanently shut off outside air, refer
to AUC Automatic recirculated-air con-
trol on page117
>"Mute on / off"
To mute the audio sources
>"Monitor on / off"
To switch the Control Display on/off
>"Telephone list"
*
To show/hide the phone book or last dis-
played list of stored phone numbers
>"HDC on / off"
To switch HDC Hill Descent Control
*
on/off
>"Next entertainment source"
To change the audio source
>"Night Vision on / off"
To switch BMW Night Vision
* on/off
5.Select the desired function and press the
controller.6.Select the button if necessary and press the
controller.
You can operate the selected function using the
corresponding button.
Operating the function
Press the corresponding button on the steering
wheel.
If you have programmed "Navigation voice
instructions" for one of the buttons:
>Switch voice instructions on/off:
Press button longer.
>To repeat the last voice instruction:
Press the button.
Page 125 of 294
Controls
123Reference
At a glance
Driving tips
Communications
Navigation
Entertainment
Mobility
Sun blinds for rear side windows
Pull the loop of the roller sun blind and hook
onto bracket.
Do not open the window with the roller
sun blind deployed. Otherwise, there is a
risk of damage and injury at higher speeds.<
Glove compartment
Opening
Pull the handle. The light in the glove compart-
ment switches on.
To prevent injury in the event of an acci-
dent while the vehicle is being driven,
close the glove compartment immediately after
use.<
Closing
Raise the lid into the closed position.
Locking
Lock with a key.
If you only hand over the remote control
without the integrated key, e.g. for valet
parking, refer to page30, the glove compart-
ment cannot be unlocked.<
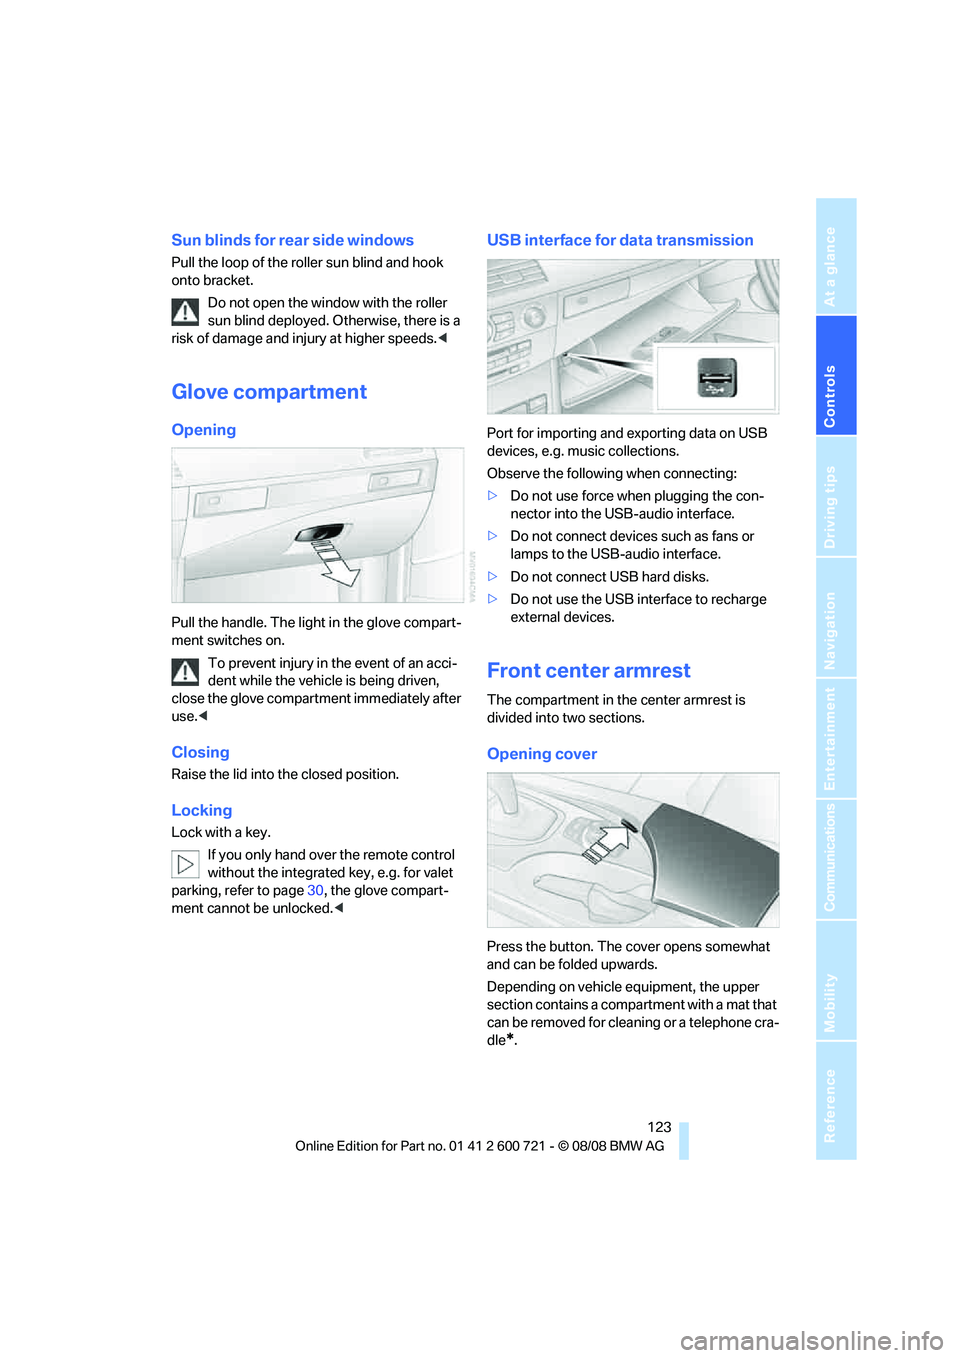
USB interface for data transmission
Port for importing and exporting data on USB
devices, e.g. music collections.
Observe the following when connecting:
>Do not use force when plugging the con-
nector into the USB-audio interface.
>Do not connect devices such as fans or
lamps to the USB-audio interface.
>Do not connect USB hard disks.
>Do not use the USB interface to recharge
external devices.
Front center armrest
The compartment in the center armrest is
divided into two sections.
Opening cover
Press the button. The cover opens somewhat
and can be folded upwards.
Depending on vehicle equipment, the upper
section contains a compartment with a mat that
can be removed for cleaning or a telephone cra-
dle
*.
Page 126 of 294
Practical interior accessories
124
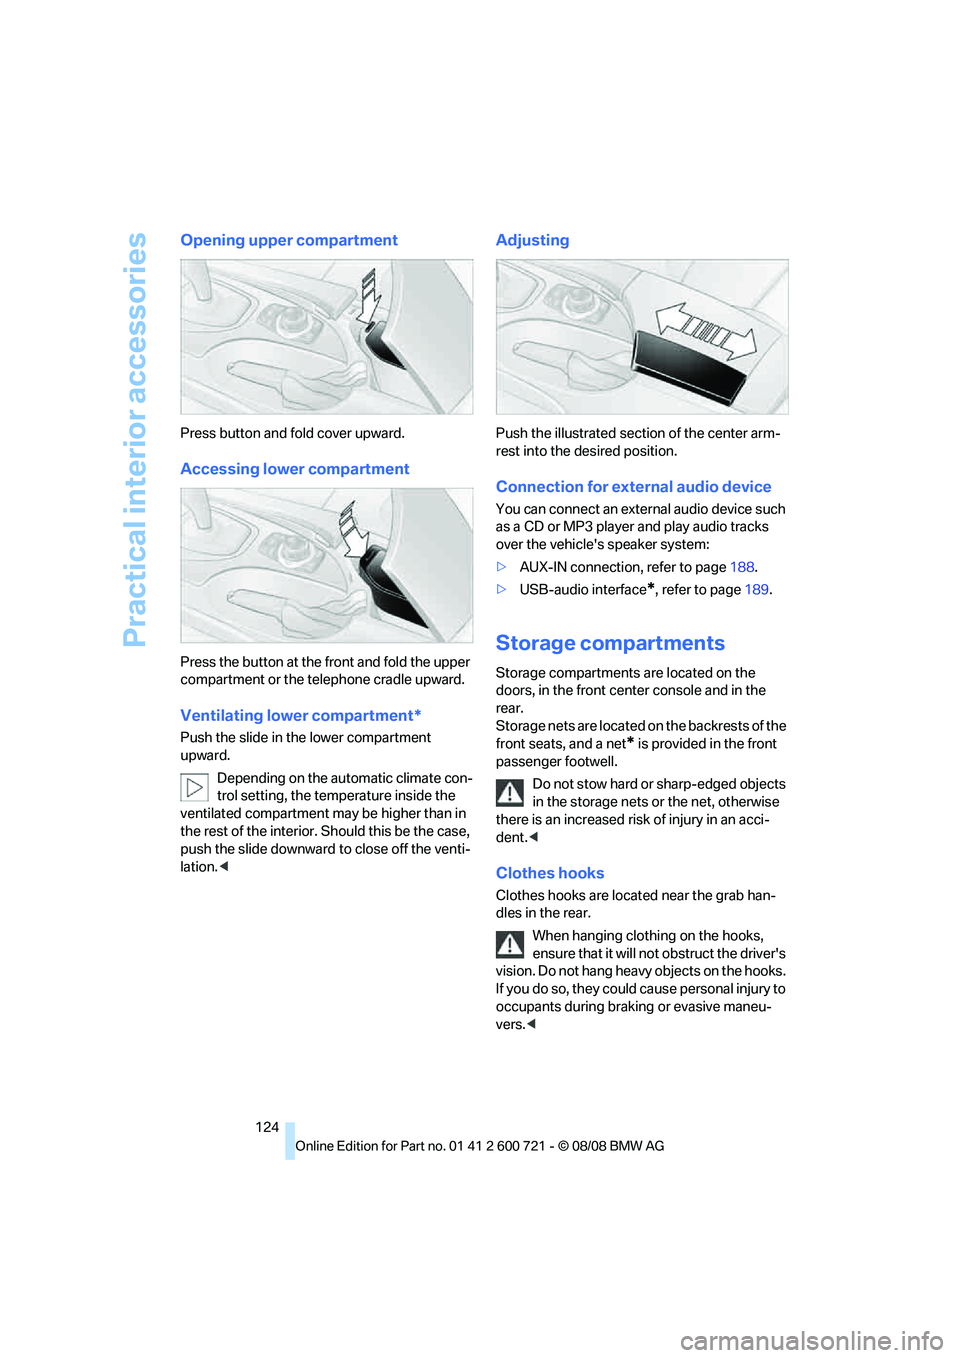
Opening upper compartment
Press button and fold cover upward.
Accessing lower compartment
Press the button at the front and fold the upper
compartment or the telephone cradle upward.
Ventilating lower compartment*
Push the slide in the lower compartment
upward.
Depending on the automatic climate con-
trol setting, the temperature inside the
ventilated compartment may be higher than in
the rest of the interior. Should this be the case,
push the slide downward to close off the venti-
lation.<
Adjusting
Push the illustrated section of the center arm-
rest into the desired position.
Connection for external audio device
You can connect an external audio device such
as a CD or MP3 player and play audio tracks
over the vehicle's speaker system:
>AUX-IN connection, refer to page188.
>USB-audio interface
*, refer to page189.
Storage compartments
Storage compartments are located on the
doors, in the front center console and in the
rear.
Storage nets are located on the backrests of the
front seats, and a net
* is provided in the front
passenger footwell.
Do not stow hard or sharp-edged objects
in the storage nets or the net, otherwise
there is an increased risk of injury in an acci-
dent.<
Clothes hooks
Clothes hooks are located near the grab han-
dles in the rear.
When hanging clothing on the hooks,
ensure that it will not obstruct the driver's
vision. Do not hang heavy objects on the hooks.
If you do so, they could cause personal injury to
occupants during braking or evasive maneu-
vers.<