2009 AUDI S4 CABRIOLET center console
[x] Cancel search: center consolePage 64 of 340
Power top
• If you park the vehicle with the power top open, be aware that
you leave the interior exposed to the effects of unexpected weather
changes as well as to criminal access. To protect your property,
close the top before leaving the car and lock away any valuables in
the luggage compartment. •
Open the power top
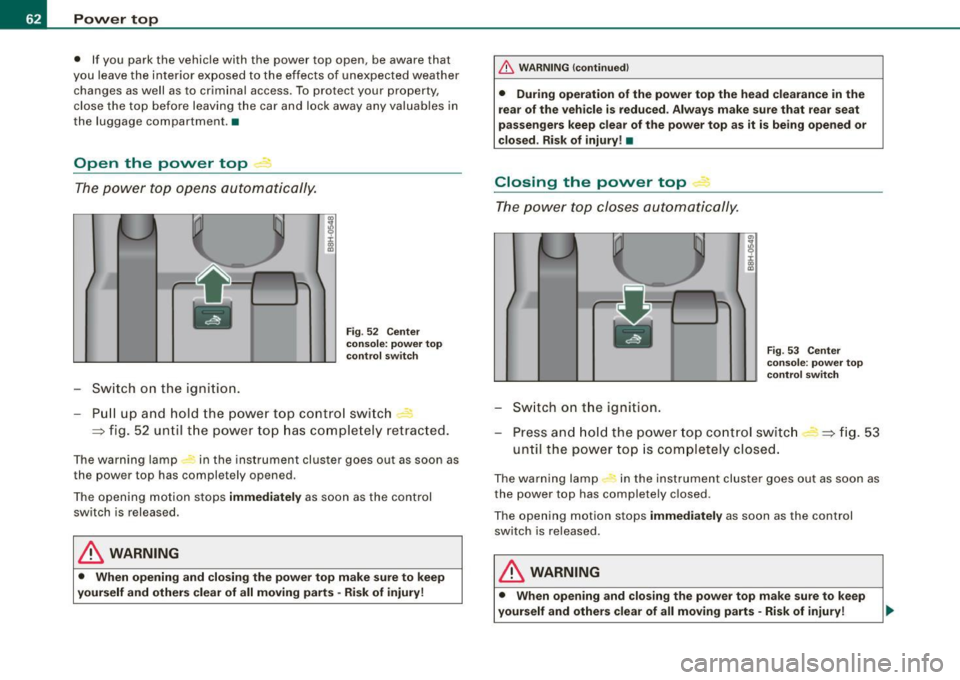
The power top opens automatically.
Switch on the ignition.
Fig. 52 Center
console: power top
control switch
Pull up and hold the power top control switch -
=:> fig. 52 until the power top has completely retracted.
The warning lamp in the instrument cluster goes out as soon as
the power top has completely opened.
The opening motion stops immediately as soon as the control
switch is released.
& WARNING
• When opening and closing the power top make sure to keep
yourself and others clear of all moving parts · Risk of injury!
_& WARNING (continued)
• During operation of the power top the head clearance in the
rear of the vehicle is reduced . Always make sure that rear seat
passengers keep clear of the power top as it is being opened or
closed . Risk of injury! •
Closing the power top 4
The power top closes automatically.
Switch on the ignition.
"'
I
Fig. 53 Center
console: power top
control switch
Press and hold the power top control switch
until the power top is completely closed. =:> fig. 53
The warning lamp #, in the instrument cluster goes out as soon as
the power top has completely closed .
The opening motion stops immediately as soon as the control
switch is released.
& WARNING
• When opening and closing the power top make sure to keep
yourself and others clear of all moving parts -Risk of injury!
Page 83 of 340

[ i J Tip s
• Do not attach any stickers to the windshield in front of the two
light sensors, as this would interfere with both the automatic oper
ation of the head ligh ts and the automatic dimming of the inside
mirror(s).
• If the veh icle is remotely un locked and locked
three times in
succession,
leaving home will not turn on the lights a fourth time to
safeguard the battery and lights.
• If you wish to use the coming home/leaving home function regu
larly, you can leave it activated at all times wi thout risking perma
nent strain on the electrical system. As the system is contro lled by
light sensors, i t wi ll only b e energi zed in darkness.
• Frequent use of the coming home/leaving home function for
approac hin g and departing a vehicle parked in the dark wi ll strain
the batte ry. This applies particularly if only short distances are
driven between stops . Occasiona lly drive longer distances to make
sure the battery is recharged sufficient ly.
• If the fo g lights have been switched on by the coming
home/leaving home function, they will always be switched off when
you switch on the ig nition. •
Contro ls and eq uip
ment
Cle ar v ision
Instrument panel illumination
The ill umina tion of the ins trume nts, dis pla ys and the
cente r consol e can be adjusted.
9:3 6
02.11.2008
Fig . 9 2 Instru men t
pane l illum in a ti on
Press the"+" button to increase the brigh tness .
Press the" -" b utton to reduce the br ig htness.
Igniti on ON , light swit ch at @ .
With the ignition switched ON, the glow of instrument needles can
be adjusted to appear brighter or dimmer.
Ignition ON , light switch at :oo: or gD.
With the lights switched on, the brightness of instrument cluster
(i .e. needles, gauges and displays) and center c onsole il luminat io n
can be adjusted .
0 Note
The instrument c luster and center console i llumination ( gauges and
needles) comes on when you swi tch on the ignition and the
vehicle
headlights are off .
Be aware of the following difference between
models built to US or Canadian specifications:
• USA model s: illumination of the in strument cluster (gauge s and
needles ), dash and center conso le around the gearshift lever is
controlled
by a light sen sor located in the instrument panel. The .,
~ehicle care Technical data
Page 106 of 340
• .___S_ e_a _ t_ s_ a_ n_ d_ s_t _o _r_ a...; g==- e ________________________________________________ _
& WARNING (continued)
• Sharp edges on the load must be covered for protection.
Always fasten the belt tightly around the sack and its contents
~ page 103, fig. 118 .
[ i ] Tips
Never stow the ski sack away if it's wet or damp (for example, snow
melting from skis). Let it dry completely before you stow it away. •
Cupholder
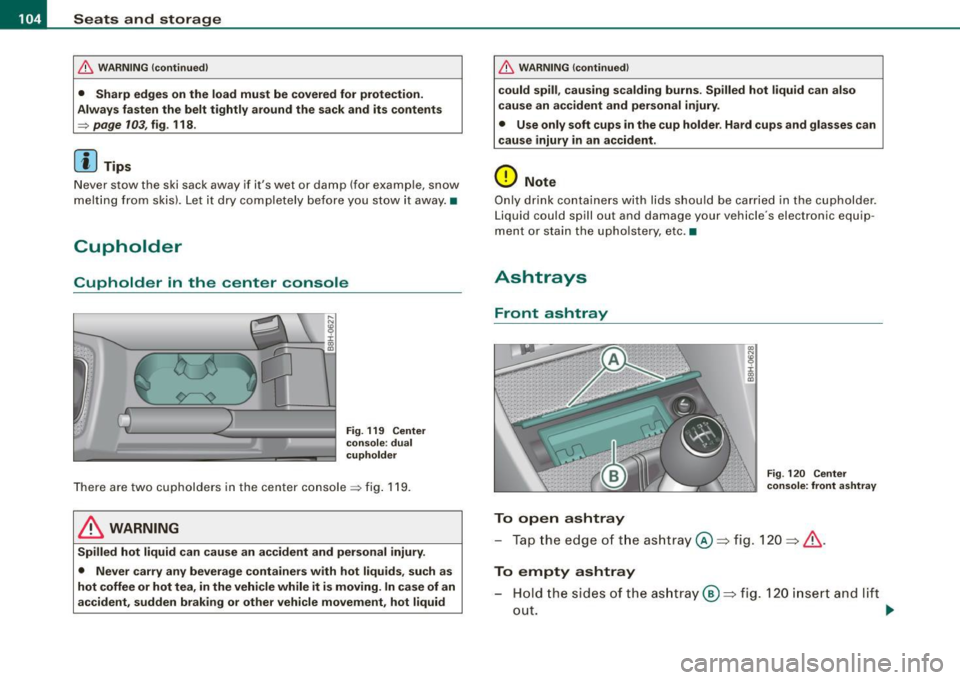
Cupholder in the center consol e
Fig. 119 Center
console : dual
cupholder
There are two cupholders in the center console~ fig. 119 .
& WARNING
Spilled hot liquid can cause an accident and personal injury.
• Never carry any beverage containers with hot liquids, such as
hot coffee or hot tea, in the vehicle while it is moving. In case of an
accident, sudden braking or other vehicle movement, hot liquid
& WARNING (continued)
could spill, causing scalding burns. Spilled hot liquid can also
cause an accident and personal injury.
• Use only soft cups in the cup holder . Hard cups and glasses can
cause injury in an accident.
0 Note
Only drink containers with lids should be carried in the cupholder.
Liquid could spill out and damage your vehicle 's electronic equip
ment or stain the upholstery , etc. •
Ashtrays
Front ashtray
To open ashtray
Fig. 120 Center
console: front ashtray
-Tap the edge of the ashtray@::::, fig . 120 ::::, &.
To empty ashtray
Hold the sides of the ashtray@::::, fig. 120 insert and lift
out.
~
Page 107 of 340
________________________________________________ S_e_ a_ ts_ a_ n_d _ s_t _o _r_ a ....; g::. e _ ___,1111
To reinstall ashtray
- Press the ashtray insert back into its holder.
& WARNING
Never put waste paper in the ashtray. Hot ashes or other hot
objects in the ashtray could set waste paper on fire. •
Rea r as htr ay
& WARNING
Never put waste paper in the ashtray. Hot ashes or other hot
objects in the ashtray could set waste paper on fire. •
Cigarette lighter/socket
Cig are tt e light er
r 00 a,
m:I Fig. 122 Center
Fig . 121 Rear ashtray
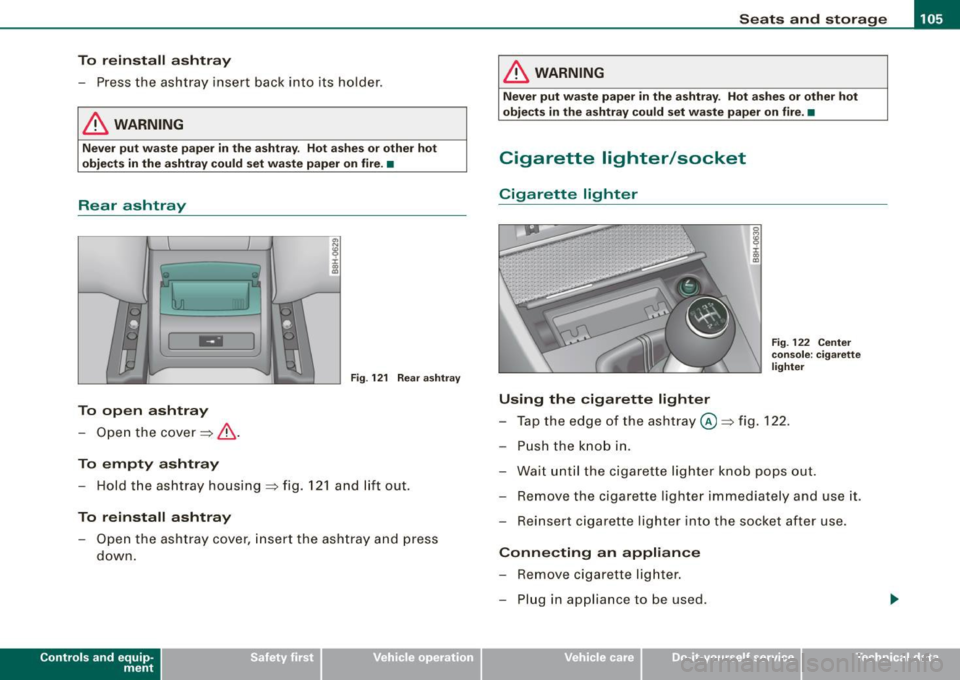
To open ashtray
- Open the cover==> &.
To empty ashtray
- Hold the ashtray housing ==> fig. 121 and lift out.
To reinstall ashtray
-Open the ashtray cover, insert the ashtray and press
down.
Contro ls and eq uip
ment
console : cigarette
lighter
Using the cigarette lighter
- Tap the edge of the ashtray @==> fig. 122.
- Push the knob in.
- Wait until the cigarette lighter knob pops out.
- Remove the cigarette lighter immediately and use it.
- Reinsert cigarette lighter into the socket after use.
Connecting an appliance
- Remove cigarette lighter.
- Plug in appliance to be used.
~ehicle care irechnical data
Page 108 of 340
• .___S_ e_a _ t_ s_ a_ n_ d_ s_t _o _r_ a...; g==- e ________________________________________________ _
The socket of the cigarette lighter may be used for 12 -volt appli
ances with maximum consumption of up to 100 wat ts, such as a
flash light, small vacuum cleaner, etc.
Before you purchase any accessories, always read and fo llow the
informat ion in~ page
318, "Additional accessories and parts
replacement".
& WARNING
Improper use of the cigare tte l ighter can cause seriou s injury or
s ta rt a fire .
• Be c are ful when u sing the cigarette lighter. If you do n ot pay
attention t o what you a re do ing wh en you are u sing the cig are tte
lighter you can burn yourself .
• The cig arette lighte r and so ck et r em ain fu nctio nal e ven if the
ign ition i s switched off or the ig nition k ey is re m oved . Never l eave
c hildren in side the veh icle w ithout supe rvisi on.
0 Note
• To avoid damaging the socket, only use p lugs that fit properly .
• Only use the cigarette lighter socket as a power source for elec
trical accessories for short durations. Use the socke ts in the vehicle
when a power source is needed for longer durations .
[ i ] Tips
When the engine is off and accessories are sti ll plugged in and are
on, the vehic le battery can sti ll be drained. •
Outlets
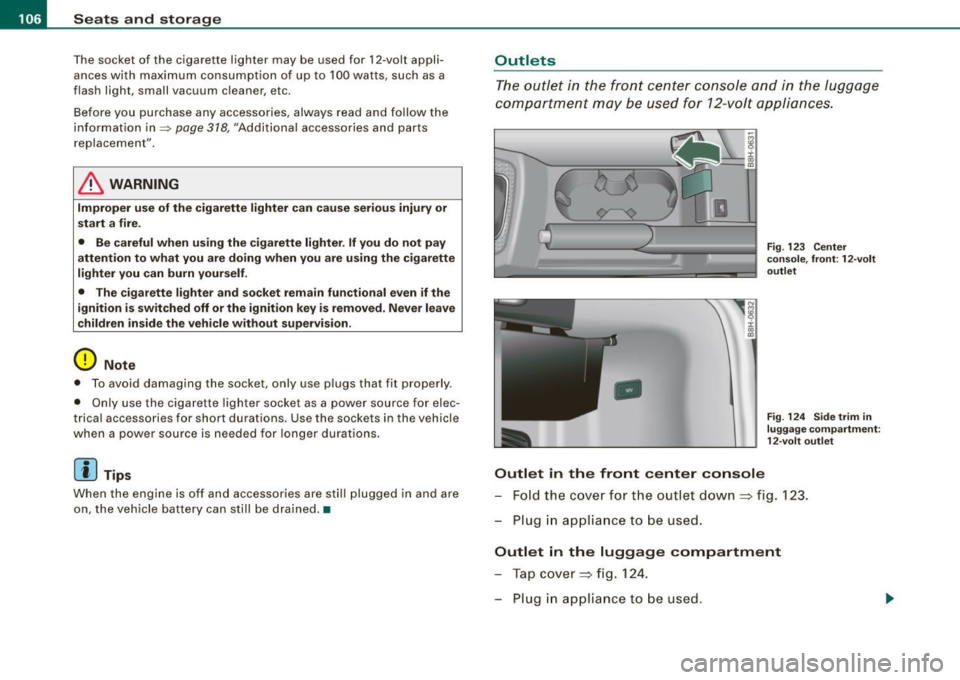
The outlet in the front center console and in the luggage
compartment may be used for 12-volt appliances .
IJ
-
Outlet in the front cent er co nsole
Fig. 12 3 Center
co nsole, fron t: 12-volt
outl et
F ig . 12 4 Sid e trim i n
lu gga ge co mpartmen t:
1 2- vol t outl et
Fo ld the cover fo r the outlet down => fig . 123.
Plug in appliance to be used .
Outlet in the luggage compartment
Tap cover => fig. 124.
Plug in appliance to be used .
Page 109 of 340
________________________________________________ S_e_ a_ ts_ a_ n_d _ s_t _o _r_ a ....; g::. e _ ___,_
The outlet may be used for 12-volt appliances with maximum
consumption of up to 100 watts, such as a flash light, small vacuum
cleaner, etc.
Before you purchase any accessories, a lways read and follow the
information in~
page 318, "Additional accessories and parts
replacement".
& WARNING
The outlet plus any appliances plugged into it remain functional
even if the ignition is switched off or the ignition key is removed.
Never leave children inside the vehicle without supervision.
0 Note
To avoid damaging the socket, only use plugs that fit properly.
[ i] Tips
When the engine is off and accessories are still plugged in and are
on, the vehic le battery can still be drained. •
Storage
General
& WARNING
• Always remove objects from the instrument panel. Any items
not put away could slide around inside the vehicle while driving or
when accelerating or when applying the brakes or when driving
around a corner.
• When you are driving make sure that anything you may have
placed in the center console or other storage locations cannot fall
Contro ls and eq uip
ment
& WARNING (continued)
out into the footwells . In case of sudden braking you would not be
able to brake, depress the clutch or accelerate .
• Any pieces of clothing that you have hung up must not interfere
with the driver's view. The coat hooks are designed only for light
weight clothing . Never hang any clothing with hard , pointed or
heavy objects in the pockets on the coat hooks . During sudden
braking or in an accident -especially if the airbag is deployed -
these objects could injure any passengers inside the vehicle. •
Glove compartment
The glove compartment is illuminated and can be locked.
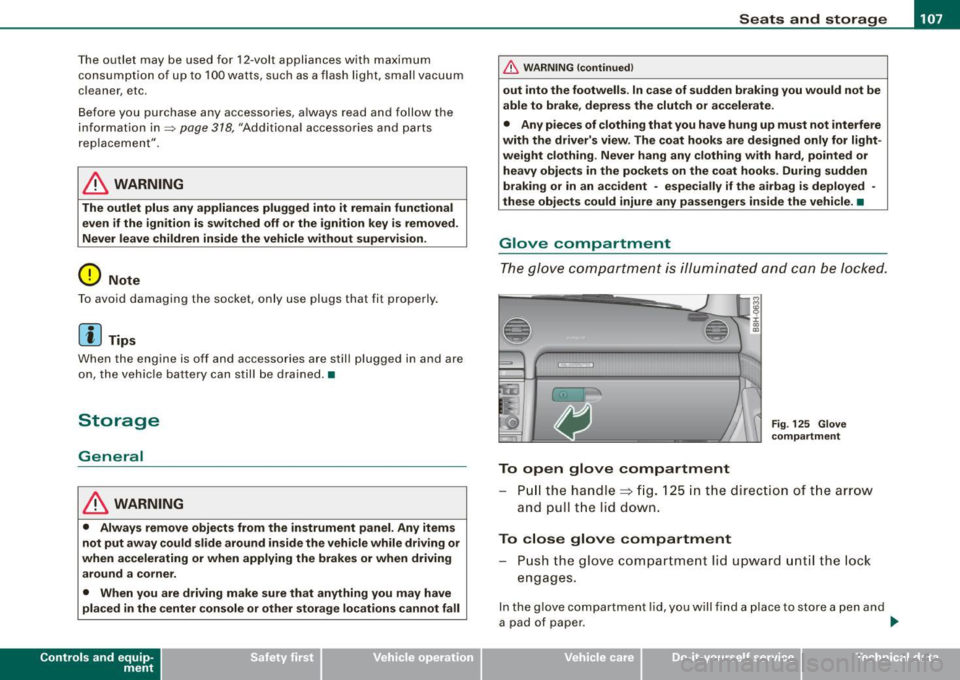
To open glove compartment
Fig. 125 Glove
compartment
P ull the handle~ fig. 125 in the direction of the arrow
and pull the lid down.
To close glove compartment
Push the glove compartment lid upward until the lock
engages.
In the glove compartment lid, you w ill find a place to store a pen and
a pad of paper . ..,_
~ehicle care irechnical data
Page 111 of 340

__________________________________________________ S_ e_ a_t _s _ a_n _ d_ s_ t _ o_ r_a ...;:g ::.. e _ ___,ffllll
Storage compartment in the center console
,,,_ _______________ ..,. ,
:c
ll:
Fig . 128 Storage
compartment in the
center console
To open press one of the trim str ips on the cover
=> fig. 128.
To close, press the cover. •
Compartments in the door trims
There are storage compartments in the door trims .
Controls and eq uip
ment
Fig . 129 Passenger 's
door : storage compart
ment inside the door
trim
& WARNING
Always read and heed all WARNINGS~ page 188, ulmportant
safety instructions on the side airbag system".•
Applie s to veh ic le s: w ith storage c om part me nt in the fr ont seats
Storage compartment in the front seats
There is a fold-out storage compartment in the front of the
seats.
Opening
- Lift the handle and pull the drawer out .
Closing
-Push the drawer in completely until it latches.
[ i] Tips
The maximum carrying capacity 2.2 lbs (1 kg). •
~ehicle care Technical data
Page 117 of 340

Warm and cold -_______________ ____,
Each of the three buttons has its own specific function (the refer
ence numbers refer to the air outlets)
~ page 115, fig . 132 .
Air di recte d t o th e w indows [-0 ]
All the air is directed to outlets 0),@ and G). Contrary to when [@I
is pressed, the amount of air remains the same.
Ai r d irecte d to th e driv er /fr ont passe nge r[~ ]
All the air is directed to outlets @,© and © in the instrument
panel. Air also is directed through the center console in the rear .
Air directed to th e fo otwell s ( ,O. I
All the air is directed to outlets © and to the outlets under the front
seats. •
Air outlets
Fig. 132 Instr ume nt pane l: w here t he ai r outlets are l ocate d
Contro ls and eq uip
ment
Air outlets => fig . 132 @ , ® and 0 can be o perated as
follows :
Outlets @
Move the slide contro l located be hind the outlet to open
or close the outlet .
Adjusting air outlets ® a nd 0
Turn the vertical thumbwheel beside the ou tlet to
increase, red uce o r shut down the a irflow from that
o utlet.
Move the small tab in t he center of the o utlet louver side
ways and up or dow n to adjust the level and direct io n of
a irfl ow.
The flow of air to the outlets is controlled either automa tically or
manually depending on the opera tion mode selected . Heated,
unheated or cooled air can flow from all out le ts.
The heater outlets for the rear footwells are located under the front seats . When you select outlets
G) , air also flows to the rear foot
we lls.
[ i ] Tips
• When defrosting/defogging the windows, air flows from outlets
0) , © and ®· To defrost or defog the windows as quickly as
possible, air outlets © and © must be opened.
• When the air conditione r is working, cooled air will flow primarily
from outlets @, G) and
@. To assure adequate cooling, outlets@,
© and © should never be completely closed .•
~ehicle care irechnical data