2009 AUDI S4 CABRIOLET warning
[x] Cancel search: warningPage 107 of 340

________________________________________________ S_e_ a_ ts_ a_ n_d _ s_t _o _r_ a ....; g::. e _ ___,1111
To reinstall ashtray
- Press the ashtray insert back into its holder.
& WARNING
Never put waste paper in the ashtray. Hot ashes or other hot
objects in the ashtray could set waste paper on fire. •
Rea r as htr ay
& WARNING
Never put waste paper in the ashtray. Hot ashes or other hot
objects in the ashtray could set waste paper on fire. •
Cigarette lighter/socket
Cig are tt e light er
r 00 a,
m:I Fig. 122 Center
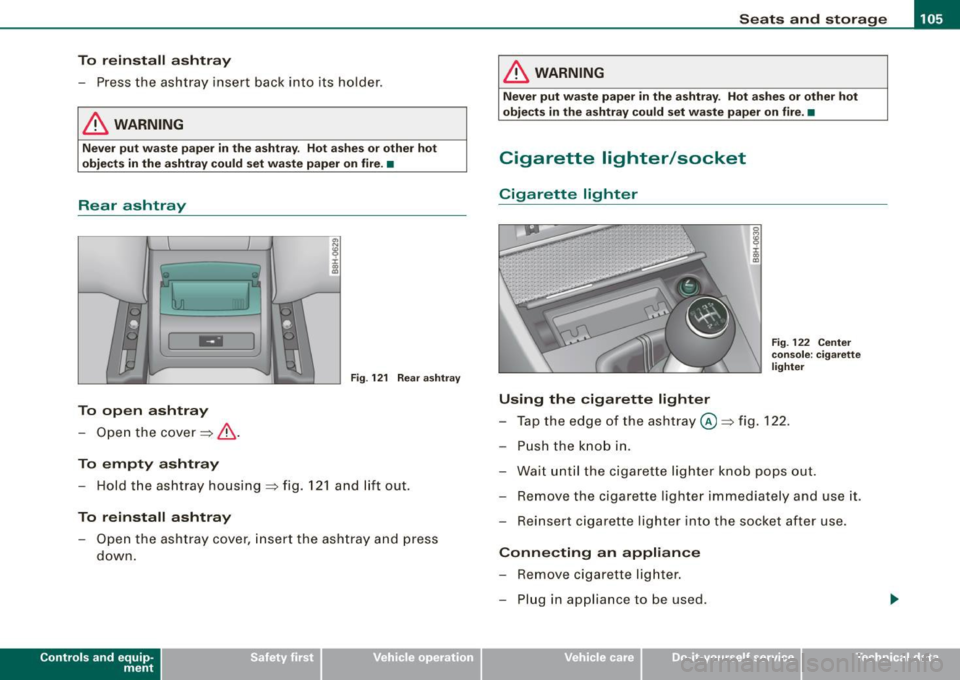
Fig . 121 Rear ashtray
To open ashtray
- Open the cover==> &.
To empty ashtray
- Hold the ashtray housing ==> fig. 121 and lift out.
To reinstall ashtray
-Open the ashtray cover, insert the ashtray and press
down.
Contro ls and eq uip
ment
console : cigarette
lighter
Using the cigarette lighter
- Tap the edge of the ashtray @==> fig. 122.
- Push the knob in.
- Wait until the cigarette lighter knob pops out.
- Remove the cigarette lighter immediately and use it.
- Reinsert cigarette lighter into the socket after use.
Connecting an appliance
- Remove cigarette lighter.
- Plug in appliance to be used.
~ehicle care irechnical data
Page 108 of 340

• .___S_ e_a _ t_ s_ a_ n_ d_ s_t _o _r_ a...; g==- e ________________________________________________ _
The socket of the cigarette lighter may be used for 12 -volt appli
ances with maximum consumption of up to 100 wat ts, such as a
flash light, small vacuum cleaner, etc.
Before you purchase any accessories, always read and fo llow the
informat ion in~ page
318, "Additional accessories and parts
replacement".
& WARNING
Improper use of the cigare tte l ighter can cause seriou s injury or
s ta rt a fire .
• Be c are ful when u sing the cigarette lighter. If you do n ot pay
attention t o what you a re do ing wh en you are u sing the cig are tte
lighter you can burn yourself .
• The cig arette lighte r and so ck et r em ain fu nctio nal e ven if the
ign ition i s switched off or the ig nition k ey is re m oved . Never l eave
c hildren in side the veh icle w ithout supe rvisi on.
0 Note
• To avoid damaging the socket, only use p lugs that fit properly .
• Only use the cigarette lighter socket as a power source for elec
trical accessories for short durations. Use the socke ts in the vehicle
when a power source is needed for longer durations .
[ i ] Tips
When the engine is off and accessories are sti ll plugged in and are
on, the vehic le battery can sti ll be drained. •
Outlets
The outlet in the front center console and in the luggage
compartment may be used for 12-volt appliances .
IJ
-
Outlet in the front cent er co nsole
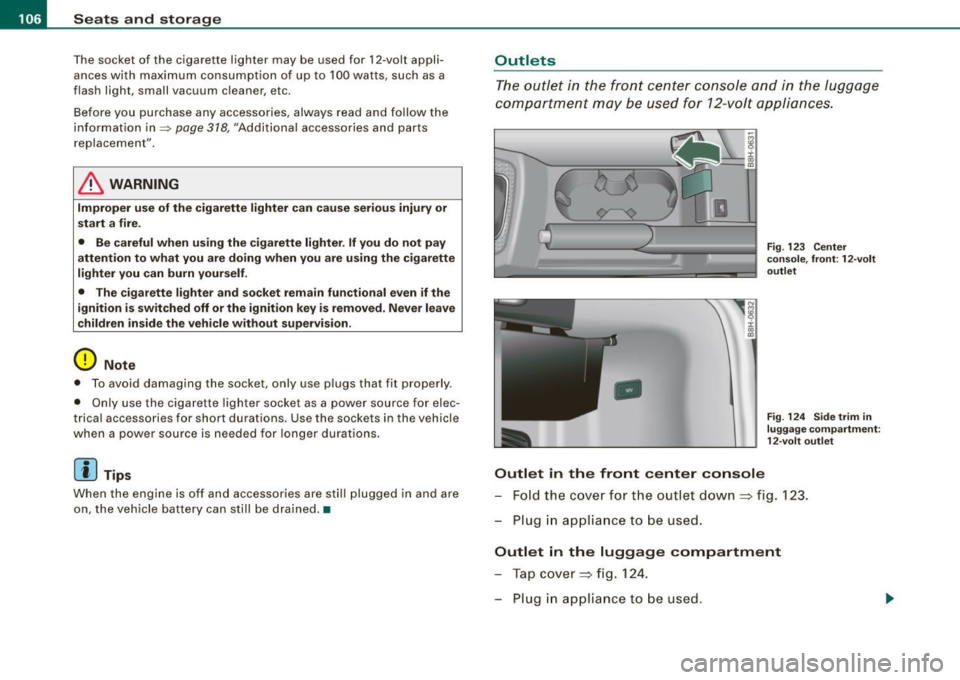
Fig. 12 3 Center
co nsole, fron t: 12-volt
outl et
F ig . 12 4 Sid e trim i n
lu gga ge co mpartmen t:
1 2- vol t outl et
Fo ld the cover fo r the outlet down => fig . 123.
Plug in appliance to be used .
Outlet in the luggage compartment
Tap cover => fig. 124.
Plug in appliance to be used .
Page 109 of 340

________________________________________________ S_e_ a_ ts_ a_ n_d _ s_t _o _r_ a ....; g::. e _ ___,_
The outlet may be used for 12-volt appliances with maximum
consumption of up to 100 watts, such as a flash light, small vacuum
cleaner, etc.
Before you purchase any accessories, a lways read and follow the
information in~
page 318, "Additional accessories and parts
replacement".
& WARNING
The outlet plus any appliances plugged into it remain functional
even if the ignition is switched off or the ignition key is removed.
Never leave children inside the vehicle without supervision.
0 Note
To avoid damaging the socket, only use plugs that fit properly.
[ i] Tips
When the engine is off and accessories are still plugged in and are
on, the vehic le battery can still be drained. •
Storage
General
& WARNING
• Always remove objects from the instrument panel. Any items
not put away could slide around inside the vehicle while driving or
when accelerating or when applying the brakes or when driving
around a corner.
• When you are driving make sure that anything you may have
placed in the center console or other storage locations cannot fall
Contro ls and eq uip
ment
& WARNING (continued)
out into the footwells . In case of sudden braking you would not be
able to brake, depress the clutch or accelerate .
• Any pieces of clothing that you have hung up must not interfere
with the driver's view. The coat hooks are designed only for light
weight clothing . Never hang any clothing with hard , pointed or
heavy objects in the pockets on the coat hooks . During sudden
braking or in an accident -especially if the airbag is deployed -
these objects could injure any passengers inside the vehicle. •
Glove compartment
The glove compartment is illuminated and can be locked.
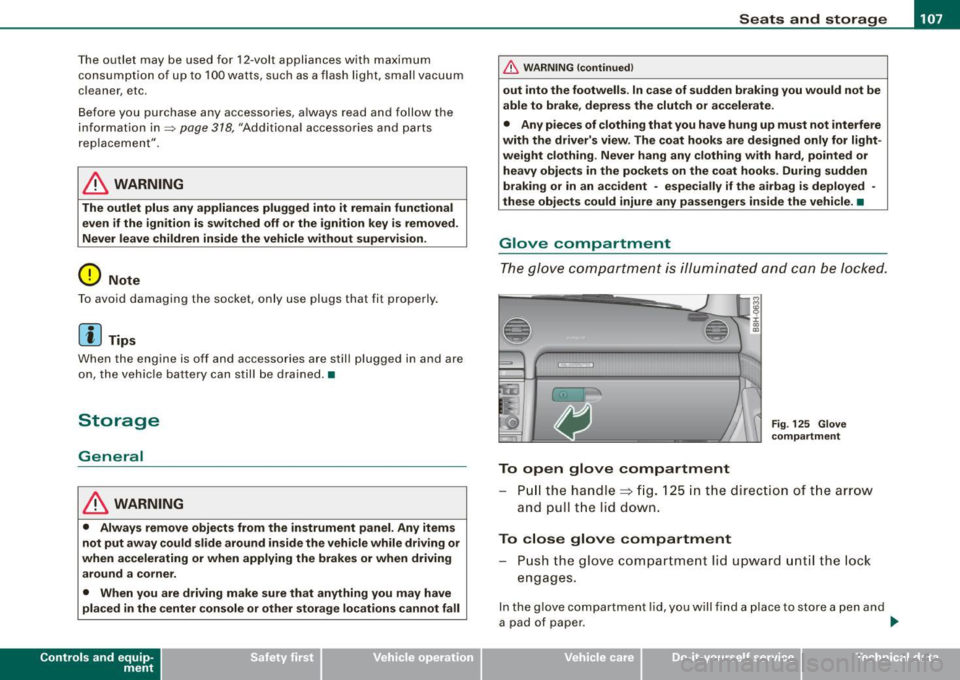
To open glove compartment
Fig. 125 Glove
compartment
P ull the handle~ fig. 125 in the direction of the arrow
and pull the lid down.
To close glove compartment
Push the glove compartment lid upward until the lock
engages.
In the glove compartment lid, you w ill find a place to store a pen and
a pad of paper . ..,_
~ehicle care irechnical data
Page 110 of 340

• .___S_ e_a _ t_ s_ a_ n_ d_ s_t _o _r_ a...; g==- e ________________________________________________ _
CD chan ger*
The CD changer for the Sound System is located on the lef t side in
the glove compartmen t.
& WARNING
T o redu ce the ris k of per so na l injur y in an acci dent or sudd en stop ,
a lways keep the g love compartment clo sed while driv ing .
[ i ] Tips
As soon as you lock your vehicle from the outside via remote control
o r the d river's doo r lock , the glove compartment is also locked. •
App lies to veh icles : with Air ve ntilat ion in the glove compa rtm ent
Air ventilation in the glove compartment
Cooled air is vented into the glove compartment when
ever the air conditioner is on.
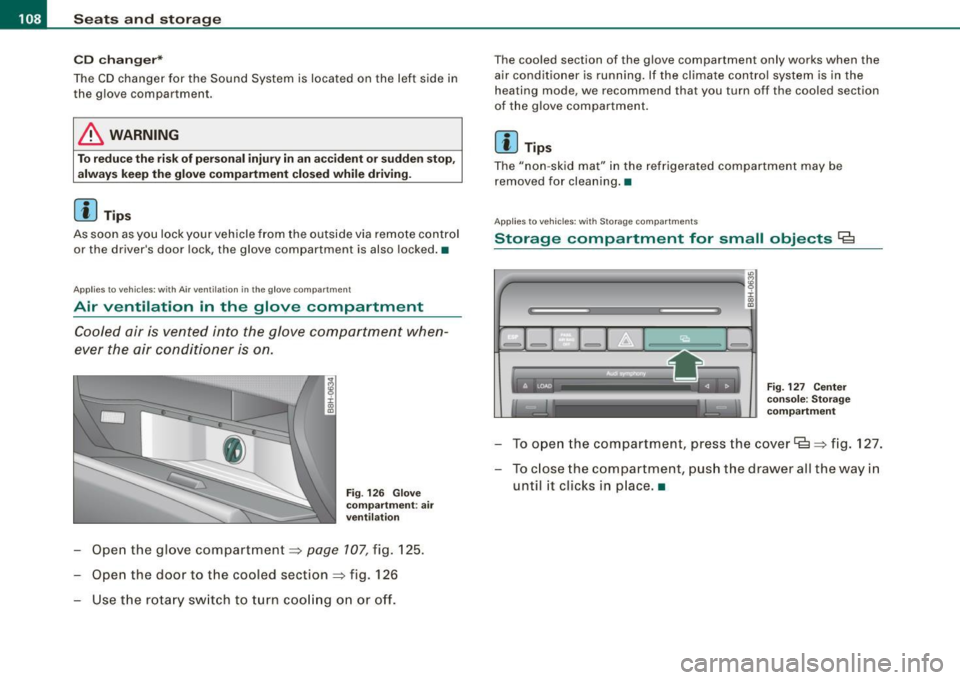
Fi g. 126 G love
com partm ent : air
v ent ilati on
Open the glove compartment=> page 107, fig. 125.
Open the door to the cooled section
=> fig . 126
Use the r otary sw itch to turn coo ling on or off.
The coo led section of the g love compartment only works when the
air conditioner is running. If the climate contro l system is in the
heating mode , we recommend that you turn off the coo led section
of the g love compartment.
[ i ] Tips
The "non -skid mat" in the refrigerated compartment may be
removed for cleaning. •
App lies to vehicles : wi th St ora ge c om part m ents
Storage compartment for small objects Ca
"'
4'--------------- -a!g :i: .,
"'
F ig. 127 Ce nter
console: S to ra g e
co mpartm ent
To ope n the compartment, press the cover Ce=> fig . 127.
- To c lose the compartment, push the drawer all the way in
until it c licks in p lace .•
Page 111 of 340

__________________________________________________ S_ e_ a_t _s _ a_n _ d_ s_ t _ o_ r_a ...;:g ::.. e _ ___,ffllll
Storage compartment in the center console
,,,_ _______________ ..,. ,
:c
ll:
Fig . 128 Storage
compartment in the
center console
To open press one of the trim str ips on the cover
=> fig. 128.
To close, press the cover. •
Compartments in the door trims
There are storage compartments in the door trims .
Controls and eq uip
ment
Fig . 129 Passenger 's
door : storage compart
ment inside the door
trim
& WARNING
Always read and heed all WARNINGS~ page 188, ulmportant
safety instructions on the side airbag system".•
Applie s to veh ic le s: w ith storage c om part me nt in the fr ont seats
Storage compartment in the front seats
There is a fold-out storage compartment in the front of the
seats.
Opening
- Lift the handle and pull the drawer out .
Closing
-Push the drawer in completely until it latches.
[ i] Tips
The maximum carrying capacity 2.2 lbs (1 kg). •
~ehicle care Technical data
Page 113 of 340

Warm and cold -
----------------
If a different driver uses your key and changes the air conditioner
settings, the latest adjustments will erase and replace the settings
you have stored.
& WARNING
Reduced visibility is dangerous and can cause accidents .
• For safe driving it is very important that all windows be free of
ice, snow and condensation.
• Fully familiarize yourself with the proper use and function of
the heating and ventilation system and especially how to defog
and defrost the windows.
• Never use the windshield wiper/washer system in freezing
weather until you have warmed the windshield first, using the
heating and ventilation system. The washer solution may freeze
on the windshield and reduce visibility.
0 Note
• If you suspect that the air conditioner has been damaged, switch
on ECON and contact an authorized Audi dealer to have the system
inspected.
• Repairs to the Audi air conditioner require special technical
knowledge and special tools. Contact an authorized Audi dealer for
assistance.
[ i] Tips
• Keep the air intake slots (in front of the windshield) free from ice,
snow and debris in order to maintain the proper function of the
climate control system.
• Air escapes through vents under the rear window. When placing
items of clothing on the luggage compartment cover, ensure that
the openings are not covered.
Controls and equip
ment
• If the inside temperature is very high (for example, if the vehicle
has been parked in sun), open the windows and allow the hot air to
escape before turning on the air conditioner. •
Controls
This overview will help you to familiarize yourself with the
air conditioning controls.
Cl Cl
Cl •
I I
•
Fig. 130 Air conditioning control elements
The left display indicates the temperature selected for the driver's
side, the right display indicates the temperature selected for the
passenger's side.
Each function is turned on or off by briefly pressing the corre
sponding button.
The indicator light in the button illuminates when
the function is active. _,.
Page 115 of 340

Warm and cold -------------------------------.J
Switching between Fahrenheit and
Centigrade
You can change the temperature display from °F (Fahren
heit) to
°C (Centigrade) and vice versa.
- Press and hold[~] and press the p lus button on the
driver's s ide temperature switch =>
page 111, fig. 130. •
Air recirculation [ <8?)
The air recirculation prevents exhaust fumes or other
pollution from entering the vehicle.
Switching on th e air re cir culation
- Press[ ~]=> page 777,fig.130 =>&
Switching off the air recirculation
- Press~ again, or
- press (AUTO], or
press[ @].
In the air recirculation mode , the air in the passenger compar tment
is recircula ted to p revent exhaust fumes and other pollution from
entering the vehicle . We recommend that you use the manua l air
recircula tion under the following conditions :
• when driving through tunnels
• in a traffic jam .
& WARNING
Do not use this setting for extended period s of time . The windo ws
c o uld fog up since no fresh air ca n enter the veh icle . If th e
Controls and equip
ment
& WAR NING (c onti nued)
wind ows fog up, pre ss th e air r ecirculat ion butt on a gai n immed i
atel y to s witch off the air re circula tion function or sel ect defro st. •
ECON [ECO N]
Using ECON helps save fuel
-Press [ECON] to switch on=> page 111 , fig. 130 .
- Press [ECON] o r pre ss [AUTO] to switch off.
In ECON mode the air condit ioner is shut off and heating and venti
lation are automat ically controlled. "ECON" translates "Economy"
s ince driving with the air conditioning compressor
disengaged
improves your mileage noticeably.
When operating in ECO N mode make sure the temperature inside
the vehicle is not lower than the outside temperature. The air is
neither cooled nor dehumidified, so there is a risk that the windows
can fog up. •
Switching the air conditioning on and off [ OFF ]
Switching the air conditioning off
- Press [ OFF] to tu rn the air condit ioner off a nd block
o utside a ir from entering the vehicle .
Switching the air conditioning on
- Press [ OFF] aga in (indicator light comes on aga in), or
- Press [AUTO], or
- Press one of the following butto ns: [ {)' ], [@ ]or
I -0, ].
Page 120 of 340

• .___O_ n_ t_h _e _ r_o _a_ d __________________________________________________ _
On the road
Steering
Adjusting the steering wheel column
The height and reach of the steering wheel can be
adjusted.
First, adjust the driver's seat correctly.
Fig . 135 Lever under
the steering column
-Push the lever~ fig. 135 -Arrow- ~& .
- Move the steering wheel to the desired position.
- Push the lever against the steering column unt il it locks.
Th ere mus t be at least 10 inches (25 cm) betw een your br eastbone
and the center of the steering wheel. If you cannot sit more than 10
inches (25 cm) from the steering wheel, we recommend that you
investigate whether adaptive equipment is available to help you
reach the pedals and increase your seating distance from the
steering wheel.
For detailed information on how to adjust the driver's seat, see
=> page 96, "Power seat adjustment" .
& WARNING
Improper use of steering wheel adjustment and improper seating
position can cause serious personal injury .
• Adjust the steering wheel column only when the vehicle is not
moving to prevent loss of vehicle control.
• Always make sure that the adjustment lever is securely pushed
up so that the position of the steering wheel cannot be changed
unintentionally when the vehicle is moving.
• Adjust the driver's seat or steering wheel so that there is a
minimum of 10 inches
125 cm) between your breastbone and the
steering wheel=> page 148, fig.
154. If you cannot maintain this
minimum distance the airbag system cannot protect you properly.
• If physical limitations prevent you from sitting 10 inches
125
cm) or more from the steering wheel, check with your authorized
Audi dealer to see if adaptive equipment is available.
• Pointing the steering wheel toward your face decreases the
ability of the supplemental driver's airbag to protect you in an
accident. Always make sure that the steering wheel is pointed
towards your chest.
• Always hold the steering wheel on the outside of the steering
wheel rim with your hands at the 9 o'clock and 3 o'clock positions
to help reduce the risk of personal injury if the driver's airbag
inflates.
• Never hold the steering wheel at the
12 o'clock position or with
your hands at other positions inside the steering wheel rim or on
the steering wheel hub. Holding the steering wheel the wrong way
can cause serious injuries to the hands, arms and head if the
driver's airbag inflates. •