Page 149 of 560
�´
�µ�´ �µ
Push the button between the center
vents to turn on the hazard warning
lights (f our-way f lashers). This
causes all f our outside turn signals
and both indicators in the instrument
panel to f lash. Use the hazard
warning lights if you need to park in
a dangerous area near heavy traffic,
or if your vehicle is disabled. Adjust the brightness of the
instrument panel by pressing the
or button. Press the button to
increase the brightness and the
button to decrease it. The brightness
can be set differently for when the
headlights are on, and when they are
off.
The level of brightness is shown on
the multi-information display while
you adjust it. It goes out 5 seconds
af ter you f inish adjusting.
Instrument Panel Brightness
Hazard Warning Button
Hazard Warning Button, Instrument Panel Brightness
146
ADJUSTMENT BUTTON
CANADA
U.S.
2009 RL
Page 150 of 560

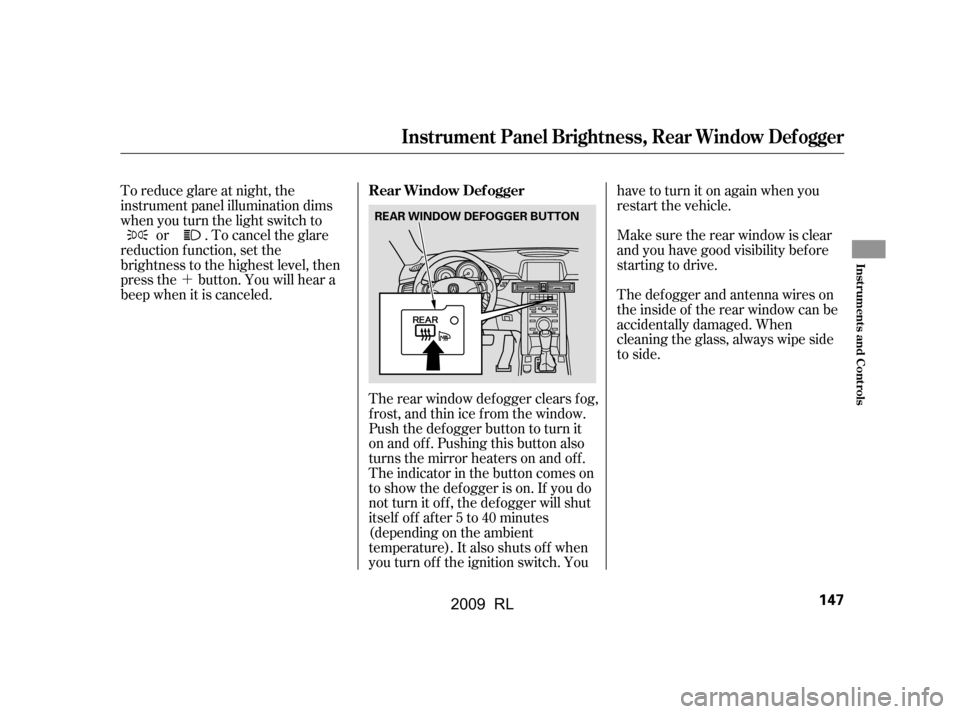
�´The rear window def ogger clears f og,
frost,andthinicefromthewindow.
Push the def ogger button to turn it
onandoff.Pushingthisbuttonalso
turns the mirror heaters on and of f .
The indicator in the button comes on
to show the def ogger is on. If you do
not turn it of f , the def ogger will shut
itself of f af ter 5 to 40 minutes
(depending on the ambient
temperature). It also shuts of f when
you turn of f the ignition switch. You have to turn it on again when you
restart the vehicle.
Make sure the rear window is clear
and you have good visibility bef ore
starting to drive.
The def ogger and antenna wires on
the inside of the rear window can be
accidentally damaged. When
cleaning the glass, always wipe side
to side.
To reduce glare at night, the
instrument panel illumination dims
when you turn the light switch to
or . To cancel the glare
reduction f unction, set the
brightness to the highest level, then
press the button. You will hear a
beep when it is canceled. Rear Window Def ogger
Instrument Panel Brightness, Rear Window Def ogger
Inst rument s and Cont rols
147
REAR WINDOW DEFOGGER BUTTON
2009 RL
Page 151 of 560
Make any steering wheel adjustment
bef ore you start driving.Move the steering wheel in, out, up,
or down by pushing and holding the
adjustment switch in that direction.Release the switch when the
steering wheel reaches the desired
position. Make sure the steering
wheel points towards your chest, not
toward your f ace, and that you can
see the instrument panel gauges and
indicators.
Steering Wheel A djustments
148
Adjusting the steering wheel
position while driving may
cause you to lose control of the
vehicle and be seriously injured
inacrash.
Adjust the steering wheel only
when the vehicle is stopped.
2009 RL
Page 155 of 560

�µ
�µ
�µ �µ
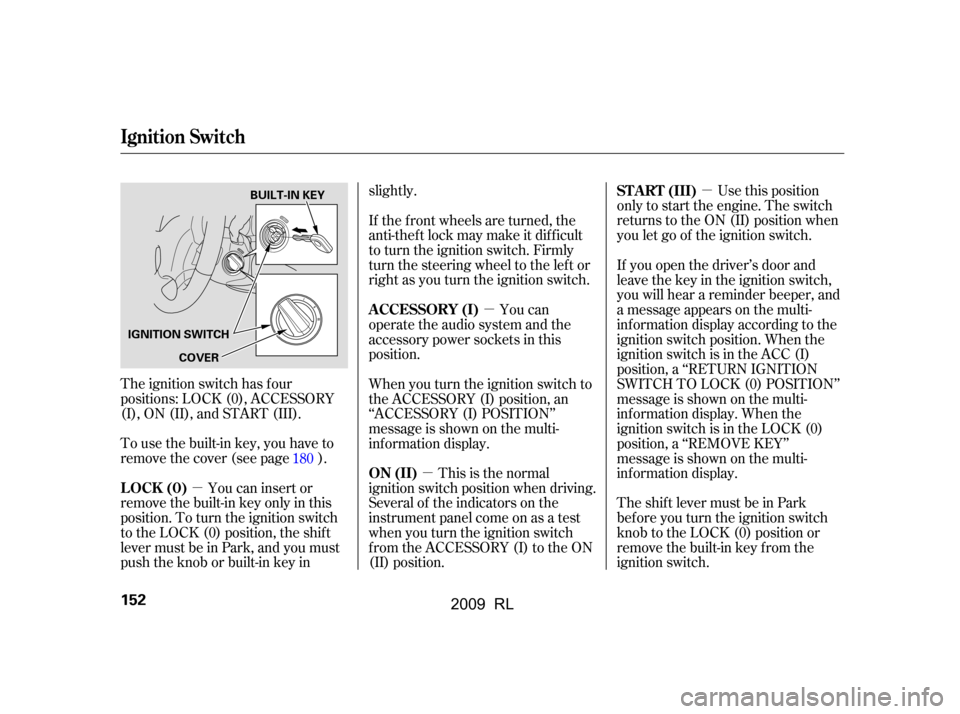
The ignition switch has f our
positions: LOCK (0), ACCESSORY
(I), ON (II), and START (III). Use this position
only to start the engine. The switch
returns to the ON (II) position when
you let go of the ignition switch.
To use the built-in key, you have to
remove the cover (see page ). This is the normal
ignition switch position when driving.
Several of the indicators on the
instrument panel come on as a test
when you turn the ignition switch
f rom the ACCESSORY (I) to the ON
(II) position.
If the f ront wheels are turned, the
anti-thef t lock may make it dif f icult
to turn the ignition switch. Firmly
turn the steering wheel to the left or
right as you turn the ignition switch.
You can insert or
remove the built-in key only in this
position. To turn the ignition switch
to the LOCK (0) position, the shift
lever must be in Park, and you must
push the knob or built-in key in slightly.
TheshiftlevermustbeinPark
bef ore you turn the ignition switch
knob to the LOCK (0) position or
remove the built-in key from the
ignition switch.
You can
operate the audio system and the
accessory power sockets in this
position.
When you turn the ignition switch to
the ACCESSORY (I) position, an
‘‘ACCESSORY (I) POSITION’’
message is shown on the multi-
inf ormation display. If you open the driver’s door and
leave the key in the ignition switch,
you will hear a reminder beeper, and
a message appears on the multi-
inf ormation display according to the
ignition switch position. When the
ignition switch is in the ACC (I)
position, a ‘‘RETURN IGNITION
SWITCH TO LOCK (0) POSITION’’
message is shown on the multi-
inf ormation display. When the
ignition switch is in the LOCK (0)
position, a ‘‘REMOVE KEY’’
message is shown on the multi-
inf ormation display.
180 ST A RT (III)
ON (II)
LOCK (0) A CCESSORY (I)
Ignition Switch
152
IGNITION SWITCH
COVER BUILT-IN KEY
2009 RL
Page 194 of 560
To apply the parking brake, push the
parking brake pedal down with your
f oot. To release the parking brake,
push on the pedal again. The parking
brake indicator on the instrument
panel should go out when the
parking brake is f ully released with
the engine running (see page ).63
Parking Brake
Inst rument s and Cont rols
191
PARKING BRAKE PEDAL
Driving the vehicle with the parking
brake applied can damage the rear
brakes, axles, and tires. A beeper will
sound if the vehicle is put into gear
with the parking brake on.
2009 RL
Page 204 of 560
�´�µ
The courtesy light in each door
comes on when the door is opened,
and goes out when the door is closed.
Your vehicle also has a courtesy light
in the ignition switch. This light
comesonwhenyouopenthedriver’s
door. It f ades out in about 30
seconds af ter the door is closed.
The courtesy lights between the sun
visors and on the rear ceiling light
panel come on when you turn the
parking lights on. To adjust its
brightness, press either of the
instrument panel brightness control
buttons ( or ) (see page ).146
Courtesy Lights
Interior Lights
Inst rument s and Cont rols
201
Front
COURTESY LIGHTS
COURTESY LIGHTS Rear
2009 RL
Page 318 of 560

The security system will not set if
the hood, trunk, or any door is not
f ully closed. If the system will not set,
check the Door and Trunk Open
monitor on the instrument panel (see
page ) to see if the doors and
trunk are f ully closed. Since it is not
part of the monitor display, manually
check the hood.
Do not attempt to alter this system
or add other devices to it.
The security system helps to protect
your vehicle and valuables f rom thef t.
The horn sounds and a combination
of headlights, parking/side marker
lights, and taillights f lash if someone
attempts to break into your vehicle
or remove the radio. This alarm
continues f or 2 minutes, then the
system resets. To reset an alarming
system bef ore the 2 minutes have
elapsed, unlock either f ront door
with the remote or the built-in key.
With the system set, you can still
open the trunk with the remote
without triggering the alarm. The
alarm will sound if the trunk lock is
f orced, or the trunk is opened with
the trunk release button on the
driver’s door or the emergency trunk
opener.
Once the security system is set,
opening any door or the hood
without using the built-in key or the
remote will cause it to sound. It also
sounds if the radio is removed f rom
the dashboard or the audio system
wiring is cut.
The security system automatically
sets 15 seconds after you lock the
doors, close the hood, and close the
trunk. For the system to activate,
you must lock the doors f rom the
outside with the remote, built-in key,
lock tab, or door lock switch. The
security system indicator on the
instrument panel starts blinking
immediately to show you the system
is setting itself . 13
Security System
Features
315
SECURITY SYSTEM INDICATOR
2009 RL
Page 319 of 560

Cruise control allows you to maintain
asetspeedabove25mph(40km/h)
without keeping your f oot on the
accelerator pedal. It should be used
f or cruising on straight, open
highways. It is not recommended f or
city driving, winding roads, slippery
roads, heavy rain, or bad weather.Push in the CRUISE button or the
ACC button (models with adaptive
cruise control) on the steering
wheel. The CRUISE MAIN or
green ACC indicator (models with
ACC) indicator on the instrument
panel comes on.
To switch f rom ACC to cruise
control, press the distance buttonon the steering wheel, and hold it
f or 1 second (see page ).
Accelerate to the desired cruising
speedabove25mph(40km/h).
Press and release the SET/
DECELbuttononthesteering
wheel. The CRUISE CONTROL
icon appears on the multi-
inf ormation display to show the
system is now activated.
1. 2.
3.
333
On models with adaptive cruise
control
Using Cruise Control
Cruise Control
316
RES/
ACCEL
BUTTON
CRUISE (ACC) BUTTON
SET/
DECEL
BUTTON
Non-ACC model is shown
Improper use of the cruise
control can lead to a crash.
Use the cruise control only
when traveling on open
highways in good weather.
2009 RL