Page 204 of 489

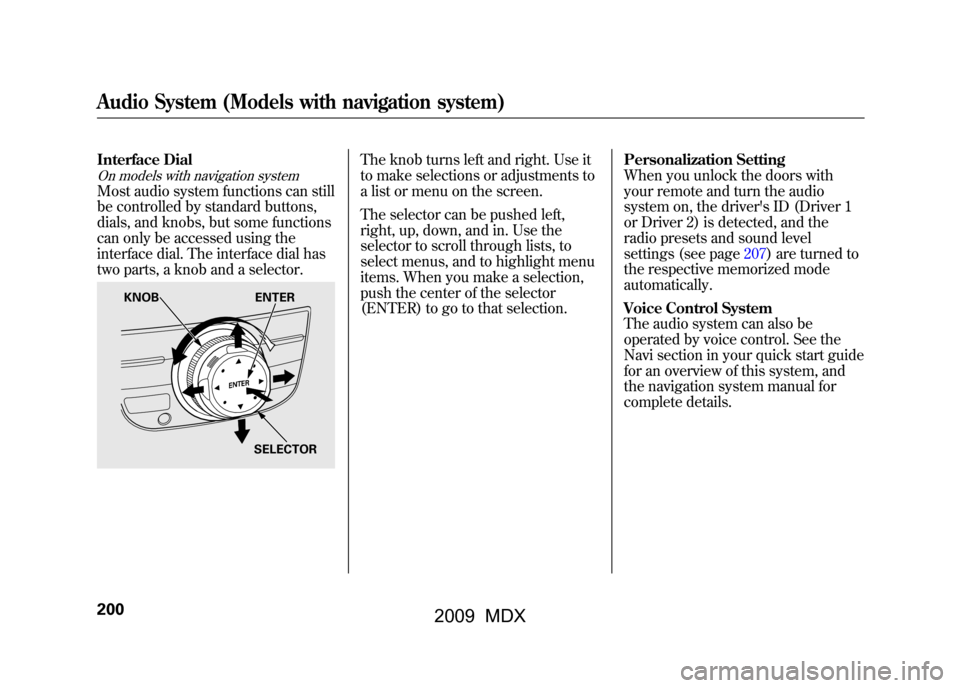
Interface DialOn models with navigation systemMost audio system functions can still
be controlled by standard buttons,
dials, and knobs, but some functions
can only be accessed using the
interface dial. The interface dial has
two parts, a knob and a selector.
The knob turns left and right. Use it
to make selections or adjustments to
a list or menu on the screen.
The selector can be pushed left,
right, up, down, and in. Use the
selector to scroll through lists, to
select menus, and to highlight menu
items. When you make a selection,
push the center of the selector
(ENTER) to go to that selection.Personalization Setting
When you unlock the doors with
your remote and turn the audio
system on, the driver's ID (Driver 1
or Driver 2) is detected, and the
radio presets and sound level
settings (see page207)are turned to
the respective memorized mode
automatically.
Voice Control System
The audio system can also be
operated by voice control. See the
Navi section in your quick start guide
for an overview of this system, and
the navigation system manual for
complete details.
KNOB
ENTER
SELECTOR
Audio System (Models with navigation system)20008/06/06 16:58:07 09 ACURA MDX MMC North America Owner's M 50 31STX620 enu
2009 MDX
Page 205 of 489
SCAN
BUTTON
AM/FM
BUTTON
POWER/
VOLUME
KNOB
AUDIO
BUTTONINTERFACE DIAL INTERFACE DIAL
PRESET
BUTTONS
Without rear entertainment system
AUDIO DISPLAY AUTO SELECT
BUTTON
SEEK
BUTTONS
TUNE KNOBSCAN
BUTTON
AM/FM
BUTTON
POWER/
VOLUME
KNOB
AUDIO
BUTTON TUNE KNOBSEEK
BUTTONS AUTO
SELECT
BUTTON
AUDIO DISPLAY
PRESET BUTTONS
With rear entertainment system
CONTINUED
Playing the AM/FM Radio (Models with navigation system)
201
Feat ures
08/06/06 16:58:07 09 ACURA MDX MMC North America Owner's M 50 31STX620 enu
2009 MDX
Page 206 of 489

To Play the AM/FM Radio
The ignition switch must be in the
ACCESSORY (I) or the ON (II)
position. Press the AUDIO button to
view the audio control display. Turn
the system on by pressing the
power/volume knob or the AM/FM
button. Adjust the volume by turning
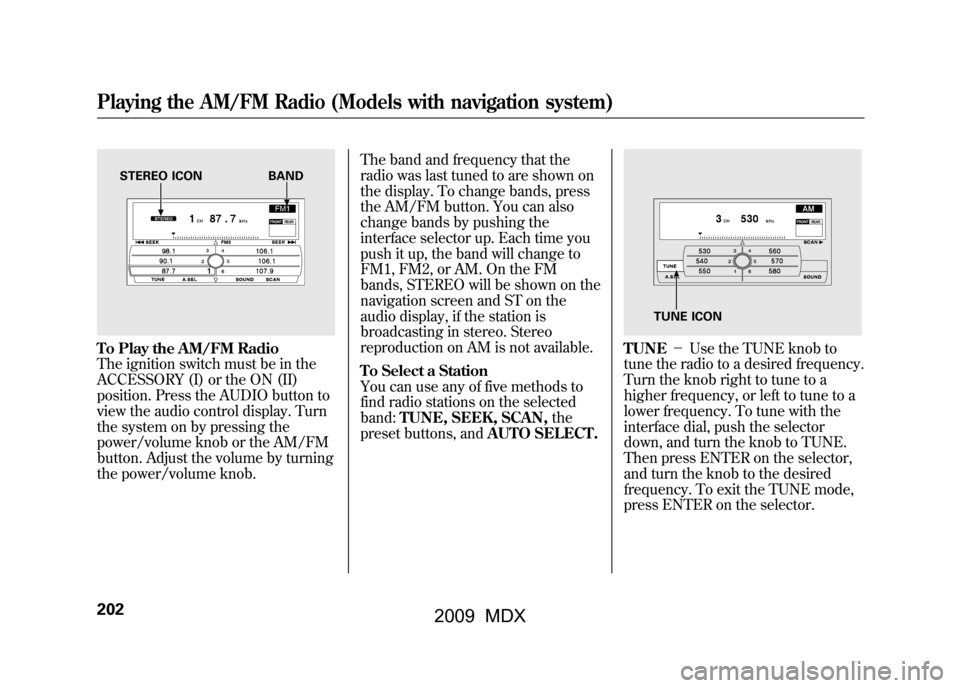
the power/volume knob.The band and frequency that the
radio was last tuned to are shown on
the display. To change bands, press
the AM/FM button. You can also
change bands by pushing the
interface selector up. Each time you
push it up, the band will change to
FM1, FM2, or AM. On the FM
bands, STEREO will be shown on the
navigation screen and ST on the
audio display, if the station is
broadcasting in stereo. Stereo
reproduction on AM is not available.
To Select a Station
You can use any of five methods to
find radio stations on the selected
band:
TUNE, SEEK, SCAN, the
preset buttons, and AUTO SELECT.
TUNE-Use the TUNE knob to
tune the radio to a desired frequency.
Turn the knob right to tune to a
higher frequency, or left to tune to a
lower frequency. To tune with the
interface dial, push the selector
down, and turn the knob to TUNE.
Then press ENTER on the selector,
and turn the knob to the desired
frequency. To exit the TUNE mode,
press ENTER on the selector.
STEREO ICON BAND
TUNE ICON
Playing the AM/FM Radio (Models with navigation system)20208/06/06 16:58:07 09 ACURA MDX MMC North America Owner's M 50 31STX620 enu
2009 MDX
Page 208 of 489

Preset-Each preset button or
preset icon can store one frequency
on AM and two frequencies on FM.To store a preset memory location:1. Select the desired band, AM or FM. FM1 and FM2 let you store
two sets of FM frequencies with
the preset buttons (on-screen
icons).
2. Use the tune, seek, or scan function to tune the radio to a
desired station.
3. Press the preset button, and hold it until you hear a beep. You can also
store frequencies with the
interface dial. Select the preset
icon you want to store the
frequency on, then press ENTER
on the interface selector, and hold
it for more than 2 seconds.
4. Repeat steps 1 through 3 to store a total of six stations on AM and
twelve stations on FM.
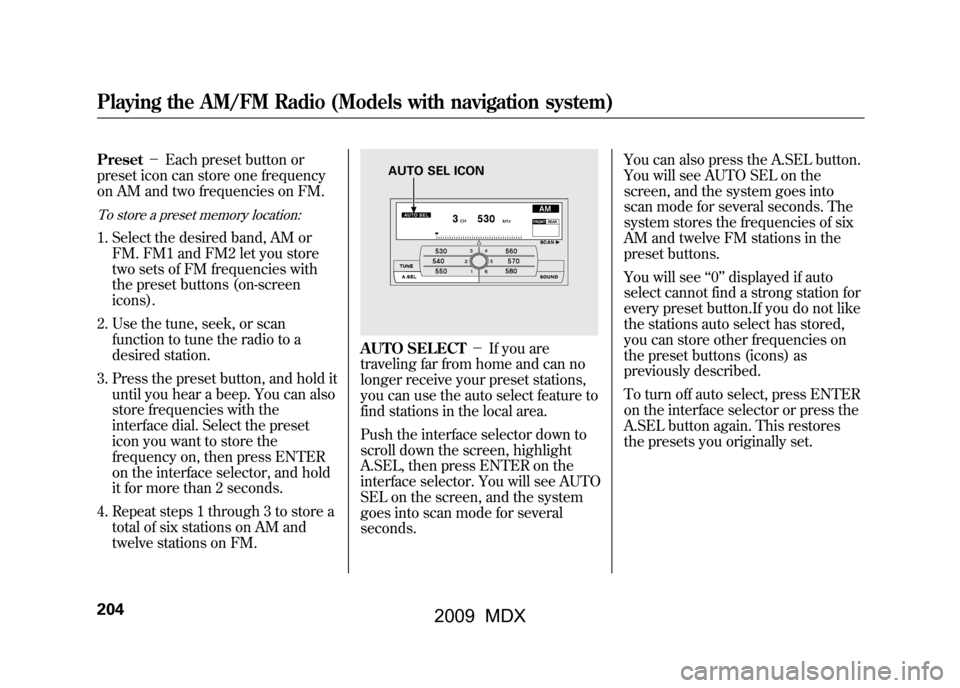
AUTO SELECT -If you are
traveling far from home and can no
longer receive your preset stations,
you can use the auto select feature to
find stations in the local area.
Push the interface selector down to
scroll down the screen, highlight
A.SEL, then press ENTER on the
interface selector. You will see AUTO
SEL on the screen, and the system
goes into scan mode for several
seconds. You can also press the A.SEL button.
You will see AUTO SEL on the
screen, and the system goes into
scan mode for several seconds. The
system stores the frequencies of six
AM and twelve FM stations in the
preset buttons.
You will see
‘‘0’’ displayed if auto
select cannot find a strong station for
every preset button.If you do not like
the stations auto select has stored,
you can store other frequencies on
the preset buttons (icons) as
previously described.
To turn off auto select, press ENTER
on the interface selector or press the
A.SEL button again. This restores
the presets you originally set.
AUTO SEL ICON
Playing the AM/FM Radio (Models with navigation system)20408/06/06 16:58:07 09 ACURA MDX MMC North America Owner's M 50 31STX620 enu
2009 MDX
Page 214 of 489
XM
BUTTON
SCAN
BUTTON
POWER/
VOLUME
KNOB
PRESET
BUTTONS
AUDIO
BUTTONINTERFACE DIAL INTERFACE DIAL
TUNE
KNOB
DISPLAY/
MODE
BUTTON
Without rear entertainment system
AUDIO DISPLAY CATEGORY BUTTONS
SCAN
BUTTON
POWER/
VOLUME
KNOB
XM
BUTTON
AUDIO
BUTTONWith rear entertainment system
AUDIO DISPLAY PRESET BUTTONS
CATEGORY
BUTTONS
TUNE KNOB
DISPLAY/
MODE
BUTTONPlaying the XM
®Satellite Radio (Models with navigation system)
21008/06/06 16:58:07 09 ACURA MDX MMC North America Owner's M 50 31STX620 enu
2009 MDX
Page 218 of 489

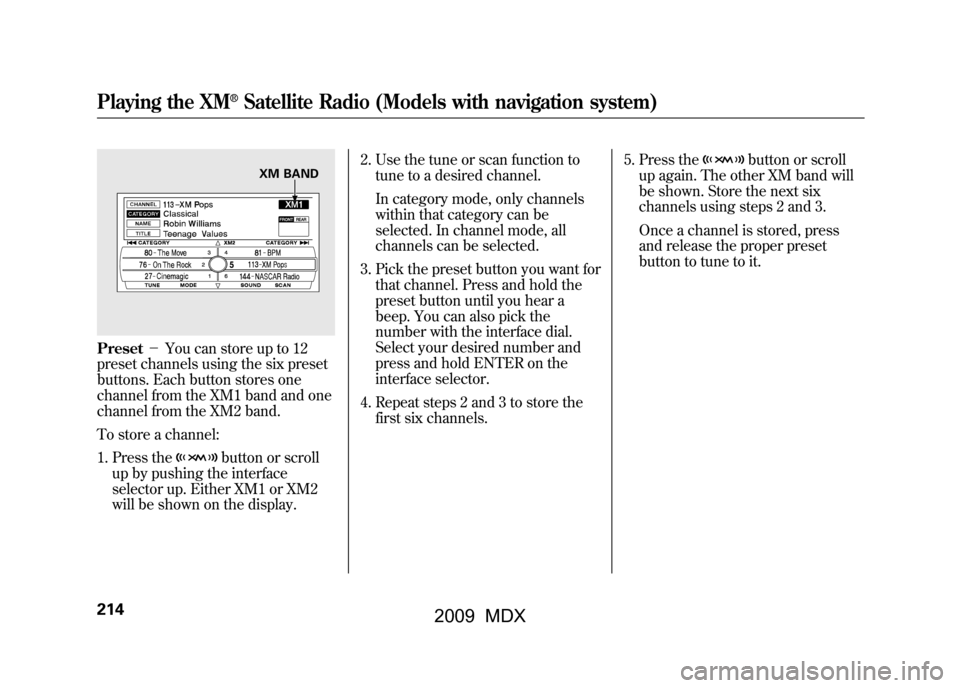
Preset-You can store up to 12
preset channels using the six preset
buttons. Each button stores one
channel from the XM1 band and one
channel from the XM2 band.
To store a channel:
1. Press the
button or scroll
up by pushing the interface
selector up. Either XM1 or XM2
will be shown on the display. 2. Use the tune or scan function to
tune to a desired channel.
In category mode, only channels
within that category can be
selected. In channel mode, all
channels can be selected.
3. Pick the preset button you want for that channel. Press and hold the
preset button until you hear a
beep. You can also pick the
number with the interface dial.
Select your desired number and
press and hold ENTER on the
interface selector.
4. Repeat steps 2 and 3 to store the first six channels. 5. Press the
button or scroll
up again. The other XM band will
be shown. Store the next six
channels using steps 2 and 3.
Once a channel is stored, press
and release the proper preset
button to tune to it.
XM BAND
Playing the XM
®Satellite Radio (Models with navigation system)
21408/06/06 16:58:07 09 ACURA MDX MMC North America Owner's M 50 31STX620 enu
2009 MDX
Page 222 of 489
SCAN
BUTTON
LOAD
BUTTON
POWER/
VOLUME
KNOB
DISC BUTTON
PRESET
BUTTONS
AUDIO
BUTTONINTERFACE DIAL
Without rear entertainment system
AUDIO DISPLAYREPEAT BUTTONRANDOM BUTTON SEEK BUTTONS With rear entertainment system
AUDIO DISPLAY PRESET BUTTONS
RANDOM
BUTTON
SEEK
BUTTONS
EJECT
BUTTON
SCAN
BUTTON
LOAD
BUTTON
POWER/
VOLUME
KNOB
REPEAT
BUTTON
DISC BUTTON
AUDIO BUTTONINTERFACE DIAL DISPLAY/MODE BUTTON FOLDER
KNOB
EJECT
BUTTON
FOLDER
KNOB
DISPLAY/
MODE
BUTTONPlaying Discs (Models with navigation system)21808/06/06 16:58:07 09 ACURA MDX MMC North America Owner's M 50 31STX620 enu
2009 MDX
Page 224 of 489

Do not use discs with adhesive labels.
The label can curl up and cause the
disc to jam in the unit.
Loading Discs in the Changer
To load multiple discs in one
operation:1. With the ignition in the ACCESSORY (I) or the ON (II)
position, press and hold the LOAD
button until you hear a beep and
see ‘‘LOAD ’’in the upper display,
then release the button.
2. Insert a disc into the slot. Insert it only about halfway; the drive will
pull it in the rest of the way. You
will see ‘‘BUSY ’’in audio display.
When you insert the first disc, the
changer will start to play the disc. 3. When
‘‘LOAD ’’appears in the
audio display again, insert the next
disc into the slot.
Do not try to insert a disc until
‘‘ LOAD ’’appears. You could
damage the audio unit.
4. Repeat this until all six positions are loaded. If you are not loading
all six positions, the system will
then begin playing the last disc
loaded.
If you stop loading discs before all
six positions are filled, the system
will wait for 10 seconds, stop the load
operation, and begin playing the last
disc loaded.
To load a single disc:
1. Press and release the LOAD button. 2.
‘‘NO DISC ’’is shown on the screen
for an empty position in the
changer. When the green load
indicator comes on and you see
the ‘‘LOAD ’’in the audio display,
insert the disc into the slot. Insert
it only about halfway; the drive will
pull it in the rest of the way.
You can select the position to load a
disc. Turn the interface knob or
press a preset button to select the
position, then press ENTER on the
selector. This starts the loading
sequence. If you do not select the
position, the system loads the disc to
the first empty position in numerical
order.
If you press the LOAD button while a
disc is playing, the system will stop
playing that disc and start the loading
sequence. It will then play the disc
just loaded.Playing Discs (Models with navigation system)22008/06/06 16:58:07 09 ACURA MDX MMC North America Owner's M 50 31STX620 enu
2009 MDX