Page 85 of 275
1. Pull the lever toward you to release the steering wheel.
2. Adjust the steering wheel to the position that suits you.
3. Push back the lever to fix the steering wheel in place. If the lever is difficult to push into place, press the steering
wheel lightly at the same time as you push the lever.
WARNING
Never adjust the steering wheel while driving.
With speed-dependent power steering (option) the level of steering force can be adjusted, see page 153
.
Keypads
Cruise control, see page 154
Adaptive cruise control (option), see page 156
.
Audio controls, see page 122.
88 03 Your driving environment
Steering wheel
Horn
Press the steering wheel hub to sound the horn.
89 03 Your driving environment
Page 89 of 275
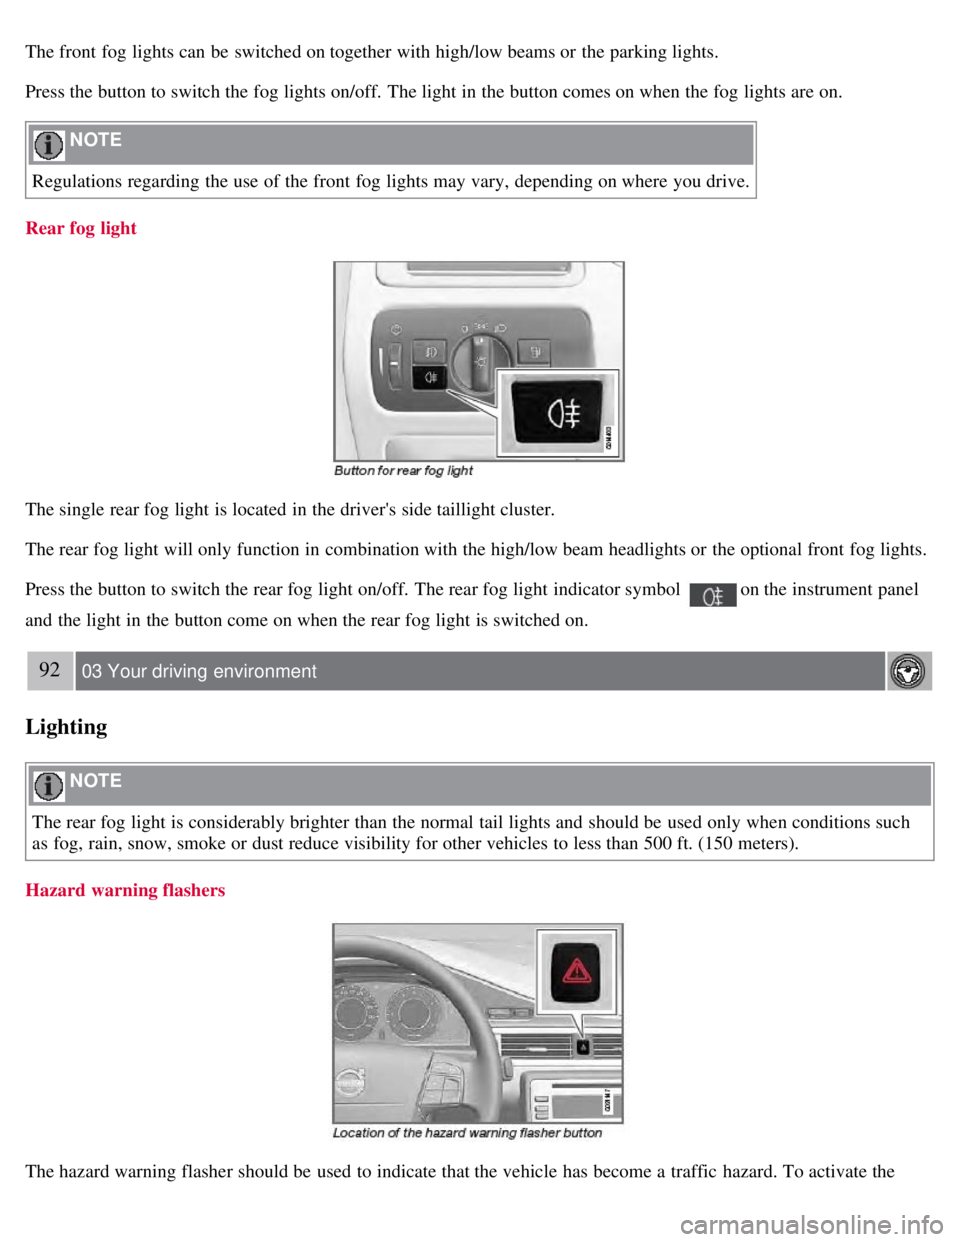
The front fog lights can be switched on together with high/low beams or the parking lights.
Press the button to switch the fog lights on/off. The light in the button comes on when the fog lights are on.
NOTE
Regulations regarding the use of the front fog lights may vary, depending on where you drive.
Rear fog light
The single rear fog light is located in the driver's side taillight cluster.
The rear fog light will only function in combination with the high/low beam headlights or the optional front fog lights.
Press the button to switch the rear fog light on/off. The rear fog light indicator symbol
on the instrument panel
and the light in the button come on when the rear fog light is switched on.
92 03 Your driving environment
Lighting
NOTE
The rear fog light is considerably brighter than the normal tail lights and should be used only when conditions such
as fog, rain, snow, smoke or dust reduce visibility for other vehicles to less than 500 ft. (150 meters).
Hazard warning flashers
The hazard warning flasher should be used to indicate that the vehicle has become a traffic hazard. To activate the
Page 90 of 275
flashers, press the button in the center dash. Press the button again to turn off the flashers.
NOTE
Regulations regarding the use of the hazard warning flasher may vary, depending on where you live.
The hazard warning flashers will be activated automatically if an airbag deploys.
Turn signals
When changing lanes
The driver can automatically flash the turn signals 3 times by moving the turn signal lever up or down to the first
position and releasing it.
When turning
Move the lever as far up or down as possible to start the turn signals. The turn signals will be cancelled
automatically by the movement of the steering wheel, or the lever can be returned to its initial position by hand.
93 03 Your driving environment
Lighting
NOTE
This automatic flashing sequence can be interrupted by immediately moving the lever in the opposite direction.
If the turn signal indicator flashes faster than normal, check for a burned-out turn signal bulb.
Interior lighting, front
Page 95 of 275
High-pressure headlight washing (option)
High-pressure headlight washing consumes a large quantity of washer fluid. To save fluid, the headlights are washed
using two alternatives:
Low/high beam headlights on
The headlights will be washed the first time the windshield is washed. Thereafter, the headlights will only be washed
once for every five times the windshield is washed within a 10-minute period.
Parking lights on
Optional Active Bi -Xenon® headlights will be washed once for every five times the windshield is washed. Normal
halogen headlights will not be washed.
CAUTION
Use ample washer fluid when washing the windshield. The windshield should be thoroughly wet when the wipers
are in operation.
NOTE
One headlight is washed at a time.
97 03 Your driving environment
Power windows
Power windows
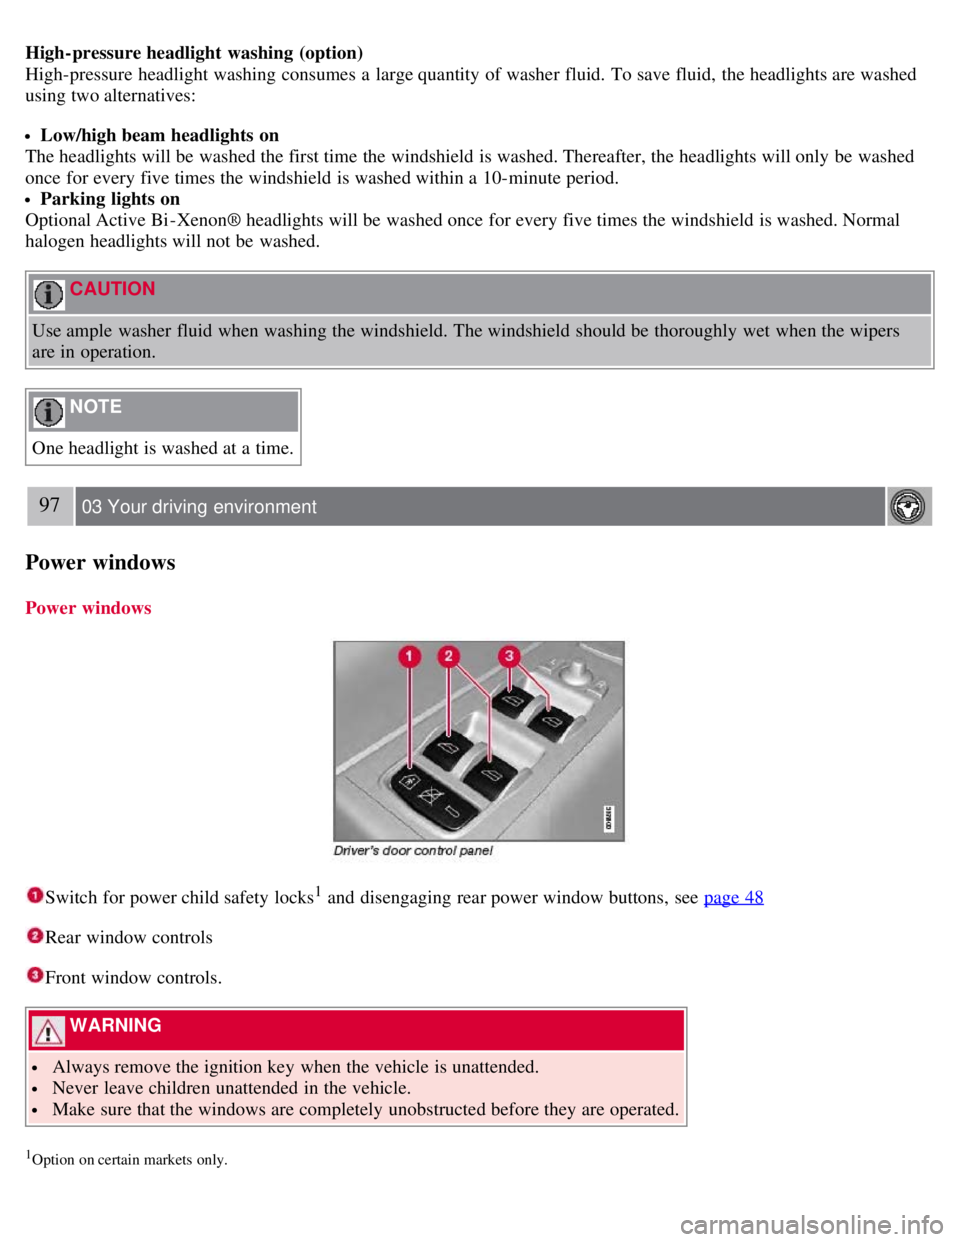
Switch for power child safety locks1 and disengaging rear power window buttons, see page 48
Rear window controls
Front window controls.
WARNING
Always remove the ignition key when the vehicle is unattended.
Never leave children unattended in the vehicle.
Make sure that the windows are completely unobstructed before they are operated.
1Option on certain markets only.
Page 97 of 275
This glass is reinforced to help provide protection against break-ins and improved sound insulation in the passenger
compartment. The windshield and side windows have laminated glass.
99 03 Your driving environment
Mirrors
Power door mirrors
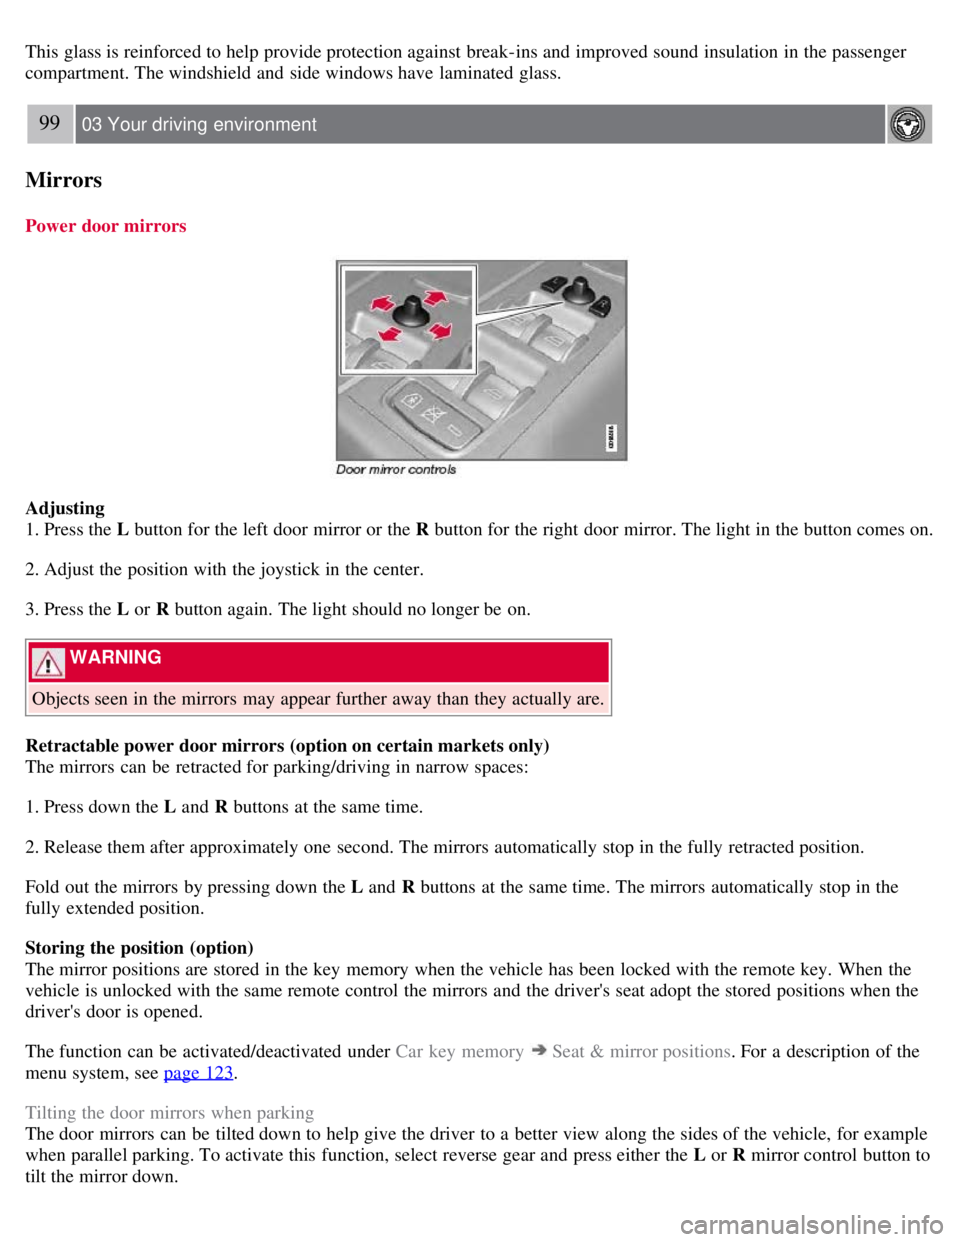
Adjusting
1. Press the L button for the left door mirror or the R button for the right door mirror. The light in the button comes on.
2. Adjust the position with the joystick in the center.
3. Press the L or R button again. The light should no longer be on.
WARNING
Objects seen in the mirrors may appear further away than they actually are.
Retractable power door mirrors (option on certain markets only)
The mirrors can be retracted for parking/driving in narrow spaces:
1. Press down the L and R buttons at the same time.
2. Release them after approximately one second. The mirrors automatically stop in the fully retracted position.
Fold out the mirrors by pressing down the L and R buttons at the same time. The mirrors automatically stop in the
fully extended position.
Storing the position (option)
The mirror positions are stored in the key memory when the vehicle has been locked with the remote key. When the
vehicle is unlocked with the same remote control the mirrors and the driver's seat adopt the stored positions when the
driver's door is opened.
The function can be activated/deactivated under Car key memory
Seat & mirror positions . For a description of the
menu system, see page 123
.
Tilting the door mirrors when parking
The door mirrors can be tilted down to help give the driver to a better view along the sides of the vehicle, for example
when parallel parking. To activate this function, select reverse gear and press either the L or R mirror control button to
tilt the mirror down.
Page 100 of 275
Automatic closing
Push the switch as far forward as possible (the position for automatic closing) and release it to automatically close the
moonroof.
WARNING
During manual closing, if the moonroof is obstructed, immediately open it again.
Never open or close the moonroof if it is obstructed in any way.
Never allow a child to operate the moonroof.
Never leave a child alone in a vehicle.
Never extend any object or body part though the open moonroof, even if the vehicle's ignition is completely
switched off.
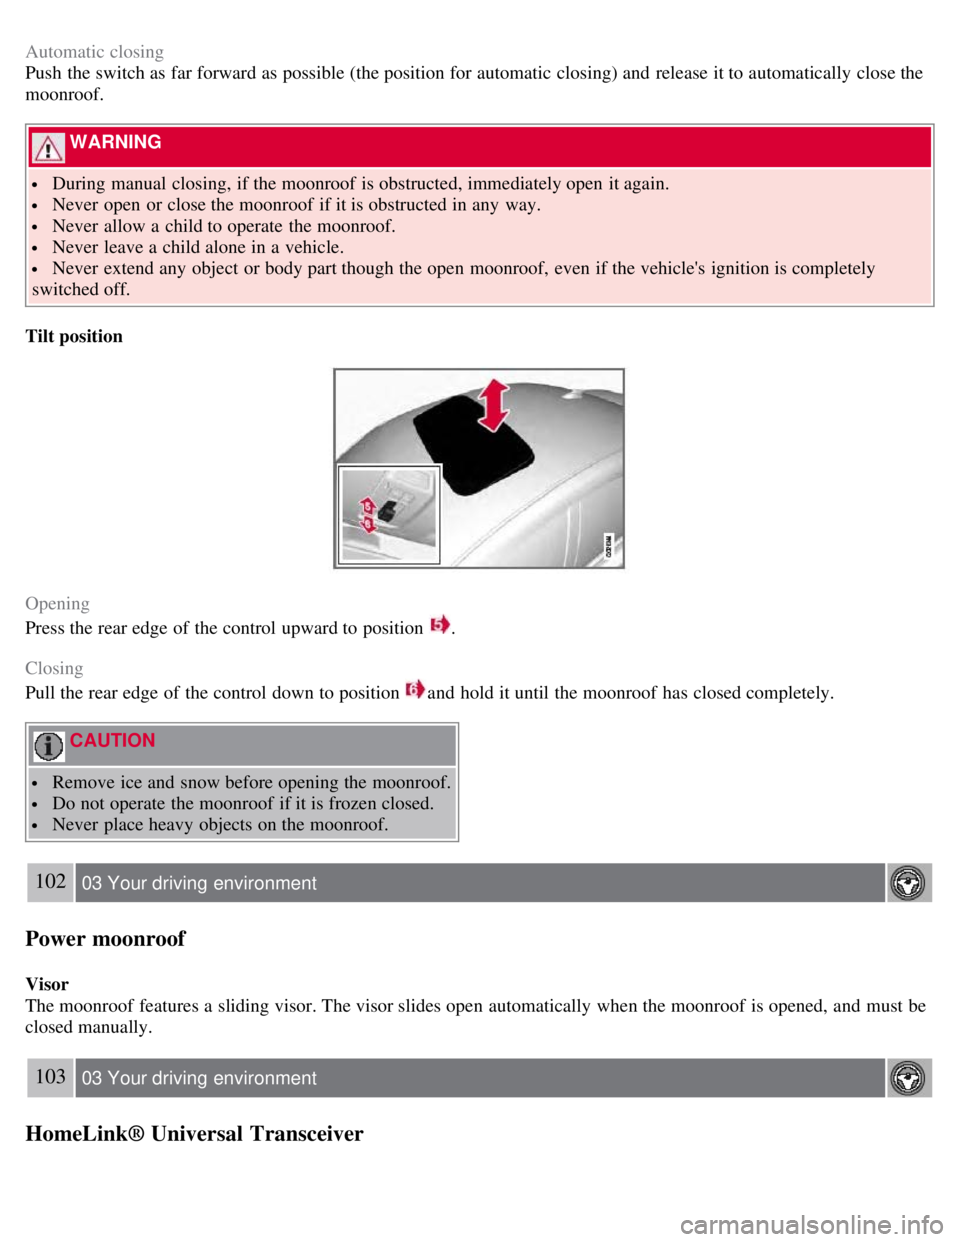
Tilt position
Opening
Press the rear edge of the control upward to position
.
Closing
Pull the rear edge of the control down to position
and hold it until the moonroof has closed completely.
CAUTION
Remove ice and snow before opening the moonroof.
Do not operate the moonroof if it is frozen closed.
Never place heavy objects on the moonroof.
102 03 Your driving environment
Power moonroof
Visor
The moonroof features a sliding visor. The visor slides open automatically when the moonroof is opened, and must be
closed manually.
103 03 Your driving environment
HomeLink® Universal Transceiver
Page 101 of 275
Introduction
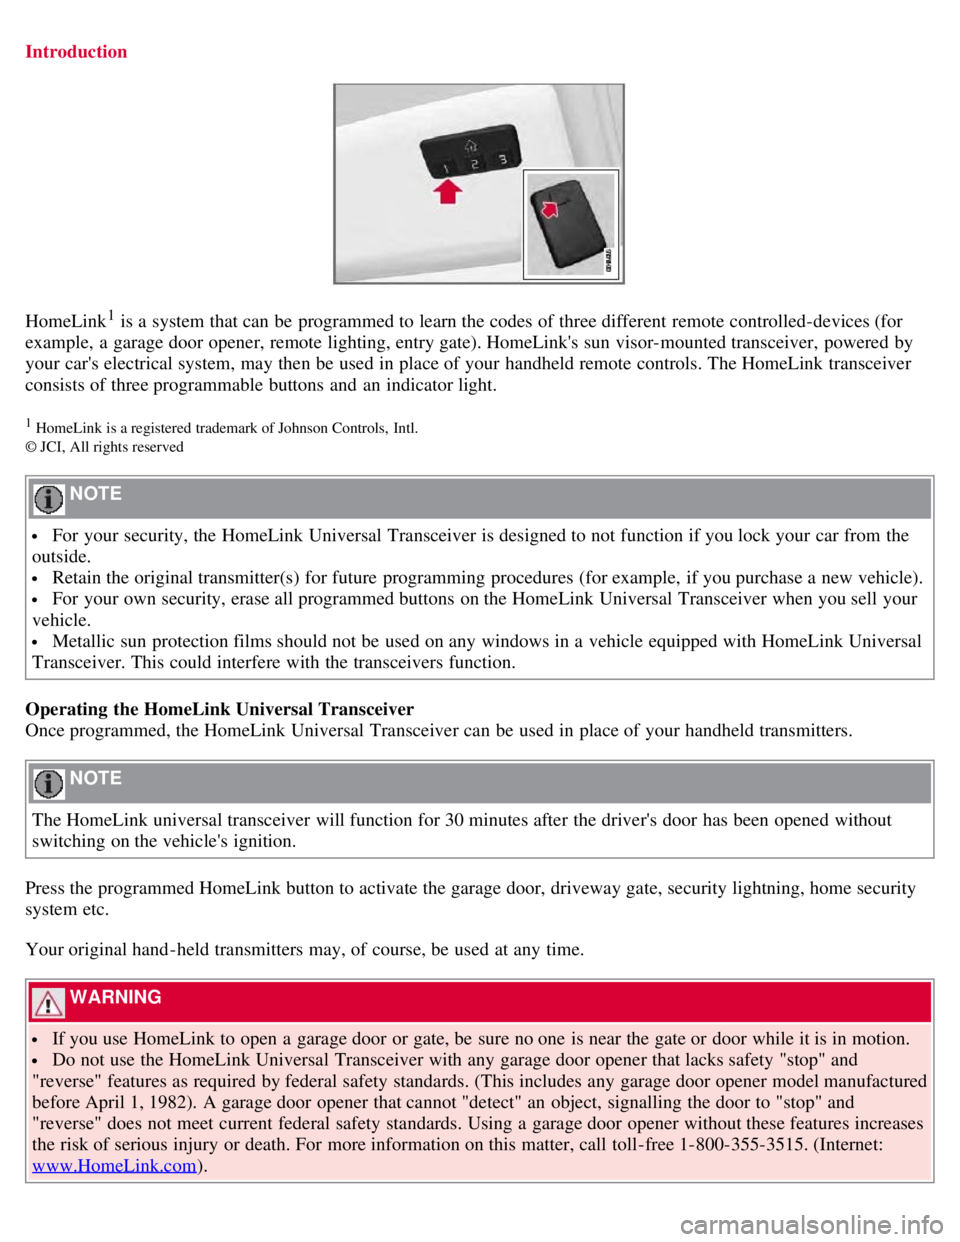
HomeLink1 is a system that can be programmed to learn the codes of three different remote controlled-devices (for
example, a garage door opener, remote lighting, entry gate). HomeLink's sun visor-mounted transceiver, powered by
your car's electrical system, may then be used in place of your handheld remote controls. The HomeLink transceiver
consists of three programmable buttons and an indicator light.
1 HomeLink is a registered trademark of Johnson Controls, Intl.
© JCI, All rights reserved
NOTE
For your security, the HomeLink Universal Transceiver is designed to not function if you lock your car from the
outside.
Retain the original transmitter(s) for future programming procedures (for example, if you purchase a new vehicle).
For your own security, erase all programmed buttons on the HomeLink Universal Transceiver when you sell your
vehicle.
Metallic sun protection films should not be used on any windows in a vehicle equipped with HomeLink Universal
Transceiver. This could interfere with the transceivers function.
Operating the HomeLink Universal Transceiver
Once programmed, the HomeLink Universal Transceiver can be used in place of your handheld transmitters.
NOTE
The HomeLink universal transceiver will function for 30 minutes after the driver's door has been opened without
switching on the vehicle's ignition.
Press the programmed HomeLink button to activate the garage door, driveway gate, security lightning, home security
system etc.
Your original hand -held transmitters may, of course, be used at any time.
WARNING
If you use HomeLink to open a garage door or gate, be sure no one is near the gate or door while it is in motion.
Do not use the HomeLink Universal Transceiver with any garage door opener that lacks safety "stop" and
"reverse" features as required by federal safety standards. (This includes any garage door opener model manufactured
before April 1, 1982). A garage door opener that cannot "detect" an object, signalling the door to "stop" and
"reverse" does not meet current federal safety standards. Using a garage door opener without these features increases
the risk of serious injury or death. For more information on this matter, call toll-free 1-800-355-3515. (Internet:
www.HomeLink.com
).
Page 105 of 275

107 03 Your driving environment
Starting the engine
Starting the engine
Ignition switch with remote key inserted (see page 80
for more information)
1. Fasten the seat belt.
WARNING
Before starting the engine, check that the seat, steering wheel and mirrors are adjusted properly. Make sure the brake
pedal can be depressed completely. Adjust the seat if necessary.
2. Insert the remote key into the ignition slot. Press the key until it is drawn into the slot
1.
NOTE
The remote key should be inserted into the ignition slot with the key blade end of the remote pointing out and the
key pad facing up. See the illustration on page 80
.
3. Depress the brake pedal
2.
WARNING
An extra mat on the driver's floor can cause the accelerator and/or brake pedal to catch. Check that the movement of
these pedals is not impeded. Not more than one protective floor covering may be used at one time.
4. Press and release the START/STOP ENGINE button. The autostart function will operate the starter motor until the
engine starts.
The starter motor operates for a maximum of 10 seconds. If the engine has not started, repeat the procedure.
1On vehicles with the optional keyless drive, it is only necessary to have a remote control in the passenger's compartment.
2 If the vehicle is moving, it is only necessary to press the START/STOP ENGINE button to start the vehicle.
WARNING
Always remove the remote key from the ignition slot when leaving the vehicle, especially if there are children in