2008 VOLVO S80 warning light
[x] Cancel search: warning lightPage 188 of 275

With the exception of gas line antifreeze during winter months, do not add solvents, thickeners, or other store -bought
additives to your vehicle's fuel, cooling, or lubricating systems. Overuse may damage your engine, and some of these
additives contain organically volatile chemicals. Do not needlessly expose yourself to these chemicals.
194 05 During your trip
Refueling
WARNING
Never carry a cell phone that is switched on while refueling your vehicle. If the phone rings, this may cause a spark
that could ignite gasoline fumes, resulting in fire and injury.
WARNING
Carbon monoxide is a poisonous, colorless, and odorless gas. It is present in all exhaust gases. If you ever smell
exhaust fumes inside the vehicle, make sure the passenger compartment is ventilated, and immediately return the
vehicle to a trained and qualified Volvo service technician for correction.
Opening/closing the fuel filler door
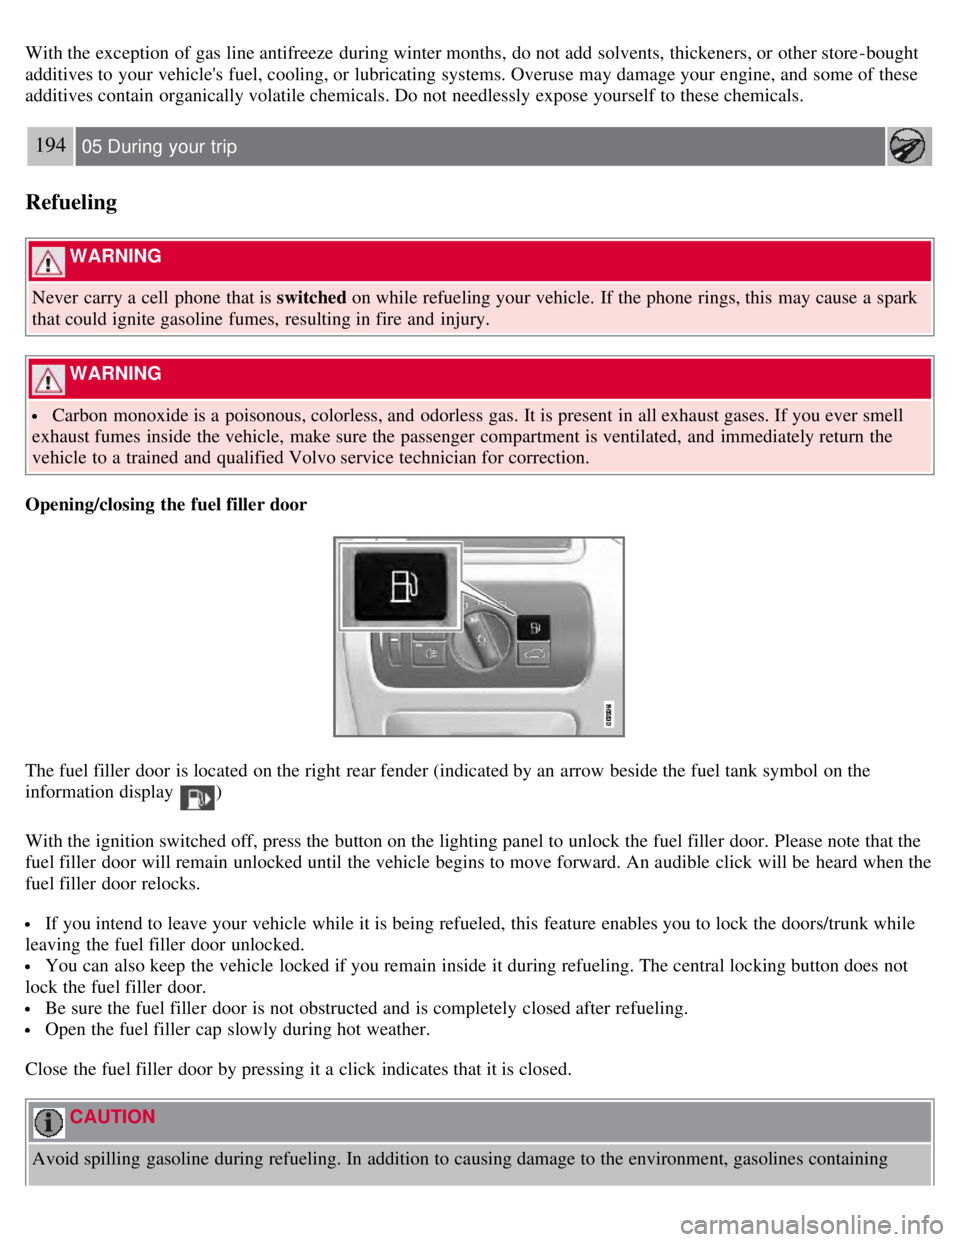
The fuel filler door is located on the right rear fender (indicated by an arrow beside the fuel tank symbol on the
information display
)
With the ignition switched off, press the button on the lighting panel to unlock the fuel filler door. Please note that the
fuel filler door will remain unlocked until the vehicle begins to move forward. An audible click will be heard when the
fuel filler door relocks.
If you intend to leave your vehicle while it is being refueled, this feature enables you to lock the doors/trunk while
leaving the fuel filler door unlocked.
You can also keep the vehicle locked if you remain inside it during refueling. The central locking button does not
lock the fuel filler door.
Be sure the fuel filler door is not obstructed and is completely closed after refueling.
Open the fuel filler cap slowly during hot weather.
Close the fuel filler door by pressing it a click indicates that it is closed.
CAUTION
Avoid spilling gasoline during refueling. In addition to causing damage to the environment, gasolines containing
Page 191 of 275

To increase loading space, the rear seat backrests can be folded down, see page 85.
The trunk lid can be unlocked via the button located on the lighting panel, see page 64.
Load the cargo in the trunk against the backrest.
Load wide cargo in the trunk on both sides of the rear seat split.
Unstable loads can be secured to the load anchoring eyelets with straps or web lashings to help keep them from
shifting.
Folding down the rear seat backrests
See page 85
for information.
WARNING
The vehicle's driving characteristics may change depending on the weight and distribution of the load.
A 44-pound (20 kg) object produces a force of 2,200 pounds (1,000 kg) in a head-on collision at 30 mph (50
km/h).
Loading the cargo area
Stop the engine and apply the parking brake when loading or unloading long objects. The gear selector can be knocked
out of position by long loads, which could set the vehicle in motion. To increase loading space, the rear seat backrests
can be folded down, see page 85
.
WARNING
Stop the engine, put the gear selector in P , and apply the parking brake when loading or unloading long objects.
The rear seat should not be loaded to a level higher than 2 in. (5 cm) below the upper edge of the rear side
windows. Objects placed higher than this level could impede the function of the Volvo Inflatable Curtain.
Load anchoring eyelets
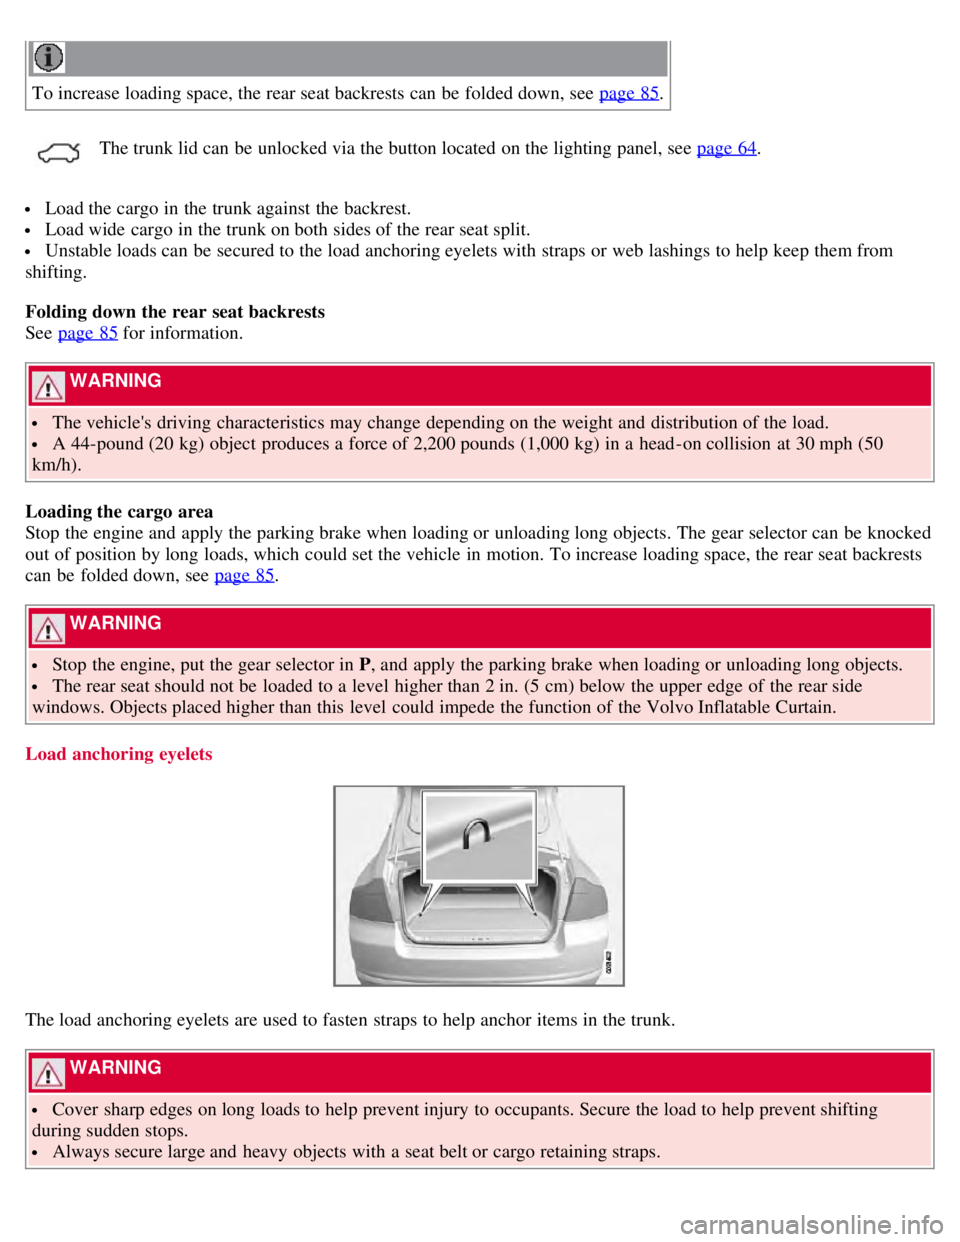
The load anchoring eyelets are used to fasten straps to help anchor items in the trunk.
WARNING
Cover sharp edges on long loads to help prevent injury to occupants. Secure the load to help prevent shifting
during sudden stops.
Always secure large and heavy objects with a seat belt or cargo retaining straps.
Page 194 of 275

201 05 During your trip
Towing a trailer
Introduction
Volvo recommends the use of Volvo trailer hitches that are specially designed for the vehicle.
NOTE
See page 270
for the maximum trailer and tongue weights recommended by Volvo.
Observe the legal requirements of the state/province in which the vehicles are
All Volvo models are equipped with energy- absorbing shock-mounted bumpers. Trailer hitch installation should
not interfere with the proper operation of this bumper system.
Trailer towing does not normally present any particular problems, but take into consideration:
Increase tire pressure to recommended full. See the tire inflation tables on pages 240 and 241.
When your vehicle is new, avoid towing heavy trailers during the first 620 miles (1,000 km).
Maximum speed when towing a trailer: 50 mph (80 km/h).
Engine and transmission are subject to increased loads. Therefore, engine coolant temperature should be closely
watched when driving in hot climates or hilly terrain. Use a lower gear and turn off the air conditioner if the
temperature gauge needle enters the red range.
If the automatic transmission begins to overheat, a message will be displayed in the text window.
Avoid overload and other abusive operation.
Hauling a trailer affects handling, durability, and economy.
It is necessary to balance trailer brakes with the towing vehicle brakes to provide a safe stop (check and observe
state/local regulations).
Do not connect the trailer's brake system directly to the vehicle's brake system.
More frequent vehicle maintenance is required.
Remove the ball and drawbar assembly when the hitch is not being used.
Volvo recommends the use of synthetic engine oil when towing a trailer over long distances or in mountainous
areas.
WARNING
Bumper-attached trailer hitches must not be used on Volvos, nor should safety chains be attached to the bumper.
Trailer hitches attaching to the vehicle rear axle must not be used.
Never connect a trailer's hydraulic brake system directly to the vehicle brake system, nor a trailer's lighting system
directly to the vehicle lighting system. Consult your nearest authorized Volvo retailer for correct installation.
When towing a trailer, the trailer's safety wire must be correctly fastened to the hole or hook provided in the
trailer hitch on the vehicle. The safety wire should never be fastened to or wound around the drawbar ball.
202 05 During your trip
Towing a trailer
NOTE
Page 201 of 275

If your Check Engine (MIL) light is lit - or was lit but went out without service, have your vehicle diagnosed and, if
necessary, serviced by a qualified Volvo technician.
If you recently had service for a lit Check Engine light, or if you had service that required disconnecting the battery,
a period of driving is necessary to bring the OBD II system to "ready" for inspection. A half-hour trip of mixed stop-
and -go/highway driving is typically needed to allow OBD II to reach readiness. Your Volvo retailer can provide you
with more information on planning a trip.
Maintain your vehicle in accordance with your vehicle's maintenance schedule.
211 06 Maintenance and specifications
Hood and engine compartment
Opening and closing the hood
Pull the lever located under the left side of the dash to release the hood lock.
Lift the hood slightly. Press the release control (located under the right front edge of the hood) to the left, and lift
the hood
WARNING
Check that the hood locks properly when closed.
Engine compartment, overview
Page 206 of 275

marks. For capacities and recommended fluid grade, see page 275.
WARNING
If a problem should occur in the power steering system or if the vehicle has no electrical current and must be towed,
it is still possible to steer the vehicle. However, keep in mind that greater effort will be required to turn the steering
wheel.
CAUTION
Keep the area around the power steering fluid reservoir clean when checking.
216 06 Maintenance and specifications
Replacing bulbs
Introduction
All bulb specifications are listed on page 223
. The following bulbs should only be replaced by a trained and qualified
Volvo service technician:
Dome lighting
Reading lights
Glove compartment lighting
Turn signals in the door mirror
Approach lighting in the door mirror
Brake lights
Active Bi -Xenon® and LED bulbs
WARNING
Active Bi -Xenon® headlights (option) - due to the high voltage used by these headlights, these bulbs should only
be replaced by a trained and qualified Volvo service technician.
Turn off the lights and remove the remote key from the ignition before changing any bulbs.
Headlight housing
Page 218 of 275

The windshield and headlight washers share a common reservoir.
The washer fluid reservoir is located on the driver's side of the engine compartment. During cold weather, the reservoir
should be filled with windshield washer solvent containing antifreeze. For capacities, see page 275
.
226 06 Maintenance and specifications
Battery
Warning symbols on the battery
NOTE
A used battery should be disposed of in an environmentally responsible manner. Consult your Volvo retailer or take
the battery to a recycling station.
Handling
Check that the battery cables are correctly connected and tightened.
Never disconnect the battery when the engine is running (for example, when replacing the battery).
Page 234 of 275

The tire pressure monitoring system uses sensors mounted in the tire valves to check inflation pressure levels. When
the vehicle is moving at a speed of approximately 20 mph (30 km/h) or faster, these sensors transmit inflation pressure
data to a receiver located in the vehicle.
NOTE
USA - FCC ID: KR5S122780002
This device complies with part 15 of the FCC rules. Operation is subject to the following conditions: (1) This device
may not cause harmful interference, and (2) this device must accept any interference received, including interference
that may cause undesired operation.
When low inflation pressure is detected, TPMS will light up the tire pressure warning light (
) (also referred to as
a telltale) in the instrument panel, and will display a message in the text window. The wording of this message is
determined by the degree of inflation pressure loss.
NOTE
If a fault occurs in TPMS, the tire pressure warning light will flash for approximately 1 minute and TIRE PRESS
SYST SERVICE REQUIRED will be displayed.
Each tire, including the spare (if provided), should be checked monthly when cold and inflated to the inflation pressure
recommended by the vehicle manufacturer on the vehicle placard or tire inflation pressure label. (If your vehicle has
tires of a different size than the size indicated on the vehicle placard or tire inflation pressure label, you should
determine the proper tire inflation pressure for those tires.)
As an added safety feature, your vehicle has been equipped with a tire pressure monitoring system (TPMS) that
illuminates a low tire pressure telltale when one or more of your tires is significantly under-inflated. Accordingly,
when the low tire pressure telltale illuminates, you should stop and check your tires as soon as possible, and inflate
them to the proper pressure. Driving on a significantly under-inflated tire causes the tire to overheat and can lead to
tire failure. Under-inflation also reduces fuel efficiency and tire tread life, and may affect the vehicle's handling and
stopping ability.
Please note that the TPMS is not a substitute for proper tire maintenance, and it is the driver's responsibility to
maintain correct tire pressure, even if under-inflation has not reached the level to trigger illumination of the TPMS low
tire pressure telltale.
Your vehicle has also been equipped with a TPMS malfunction indicator to indicate when the system is not operating
properly. The TPMS malfunction indicator is combined with the low tire pressure telltale. When the system detects a
malfunction, the telltale will flash for approximately one minute and then remain continuously illuminated. This
sequence will continue upon subsequent vehicle start-ups as long as the malfunction exists. When the malfunction
indicator is illuminated, the system may not be able to detect or signal low tire pressure as intended. TPMS
malfunctions may occur for a variety of reasons, including the installation of replacement or alternate tires or wheels
on the vehicle that prevent the TPMS from functioning properly. Always check the TPMS malfunction telltale after
replacing one or more tires or wheels on your vehicle to ensure that the replacement or alternate tires and wheels allow
the TPMS to continue to function properly.
243 06 Maintenance and specifications
Wheels and tires
Page 235 of 275

NOTE
TPMS indicates low tire pressure but does not replace normal tire maintenance. For information on correct tire
pressure, please refer to the tables beginning on page 240
, or consult your Volvo retailer.
The tire pressure warning light will not identify which tire is under-inflated. Be sure to check all four tires.
A certain amount of air seepage from the tires occurs naturally and tire pressure fluctuates with seasonal changes
in temperature. Always check tire pressure regularly.
Erasing warning messages
When a low tire pressure warning message has been displayed, and the tire pressure warning light has come on:
1. Use a tire pressure gauge to check the inflation pressure of all four tires.
2. Re-inflate the tire(s) to the correct pressure (consult the tire pressure placard or the tables beginning on page 240
).
3. In certain cases, it may be necessary to drive the vehicle for several minutes at a speed of 20 mph (30 km/h) or
faster. This will erase the warning text and the warning light will go out.
WARNING
Incorrect inflation pressure could lead to tire failure, resulting in a loss of control of the vehicle.
Changing wheels with TPMS
Please note the following when changing or replacing the factory installed TPMS wheels/tires on the vehicle:
Only the factory-mounted wheels are equipped with TPMS sensors in the valves.
If the vehicle is equipped with a temporary spare tire, this tire does not have a TPMS sensor.
If wheels without TPMS sensors are mounted on the vehicle, TIRE PRESS SYST SERVICE REQUIRED will be
displayed each time the vehicle is driven above 25 mph (40 km/h) for 10 minutes or more.
Once TPMS sensors are properly installed, the warning message should not reappear. If the message is still
displayed, drive the vehicle for several minutes at a speed of 20 mph (30 km/h) or faster to erase the message.
Volvo recommends that TPMS sensors be fitted on all wheels used on the vehicle. Volvo does not recommend
moving sensors back and forth between sets of wheels.
NOTE
If you change to tires with a different recommended inflation pressure, the TPMS system must be recalibrated to
these tires. This must be done by a trained and qualified Volvo service technician.
If a tire is changed, or if the TPMS sensor is moved to another wheel, the sensor's seal, nut, and valve core should
be replaced.
When installing TPMS sensors, the vehicle must be parked for at least 15 minutes with the ignition off. if the
vehicle is driven within 15 minutes, a TPMS error message will be displayed.
CAUTION
When inflating tires with TPMS valves, press the pump's mouthpiece straight onto the valve to help avoid bending or
otherwise damaging the valve.
244 06 Maintenance and specifications
Wheels and tires