2008 VOLVO S80 clock
[x] Cancel search: clockPage 128 of 275
Turn the control clockwise to increase or counterclockwise to decrease the blower speed. Pressing the AUTO switch
will automatically regulate blower speed and override manual adjustment.
NOTE
If the blower is turned off completely, the air conditioning is disengaged, which may result in fogging on the
windows.
Heated front seats (option)
Press the button once for the highest heat level - three indicator lights come on.
Press the button twice for a lower heat level - two indicator lights come on.
Press the button three times for the lowest heat level - one indicator light comes on.
Press the button four times to switch off the heat - no indicator lights come on.
130 04 Comfort and driving pleasure
Climate system
Heated rear seats (option)
Heat control for the outboard seating positions takes place in the same way as for the front seat.
Air distribution
The figure consists of three buttons. When the buttons are pressed, an indicator light in front of the respective part of
the figure illuminates and shows which air distribution is selected, see page 133
.
Auto
Page 135 of 275
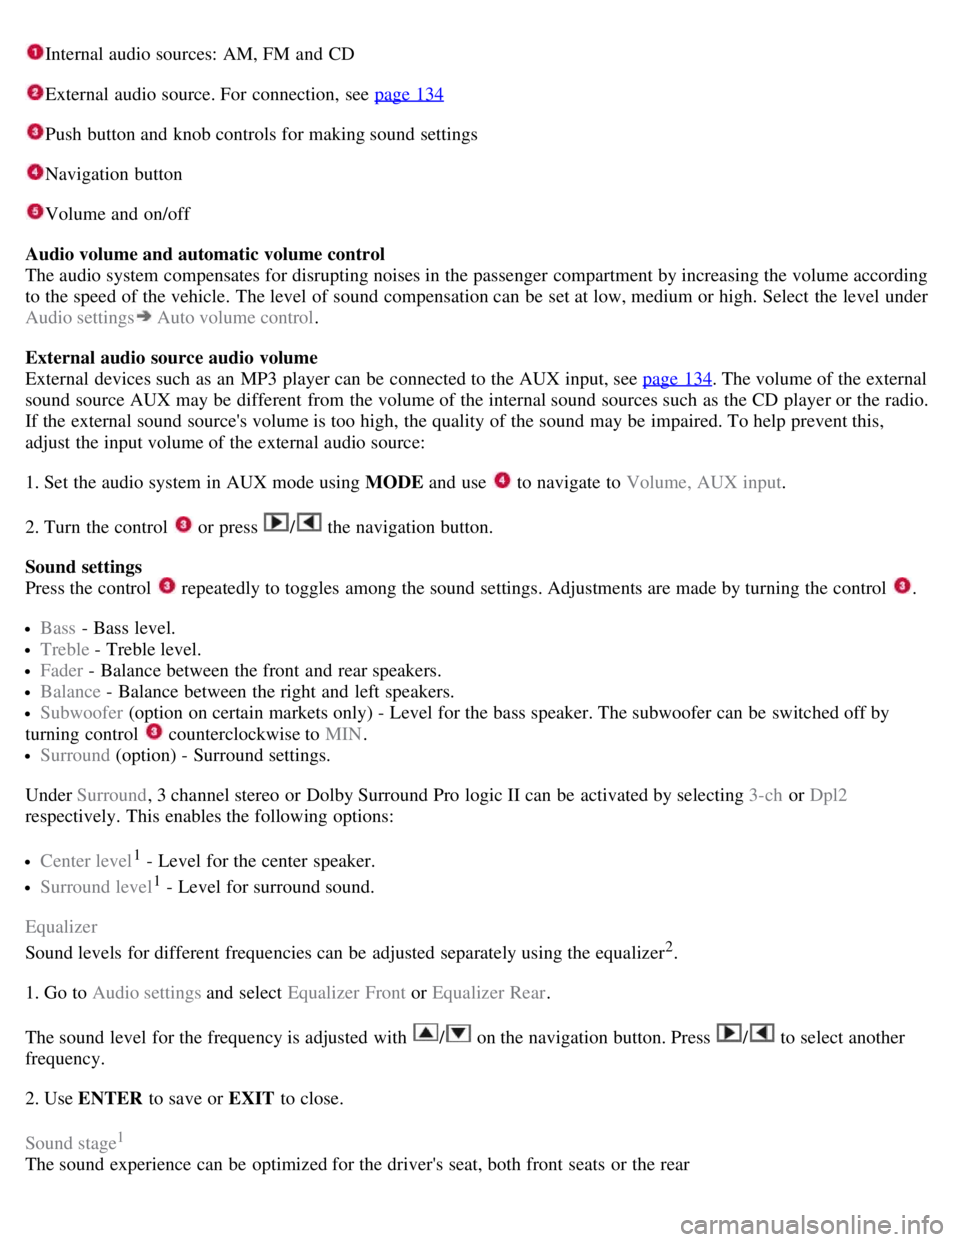
Internal audio sources: AM, FM and CD
External audio source. For connection, see page 134
Push button and knob controls for making sound settings
Navigation button
Volume and on/off
Audio volume and automatic volume control
The audio system compensates for disrupting noises in the passenger compartment by increasing the volume according
to the speed of the vehicle. The level of sound compensation can be set at low, medium or high. Select the level under
Audio settings
Auto volume control .
External audio source audio volume
External devices such as an MP3 player can be connected to the AUX input, see page 134
. The volume of the external
sound source AUX may be different from the volume of the internal sound sources such as the CD player or the radio.
If the external sound source's volume is too high, the quality of the sound may be impaired. To help prevent this,
adjust the input volume of the external audio source:
1. Set the audio system in AUX mode using MODE and use
to navigate to Volume, AUX input.
2. Turn the control
or press / the navigation button.
Sound settings
Press the control
repeatedly to toggles among the sound settings. Adjustments are made by turning the control .
Bass - Bass level.
Treble - Treble level.
Fader - Balance between the front and rear speakers.
Balance - Balance between the right and left speakers.
Subwoofer (option on certain markets only) - Level for the bass speaker. The subwoofer can be switched off by
turning control
counterclockwise to MIN .
Surround (option) - Surround settings.
Under Surround , 3 channel stereo or Dolby Surround Pro logic II can be activated by selecting 3-ch or Dpl2
respectively. This enables the following options:
Center level1 - Level for the center speaker.
Surround level1 - Level for surround sound.
Equalizer
Sound levels for different frequencies can be adjusted separately using the equalizer
2.
1. Go to Audio settings and select Equalizer Front or Equalizer Rear.
The sound level for the frequency is adjusted with
/ on the navigation button. Press / to select another
frequency.
2. Use ENTER to save or EXIT to close.
Sound stage
1
The sound experience can be optimized for the driver's seat, both front seats or the rear
Page 189 of 275
alcohol can cause damage to painted surfaces, which may not be covered under the New Vehicle Limited Warranty.
195 05 During your trip
Refueling
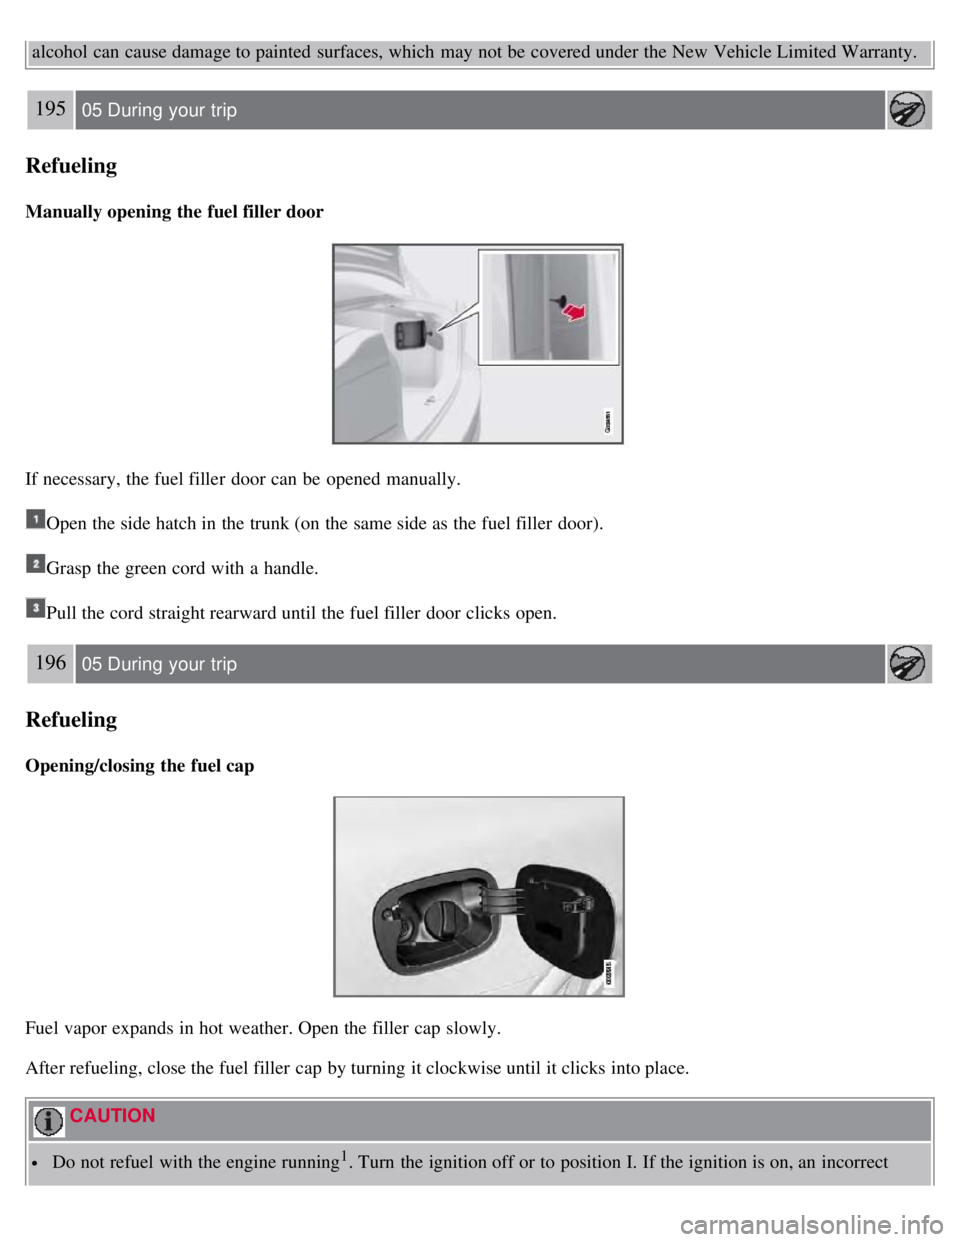
Manually opening the fuel filler door
If necessary, the fuel filler door can be opened manually.
Open the side hatch in the trunk (on the same side as the fuel filler door).
Grasp the green cord with a handle.
Pull the cord straight rearward until the fuel filler door clicks open.
196 05 During your trip
Refueling
Opening/closing the fuel cap
Fuel vapor expands in hot weather. Open the filler cap slowly.
After refueling, close the fuel filler cap by turning it clockwise until it clicks into place.
CAUTION
Do not refuel with the engine running1. Turn the ignition off or to position I. If the ignition is on, an incorrect
Page 212 of 275
220 06 Maintenance and specifications
Replacing bulbs
Fog lights
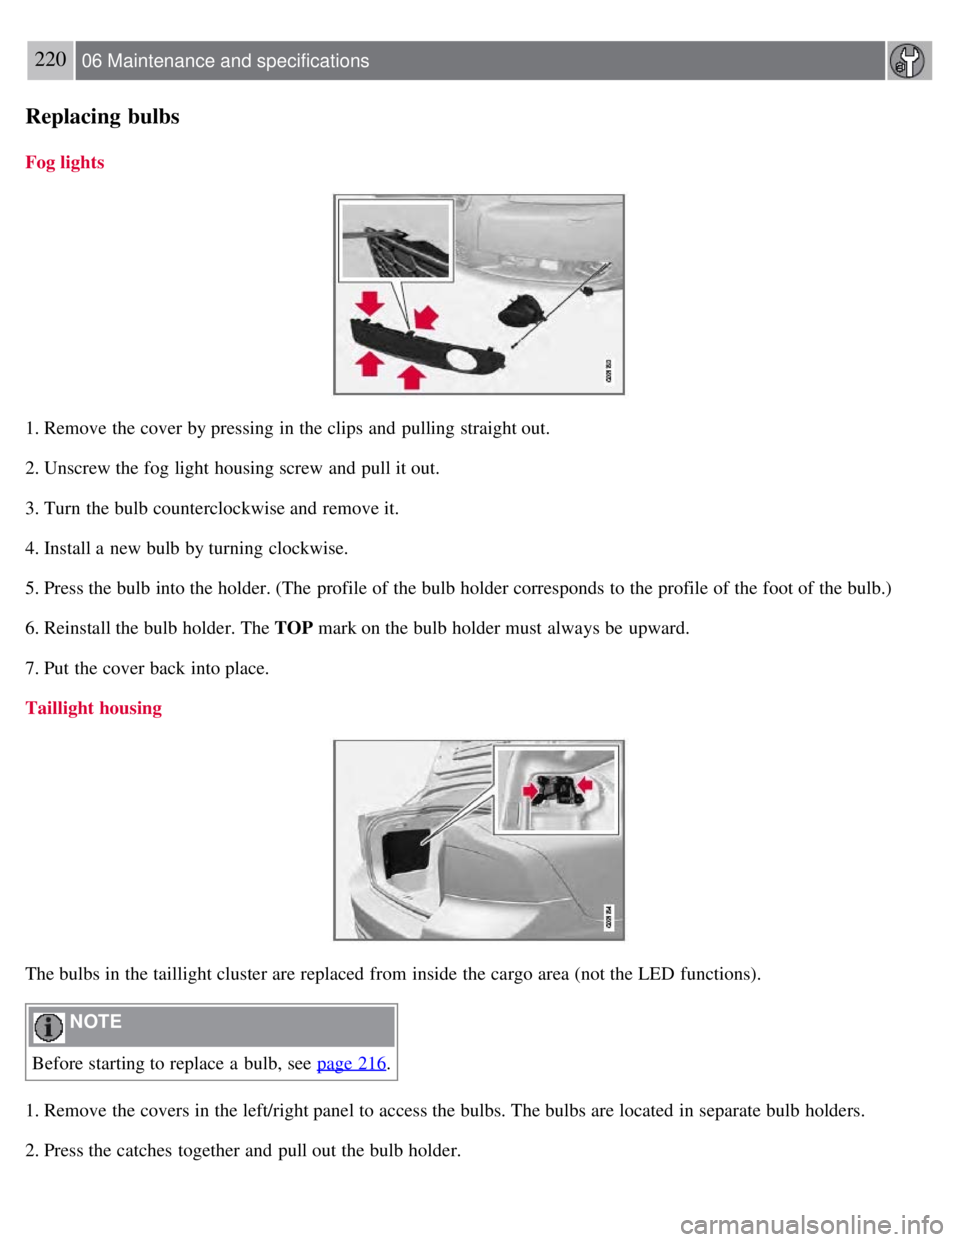
1. Remove the cover by pressing in the clips and pulling straight out.
2. Unscrew the fog light housing screw and pull it out.
3. Turn the bulb counterclockwise and remove it.
4. Install a new bulb by turning clockwise.
5. Press the bulb into the holder. (The profile of the bulb holder corresponds to the profile of the foot of the bulb.)
6. Reinstall the bulb holder. The TOP mark on the bulb holder must always be upward.
7. Put the cover back into place.
Taillight housing
The bulbs in the taillight cluster are replaced from inside the cargo area (not the LED functions).
NOTE
Before starting to replace a bulb, see page 216
.
1. Remove the covers in the left/right panel to access the bulbs. The bulbs are located in separate bulb holders.
2. Press the catches together and pull out the bulb holder.
Page 244 of 275
3. Undo the retaining bolt.
4. Lift out the foam block with tools.
5. Lift out the spare wheel.
The other two blocks can remain in the wheel well.
After use
The foam block and spare wheel must be replaced in the reverse order. Note the arrow on the upper foam block. It
should point forward.
254 06 Maintenance and specifications
Wheels and tires
Changing a tire:
1. Apply the parking brake.
2. Put the gear selector in P.
3. Block the wheels that are on the ground with wooden blocks or large stones.
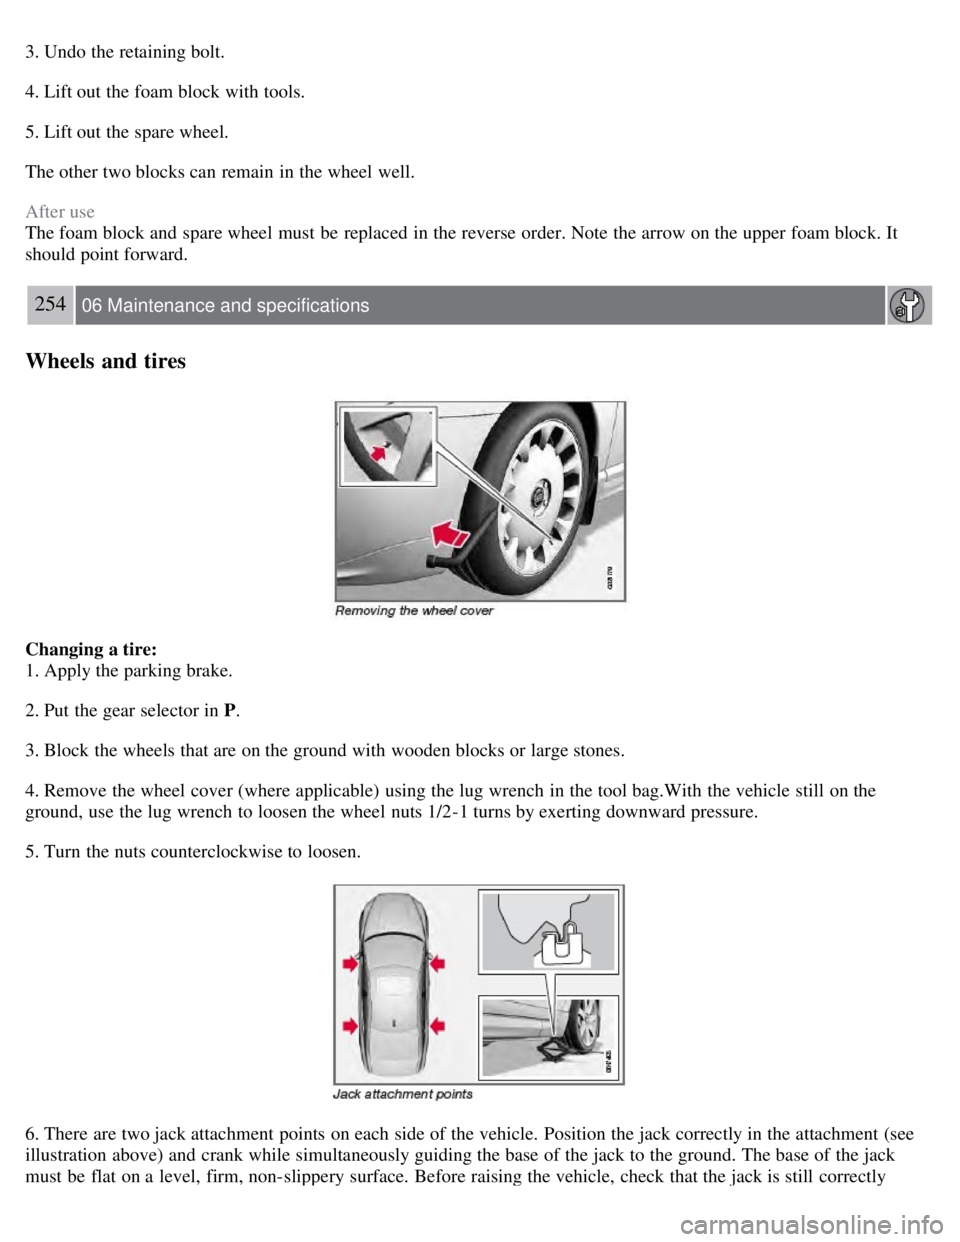
4. Remove the wheel cover (where applicable) using the lug wrench in the tool bag.With the vehicle still on the
ground, use the lug wrench to loosen the wheel nuts 1/2-1 turns by exerting downward pressure.
5. Turn the nuts counterclockwise to loosen.
6. There are two jack attachment points on each side of the vehicle. Position the jack correctly in the attachment (see
illustration above) and crank while simultaneously guiding the base of the jack to the ground. The base of the jack
must be flat on a level, firm, non-slippery surface. Before raising the vehicle, check that the jack is still correctly
Page 248 of 275
Skin: Wash affected areas of skin with soap and water. Get medical attention if symptoms occur.
Eyes: Flush with plenty of water for least 15 minutes, occasionally lifting the upper and lower eyelids. Get
medical attention if symptoms occur.
Inhalation: Move the person to fresh air. If irritation persists, get medical attention
1Certain markets only.
258 06 Maintenance and specifications
Wheels and tires
Inflating tires
The tire sealing system can be used to inflate the tires. To do so:
1. Park the car in a safe place.
2. The compressor should be switched off. Ensure that the on/off switch is in position 0 (the 0 side of the switch should
be pressed down).
3. Take out the electrical wire and hose.
4. Remove the valve cap from the tire's inflation valve and screw the hose connector onto the valve as tightly as
possible by hand.
5. Connect the electrical wire to the nearest 12-volt socket in the vehicle.
6. Start the vehicle's engine.
WARNING
The vehicle's engine should be running when the tire sealing system is used to avoid battery drain. Therefore, be
sure the vehicle is parked in a well ventilated place, or outdoors, before using the system.
Children should never be left unattended in the vehicle when the engine is running.
7. Check the tire's inflation pressure on the gauge. Switch off the compressor briefly to get a clear reading from the
pressure gauge.
8. Refer to the tables on pages 240 and 241
for the correct tire inflation pressure. If the tire needs to be inflated, start
the tire sealing system's compressor (press the on/off switch to position I ). If necessary, release air from the tire by
turning the air release knob counterclockwise.
CAUTION
The compressor should not be used for more than 10 minutes at a time to avoid overheating.
9. Turn off the compressor (press the on/off switch to position 0) when the correct inflation pressure has been reached.
10. Unscrew the hose from the tire's inflation valve and reinstall the valve cap.
11. Disconnect the electrical wire from the 12-volt socket.
Page 251 of 275
CAUTION
The compressor should not be used for more than 10 minutes at a time to avoid overheating.
WARNING
If the pressure remains below 22 psi (1.8 bar) after approximately seven minutes, turn off the compressor. In this
case, the hole is too large to be sealed and the vehicle should not be driven.
12. Switch off the compressor and disconnect the electrical wire from the 12-volt socket.
13. Unscrew the hose from the tire's inflation valve and reinstall the valve cap.
14. Immediately drive the vehicle for approximately 2 miles (3 km) at a maximum speed of 50 mph (80 km/h) to
distribute the sealing compound in the tire.
NOTE
Safely stow the tire sealing system in a convenient place as it will soon be used again to check the tire's inflation
pressure.
The empty bottle of sealing compound cannot be removed from the bottle holder. Consult a trained and qualified
Volvo service technician to have the bottle removed and properly disposed of.
WARNING
If heavy vibrations, unsteady steering behavior, or noises should occur while driving, reduce speed and park the
vehicle in a safe place. Recheck the tire for bumps, cracks, or other visible damage, and recheck its inflation
pressure. If the pressure is below 19 psi (1.3 bar), do not continue driving. Have the vehicle towed to a trained and
qualified Volvo service technician.
261 06 Maintenance and specifications
Wheels and tires
Stage 2: Checking inflation pressure
1. Connect the tire sealing system as described in stage 1.
2. Refer to the tables on pages 240 and 241
for the correct tire inflation pressure. If the tire needs to be inflated, start
the tire sealing system's compressor. If necessary, release air from the tire by turning the air release knob
counterclockwise.
CAUTION
The compressor should not be used for more than 10 minutes at a time to avoid overheating.
WARNING
If you interrupt your trip for more than 1 hour, check the inflation pressure in the damaged tire again before
continuing.
Page 266 of 275
infant seats36-37
ISOFIX/LATCH anchors42
top tether anchors43
Child restraints
recalls and registration 44
Child safety 31-33
booster cushions41
child restraint systems34- 35
convertible seats38- 40
infant seats36- 37
Child safety locks48
Climate system
air distribution 127
air vents128
Interior Air Quality System127
introduction126
passenger compartment filter126
refrigerant126
Clock, setting 79
Cold weather driving190
Collision warning system166,168
Compass in rearview mirror149
Conserving electrical current189
Convertible seats38-40
Coolant214, 275
Cooling system, general information189
Courtesy lighting93-94
Crash mode30
Cruise control154-155
adaptive156- 159
Curb weight247
Current, conserving189
D
Defroster130
Detachable key blade57-58
Dimensions269
Disconnecting the front passenger's airbag22-24
Distance Alert163
Dome lighting93-94
Door mirrors99
Distance Alert system171
Driver distraction warning7
Driving economically188
Driving in cold weather190