2008 VOLVO S80 center console
[x] Cancel search: center consolePage 133 of 275
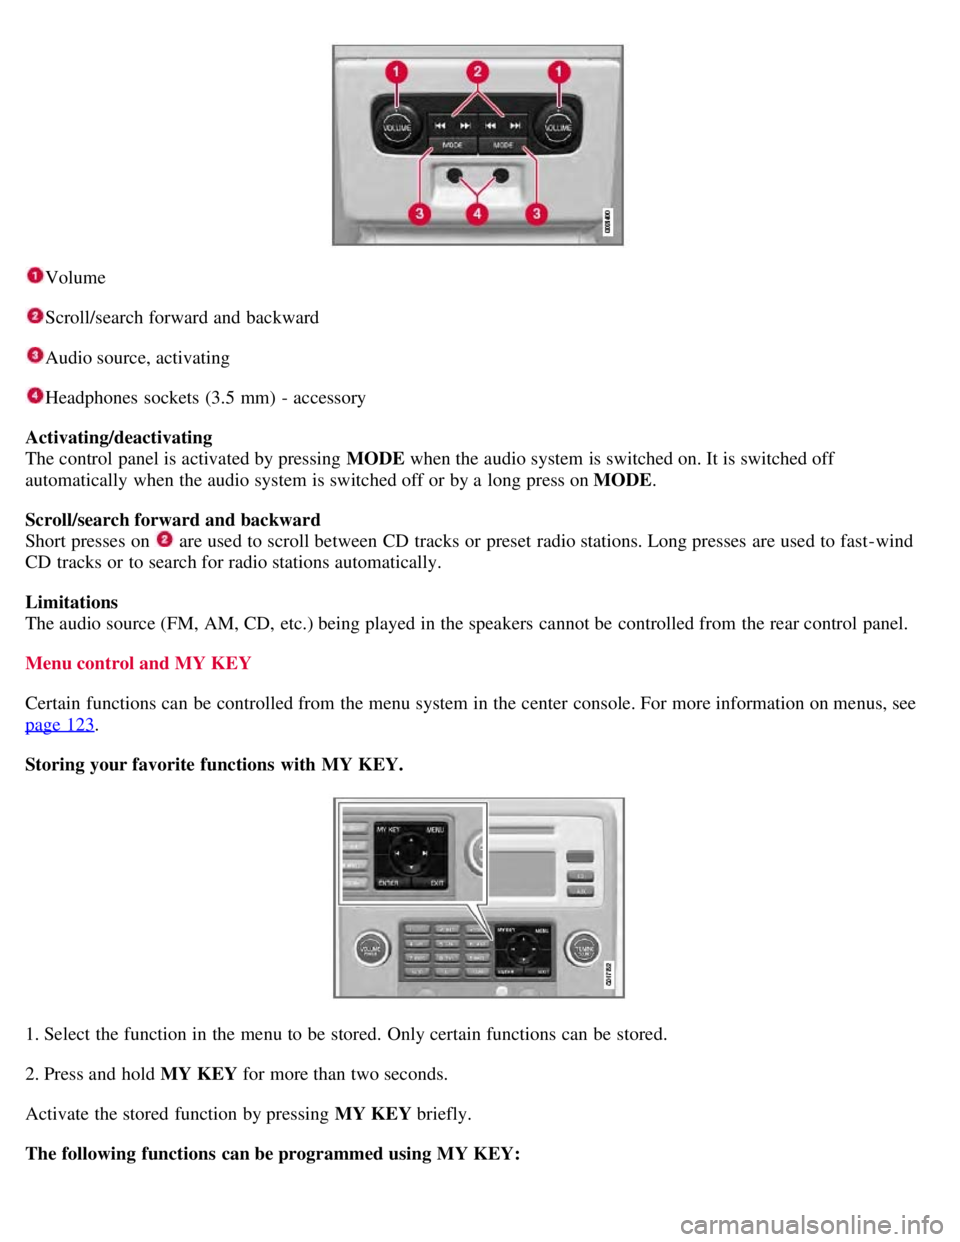
Volume
Scroll/search forward and backward
Audio source, activating
Headphones sockets (3.5 mm) - accessory
Activating/deactivating
The control panel is activated by pressing MODE when the audio system is switched on. It is switched off
automatically when the audio system is switched off or by a long press on MODE .
Scroll/search forward and backward
Short presses on
are used to scroll between CD tracks or preset radio stations. Long presses are used to fast -wind
CD tracks or to search for radio stations automatically.
Limitations
The audio source (FM, AM, CD, etc.) being played in the speakers cannot be controlled from the rear control panel.
Menu control and MY KEY
Certain functions can be controlled from the menu system in the center console. For more information on menus, see
page 123
.
Storing your favorite functions with MY KEY.
1. Select the function in the menu to be stored. Only certain functions can be stored.
2. Press and hold MY KEY for more than two seconds.
Activate the stored function by pressing MY KEY briefly.
The following functions can be programmed using MY KEY:
Page 150 of 275
Active chassis system-Four C
Active chassis (Four C)-option
Active chassis, Four-C (Continuously Controlled Chassis Concept), regulates the characteristics of the shock absorbers
so that the car's driving characteristics can be adjusted. There are three settings: Comfort, Sport and Advanced.
Comfort
Comfort mode offers a somewhat softer ride and the transmission shifts gears at lower rpm. This mode is particularly
suitable for long-distance highway driving. The indicator light in the button will be on when this mode is selected.
Sport
In this mode, the vehicle's body sway is reduced during cornering and steering response is more immediate. The
transmission shifts up at higher rpm for sportier driving. The indicator light in the button will be on to indicate that
Sport mode has been selected.
Advanced
In this mode, body sway in curves is minimal and steering response is very direct. Gear shifting is done at high rpm in
each gear for dynamic and active driving.
Operation
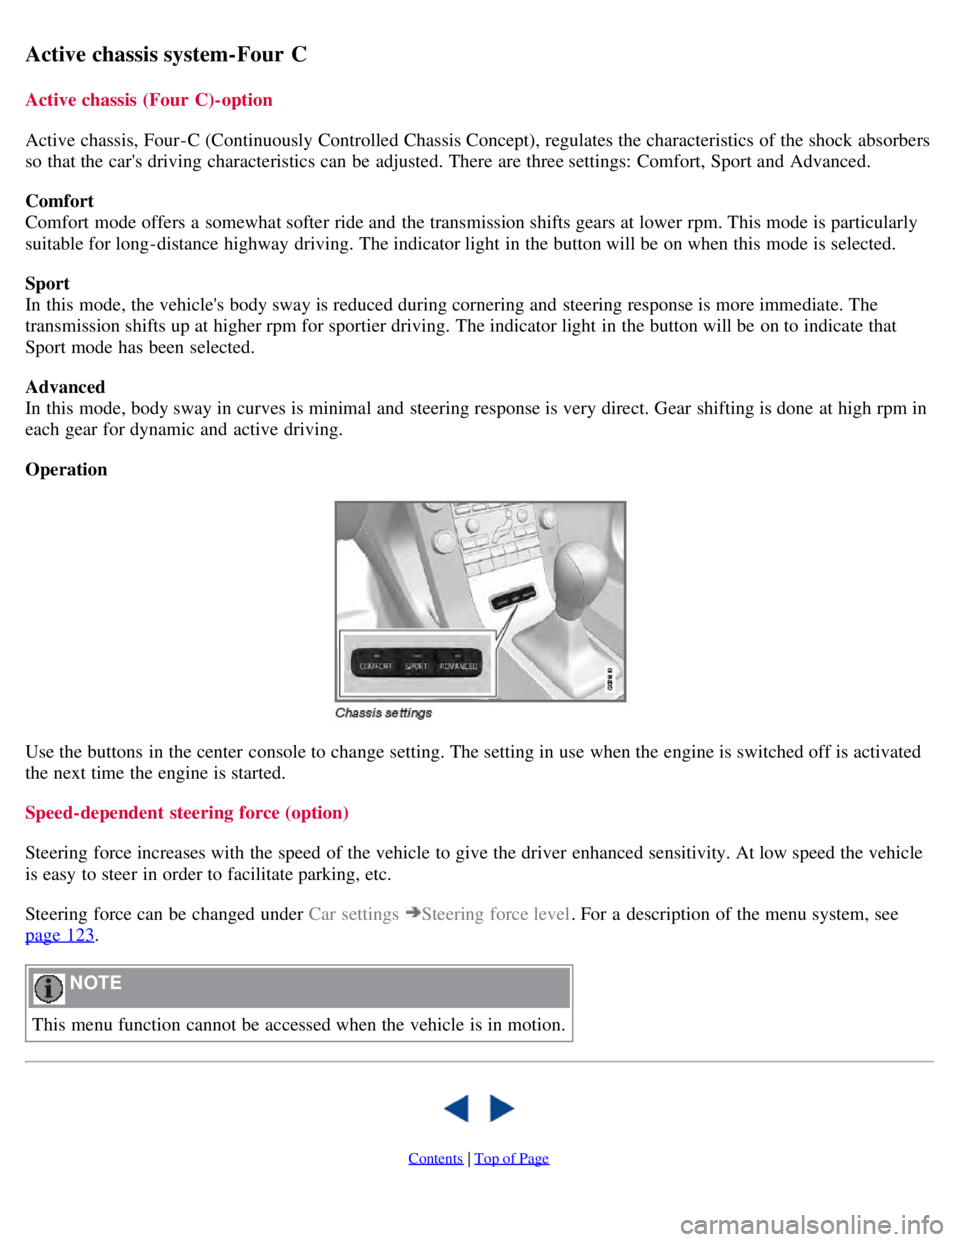
Use the buttons in the center console to change setting. The setting in use when the engine is switched off is activated
the next time the engine is started.
Speed-dependent steering force (option)
Steering force increases with the speed of the vehicle to give the driver enhanced sensitivity. At low speed the vehicle
is easy to steer in order to facilitate parking, etc.
Steering force can be changed under Car settings
Steering force level. For a description of the menu system, see
page 123
.
NOTE
This menu function cannot be accessed when the vehicle is in motion.
Contents | Top of Page
Page 164 of 275
Brake support prepares the brake system to react quickly, and the brakes are applied slightly. This may be experienced
as a light tug.
If the brakes are applied quickly, full braking effect will be provided, even if pressure on the brake pedal is light.
Auto-brake
If a collision is imminent and the driver has not applied the brakes, the auto-brake function is activated without the
driver pressing the brake pedal. Limited brake force is applied to reduce the vehicle's speed when the collision occurs.
WARNING
The driver must apply the brakes for full braking effect.
NOTE
The auto-brake function is always on and cannot be turned off.
Operation
Settings are made from the center console via a menu system. See page 122
for information on using the menu system.
On and off
To switch Collision Warning on or off, go into the menu Car settings
Collision warning settings and select On or
Off . When the engine is started, the setting that was selected when it was switched off will be used.
Activating/deactivating warning signals
The collision warning system's audible and visual signals are activated automatically when the engine is started if the
collision warning system is activated.
The audible warning signal can be activated/deactivated by selecting the alternative On or Off in Car settings
Collision warning settings Warning sound.
Setting a warning distance
This setting determines the distance at which the visual and audible warnings are triggered. Select Long , Normal, or
Short under Car settings
Collision warning settings Warning distance .
The warning distance determines the level of sensitivity used by the system. The warning distance Long provides an
earlier warning. Begin by using Long and if the system gives too many warnings, try changing to Normal .
WARNING
The setting Short should only be used in situations where traffic is light and moving at low speeds.
Collision Warning alerts the driver to the risk of a collision but this function cannot reduce the driver's reaction
time.
For Collision Warning to be as effective as possible, it is recommended that Distance Alert be set to 4 or 5, see
page 163
.
NOTE
When Adaptive Cruise Control (ACC) is used, the warning light and signal will be used by ACC, even if Collision
Warning has been switched off.
In situations where traffic is moving at considerably different speeds, or if the vehicle ahead brakes suddenly,
warnings may be considered to be late, even if the setting Long has been selected.
Page 170 of 275
174 04 Comfort and driving pleasure
Driver Alert System -option
Lane Departure Warning (LDW)-general information
This function is designed to help reduce the risk of accidents in situations where the vehicle leaves its lane and there is
a risk of driving off the road or into the opposite lane.
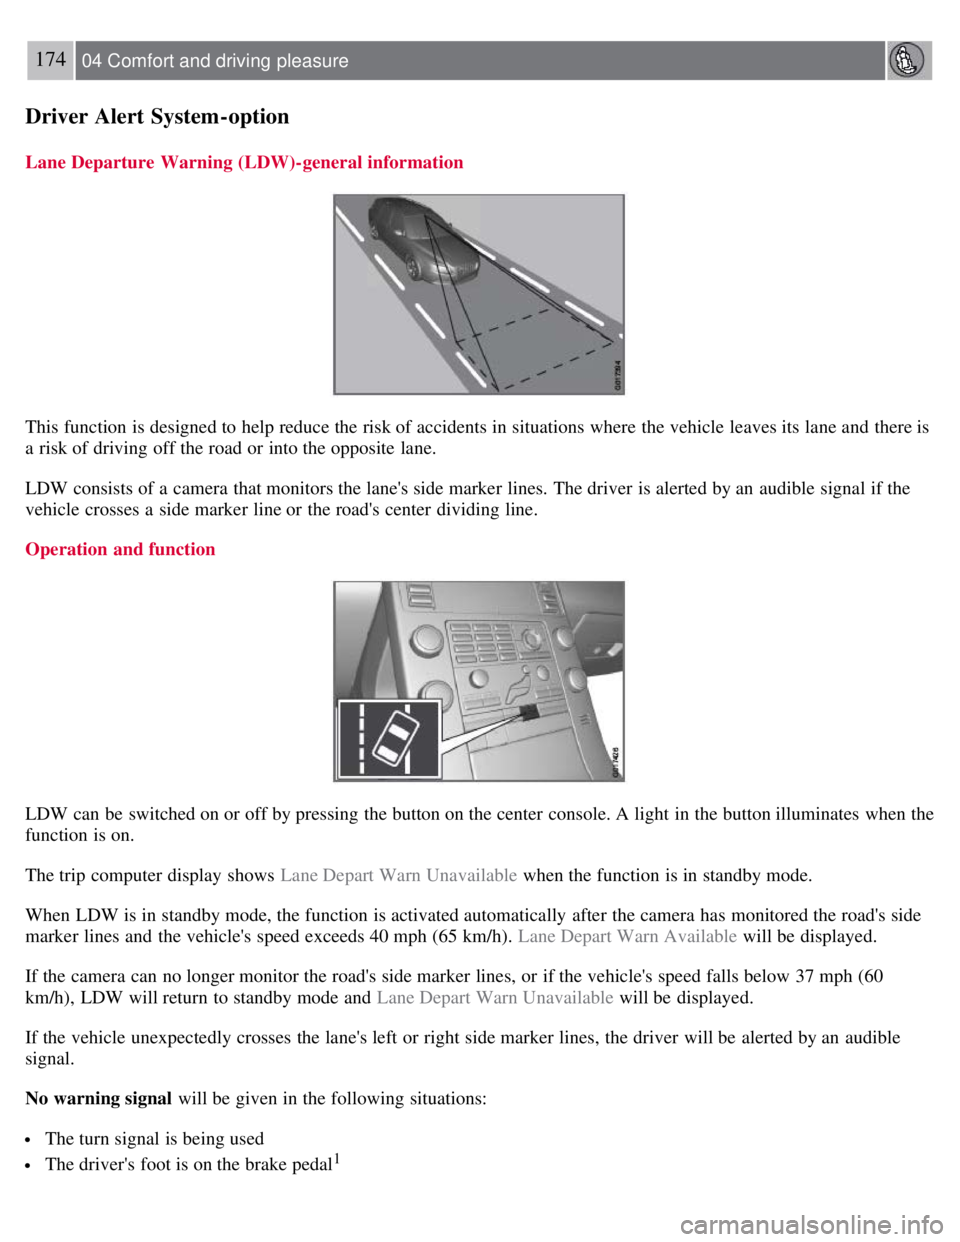
LDW consists of a camera that monitors the lane's side marker lines. The driver is alerted by an audible signal if the
vehicle crosses a side marker line or the road's center dividing line.
Operation and function
LDW can be switched on or off by pressing the button on the center console. A light in the button illuminates when the
function is on.
The trip computer display shows Lane Depart Warn Unavailable when the function is in standby mode.
When LDW is in standby mode, the function is activated automatically after the camera has monitored the road's side
marker lines and the vehicle's speed exceeds 40 mph (65 km/h). Lane Depart Warn Available will be displayed.
If the camera can no longer monitor the road's side marker lines, or if the vehicle's speed falls below 37 mph (60
km/h), LDW will return to standby mode and Lane Depart Warn Unavailable will be displayed.
If the vehicle unexpectedly crosses the lane's left or right side marker lines, the driver will be alerted by an audible
signal.
No warning signal will be given in the following situations:
The turn signal is being used
The driver's foot is on the brake pedal1
Page 172 of 275

This system is available in the rear bumper only, or in both the front and rear bumpers.
Park assist utilizes four ultrasound sensors in the bumper(s) to measure the distance to a vehicle, object, or a person
who may be close to the front or rear of your vehicle. An audible signal and symbols in the audio system's display
indicate the distance to the object.
WARNING
Park Assist is an information system, NOT a safety system. This system is designed to be a supplementary aid when
parking the vehicle. It is not, however, intended to replace the driver's attention and judgement.
Function
Park assist is activated automatically when the vehicle is started. The indicator light in the button in the center console
illuminates when the system is on.
The front park assist system is active from the time the engine is started until the vehicle exceeds a speed of
approximately 10 mph (15 km/h). It is also active when the vehicle is backing up.
Rear park assist is active when the engine is running and reverse gear has been selected.
Activating/deactivating
The system is activated automatically when the vehicle is started.
Press the Park assist button on the center console to temporarily deactivate the system(s). The indicator light in the
button will go out when the system has been deactivated.
Park assist will be automatically reactivated the next time the engine is started, or if the button is pressed (the
indicator light in the button will illuminate).
NOTE
Front park assist is disengaged automatically when the parking brake is applied.
If the vehicle is equipped with front and rear park assist, both systems will be deactivated by pressing the button.
177 04 Comfort and driving pleasure
Park assist (option)
Signals from the park assist system
Page 178 of 275
182 04 Comfort and driving pleasure
Blind Spot Information System (option)
Switching BLIS on and off
BLIS is automatically activated when the ignition is switched on. The indicator lights will provide confirmation by
flashing 3 times.
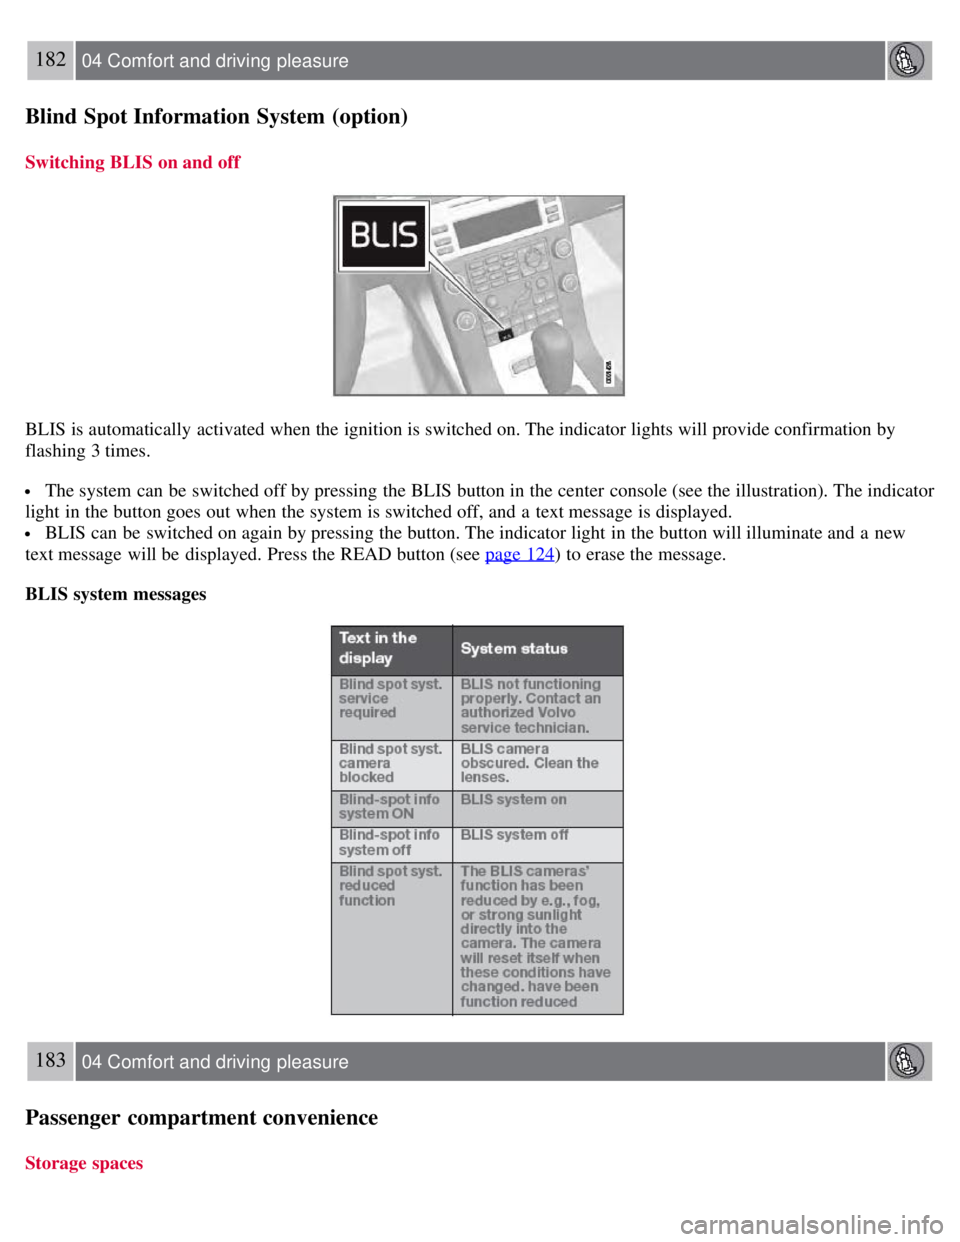
The system can be switched off by pressing the BLIS button in the center console (see the illustration). The indicator
light in the button goes out when the system is switched off, and a text message is displayed.
BLIS can be switched on again by pressing the button. The indicator light in the button will illuminate and a new
text message will be displayed. Press the READ button (see page 124
) to erase the message.
BLIS system messages
183 04 Comfort and driving pleasure
Passenger compartment convenience
Storage spaces
Page 214 of 275
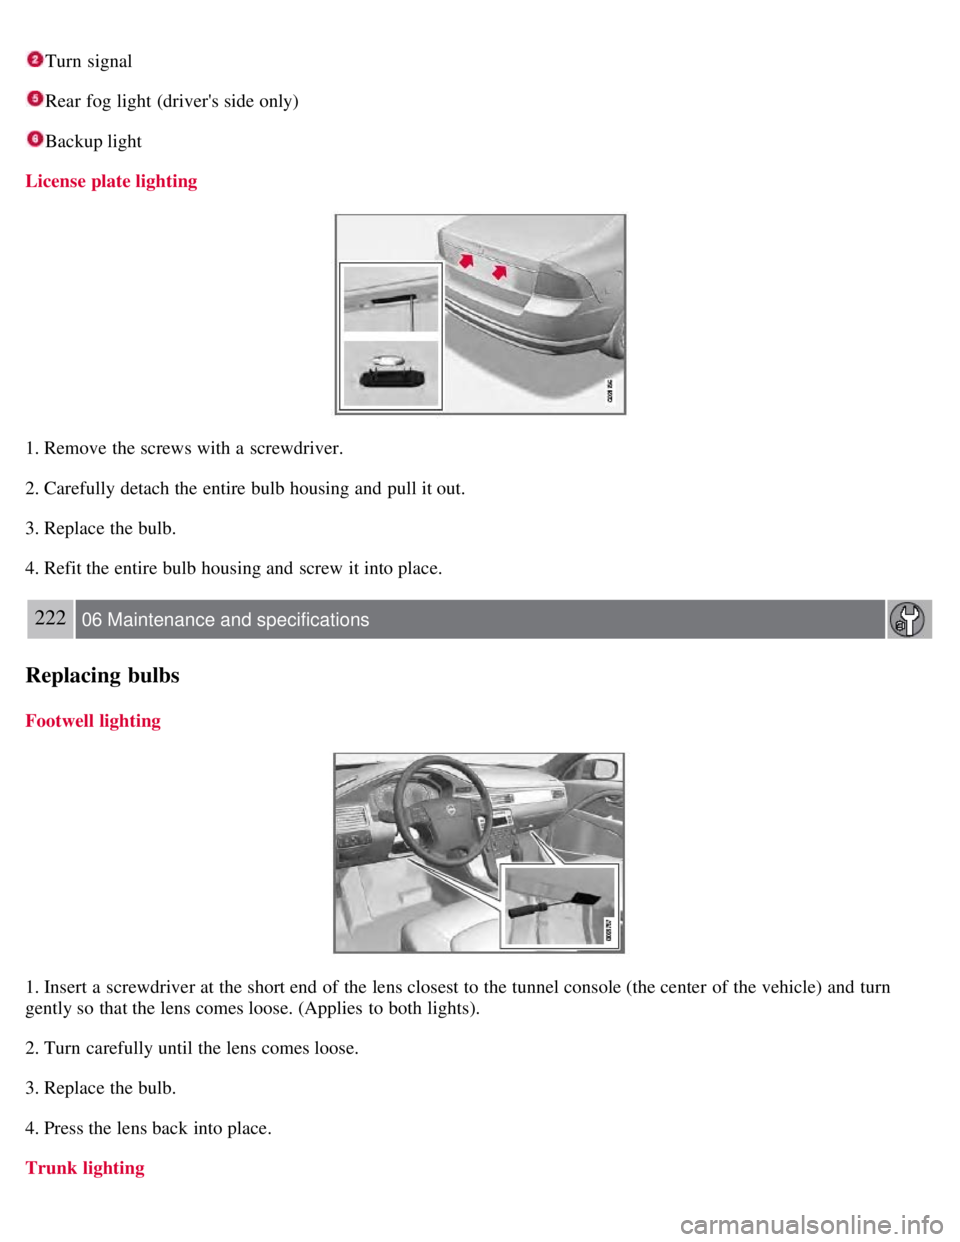
Turn signal
Rear fog light (driver's side only)
Backup light
License plate lighting
1. Remove the screws with a screwdriver.
2. Carefully detach the entire bulb housing and pull it out.
3. Replace the bulb.
4. Refit the entire bulb housing and screw it into place.
222 06 Maintenance and specifications
Replacing bulbs
Footwell lighting
1. Insert a screwdriver at the short end of the lens closest to the tunnel console (the center of the vehicle) and turn
gently so that the lens comes loose. (Applies to both lights).
2. Turn carefully until the lens comes loose.
3. Replace the bulb.
4. Press the lens back into place.
Trunk lighting
Page 246 of 275
Tire sealing system
Certain models are equipped with a tire sealing system that enables you to temporarily seal a hole in the tread surface
and reinflate a flat tire, or to adjust a tire's inflation pressure.
The system consists of an air compressor, a container for the sealing compound, wiring to connect the system to the
vehicle's electrical system via one of the 12-volt sockets, and a hose used to connect the system to the tire's inflation
valve.
The 12-volt sockets are located in the front tunnel console, on the rear side of the center console in the rear seat. See
page 185
.
Accessing the tire sealing system
The tire sealing system is stowed under the floor of the trunk. To access it:
1. Fold up the floor carpeting, starting at the rear and working forward.
2. Remove the retaining screws
3. Lift out the foam plastic block holding the jack and lug wrench.
4. Lift out the tire sealing system.
NOTE
The tire sealing system is only intended to seal holes on the tire's tread area, not the sidewall.
Tires with large holes or tears cannot be repaired with the tire sealing system.
WARNING
After using the tire sealing system, the vehicle should not be driven farther than approximately 120 miles (200
km).
Have the tire inspected by a qualified service technician as soon as possible to determine if it can be permanently
repaired or must be replaced.
The vehicle should not be driven faster than 50 mph (80 km/h) while using a tire that has been temporarily
repaired with the tire sealing system.
After using the tire sealing system, drive carefully and avoid abrupt steering maneuvers and sudden stops.
257 06 Maintenance and specifications
Wheels and tires
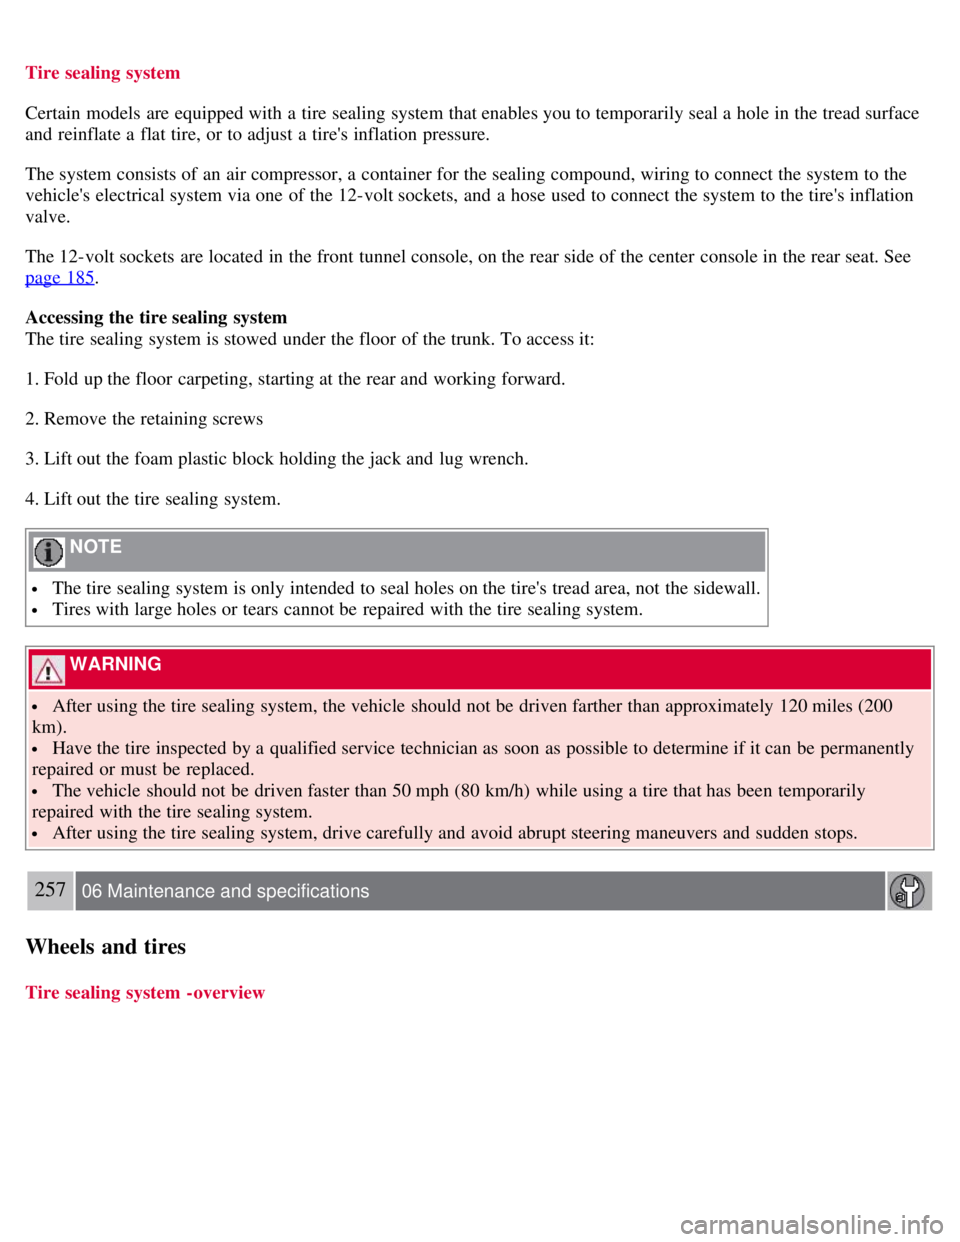
Tire sealing system -overview