Page 204 of 275
Do not allow oil to spill onto or come into contact with hot exhaust pipe surfaces.
NOTE
Synthetic oil is not used when the oil is changed at the normal maintenance intervals except at owner request and at
additional charge. Please consult your Volvo retailer.
214 06 Maintenance and specifications
Fluids
Coolant
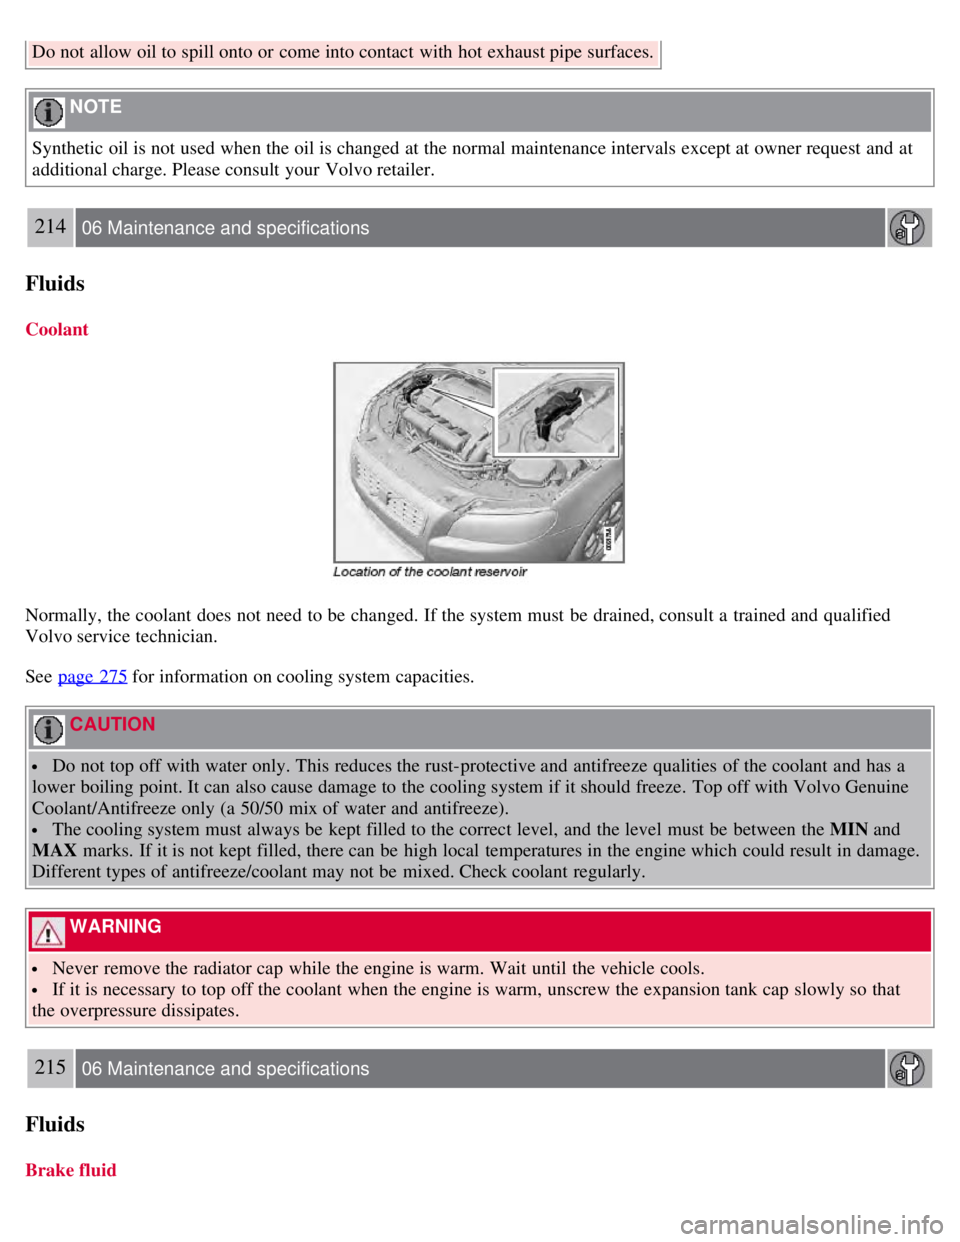
Normally, the coolant does not need to be changed. If the system must be drained, consult a trained and qualified
Volvo service technician.
See page 275
for information on cooling system capacities.
CAUTION
Do not top off with water only. This reduces the rust-protective and antifreeze qualities of the coolant and has a
lower boiling point. It can also cause damage to the cooling system if it should freeze. Top off with Volvo Genuine
Coolant/Antifreeze only (a 50/50 mix of water and antifreeze).
The cooling system must always be kept filled to the correct level, and the level must be between the MIN and
MAX marks. If it is not kept filled, there can be high local temperatures in the engine which could result in damage.
Different types of antifreeze/coolant may not be mixed. Check coolant regularly.
WARNING
Never remove the radiator cap while the engine is warm. Wait until the vehicle cools.
If it is necessary to top off the coolant when the engine is warm, unscrew the expansion tank cap slowly so that
the overpressure dissipates.
215 06 Maintenance and specifications
Fluids
Brake fluid
Page 205 of 275
Checking the level
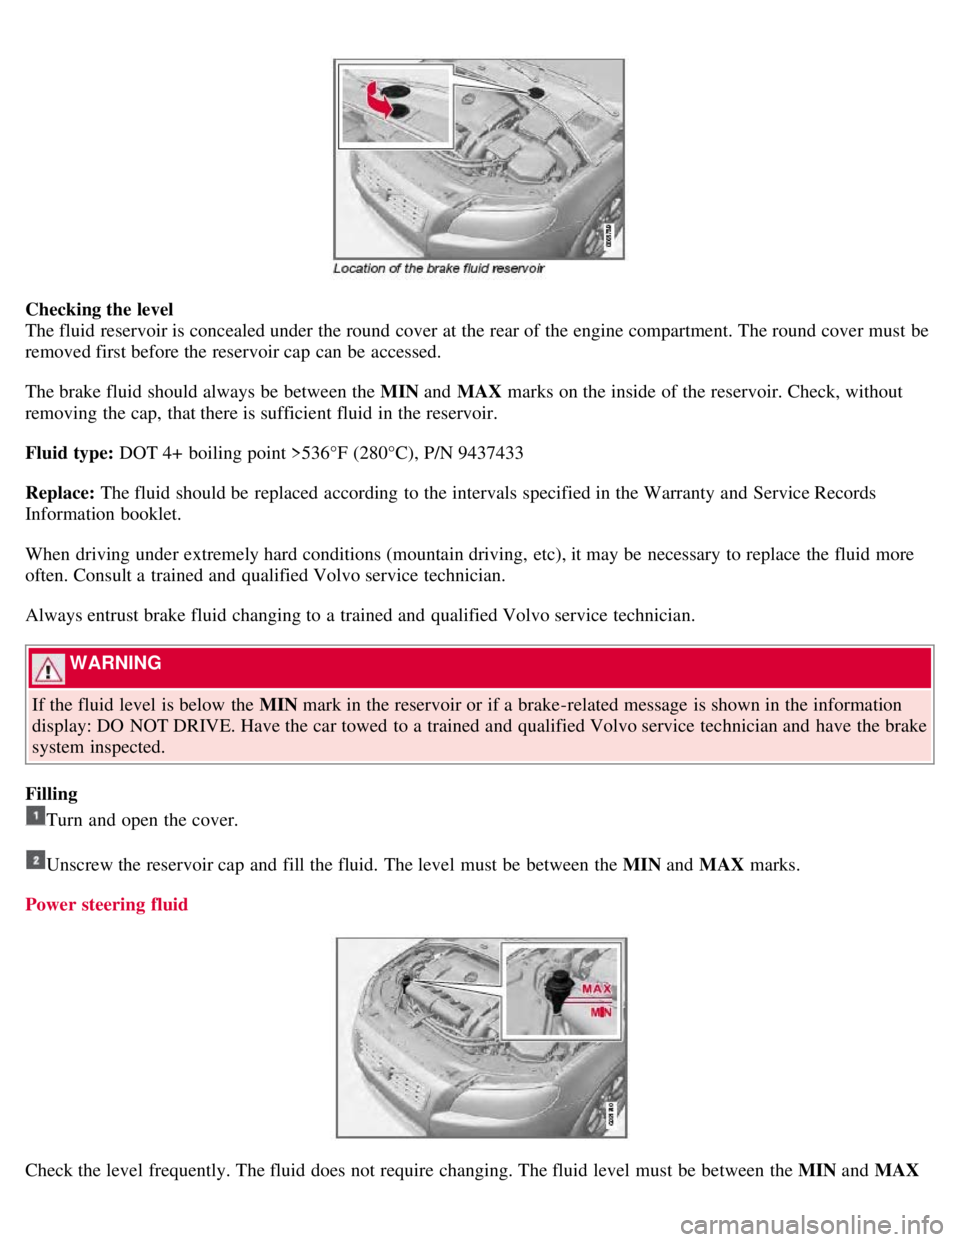
The fluid reservoir is concealed under the round cover at the rear of the engine compartment. The round cover must be
removed first before the reservoir cap can be accessed.
The brake fluid should always be between the MIN and MAX marks on the inside of the reservoir. Check, without
removing the cap, that there is sufficient fluid in the reservoir.
Fluid type: DOT 4+ boiling point >536°F (280°C), P/N 9437433
Replace: The fluid should be replaced according to the intervals specified in the Warranty and Service Records
Information booklet.
When driving under extremely hard conditions (mountain driving, etc), it may be necessary to replace the fluid more
often. Consult a trained and qualified Volvo service technician.
Always entrust brake fluid changing to a trained and qualified Volvo service technician.
WARNING
If the fluid level is below the MIN mark in the reservoir or if a brake-related message is shown in the information
display: DO NOT DRIVE. Have the car towed to a trained and qualified Volvo service technician and have the brake
system inspected.
Filling
Turn and open the cover.
Unscrew the reservoir cap and fill the fluid. The level must be between the MIN and MAX marks.
Power steering fluid
Check the level frequently. The fluid does not require changing. The fluid level must be between the MIN and MAX
Page 206 of 275
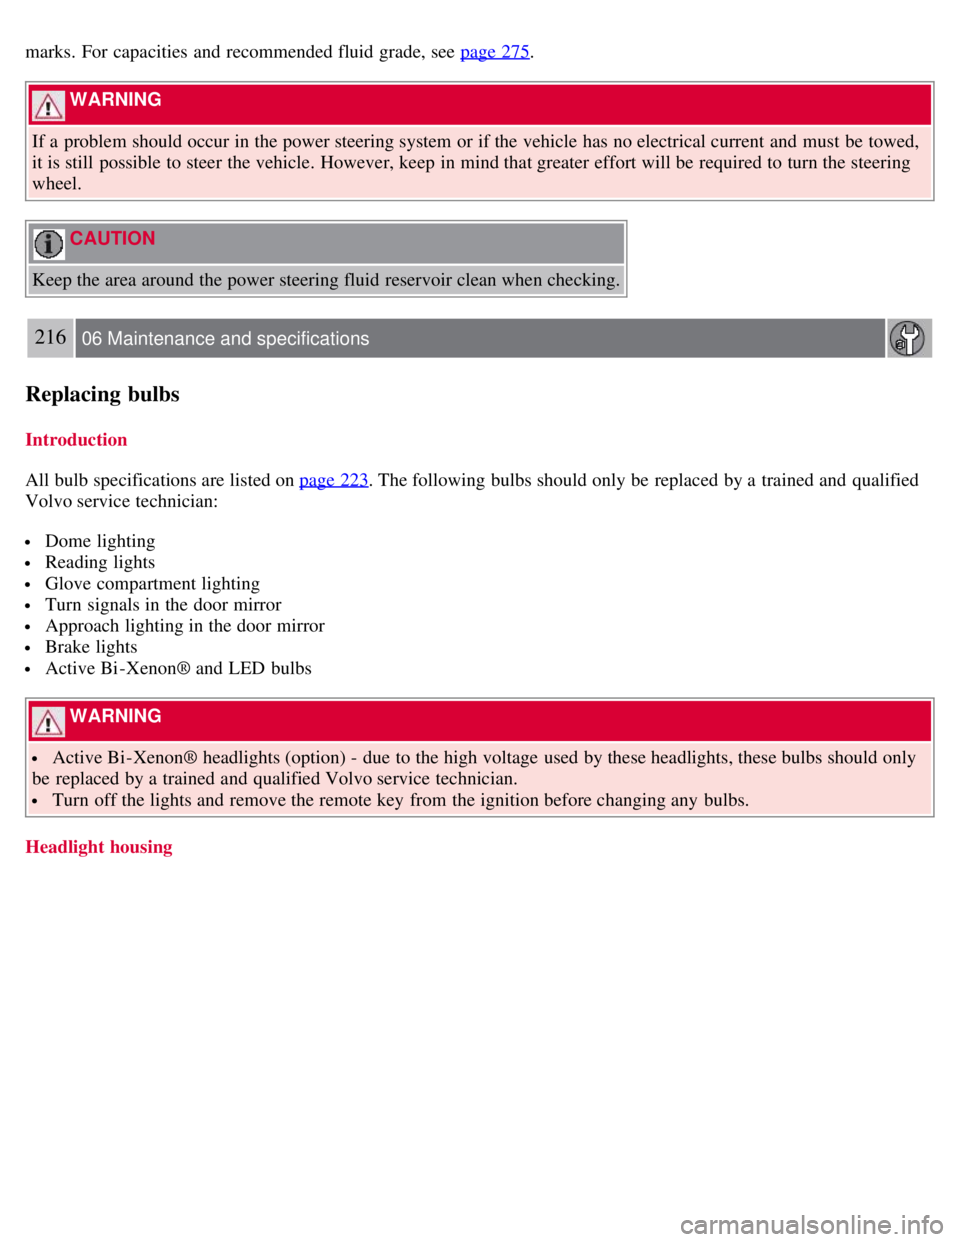
marks. For capacities and recommended fluid grade, see page 275.
WARNING
If a problem should occur in the power steering system or if the vehicle has no electrical current and must be towed,
it is still possible to steer the vehicle. However, keep in mind that greater effort will be required to turn the steering
wheel.
CAUTION
Keep the area around the power steering fluid reservoir clean when checking.
216 06 Maintenance and specifications
Replacing bulbs
Introduction
All bulb specifications are listed on page 223
. The following bulbs should only be replaced by a trained and qualified
Volvo service technician:
Dome lighting
Reading lights
Glove compartment lighting
Turn signals in the door mirror
Approach lighting in the door mirror
Brake lights
Active Bi -Xenon® and LED bulbs
WARNING
Active Bi -Xenon® headlights (option) - due to the high voltage used by these headlights, these bulbs should only
be replaced by a trained and qualified Volvo service technician.
Turn off the lights and remove the remote key from the ignition before changing any bulbs.
Headlight housing
Page 218 of 275
The windshield and headlight washers share a common reservoir.
The washer fluid reservoir is located on the driver's side of the engine compartment. During cold weather, the reservoir
should be filled with windshield washer solvent containing antifreeze. For capacities, see page 275
.
226 06 Maintenance and specifications
Battery
Warning symbols on the battery
NOTE
A used battery should be disposed of in an environmentally responsible manner. Consult your Volvo retailer or take
the battery to a recycling station.
Handling
Check that the battery cables are correctly connected and tightened.
Never disconnect the battery when the engine is running (for example, when replacing the battery).
Page 219 of 275
The service life and function of the battery is influenced by factors such as the number of starts, discharging, driving
style, driving conditions, climatic conditions etc.
Never use a quick charger to charge the battery.
WARNING
Never expose the battery to open flame or electric spark.
Do not smoke near the battery.
Battery fluid contains sulfuric acid. Do not allow battery fluid to contact eyes, skin, fabrics or painted surfaces. If
contact occurs, flush the affected area immediately with water. Obtain medical help immediately if eyes are affected.
NOTE
The life of the battery is shortened if it becomes discharged repeatedly.
227 06 Maintenance and specifications
Battery
Maintenance
Regularly check that the electrolyte level is correct and never fill above the level mark.
Check all cells. Use a large screwdriver or a coin to remove the cell caps. Each cell has its own maximum and
minimum level mark.
If necessary, top up with distilled water to the battery's maximum mark.
Tighten the cell caps thoroughly.
CAUTION
Always use distilled or deionized water (battery water).
Never fill above the level mark in the cell.
228 06 Maintenance and specifications
Battery
Changing
Page 220 of 275
WARNING
Connect and disconnect the positive and negative cables in the correct sequence.
Removal
Switch off the ignition and wait at least 5 minutes before disconnecting the battery so that all information in the
vehicle's electrical system can be stored in the control modules.
Open the clips on the front cover and remove the cover.
Release the rubber moulding so that the rear cover is free.
Remove the rear cover by pulling it away.
Page 221 of 275
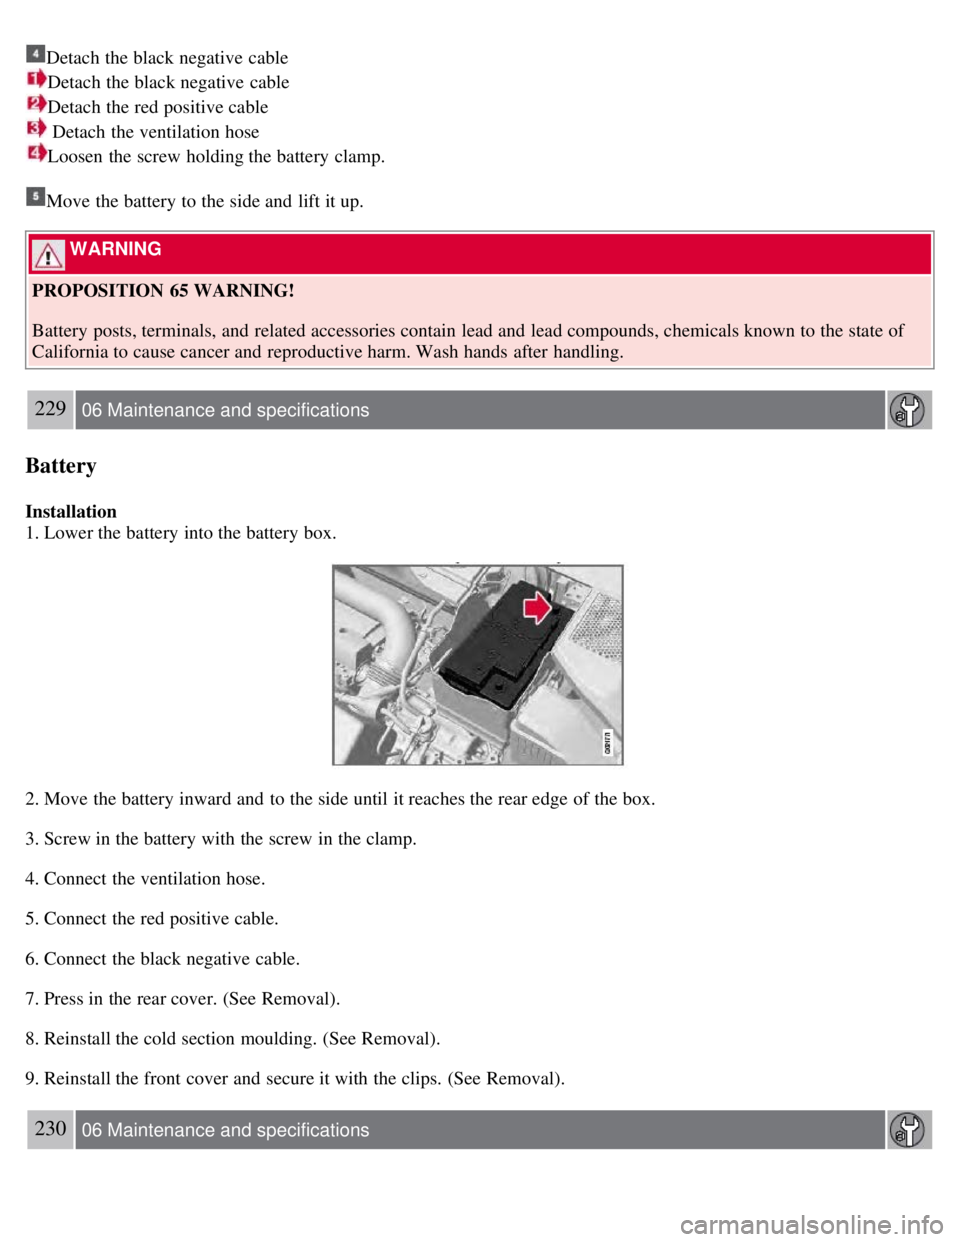
Detach the black negative cable
Detach the black negative cable
Detach the red positive cable
Detach the ventilation hose
Loosen the screw holding the battery clamp.
Move the battery to the side and lift it up.
WARNING
PROPOSITION 65 WARNING!
Battery posts, terminals, and related accessories contain lead and lead compounds, chemicals known to the state of
California to cause cancer and reproductive harm. Wash hands after handling.
229 06 Maintenance and specifications
Battery
Installation
1. Lower the battery into the battery box.
2. Move the battery inward and to the side until it reaches the rear edge of the box.
3. Screw in the battery with the screw in the clamp.
4. Connect the ventilation hose.
5. Connect the red positive cable.
6. Connect the black negative cable.
7. Press in the rear cover. (See Removal).
8. Reinstall the cold section moulding. (See Removal).
9. Reinstall the front cover and secure it with the clips. (See Removal).
230 06 Maintenance and specifications
Page 222 of 275

Fuses
Replacing fuses
There are relay/fuse boxes located in the engine compartment, the passenger compartment, and the trunk.
If an electrical component fails to function, this may be due to a blown fuse. The easiest way to see if a fuse is blown
is to remove it.
To do so:
1. Pull the fuse straight out. If a fuse is difficult to remove, special fuse removal tools are located on the inside of the
fuse box covers.
2. From the side, examine the curved metal wire in the fuse to see if it is intact.
If the wire is broken, insert a new fuse of the same color and amperage (written on the fuse).
If fuses burn out repeatedly, have the electrical system inspected by a trained and qualified Volvo service technician.
WARNING
Never use metal objects or fuses with higher amperage than those stated on the following pages. Doing so could
seriously damage or overload the vehicle's electrical system.
Location of the fuse boxes
Under the glove compartment
Engine compartment
Trunk
231 06 Maintenance and specifications
Fuses
Engine compartment