Page 65 of 246

The mirrors should always be adjusted prior to driving.
Objects seen in the passenger's side wide -angle door mirror are closer than they appear to be.
Storing the mirrors' position
The position of the power door mirrors is stored when the car is locked with the remote control. When the car is
unlocked with the same remote control, the mirrors will move to the stored position.
Blind Spot Information System (BLIS) -option
The Blind Spot Information System (BLIS) is an information system that indicates the presence of another vehicle in
the side-view mirror's "blind area." See page 159
for detailed information.
71 02 Instruments and controls
Personal settings
Control panel
A. Display
B. Menu button
C. Exit button
D. Enter button
E. Menu navigation controls
Personal settings can be made for some of the car's functions, such as the central locking system, climate control, and
the audio system. Please refer to page 236
for more information on the audio functions that can be adjusted. The
settings are presented in the display (A).
To access the menu and adjust settings:
1. Press MENU (B).
2. Scroll to "Car Settings" using the menu navigation control (E).
ProCarManuals.com
Page 66 of 246

3. Press ENTER (D).
4. Select an alternative using the menu navigation control (E).
5. Confirm your selection by pressing ENTER.
To exit the menu:
Press EXIT (C).
Available settings
Clock adjust
To set the time:
1. Use the number keys or the up/down arrow keys on the navigation control (E) to change the hour or minute.
2. Select hour(s) or minute(s) to be changed with the left/right arrow keys.
3. Press ENTER to start the clock.
NOTE
If you are currently using the 12-hour time setting, use the up/down arrow keys to select AM/PM after the minute-
setting has been adjusted.
Lock confirmation light
When the car is locked/unlocked with the remote control, the direction indicators can be selected to flash to confirm
the action. The alternatives On/Off are available for both locking and unlocking.
72 02 Instruments and controls
Personal settings
Autolock
When the car starts to move, the doors and trunk can be locked automatically. The alternatives On/Off are available.
NOTE
Pulling the handle twice on a door unlocks and opens that door.
Unlock
There are two alternatives for unlocking:
Global (All doors)
Unlocks all doors and the trunk with one press on the remote control.
Two Step (Two-stage unlocking)
This alternative unlocks the driver's door with one press on the remote control. A second press unlocks the passenger's
door and the trunk.
ProCarManuals.com
Page 67 of 246

Operating side windows
The following alternative can be selected for opening all windows at the same time by pressing and holding the Unlock
button on the central locking system's remote control. See page 113
for more information.
Auto open all windows On/Off
Approach lighting
This alternative determines the length of time for which the car's lights will remain on when the Approach light button
on the central locking system's remote control is pressed. Intervals of 30/60/90 seconds may be selected. See page 113
for more information.
Home safe lighting
This alternative determines the length of time for which the car's lights will remain on when the high beam lever on the
steering column is pulled toward the wheel with the ignition switched off. Intervals of 30/60/90 seconds may be
selected. See page 57
for information on using this function.
Information
VIN number:
The VIN (Vehicle Identification Number) is the car's unique identity number.
Number of Keys:
The number of keys registered for the car is displayed here.
Climate functions
Blower speed in AUTO mode:
The blower speed can be set to AUTO mode in models equipped with ECC. Choose between "Low", "Normal" and
"High".
Timer for recirculation:
When the timer is active, the air recirculates in the car for 3-12 minutes depending on the ambient temperature. Select
On/Off depending on whether the recirculation timer is to be active or not.
Reset to factory settings
Use this alternative to return to the default climate system settings.
73 02 Instruments and controls
HomeLink® Universal Transceiver (option)
Introduction
ProCarManuals.com
Page 68 of 246

HomeLink1 is a system that can be programmed to learn the codes of three different remote controlled-devices (for
example, a garage door opener, remote lighting, entry gate). HomeLink's sun visor-mounted transceiver, powered by
your car's electrical system, may then be used in place of your handheld remote controls. The HomeLink transceiver
consists of three programmable buttons and an indicator light.
1HomeLink is a registered trademark of Johnson Controls, Intl.
© JCI, All rights reserved
NOTE
For your security, the HomeLink Universal Transceiver is designed to not function if you lock your car from the
outside.
Retain the original transmitter(s) for future programming procedures (for example, if you purchase a new vehicle).
For your own security, erase all programmed buttons on the HomeLink Universal Transceiver when you sell your
vehicle.
Metallic sun protection films should not be used on any windows in a vehicle equipped with HomeLink Universal
Transceiver. This could interfere with the transceivers function.
Operating the HomeLink Universal Transceiver
Once programmed, the HomeLink Universal Transceiver can be used in place of your handheld transmitters.
NOTE
The HomeLink universal transceiver will function for 30 minutes after the driver's door has been opened without
switching on the vehicle's ignition.
Press the programmed HomeLink button to activate the garage door, driveway gate, security lightning, home security
system etc. Your original hand -held transmitters may, of course, be used at any time.
WARNING
If you use HomeLink to open a garage door or gate, be sure no one is near the gate or door while it is in motion.
Do not use the HomeLink Universal Transceiver with any garage door opener that lacks safety "stop" and
"reverse" features as required by federal safety standards. (This includes any garage door opener model manufactured
before April 1, 1982). A garage door opener that cannot "detect" an object, signalling the door to "stop" and
"reverse" does not meet current federal safety standards. Using a garage door opener without these features increases
the risk of serious injury or death. For more information on this matter, call toll-free 1-800-355-3515. (Internet:
www.HomeLink.com
).
ProCarManuals.com
Page 69 of 246

Programming the transceiver for the first time (U.S. residents)
1. For first time training, press and hold the two outer HomeLink buttons, releasing only when the HomeLink indicator
light begins to flash after 20 seconds. (Do not perform this step when training the additional HomeLink buttons.)
2. Position the hand -held transmitter 1-3 inches away from the HomeLink surface
74 02 Instruments and controls
HomeLink® Universal Transceiver (option)
(located on your sun visor), keeping the HomeLink indicator light in view.
3. Using both hands, simultaneously press and hold both the desired HomeLink button and hand held transmitter
button. DO NOT release until the HomeLink indicator light flashes slowly and then rapidly. When the indicator light
flashes rapidly, both buttons may be released. (The rapid flashing indicates successful training.)
NOTE
Some garage door openers may require you to replace step 3 with the "cycling" procedure noted in the
"Programming the transceiver for the first time (Canadian residents)" section.
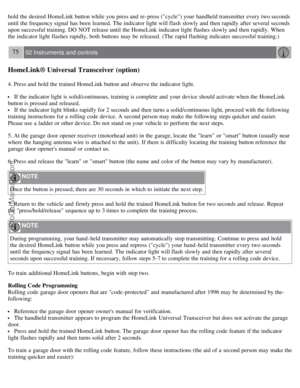
4. Press and hold the trained HomeLink button and observe the indicator light.
If the indicator light is solid/continuous, training is complete and your device should activate when the HomeLink
button is pressed and released.
If the indicator light blinks rapidly for 2 seconds and then turns a solid/continuous light, proceed with the following
training instructions for a rolling code device. A second person may make the following steps quicker and easier.
Please use a ladder or other device. Do not stand on your vehicle to perform the next steps.
5. At the garage door opener receiver (motorhead unit) in the garage, locate the "learn" or "smart" button (usually near
where the hanging antenna wire is attached to the unit). If there is difficulty locating the training button, reference the
garage door opener's manual or contact us toll-free 1-800-355-3515 (Internet: www.HomeLink.com
).
6. Press and release the "learn" or "smart" button (the name and color of the button may vary by manufacturer).
NOTE
Once the button is pressed, there are 30 seconds in which to initiate the next step.
7. Return to the vehicle and firmly press and hold the trained HomeLink button for two seconds and release. Repeat
the "press/hold/release" sequence up to 3 times to complete the training process.
To train additional HomeLink buttons, begin with step two.
Programming the transceiver for the first time (Canadian residents)
1. For first time training, press and hold the two outer HomeLink buttons releasing only when the HomeLink indicator
light begins to flash after 20 seconds. (Do not perform this step when training the additional HomeLink buttons.)
2. Position the hand -held transmitter 1-3 inches (2.5-7.5 cm) away from the HomeLink surface (located on your)
keeping the HomeLink indicator light in view.
3. Using both hands, simultaneously press and hold both the desired HomeLink button and hand held transmitter
button. During programming, your handheld transmitter may automatically stop transmitting. Continue to press and
ProCarManuals.com
Page 70 of 246

hold the desired HomeLink button while you press and re-press ("cycle") your handheld transmitter every two seconds
until the frequency signal has been learned. The indicator light will flash slowly and then rapidly after several seconds
upon successful training. DO NOT release until the HomeLink indicator light flashes slowly and then rapidly. When
the indicator light flashes rapidly, both buttons may be released. (The rapid flashing indicates successful training.)
75 02 Instruments and controls
HomeLink® Universal Transceiver (option)
4. Press and hold the trained HomeLink button and observe the indicator light.
If the indicator light is solid/continuous, training is complete and your device should activate when the HomeLink
button is pressed and released.
If the indicator light blinks rapidly for 2 seconds and then turns a solid/continuous light, proceed with the following
training instructions for a rolling code device. A second person may make the following steps quicker and easier.
Please use a ladder or other device. Do not stand on your vehicle to perform the next steps.
5. At the garage door opener receiver (motorhead unit) in the garage, locate the "learn" or "smart" button (usually near
where the hanging antenna wire is attached to the unit). If there is difficulty locating the training button reference the
garage door opener's manual or contact us.
6. Press and release the "learn" or "smart" button (the name and color of the button may vary by manufacturer).
NOTE
Once the button is pressed, there are 30 seconds in which to initiate the next step.
7. Return to the vehicle and firmly press and hold the trained HomeLink button for two seconds and release. Repeat
the "press/hold/release" sequence up to 3 times to complete the training process.
NOTE
During programming, your hand -held transmitter may automatically stop transmitting. Continue to press and hold
the desired HomeLink button while you press and repress ("cycle") your hand -held transmitter every two seconds
until the frequency signal has been learned. The indicator light will flash slowly and then rapidly after several
seconds upon successful training. If necessary, follow steps 5-7 to complete the training for a rolling code device.
To train additional HomeLink buttons, begin with step two.
Rolling Code Programming
Rolling code garage door openers that are "code-protected" and manufactured after 1996 may be determined by the-
following:
Reference the garage door opener owner's manual for verification.
The handheld transmitter appears to program the HomeLink Universal Transceiver but does not activate the garage
door.
Press and hold the trained HomeLink button. The garage door opener has the rolling code feature if the indicator
light flashes rapidly and then turns solid after 2 seconds.
To train a garage door with the rolling code feature, follow these instructions (the aid of a second person may make the
training quicker and easier):
ProCarManuals.com
Page 71 of 246

1. Locate the training button on the garage door opener motor head unit. Exact location and color of the button may
vary by garage door opener brand. If there is difficulty locating the training button, reference the garage door opener
owner's manual or please visit our Web site at www.homelink.com
.
2. Press the training button on the garage door opener motor head unit (which activates the "training light").
NOTE
Following step 2, there are 30 seconds in which to initiate step 3.
3. Firmly press and release the programmed HomeLink® button. Press and release the HomeLink button a second time
to complete the training process. (Some garage door openers may require
76 02 Instruments and controls
HomeLink® Universal Transceiver (option)
you to do this procedure a third time to complete the training.)
The garage door opener should now recognize the HomeLink Wireless Control System. The remaining two buttons
may now be trained if this has not previously been done. Refer to the Programming portion of this text. The
HomeLink Wireless Control System (once programmed) or the original handheld transmitter may be used to activate
the garage door. In the event that there are still difficulties in programming the HomeLink Wireless Control System,
please visit our Web site, www.homelink.com
.
Reprogramming a Single HomeLink Button
To program a device to HomeLink using a HomeLink button previously trained, follow these steps:
1. Press and hold the desired HomeLink button. Do NOT release until step 4 has been completed.
2. When the indicator light begins to flash slowly ( after 20 seconds), position the handheld transmitter 1 to 3 inches
away from the HomeLink surface.
3. Press and hold the handheld transmitter button. The HomeLink indicator light will flash, first slowly and then
rapidly.
4. When the indicator light begins to flash rapidly, release both buttons.
The previous device has now been erased and the new device can be activated by pushing the HomeLink button that
has just been programmed. This procedure will not affect any other programmed HomeLink.
Erasing Channels
Individual buttons cannot be erased. However, to erase all three programmed buttons:
1. Press and hold the two outside buttons until the indicator light begins to flash (after 20 seconds).
2. Release both buttons.
The HomeLink® Wireless Control System is now in the training (learning) mode and can be programmed at any time
following steps 2 through 4 in the Programming section.
77 02 Instruments and controls
ProCarManuals.com
Page 72 of 246
This page left intentionally blank.
Contents | Top of Page
ProCarManuals.com