Page 154 of 400
 or all wheels (4WD
models) spi")
156
2−4. Using other driving systems
Driving assist systems
When VSC/TRAC are operating
If the vehicle is in danger of slip−
ping, or if the rear wheels (2WD
models) or all wheels (4WD
models) spin, the indicator light
flashes to indicate that VSC/
TRAC have been engaged.
A buzzer (intermittent) sounds to
indicate that VSC is operating. To help enhance driving safety a nd performance, the following sys�
tems operate automatically in res
ponse to various driving situations.
Be aware, however, that these systems are supplementary and
should not be relied upon too h
eavily when operating the vehicle.
� ABS (Anti�lock Brake System)
Restrains the vehicle from slipping when driving on slick road surfaces
or in the event of sudden braking.
� Brake Assist
Generates an increased level of braking force after the brake pedal is
depressed, when the system detects a panic stop situation.
� VSC (Vehicle Stability Control)
Helps the driver to control skidding when swerving suddenly or turning
on slippery road surfaces.
� TRAC (Traction Control)
Maintains drive power and prevents the rear wheels (2WD models) or
all wheels (4WD models) from spinning when starting the vehicle or
accelerating on slippery roads.
Page 155 of 400
157
2−4. Using other driving systems
2
When driving
To disable VSC
If the vehicle gets stuck in fresh snow or mud, VSC may reduce
power from the engine to the wheels. You may need to turn the sys−
tem off to enable you to rock the vehicle in order to free it.
Vehicles with rear differential lock system
Press the RR DIFF LOCK
switch.
The rear differential lock and VSC
OFF indicators should come on.
Push the switch again to turn the
system back on.
4WD models with an automatic transmission
Shift the front−wheel drive control
lever to H4 or L4.
The four−wheel drive and VSC
OFF indicators should come on.
Shift the lever to H2, turn the sys−
tem back on.
4WD models with a manual transmission
Shift the four−wheel drive control
lever to HL or LL.
The center differential lock and
VSC OFF indicators should come
on.
Shift the lever to H, turn the sys−
tem back on.
Page 162 of 400

164 2−5. Driving information
NOTICE
� To prevent the water damage
� Take all necessary safety measures to ensure that water damage to the
engine or other components does not occur.
Water entering the engine air intake will cause severe engine damage.
�Water entering the automatic transmission will cause deterioration in shift
quality, locking up of your transmission accompanied by vibration, and ulti−
mately damage.
� Water can wash the grease from wheel bearings, causing rusting and pre−
mature failure, and may also enter the differentials, transmission and
transfer case, reducing the gear oil’s lubricating qualities.
� When you drive through water
If driving through water, such as when crossing shallow streams, first check
the depth of the water and the bottom of the river bed for firmness. Drive
slowly and avoid deep water.
� Inspection after off�road driving
� Sand and mud that has accumulate
d in brake drums and around brake
discs may affect braking efficiency and may damage brake system compo−
nents.
� Always perform a maintenance inspection after each day of off−road driv−
ing that has taken you through rough terrain, sand, mud, or water. For
scheduled maintenance information, refer to the “Scheduled Maintenance
Guide” or “Owner ’s Manual Supplement”.
Page 172 of 400
174 2−5. Driving information
Selecting trailer ball
Use the correct trailer ball for your application.
Trailer ball load rating
Matches or exceeds the gross
trailer weight rating of the trailer.
Ball diameter
Matches the size of the trailer
coupler. Most couplers are
stamped with the required trailer
ball size.
Shank length
Protrudes beyond the bottom of
the lock washer and nut at least 2
threads.
Shank diameter
Matches the ball mount hole
diameter size.
Connecting trailer lights
Use the wire harness stored in
the rear end underbody.
Page 178 of 400

180 2−5. Driving information
� Always place wheel blocks under both the vehicle and the trailer
wheels when parking. Apply the parking brake firmly, and put the
transmission in P (automatic transmission) or in 1 or R (manual
transmission). Avoid parking on a slope, but if unavoidable, do so
only after performing the following:
Apply the brakes and keep them applied.
Have someone place wheel bloc
ks under both the vehicle and
trailer wheels.
When the wheel blocks are in place, release the brakes slowly
until the blocks absorb the load.
Apply the parking brake firmly.
Shift into 1 or R (manual transmission) or P (automatic trans−
mission) and turn off the engine.
� When restarting after parking on a slope:
With the transmission in P (automatic transmission) or the
clutch pedal (manual transmission) depressed, start the
engine. On vehicles with an au tomatic transmission, be sure
to keep the brake pedal pressed.
Shift into a forward gear. If reversing, shift into R.
Release the parking brake (also
brake pedal on vehicles with
an automatic transmission), and slowly pull or back away from
the wheel blocks. Stop and apply the brakes.
Have someone retrieve the blocks.
Page 181 of 400
184
3−1. Using the air conditioning system and defogger
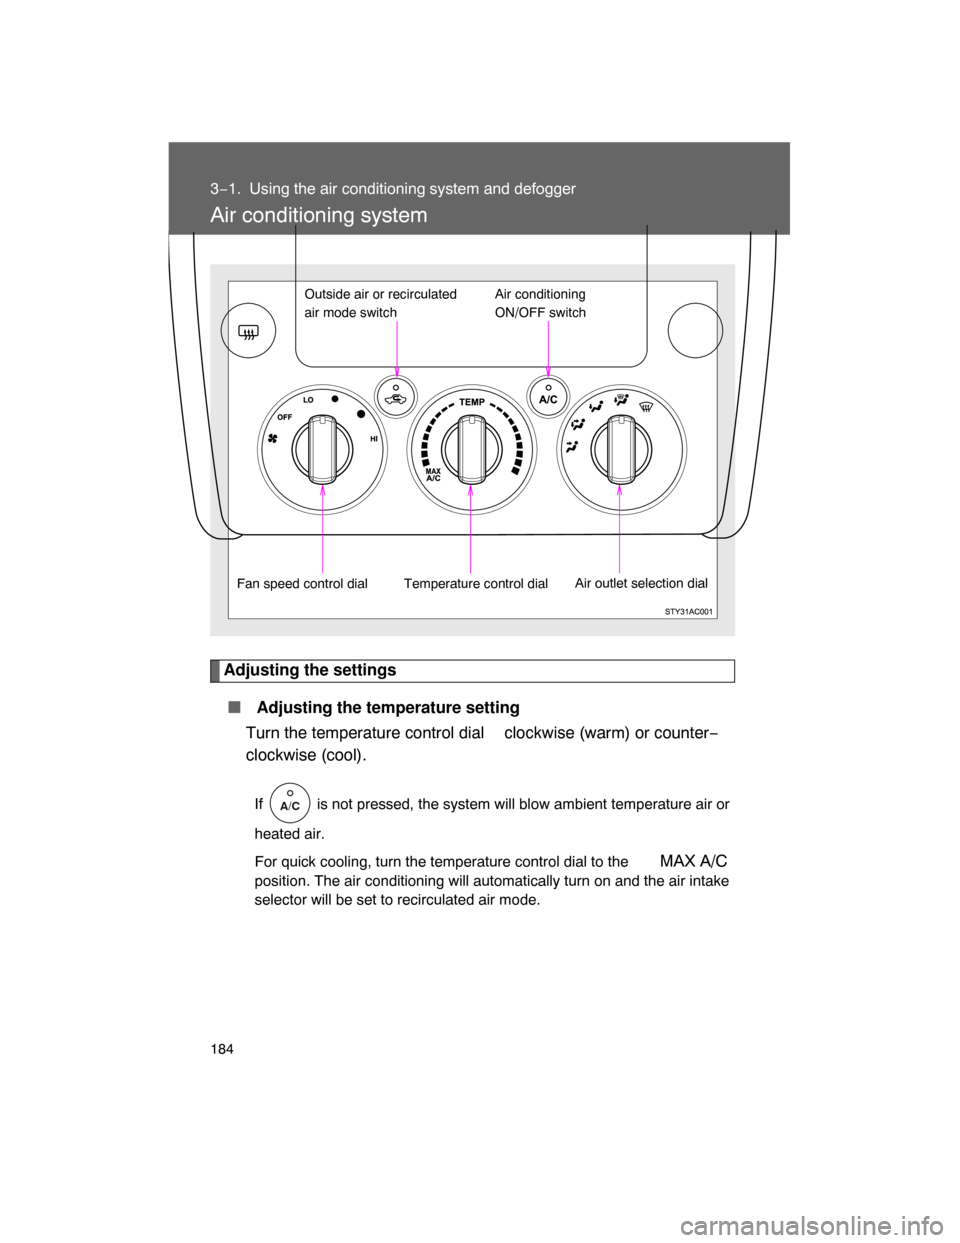
Air conditioning system
Adjusting the settings
� Adjusting the temperature setting
Turn the temperature control dial clockwise (warm) or counter−
clockwise (cool).
If is not pressed, the system will blow ambient temperature air or
heated air.
For quick cooling, turn the temperature control dial to the
MAX A/C
position. The air conditioning will automatically turn on and the air intake
selector will be set to recirculated air mode.
Outside air or recirculated
air mode switch
Air outlet selection dial Air conditioning
ON/OFF switch
Temperature control dialFan speed control dial
A/C
Page 182 of 400
185
3−1. Using the air conditioning system and defogger
3
Interior features
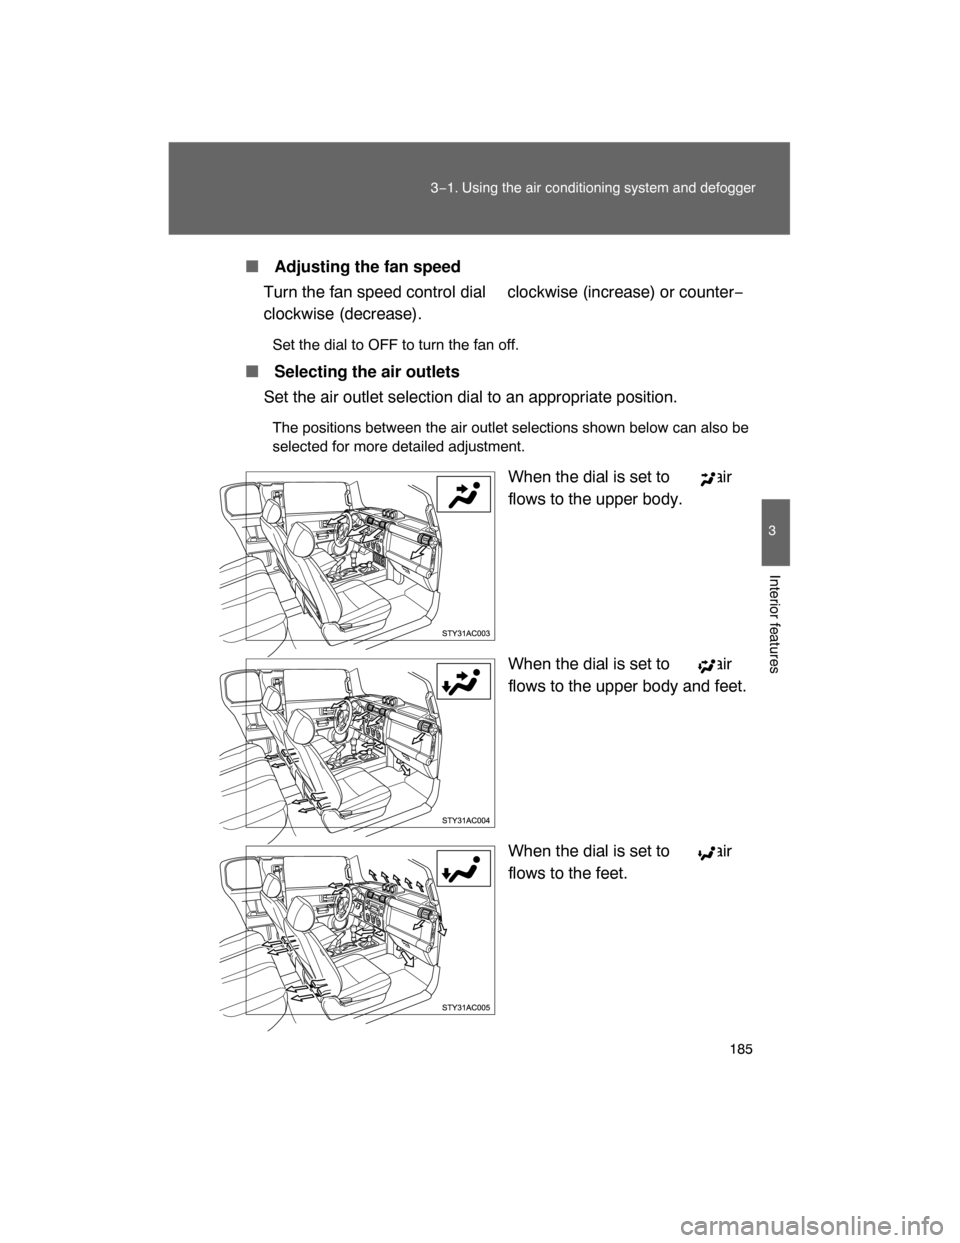
� Adjusting the fan speed
Turn the fan speed control dial clockwise (increase) or counter−
clockwise (decrease).
Set the dial to OFF to turn the fan off.
� Selecting the air outlets
Set the air outlet selection dial to an appropriate position.
The positions between the air outlet selections shown below can also be
selected for more detailed adjustment.
When the dial is set to , air
flows to the upper body.
When the dial is set to , air
flows to the upper body and feet.
When the dial is set to , air
flows to the feet.
Page 184 of 400
187
3−1. Using the air conditioning system and defogger
3
Interior features
� If the ambient temperature drops while using the recirculated
air mode
The air intake mode automatically changes from recirculated air
mode to outside air mode after a few minutes.
To cancel this function:
Press and hold for longer than 2 seconds.
To reactivate this function:
Turn the engine switch to the LOCK or ACC position.
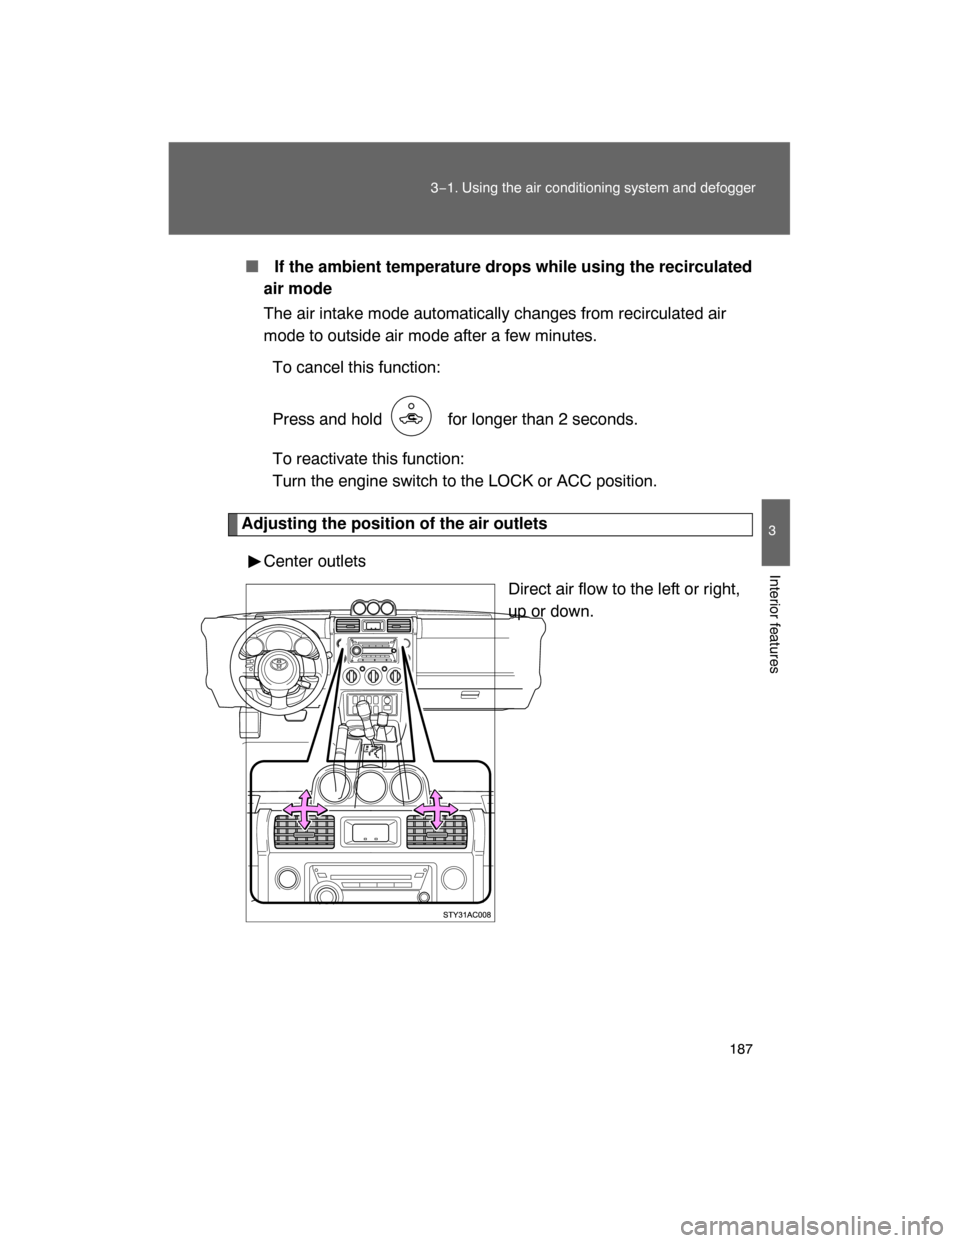
Adjusting the position of the air outlets
Center outlets
Direct air flow to the left or right,
up or down.