Page 136 of 496

124
CY13312
Adjust the mirror so that you can just
see the rear of your vehicle in the mir-
ror.
This mirror is equipped with auto anti−
glare function. The function is designed
to reduce glare from the headlights of
the vehicle behind you during night
driving.
When the engine switch is turned on, the
inside rear view mirror always turns on in
the automatic function mode.
The indicator illuminates to show you that
the function is on.In automatic function mode, if the mirror
detects light from the headlights of the
vehicle behind you, the mirror surface
darkens slightly to reduce the reflected
light.
To turn off and on the automatic function,
push the �
" switch for longer than 3
seconds.
Adjust it before driving so that the rear
view is in the best condition.
When the inside air temperature is low, it
may take a little longer for the mirror to
darken in response to the detection of
headlights.
CAUTION
Do not adjust the mirror while the
vehicle is moving. Doing so may
cause the driver to mishandle the ve-
hicle and an accident may occur re-
sulting in death or serious injuries.
CY13313
To ensure correct functioning of anti−
glare mirror sensors located on both
sides of the mirror, do not touch or
cover the sensors with your finger or
a piece of cloth, etc.
Auto anti−glare inside rear
view mirror
Page 137 of 496
125
CY13247
Rear side−view mirrors are useful as a
secondary means of checking the area
to the rear of the vehicle.
Carefully check the area to the rear of the
vehicle by either looking directly or using
both outside and inside rear view mirrors.
CY13124
Ty p e A
CY13125
Ty p e B
Rear side−view mirrorsSun visors�
Page 138 of 496
126
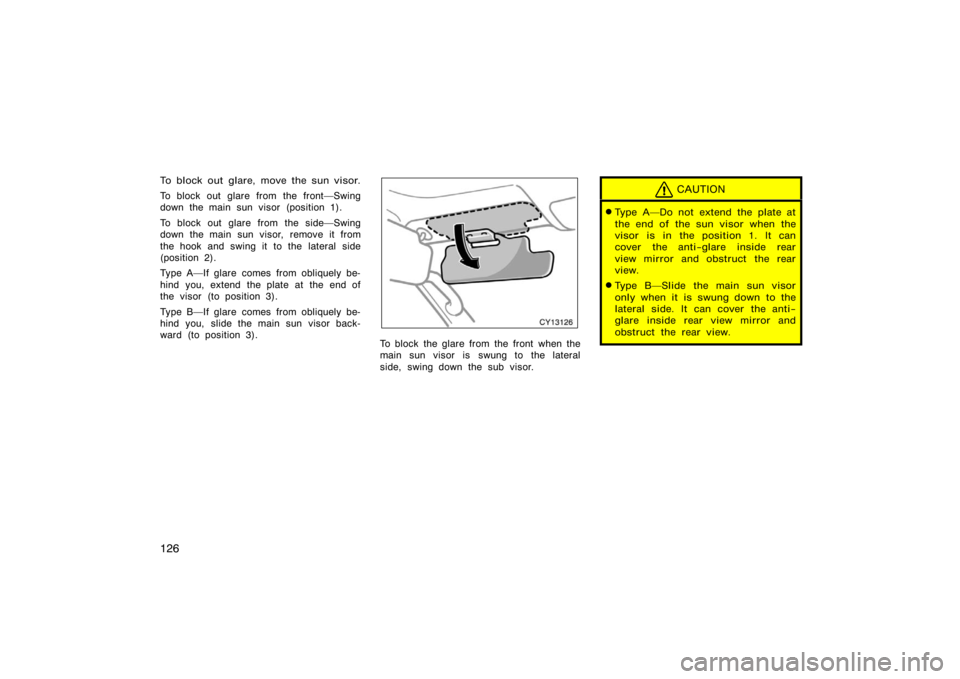
To block out glare, move the sun visor.
To block out glare from the front�Swing
down the main sun visor (position 1).
To block out glare from the side�Swing
down the main sun visor, remove it from
the hook and swing it to the lateral side
(position 2).
Type A�If glare comes from obliquely be-
hind you, extend the plate at the end of
the visor (to position 3).
Type B�If glare comes from obliquely be-
hind you, slide the main sun visor back-
ward (to position 3).
CY13126
To block the glare from the front when the
main sun visor is swung to the lateral
side, swing down the sub visor.
CAUTION
�Type A�Do not extend the plate at
the end of the sun visor when the
visor is in the position 1. It can
cover the anti−glare inside rear
view mirror and obstruct the rear
view.
�Type B�Slide the main sun visor
only when it is swung down to the
lateral side. It can cover the anti−
glare inside rear view mirror and
obstruct the rear view.
Page 139 of 496
127
CY13160
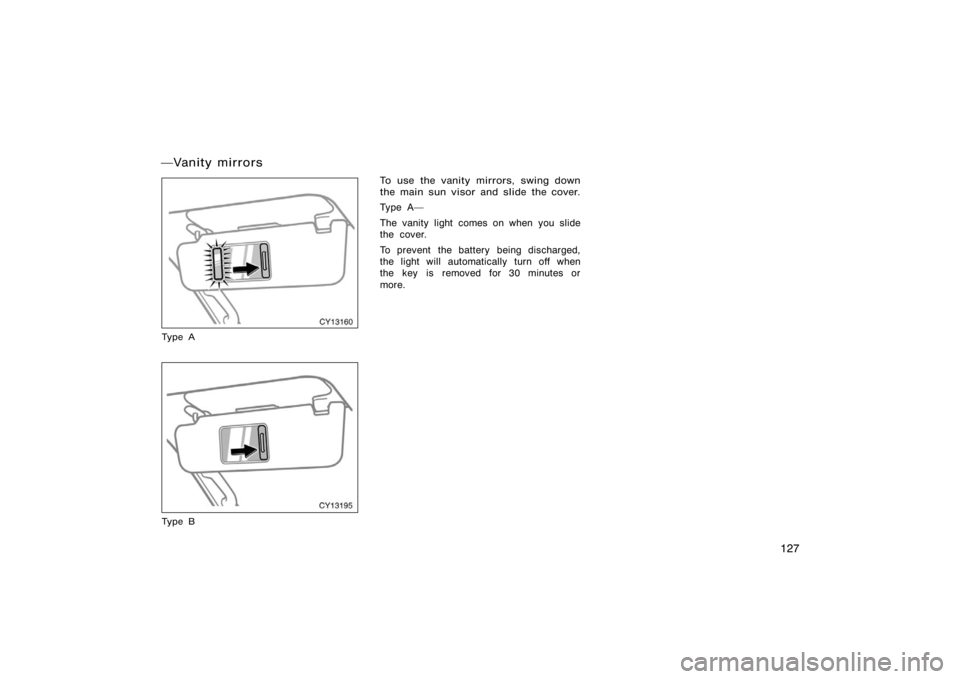
Ty p e A
CY13195
Ty p e B
To use the vanity mirrors, swing down
the main sun visor and slide the cover.
Ty p e A �
The vanity light comes on when you slide
the cover.
To prevent the battery being discharged,
the light will automatically turn off when
the key is removed for 30 minutes or
more.
�Vanity mirrors
Page 141 of 496

129
OPERATION OF INSTRUMENTS AND
CONTROLS
Lights, Wipers and Defogger
Headlights and turn signals130
. . . . . . . . . . . . . . . . . . . . . . . . . . . . . . . . . .
Emergency flashers 135
. . . . . . . . . . . . . . . . . . . . . . . . . . . . . . . . . . . . \
. . . . .
Instrument panel light control 135
. . . . . . . . . . . . . . . . . . . . . . . . . . . . . . . .
Front fog lights 136
. . . . . . . . . . . . . . . . . . . . . . . . . . . . . . . . . . . . \
. . . . . . . . .
Interior light 136
. . . . . . . . . . . . . . . . . . . . . . . . . . . . . . . . . . . . \
. . . . . . . . . . . .
Personal lights 138
. . . . . . . . . . . . . . . . . . . . . . . . . . . . . . . . . . . . \
. . . . . . . . .
Luggage compartment light 138
. . . . . . . . . . . . . . . . . . . . . . . . . . . . . . . . . .
Engine (ignition) switch light 139
. . . . . . . . . . . . . . . . . . . . . . . . . . . . . . . . .
Running board lights 140
. . . . . . . . . . . . . . . . . . . . . . . . . . . . . . . . . . . . \
. . . .
Windshield wipers and washer 141
. . . . . . . . . . . . . . . . . . . . . . . . . . . . . . .
Back window wiper and washer 141
. . . . . . . . . . . . . . . . . . . . . . . . . . . . . .
Back window and outside rear view mirror defoggers 142
. . . . . . . . . . .
SECTION 1− 5
Page 154 of 496

142
For instructions on adding washer fluid,
see �Adding washer fluid" on page 453 in
Section 7−3.
If the back window is not fully closed, the
back window wiper and washer will not
work. Make sure the back window is fully
closed when using the back window wiper
and washer.
NOTICE
Do not operate the back window wip-
er if the back window is dry. It may
scratch the glass.
CY14009
To defog or defrost the back window,
push the switch with the back window
closed.
The engine switch must be in the �ON"
position.
The thin heater wires on the inside of the
back window will quickly clear the surface.
An indicator light will illuminate to indicate
the defogger is operating.
On some models, heater panels in the
outside rear view mirrors will also quickly
clear the surfaces.
Push the switch once again to turn the
defoggers off.The system will automatically shut off af-
ter the defoggers have operated about 15
minutes.
If the back window is not fully closed, the
back window defogger will not work. Make
sure the back window is fully closed when
using the back window defogger.
If the back window is opened while the
defogger is working, the defogger will au-
tomatically turn off. Even if the back win-
dow is fully closed after that, the defogger
will not automatically turn on.
Make sure you turn the defoggers off
when the surfaces are clear. Leaving the
defoggers on for a long time could cause
the battery to discharge, especially during
stop−and−go driving. The defoggers are
not designed for drying rain water or for
melting snow.
CAUTION
On some models, since the mirror
surfaces can get hot, do not touch
them when the defogger switch is on.
Back window and outside rear
view mirror defoggers
Page 319 of 496

The distance the vehicle can travel with
the remaining fuel is calculated and
displayed based on the quantity of re-
maining fuel and past fuel consumpti")
307
2. Driving range(�RANGE MI" or �RANGE km")
The distance the vehicle can travel with
the remaining fuel is calculated and
displayed based on the quantity of re-
maining fuel and past fuel consumption.
The driving range display indicates the
approximate distance that you can drive
until the fuel gauge reaches �E". It is
different from the actual distance traveled.
The displayed value is updated about ev-
ery 10 seconds.
Every time you refuel the vehicle, the cal-
culation is reset. However, when only a
small amount of fuel is added to the tank,
the display may not be reset.
The actual driving range varies with driv-
ing habits and road conditions. If fuel con-
sumption is good, the driving range will be
longer than indicated. If fuel consumption
is poor, the driving range will be shorter
than indicated.
If the low fuel level warning light comes
on, refuel the vehicle even if the display
indicates that the vehicle can be driven
further. 3. Average fuel consumption
(�AVG. MPG" or �AVG. L/100 km")
Average fuel consumption is calculated
and displayed based on total driving
distance and total fuel consumption
with the engine running.
The displayed value is updated about ev-
ery 10 seconds.
To reset the calculation, push the
�RESET" button about 1 second.
4. Average vehicle speed (�AVG. MPH" or �AVG. km/h")
Average vehicle speed is calculated and
displayed based on total driving dis-
tance and total driving time with the
engine running.
The displayed value is updated about ev-
ery 10 seconds.
To reset the calculation, push the
�RESET" button about 1 second.
CY19138
The direction is indicated on the inside
rear view mirror.
If the engine switch was turned off with
the system on, the system will automati-
cally turn back on when the engine switch
is turned on.
Push the �
" switch to turn the compass
system on and off.
Compass
Page 320 of 496

308
The compass indicates the direction
that the vehicle is heading. In the
above case, it shows that the vehicle is
heading north.Displays
Directions
N
NE E
SE
S
SW W
NWNorth
Northeast East
Southeast
South
Southwest West
Northwest
The compass may not show the correct
direction in the following conditions:
�The vehicle is stopped immediately af-
ter turning.
�The compass does not adjust while the
vehicle is stopped.
�The engine switch is turned off immedi-
ately after turning.
�The vehicle is on an inclined surface.
�The vehicle is in a place where the
earth’s magnetic field is subject to in-
terference by artificial magnetic fields
(underground parking, under a steel
tower, between buildings, roof parking,
near a crossing, near a large vehicle,
etc.).
�The vehicle is magnetized. (There is a
magnet or a metal object on or near
the inside rear view mirror.)
�The battery has been disconnected.
If your vehicle is out of the set zone,
refer to �CALIBRATING THE COMPASS"
below to set the zone number.
If the deviation is small, the compass
works to calibrate the direction automati-
cally while the vehicle is in motion.
For additional precision or for complete
calibrating, see �CALIBRATING THE
COMPASS" below.
CY19139
Compass sensor
The compass sensor is in the inside
rear view mirror.
NOTICE
Do not put magnets or a metal object
on or near the inside rear view mirror
of the vehicle. Doing this may cause
malfunction of the compass sensor.