2008 SUZUKI SX4 water
[x] Cancel search: waterPage 37 of 278
2-24
BEFORE DRIVING
80J21-03E
Lap-Shoulder BeltEmergency Locking Retractor (ELR)
The seat belt has an emergency locking
retractor (ELR), which is designed to lock
the seat belt only during a sudden stop or
impact. It also may lock if you pull the belt
across your body very quickly. If this hap-
pens, let the belt go back to unlock it, then
pull the belt across your body more slowly.
Automatic Locking Retractor (ALR)
The front passenger’s seat belt and the
rear seat belts have emergency locking
retractors (ELRs) that can be temporarily
converted to function as automatic locking
retractors (ALRs). The ALR mode should
be used if you need to secure a child
restraint system in the seat. Refer to the
“Child Restraint Systems” section for
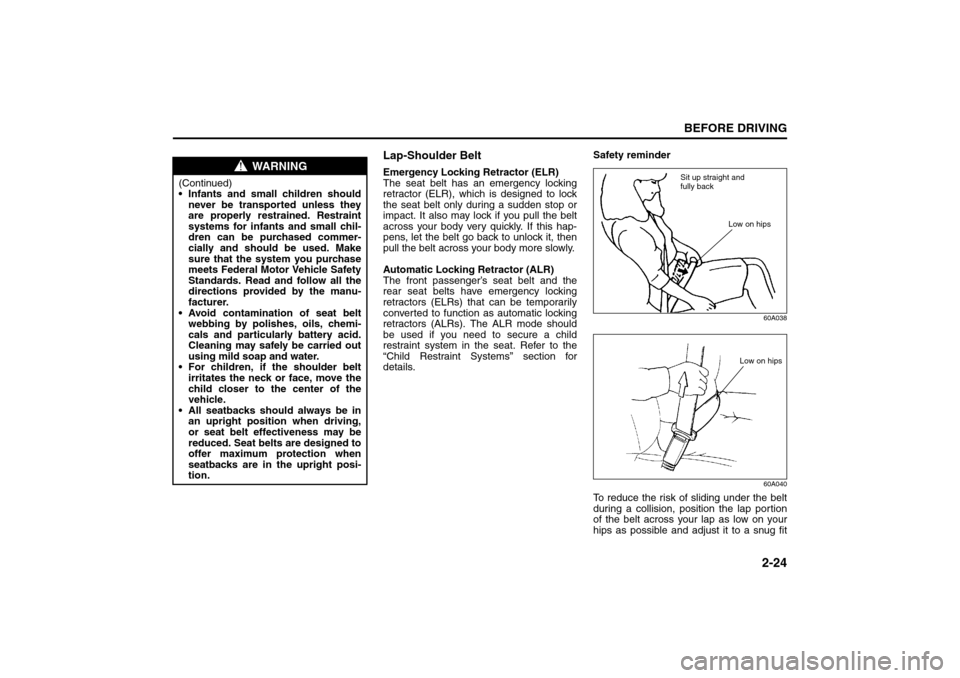
details.Safety reminder
60A038
60A040
To reduce the risk of sliding under the belt
during a collision, position the lap portion
of the belt across your lap as low on your
hips as possible and adjust it to a snug fit
WARNING
(Continued)
Infants and small children should
never be transported unless they
are properly restrained. Restraint
systems for infants and small chil-
dren can be purchased commer-
cially and should be used. Make
sure that the system you purchase
meets Federal Motor Vehicle Safety
Standards. Read and follow all the
directions provided by the manu-
facturer.
Avoid contamination of seat belt
webbing by polishes, oils, chemi-
cals and particularly battery acid.
Cleaning may safely be carried out
using mild soap and water.
For children, if the shoulder belt
irritates the neck or face, move the
child closer to the center of the
vehicle.
All seatbacks should always be in
an upright position when driving,
or seat belt effectiveness may be
reduced. Seat belts are designed to
offer maximum protection when
seatbacks are in the upright posi-
tion.
Sit up straight and
fully back
Low on hips
Low on hips
Seat Belts and Child Restraint Systems: 3
Page 62 of 278

2-49BEFORE DRIVING
80J21-03E
65D610
54G582
Note that even though your vehicle may be
moderately damaged in a collision, the col-
lision may not have been severe enough to
trigger the front, side, or side curtain air
bags to inflate. If your car sustains ANY
front-end or side damage, have the air bag
system inspected by an authorized
SUZUKI dealer to ensure it is in proper
working order.
Your vehicle is equipped with a diagnostic
module which records information about
the air bag system if the air bags deploy in
a crash. The module records information
about overall system status, which sensors
activated the deployment, and whether the
front seat belts were in use.Servicing the Air Bag SystemIf the air bags inflate, have the air bags and
related components replaced by an autho-
rized SUZUKI dealer as soon as possible.
If your vehicle ever gets in deep water and
the driver’s floor is submerged, the air bag
controller could be damaged. If this hap-
pens, have the air bag system inspected
by the SUZUKI dealer as soon as possible.
Special procedures are required for servic-
ing or replacing an air bag. For that reason,
only an authorized SUZUKI dealer should
be allowed to service or replace your air
bags. Please remind anyone who services
your SUZUKI that it has air bags.
WARNING
The driver should not lean over the
steering wheel. The front passen-
ger should not rest his or her body
against the dashboard, or other-
wise get too close to the dash-
board. For vehicles with side air
bags and side curtain air bags,
occupants should not lean on or
sleep against the door. In these sit-
uations, the out-of-position occu-
pant would be too close to an
inflating air bag, and may suffer
severe injury.
Do not attach any objects to, or
place any objects over, the steering
wheel or dashboard. Do not place
any objects between the air bag
and the driver or front passenger.
These objects may interfere with air
bag operation or may be propelled
by the air bag in the event of a
crash. Either of these conditions
may cause severe injury.
For vehicles with side air bags, do
not place seat covers on the front
seats, because seat covers could
restrict the air bag’s inflation. Also,
do not place any cup holders or
other objects on the door, as these
objects could be propelled by the
air bag in the event of a crash.
Either of these conditions may
cause severe injury.
Page 84 of 278
4-7INSTRUMENT PANEL
80J21-03E
driver’s seat belt is buckled. After repeating
several times, the reminder will be can-
celed even if the driver’s seat belt remains
unbuckled.
For details about the seat belt reminder,
refer to “Seat Belts and Child Restraint
Systems” in the “BEFORE DRIVING” sec-
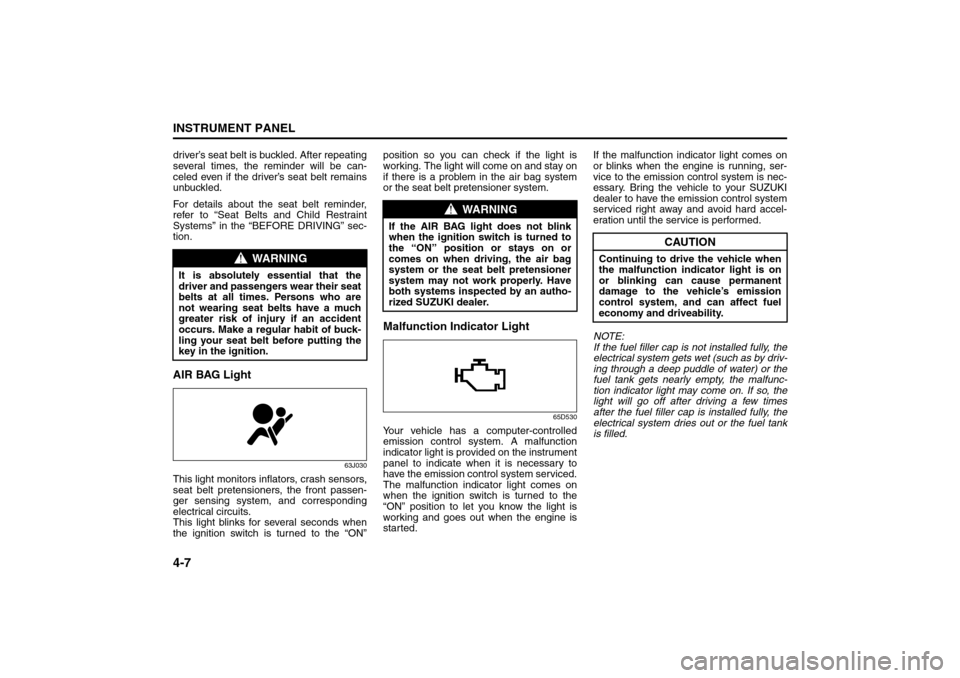
tion.AIR BAG Light
63J030
This light monitors inflators, crash sensors,
seat belt pretensioners, the front passen-
ger sensing system, and corresponding
electrical circuits.
This light blinks for several seconds when
the ignition switch is turned to the “ON”position so you can check if the light is
working. The light will come on and stay on
if there is a problem in the air bag system
or the seat belt pretensioner system.
Malfunction Indicator Light
65D530
Your vehicle has a computer-controlled
emission control system. A malfunction
indicator light is provided on the instrument
panel to indicate when it is necessary to
have the emission control system serviced.
The malfunction indicator light comes on
when the ignition switch is turned to the
“ON” position to let you know the light is
working and goes out when the engine is
started.If the malfunction indicator light comes on
or blinks when the engine is running, ser-
vice to the emission control system is nec-
essary. Bring the vehicle to your SUZUKI
dealer to have the emission control system
serviced right away and avoid hard accel-
eration until the service is performed.
NOTE:
If the fuel filler cap is not installed fully, the
electrical system gets wet (such as by driv-
ing through a deep puddle of water) or the
fuel tank gets nearly empty, the malfunc-
tion indicator light may come on. If so, the
light will go off after driving a few times
after the fuel filler cap is installed fully, the
electrical system dries out or the fuel tank
is filled.
WARNING
It is absolutely essential that the
driver and passengers wear their seat
belts at all times. Persons who are
not wearing seat belts have a much
greater risk of injury if an accident
occurs. Make a regular habit of buck-
ling your seat belt before putting the
key in the ignition.
WARNING
If the AIR BAG light does not blink
when the ignition switch is turned to
the “ON” position or stays on or
comes on when driving, the air bag
system or the seat belt pretensioner
system may not work properly. Have
both systems inspected by an autho-
rized SUZUKI dealer.
CAUTION
Continuing to drive the vehicle when
the malfunction indicator light is on
or blinking can cause permanent
damage to the vehicle’s emission
control system, and can affect fuel
economy and driveability.
Warning and Indicator Lights: 8
A/T Selector Position Indicator: 8
Speedometer/Odometer/Trip meter: 8
Page 134 of 278
4-57INSTRUMENT PANEL
80J21-03E
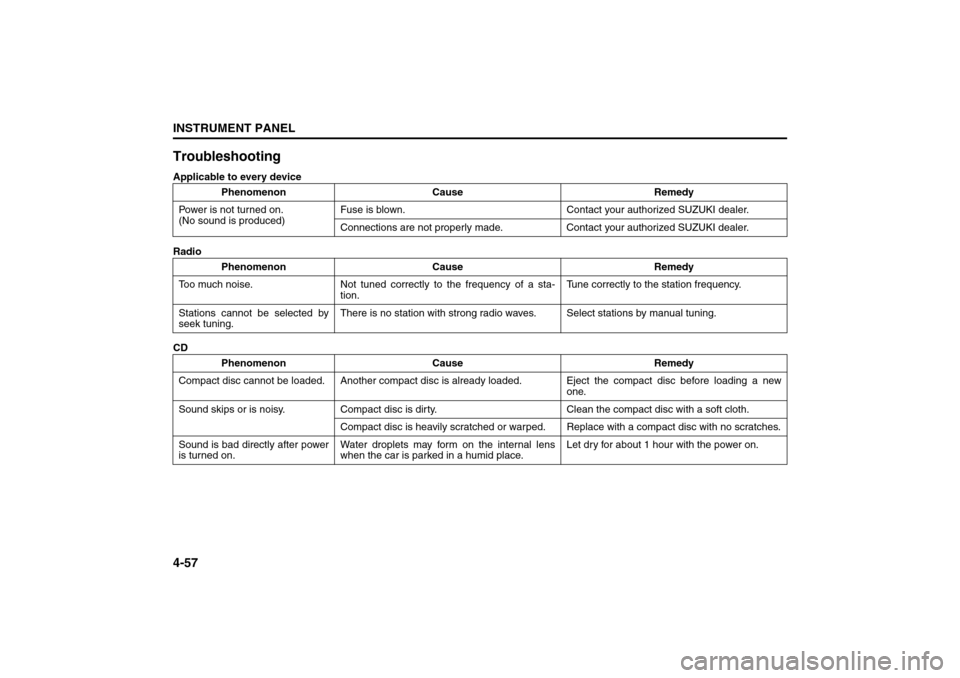
TroubleshootingApplicable to every device
Radio
CDPhenomenon Cause Remedy
Power is not turned on.
(No sound is produced)Fuse is blown. Contact your authorized SUZUKI dealer.
Connections are not properly made. Contact your authorized SUZUKI dealer.
Phenomenon Cause Remedy
Too much noise. Not tuned correctly to the frequency of a sta-
tion.Tune correctly to the station frequency.
Stations cannot be selected by
seek tuning.There is no station with strong radio waves. Select stations by manual tuning.
Phenomenon Cause Remedy
Compact disc cannot be loaded. Another compact disc is already loaded. Eject the compact disc before loading a new
one.
Sound skips or is noisy. Compact disc is dirty. Clean the compact disc with a soft cloth.
Compact disc is heavily scratched or warped. Replace with a compact disc with no scratches.
Sound is bad directly after power
is turned on.Water droplets may form on the internal lens
when the car is parked in a humid place.Let dry for about 1 hour with the power on.
Page 156 of 278
6-1OPERATING YOUR VEHICLE
80J21-03E
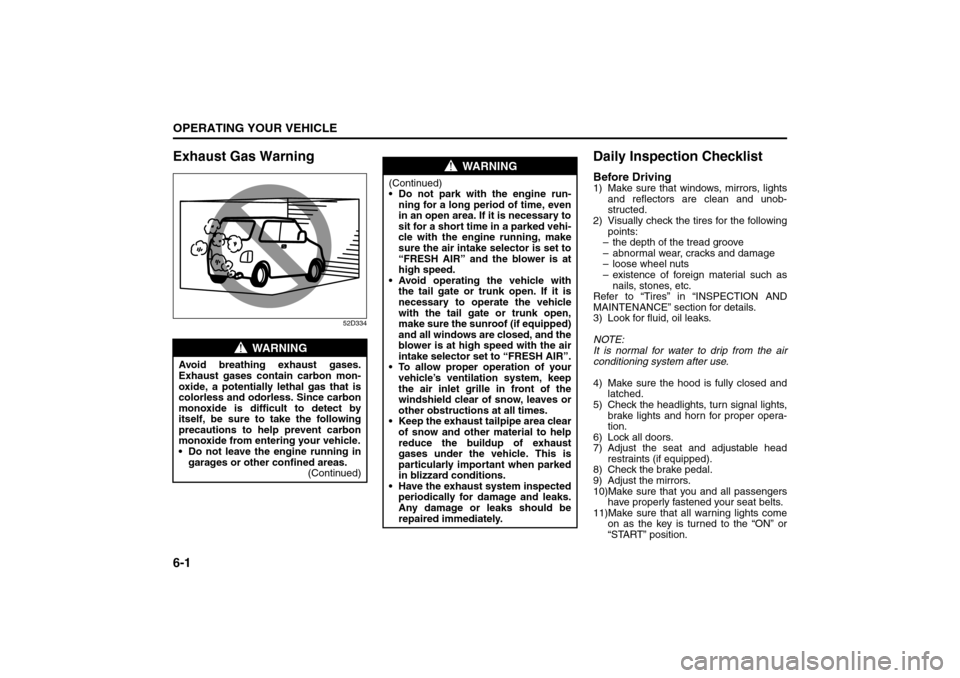
Exhaust Gas Warning
52D334
Daily Inspection ChecklistBefore Driving1) Make sure that windows, mirrors, lights
and reflectors are clean and unob-
structed.
2) Visually check the tires for the following
points:
– the depth of the tread groove
– abnormal wear, cracks and damage
– loose wheel nuts
– existence of foreign material such as
nails, stones, etc.
Refer to “Tires” in “INSPECTION AND
MAINTENANCE” section for details.
3) Look for fluid, oil leaks.
NOTE:
It is normal for water to drip from the air
conditioning system after use.
4) Make sure the hood is fully closed and
latched.
5) Check the headlights, turn signal lights,
brake lights and horn for proper opera-
tion.
6) Lock all doors.
7) Adjust the seat and adjustable head
restraints (if equipped).
8) Check the brake pedal.
9) Adjust the mirrors.
10)Make sure that you and all passengers
have properly fastened your seat belts.
11)Make sure that all warning lights come
on as the key is turned to the “ON” or
“START” position.
WARNING
Avoid breathing exhaust gases.
Exhaust gases contain carbon mon-
oxide, a potentially lethal gas that is
colorless and odorless. Since carbon
monoxide is difficult to detect by
itself, be sure to take the following
precautions to help prevent carbon
monoxide from entering your vehicle.
Do not leave the engine running in
garages or other confined areas.
(Continued)
WARNING
(Continued)
Do not park with the engine run-
ning for a long period of time, even
in an open area. If it is necessary to
sit for a short time in a parked vehi-
cle with the engine running, make
sure the air intake selector is set to
“FRESH AIR” and the blower is at
high speed.
Avoid operating the vehicle with
the tail gate or trunk open. If it is
necessary to operate the vehicle
with the tail gate or trunk open,
make sure the sunroof (if equipped)
and all windows are closed, and the
blower is at high speed with the air
intake selector set to “FRESH AIR”.
To allow proper operation of your
vehicle’s ventilation system, keep
the air inlet grille in front of the
windshield clear of snow, leaves or
other obstructions at all times.
Keep the exhaust tailpipe area clear
of snow and other material to help
reduce the buildup of exhaust
gases under the vehicle. This is
particularly important when parked
in blizzard conditions.
Have the exhaust system inspected
periodically for damage and leaks.
Any damage or leaks should be
repaired immediately.
Exhaust Gas Warning: NO
Daily Inspection Checklist: NO
Page 163 of 278
6-8
OPERATING YOUR VEHICLE
80J21-03E
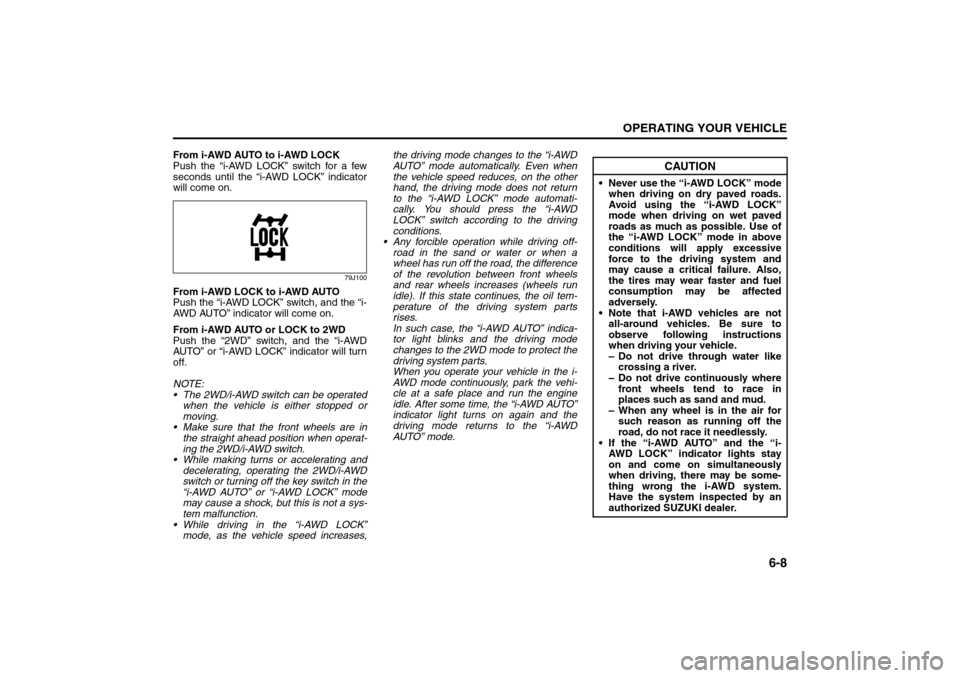
From i-AWD AUTO to i-AWD LOCK
Push the “i-AWD LOCK” switch for a few
seconds until the “i-AWD LOCK” indicator
will come on.
79J100
From i-AWD LOCK to i-AWD AUTO
Push the “i-AWD LOCK” switch, and the “i-
AWD AUTO” indicator will come on.
From i-AWD AUTO or LOCK to 2WD
Push the “2WD” switch, and the “i-AWD
AUTO” or “i-AWD LOCK” indicator will turn
off.
NOTE:
The 2WD/i-AWD switch can be operated
when the vehicle is either stopped or
moving.
Make sure that the front wheels are in
the straight ahead position when operat-
ing the 2WD/i-AWD switch.
While making turns or accelerating and
decelerating, operating the 2WD/i-AWD
switch or turning off the key switch in the
“i-AWD AUTO” or “i-AWD LOCK” mode
may cause a shock, but this is not a sys-
tem malfunction.
While driving in the “i-AWD LOCK”
mode, as the vehicle speed increases,the driving mode changes to the “i-AWD
AUTO” mode automatically. Even when
the vehicle speed reduces, on the other
hand, the driving mode does not return
to the “i-AWD LOCK” mode automati-
cally. You should press the “i-AWD
LOCK” switch according to the driving
conditions.
Any forcible operation while driving off-
road in the sand or water or when a
wheel has run off the road, the difference
of the revolution between front wheels
and rear wheels increases (wheels run
idle). If this state continues, the oil tem-
perature of the driving system parts
rises.
In such case, the “i-AWD AUTO” indica-
tor light blinks and the driving mode
changes to the 2WD mode to protect the
driving system parts.
When you operate your vehicle in the i-
AWD mode continuously, park the vehi-
cle at a safe place and run the engine
idle. After some time, the “i-AWD AUTO”
indicator light turns on again and the
driving mode returns to the “i-AWD
AUTO” mode.
CAUTION
Never use the “i-AWD LOCK” mode
when driving on dry paved roads.
Avoid using the “i-AWD LOCK”
mode when driving on wet paved
roads as much as possible. Use of
the “i-AWD LOCK” mode in above
conditions will apply excessive
force to the driving system and
may cause a critical failure. Also,
the tires may wear faster and fuel
consumption may be affected
adversely.
Note that i-AWD vehicles are not
all-around vehicles. Be sure to
observe following instructions
when driving your vehicle.
– Do not drive through water like
crossing a river.
– Do not drive continuously where
front wheels tend to race in
places such as sand and mud.
– When any wheel is in the air for
such reason as running off the
road, do not race it needlessly.
If the “i-AWD AUTO” and the “i-
AWD LOCK” indicator lights stay
on and come on simultaneously
when driving, there may be some-
thing wrong the i-AWD system.
Have the system inspected by an
authorized SUZUKI dealer.
Braking: 6
Page 164 of 278
6-9OPERATING YOUR VEHICLE
80J21-03E
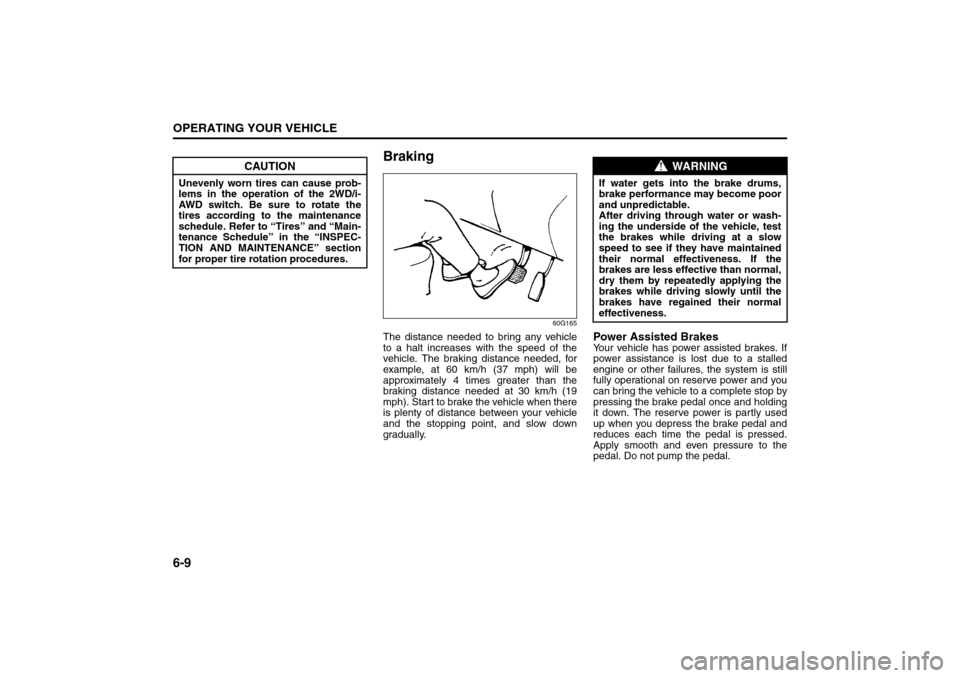
Braking
60G165
The distance needed to bring any vehicle
to a halt increases with the speed of the
vehicle. The braking distance needed, for
example, at 60 km/h (37 mph) will be
approximately 4 times greater than the
braking distance needed at 30 km/h (19
mph). Start to brake the vehicle when there
is plenty of distance between your vehicle
and the stopping point, and slow down
gradually.
Power Assisted BrakesYour vehicle has power assisted brakes. If
power assistance is lost due to a stalled
engine or other failures, the system is still
fully operational on reserve power and you
can bring the vehicle to a complete stop by
pressing the brake pedal once and holding
it down. The reserve power is partly used
up when you depress the brake pedal and
reduces each time the pedal is pressed.
Apply smooth and even pressure to the
pedal. Do not pump the pedal.
CAUTION
Unevenly worn tires can cause prob-
lems in the operation of the 2WD/i-
AWD switch. Be sure to rotate the
tires according to the maintenance
schedule. Refer to “Tires” and “Main-
tenance Schedule” in the “INSPEC-
TION AND MAINTENANCE” section
for proper tire rotation procedures.
WARNING
If water gets into the brake drums,
brake performance may become poor
and unpredictable.
After driving through water or wash-
ing the underside of the vehicle, test
the brakes while driving at a slow
speed to see if they have maintained
their normal effectiveness. If the
brakes are less effective than normal,
dry them by repeatedly applying the
brakes while driving slowly until the
brakes have regained their normal
effectiveness.
Braking: 6
Break-In: 6
Catalytic Converter: NO
Page 178 of 278
7-1DRIVING TIPS
80J21-03E
52D078S
Highway DrivingWhen driving at highway speeds, pay
attention to the following:
Stopping distance progressively
increases with vehicle speed. Apply the
brakes far enough ahead of the stopping
point to allow for the extra stopping dis-
tance.
On rainy days, “Hydroplaning” can occur.
“Hydroplaning” is the loss of direct con-
tact between the road surface and the
vehicle’s tires due to a water film forming
between them. Steering or braking the
vehicle while “Hydroplaning” can be very
difficult, and loss of control can occur.
Keep speed down when the road surface
is wet.
At high speeds, the vehicle may be
affected by side winds. Therefore,
reduce speed and be prepared for unex-
pected buffeting, which can occur at the
exits of tunnels, when passing by a cut of
a hill, or when being overtaken by large
vehicles, etc.
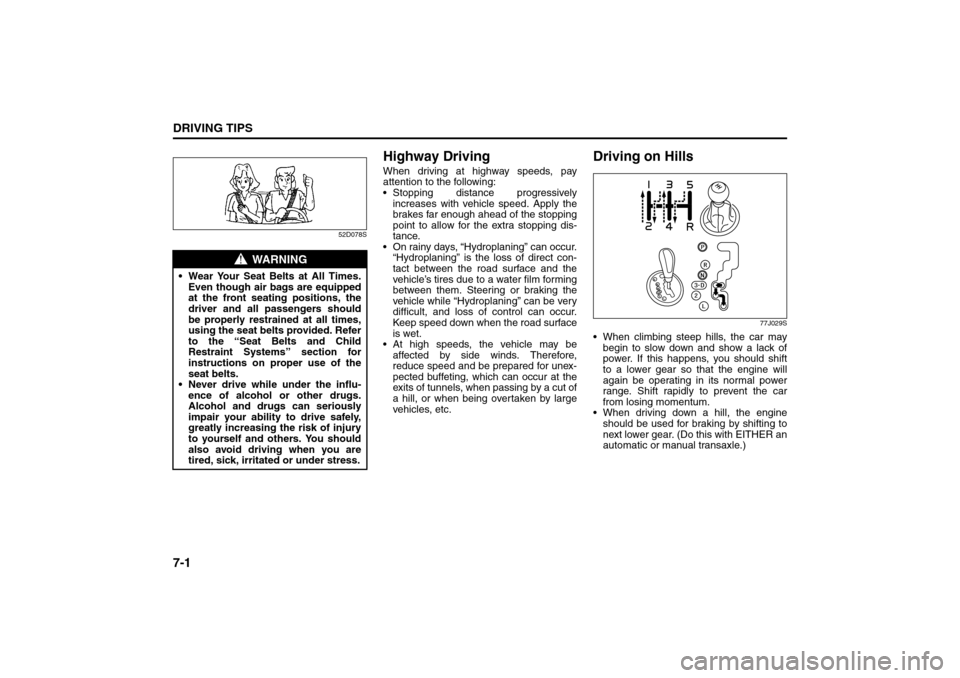
Driving on Hills
77J029S
When climbing steep hills, the car may
begin to slow down and show a lack of
power. If this happens, you should shift
to a lower gear so that the engine will
again be operating in its normal power
range. Shift rapidly to prevent the car
from losing momentum.
When driving down a hill, the engine
should be used for braking by shifting to
next lower gear. (Do this with EITHER an
automatic or manual transaxle.)
WARNING
Wear Your Seat Belts at All Times.
Even though air bags are equipped
at the front seating positions, the
driver and all passengers should
be properly restrained at all times,
using the seat belts provided. Refer
to the “Seat Belts and Child
Restraint Systems” section for
instructions on proper use of the
seat belts.
Never drive while under the influ-
ence of alcohol or other drugs.
Alcohol and drugs can seriously
impair your ability to drive safely,
greatly increasing the risk of injury
to yourself and others. You should
also avoid driving when you are
tired, sick, irritated or under stress.
Highway Driving: NO
Driving on Hills: NO