2008 SUZUKI SX4 audio
[x] Cancel search: audioPage 65 of 278
STEERING COLUMN CONTROLS
3
80J21-03E
60G405
STEERING COLUMN CONTROLSIgnition Switch ..................................................................... 3-1
Lighting/Turn Signal Control Lever ................................... 3-5
Windshield Wiper and Washer Lever ................................ 3-6
Rear Window Wiper/Washer Switch (if equipped) ........... 3-8
Tilt Steering Lock Lever (if equipped) ............................... 3-8
Cruise Control (if equipped) ............................................... 3-9
Remote Audio Controls (if equipped) ............................... 3-11
Horn ...................................................................................... 3-11
Page 73 of 278
3-8
STEERING COLUMN CONTROLS
80J21-03E
Rear Window Wiper/Washer
Switch (if equipped)
80JC038
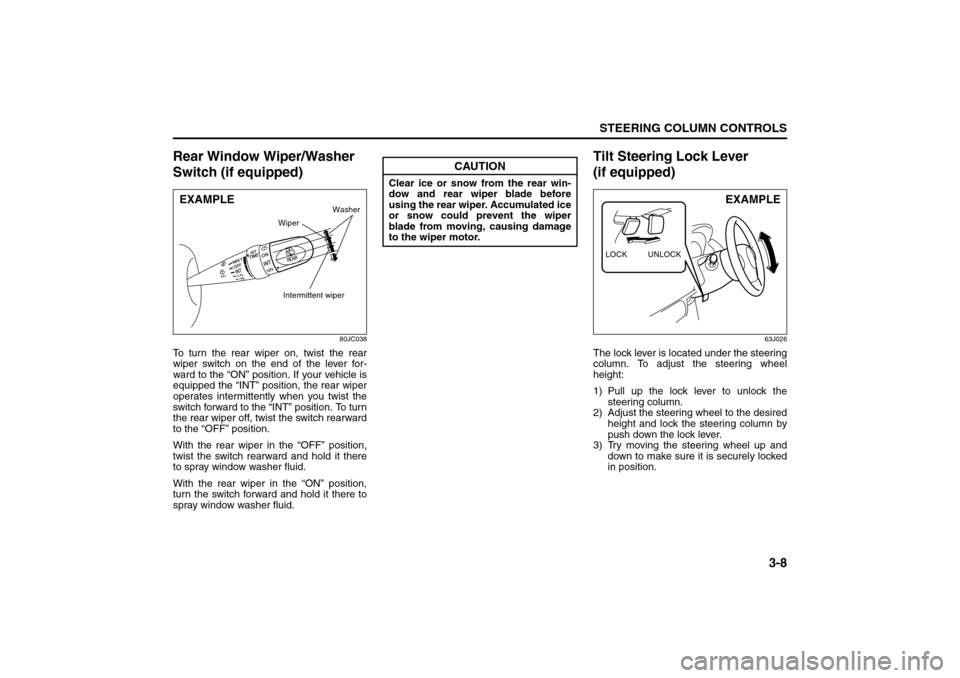
To turn the rear wiper on, twist the rear
wiper switch on the end of the lever for-
ward to the “ON” position. If your vehicle is
equipped the “INT” position, the rear wiper
operates intermittently when you twist the
switch forward to the “INT” position. To turn
the rear wiper off, twist the switch rearward
to the “OFF” position.
With the rear wiper in the “OFF” position,
twist the switch rearward and hold it there
to spray window washer fluid.
With the rear wiper in the “ON” position,
turn the switch forward and hold it there to
spray window washer fluid.
Tilt Steering Lock Lever
(if equipped)
63J026
The lock lever is located under the steering
column. To adjust the steering wheel
height:
1) Pull up the lock lever to unlock the
steering column.
2) Adjust the steering wheel to the desired
height and lock the steering column by
push down the lock lever.
3) Try moving the steering wheel up and
down to make sure it is securely locked
in position.
EXAMPLE
Intermittent wiper
Washer
Wiper
CAUTION
Clear ice or snow from the rear win-
dow and rear wiper blade before
using the rear wiper. Accumulated ice
or snow could prevent the wiper
blade from moving, causing damage
to the wiper motor.
LOCK UNLOCK
EXAMPLE
Cruise Control: 7, 8
Remote Audio Controls:
Horn: 6
Page 76 of 278
3-11STEERING COLUMN CONTROLS
80J21-03E
Remote Audio Controls
(if equipped)
80J027
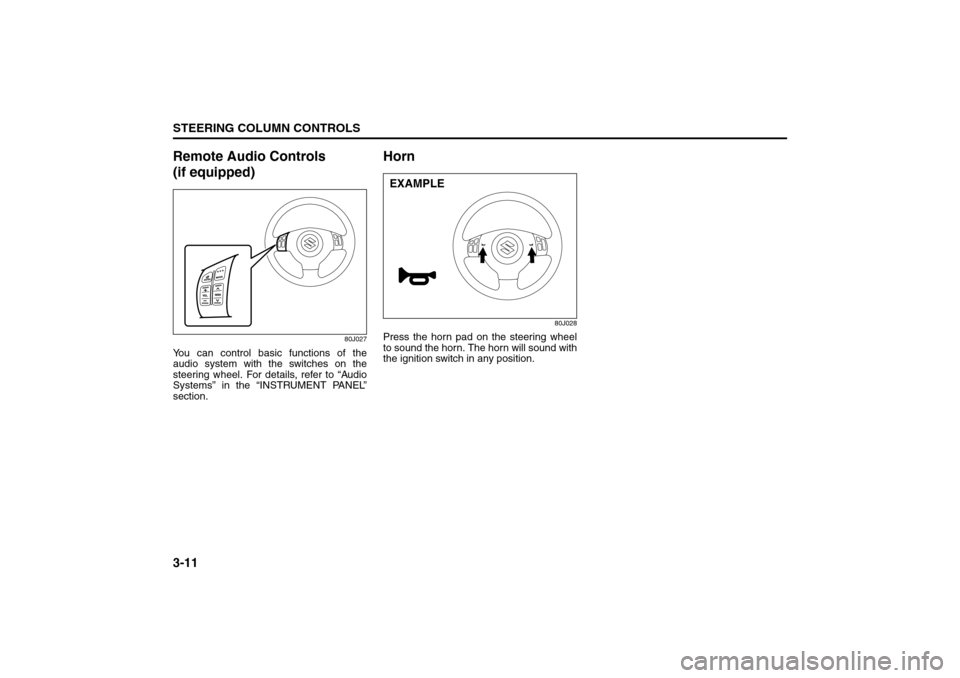
You can control basic functions of the
audio system with the switches on the
steering wheel. For details, refer to “Audio
Systems” in the “INSTRUMENT PANEL”
section.
Horn
80J028
Press the horn pad on the steering wheel
to sound the horn. The horn will sound with
the ignition switch in any position.EXAMPLE
Page 77 of 278
INSTRUMENT PANEL
4
80J21-03E
60G406
INSTRUMENT PANELInstrument Panel ................................................................. 4-1
Instrument Cluster .............................................................. 4-2
Warning and Indicator Lights ............................................ 4-3
A/T Selector Position Indicator (if equipped) ................... 4-10
Speedometer/Odometer/Trip meter ................................... 4-11
Tachometer .......................................................................... 4-12
Fuel Gauge ........................................................................... 4-12
Temperature Gauge ............................................................ 4-13
Hazard Warning Switch ...................................................... 4-13
“ESP OFF” Switch (if equipped) ........................................ 4-13
Instrument Light Brightness Control ................................ 4-14
2WD/i-AWD (intelligent All Wheel Drive) Switch
(if equipped) ......................................................................... 4-14
Heated Rear Window and Heated Outside Rearview
Mirrors (if equipped) Switch ............................................... 4-15
Fog Light Switch (if equipped) ........................................... 4-16
Cigarette Lighter and Ashtray (if equipped) ..................... 4-16
Information Display ............................................................. 4-17
Glove Box ............................................................................ 4-20
Heating and Air Conditioning System ............................... 4-21
Audio Systems .................................................................... 4-32
Page 78 of 278
4-1INSTRUMENT PANEL
80J21-03E
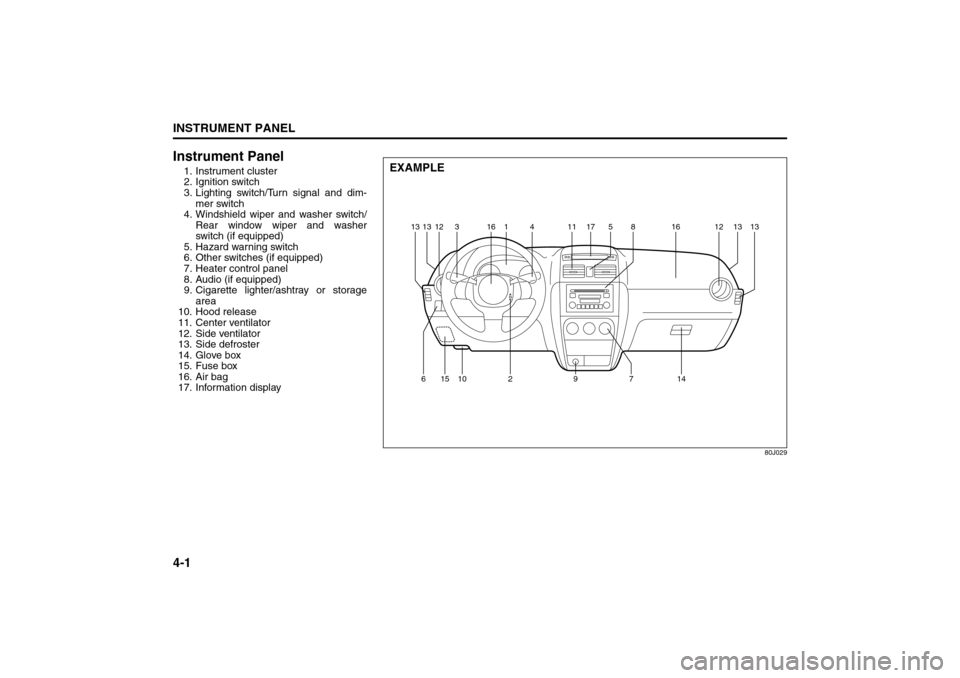
Instrument Panel1. Instrument cluster
2. Ignition switch
3. Lighting switch/Turn signal and dim-
mer switch
4. Windshield wiper and washer switch/
Rear window wiper and washer
switch (if equipped)
5. Hazard warning switch
6. Other switches (if equipped)
7. Heater control panel
8. Audio (if equipped)
9. Cigarette lighter/ashtray or storage
area
10. Hood release
11. Center ventilator
12. Side ventilator
13. Side defroster
14. Glove box
15. Fuse box
16. Air bag
17. Information display
80J029
EXAMPLE
12 13
13
13 31614 11 517
8161213
15 10
629714
Instrument Panel: 3, 8
Page 91 of 278
4-14
INSTRUMENT PANEL
80J21-03E
For details of the ESP
® systems, refer to
“Electronic Stability Program (ESP
®)” in
the “OPERATING YOUR VEHICLE” sec-
tion.
Instrument Light Brightness
Control
66J038
Your vehicle has a system to automatically
dim the instrument panel lights when the
ignition switch is in the “ON” position and
the lighting switch is turned to either the
second or third position. The level of
brightness depends on the position of the
brightness control thumbwheel.
To cancel the automatic dimming feature
and maintain full brightness of lights other
than the audio display, turn the instrument
brightness control thumbwheel upward
until click is heard. To activate the auto-
matic dimming feature, turn the brightness
control thumbwheel downward. When the
thumbwheel is in the minimum brightness
position, the instrument panel lights,
except for the meter lights, are turned off.
2WD/i-AWD (intelligent All
Wheel Drive) Switch
(if equipped)
79J177
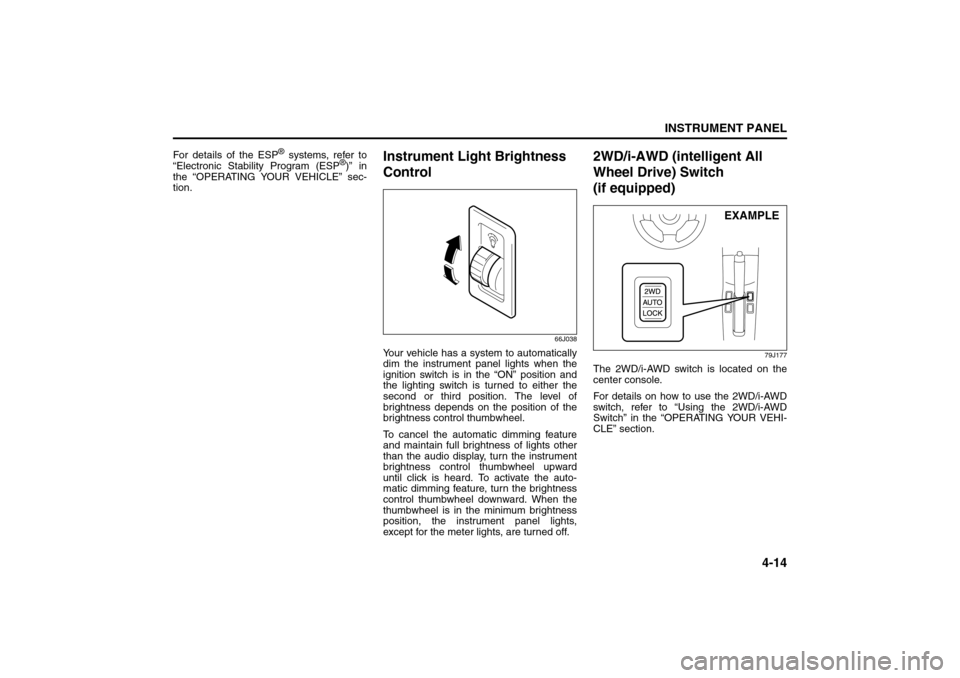
The 2WD/i-AWD switch is located on the
center console.
For details on how to use the 2WD/i-AWD
switch, refer to “Using the 2WD/i-AWD
Switch” in the “OPERATING YOUR VEHI-
CLE” section.
EXAMPLE
Information Display:
Glove Box: 3
Page 103 of 278

4-26
INSTRUMENT PANEL
80J21-03E
Heat & defrost (d)
79J068
Temperature-controlled air comes out of
the floor outlets, the windshield defroster
outlets, the side defroster outlets and the
side outlets.
Defrost (e)
79J069
Temperature-controlled air comes out of
the windshield defroster outlets, the side
defroster outlets and the side outlets.
NOTE:
When the air flow selector (3) is turned
either to “Heat & defrost (d)” or “Defrost
(e)”, the air conditioning system will come
on and the “FRESH AIR” mode will be
selected automatically.Air intake selector (4)
63J047
This selector is used to select the following
modes.
Fresh Air (f)
When this mode is selected, the indicator
light will go off and outside air is used.
Recirculated Air (g)
When this mode is selected, the indicator
light will come on, outside air is shut out
and inside air is recirculated. This mode is
suitable when driving through dusty or pol-
luted air such as in a tunnel, or when
attempting to quickly cool down the inte-
rior.
“FRESH AIR” and “RECIRCULATED AIR”
are switched alternately each time the air
intake selector is pushed.
NOTE:
If you select “RECIRCULATED AIR” for an
extended period of time, the air in the vehi-
cle can become contaminated. Therefore,
you should occasionally select “FRESH
AIR”.Air conditioning switch (5)
To turn on the air conditioning system,
push in the “A/C” switch and set the blower
speed selector to a position other than
“OFF”. With this “A/C” switch operation, a
indicator light will come on when the air
conditioning system is on. To turn off the
air conditioning system, push the “A/C”
switch again.
During operation of the air conditioner, you
may notice slight changes in engine
speed. These changes are normal, the
system is designed so that the compressor
turns on or off to maintain the desired tem-
perature.
Less operation of the compressor results
in better fuel economy.
(g)
(f)
Audio Systems:
Page 104 of 278
4-27INSTRUMENT PANEL
80J21-03E
System Operating InstructionsNatural ventilation
Select “VENTILATION” and “FRESH AIR”,
the temperature selector to the desired
temperature position, and the blower
speed selector to “OFF”. Fresh air will flow
through the vehicle during driving.
Forced ventilation
The control settings are the same as for
natural ventilation except you set the
blower speed selector to a position other
than “OFF”.
Normal heating (using outside air)
Select “HEAT” and “FRESH AIR”, the tem-
perature selector to the desired tempera-
ture position and the blower speed selector
to the desired blower speed position. Set-
ting the blower speed selector to a higher
blower speed position increases heating
efficiency.
Quick heating (using recirculated air)
The control settings are the same as for
normal heating except you select “RECIR-
CULATED AIR”. If you use this heating
method for an extended period of time, the
air in the vehicle can become contami-
nated and the windows can become misty.
Therefore, use this method only for quick
heating and change to the normal heating
method as soon as possible.
Head cooled/Feet warmed heating
Select “BI-LEVEL” and “FRESH AIR”, the
temperature selector to the desired tem-perature position, and the blower speed
selector to the desired blower speed posi-
tion. Unless the temperature selector is in
the fully COLD position or fully HOT posi-
tion, the air that comes out of the center
and side outlets will be cooler than the air
that comes out of the floor outlets.
Normal cooling
Turn on the “A/C” switch, set the air flow
selector to “VENTILATION”, the tempera-
ture selector to the desired temperature
position and the blower speed selector to
the desired blower speed position. Setting
the blower speed selector to a higher
blower speed position increases cooling
efficiency.
You can switch the air intake selector to
either “FRESH AIR” or “RECIRCULATED
AIR” as you desire. Choosing “RECIRCU-
LATED AIR” increases cooling efficiency.
Quick cooling (using recirculated air)
The control settings are the same as for
normal cooling except you select “RECIR-
CULATED AIR” and the highest blower
speed.
NOTE:
If you select “RECIRCULATED AIR” for
an extended period of time, the air in the
vehicle can become contaminated.
Therefore, you should occasionally
select “FRESH AIR”.
If your vehicle has been left in the sun
with the windows closed, it will cool
faster if you open the windows brieflywhile you operate the air conditioner with
the air intake selector at “FRESH AIR”
and the blower at high speed.
Dehumidifying
Turn on the “A/C” switch, set the air flow
selector to a desired air flow selector posi-
tion, and select “FRESH AIR”, the temper-
ature selector to the desired temperature
position, and the blower speed selector to
the desired blower speed position.
NOTE:
Because the air conditioner dehumidifies
the air, turning it on will help keep the win-
dows clear, even when blowing heated air
using the “DEFROST” or “HEAT &
DEFROST” functions.
Audio Systems: