2008 SUZUKI SX4 wheel
[x] Cancel search: wheelPage 74 of 278
3-9STEERING COLUMN CONTROLS
80J21-03E
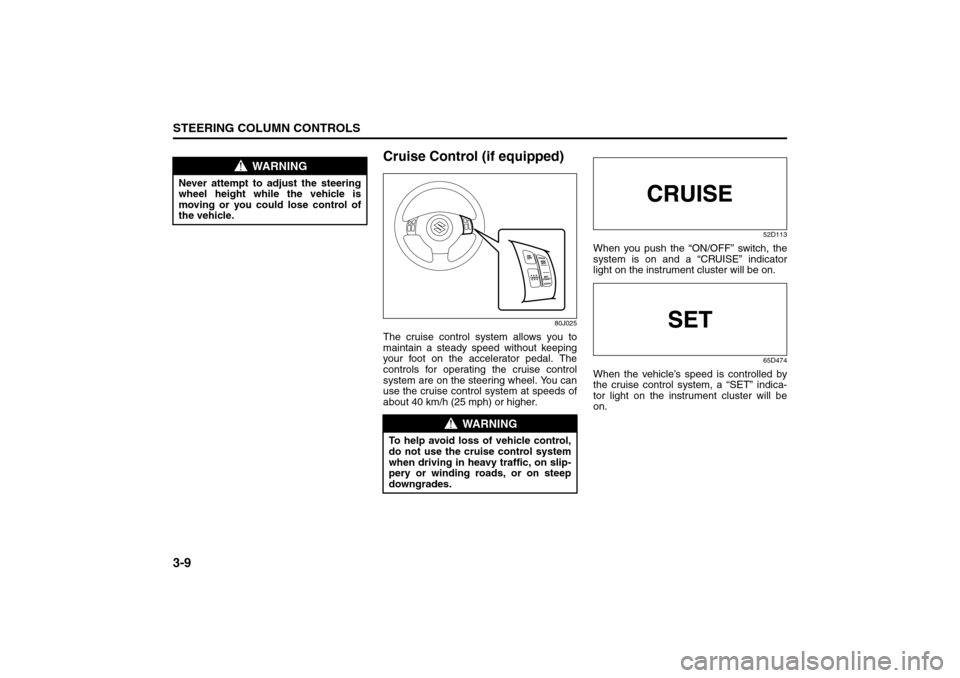
Cruise Control (if equipped)
80J025
The cruise control system allows you to
maintain a steady speed without keeping
your foot on the accelerator pedal. The
controls for operating the cruise control
system are on the steering wheel. You can
use the cruise control system at speeds of
about 40 km/h (25 mph) or higher.
52D113
When you push the “ON/OFF” switch, the
system is on and a “CRUISE” indicator
light on the instrument cluster will be on.
65D474
When the vehicle’s speed is controlled by
the cruise control system, a “SET” indica-
tor light on the instrument cluster will be
on.
WARNING
Never attempt to adjust the steering
wheel height while the vehicle is
moving or you could lose control of
the vehicle.
WARNING
To help avoid loss of vehicle control,
do not use the cruise control system
when driving in heavy traffic, on slip-
pery or winding roads, or on steep
downgrades.
Page 76 of 278
3-11STEERING COLUMN CONTROLS
80J21-03E
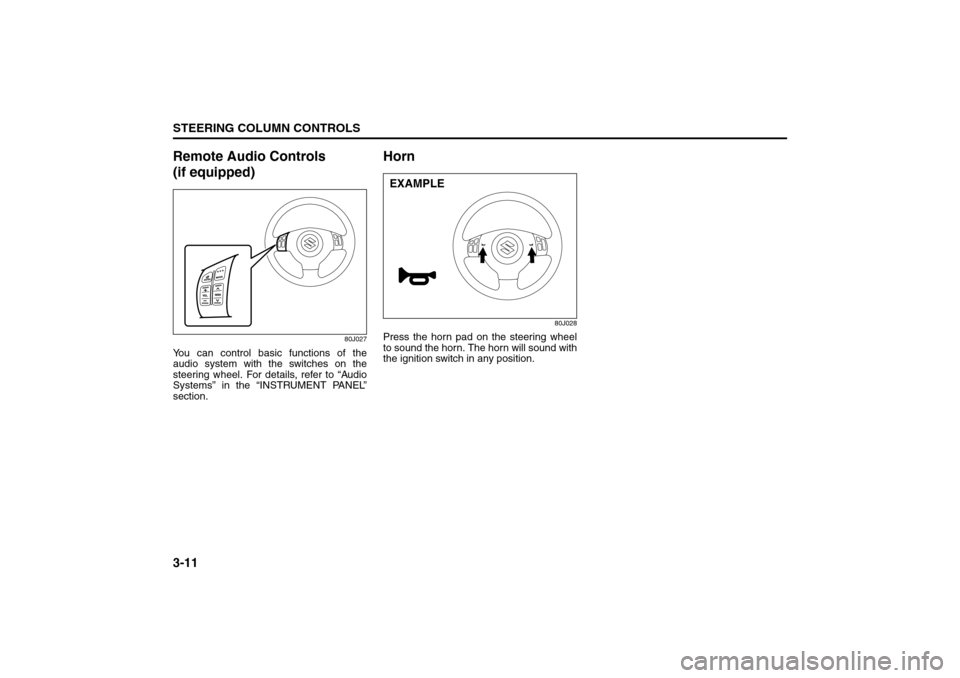
Remote Audio Controls
(if equipped)
80J027
You can control basic functions of the
audio system with the switches on the
steering wheel. For details, refer to “Audio
Systems” in the “INSTRUMENT PANEL”
section.
Horn
80J028
Press the horn pad on the steering wheel
to sound the horn. The horn will sound with
the ignition switch in any position.EXAMPLE
Page 77 of 278
INSTRUMENT PANEL
4
80J21-03E
60G406
INSTRUMENT PANELInstrument Panel ................................................................. 4-1
Instrument Cluster .............................................................. 4-2
Warning and Indicator Lights ............................................ 4-3
A/T Selector Position Indicator (if equipped) ................... 4-10
Speedometer/Odometer/Trip meter ................................... 4-11
Tachometer .......................................................................... 4-12
Fuel Gauge ........................................................................... 4-12
Temperature Gauge ............................................................ 4-13
Hazard Warning Switch ...................................................... 4-13
“ESP OFF” Switch (if equipped) ........................................ 4-13
Instrument Light Brightness Control ................................ 4-14
2WD/i-AWD (intelligent All Wheel Drive) Switch
(if equipped) ......................................................................... 4-14
Heated Rear Window and Heated Outside Rearview
Mirrors (if equipped) Switch ............................................... 4-15
Fog Light Switch (if equipped) ........................................... 4-16
Cigarette Lighter and Ashtray (if equipped) ..................... 4-16
Information Display ............................................................. 4-17
Glove Box ............................................................................ 4-20
Heating and Air Conditioning System ............................... 4-21
Audio Systems .................................................................... 4-32
Page 80 of 278

4-3INSTRUMENT PANEL
80J21-03E
Warning and Indicator LightsLow Tire Pressure Warning Light
52D305
As an added safety feature, your vehicle
has been equipped with a tire pressure
monitoring system (TPMS) that uses a low
tire pressure warning light to inform you
when one or more of your tires is signifi-
cantly under-inflated.
When the ignition switch is turned to the
“ON” position, this light comes on briefly so
you can check that the light is working.
When the low tire pressure warning light is
lit, one or more of your tires is significantly
under-inflated. You should stop and check
your tires as soon as possible, and inflate
them to the proper pressure as indicated
on the vehicle’s tire information placard.
Driving on a significantly under-inflated tire
causes the tire to overheat and can lead to
tire failure. Under-inflation also reduces
fuel efficiency and tire tread life, and may
affect the vehicle’s handling and stopping
ability. Each tire, including the spare,
should be checked at least once a month
when cold and set to the recommendedinflation pressure as specified in the vehi-
cle placard and owner’s manual.
The low tire pressure warning light is also
used to inform you of a TPMS malfunction.
When the system detects a malfunction,
this light will flash for approximately one
minute and then remain continuously illu-
minated. This sequence will be repeated
approximately ten minutes after subse-
quent the ignition switch is turned on as
long as the malfunction exists.
NOTE:
The low tire pressure warning light may not
come on immediately if you have a sudden
loss of air pressure.
WARNING
If the low tire pressure warning light
does not come on when the ignition
is turned to the “ON” position, or
comes on and blinks while driving
there may be a problem with the tire
pressure monitoring system. Have
your vehicle inspected by an autho-
rized SUZUKI dealer. Even if the light
turns off after blinking, indicating
that monitoring system has recov-
ered, make sure to have an autho-
rized SUZUKI dealer check the
system.
WARNING
The load rating of your tires is
reduced at lower inflation pressures.
If your tires become even moderately
under-inflated, the vehicle load may
exceed the load rating of the tires,
which can lead to tire failure. The low
tire pressure warning light will not
alert you of this condition. The warn-
ing light will only come on when one
or more of your tires become signifi-
cantly under-inflated. Check and
adjust your tire inflation pressure at
least once a month. Refer to “Tires”
in the “INSPECTION AND MAINTE-
NANCE” section.
WARNING
If the low tire pressure warning light
comes on and stays on, reduce your
speed and avoid abrupt steering and
braking. Stop in a safe place as soon
as possible and check your tires.
If you have a flat tire, replace it with
the spare tire. Refer to “Jacking
Instructions” in the “EMERGENCY
SERVICE” section. Refer to
“Replacing Tires and/or Wheels”
for instructions on how to restore
normal operation of the tire pres-
sure monitoring system after you
have had a flat tire.
(Continued)
Warning and Indicator Lights: 8
Page 86 of 278
4-9INSTRUMENT PANEL
80J21-03E
If this light blinks in red, it reminds you that
the remote controller is not in the vehicle.
For details, refer to “Keyless Start System
Remote Controller/Keyless Entry System
Transmitter” in the “BEFORE DRIVING”
section.Turn Signal Indicators
50G055
When you turn on the left or right turn sig-
nals, the corresponding green arrow on the
instrument panel will flash along with the
respective turn signal lights.
When you turn on the hazard warning
switch, both arrows will flash along with all
of the turn signal lights.High Beam Indicator Light
50G056
This indicator comes on when headlight
high beams are turned on.
intelligent All Wheel Drive (i-AWD)
AUTO Indicator Light (if equipped)
79J040
When the ignition switch is turned to the
“ON” position, the light comes on briefly so
you can check that the light is working.
When the 2WD/i-AWD switch is in the “i-
AWD AUTO” mode with the ignition switch
in the “ON” position, the light comes on
and stays on.
If the light and the “i-AWD LOCK” indicator
light stay on or come on simultaneously
when driving, there may be something
wrong with the i-AWD system. Have the
system inspected by an authorized
SUZUKI dealer.
If the oil temperature of the parts for i-AWD
system is high, this light will blink. The “i-
AWD AUTO” or “i-AWD LOCK” mode will
be changed to the “2WD” mode automati-
cally to prevent a damage of the parts for i-
AWD system.
NOTE:
If you restart the engine, the light will stop
blinking temporarily.For details, refer to “Using the 2WD/i-AWD
Switch” in the “OPERATING YOUR VEHI-
CLE” section.
NOTE:
When the vehicle speed is increased, the
“i-AWD LOCK” mode will be changed to
the “i-AWD AUTO” mode automatically.
The “i-AWD AUTO” indicator light will come
on and stay on.
intelligent All Wheel Drive (i-AWD)
LOCK Indicator Light (if equipped)
79J100
When the ignition switch is turned to the
“ON” position, this light comes on briefly so
you can check that the light is working.
The light comes on when the 2WD/i-AWD
switch is changed to the “i-AWD LOCK”
mode from the “i-AWD AUTO” mode.
If the light and the “i-AWD AUTO” indicator
light stay on or come on simultaneously
when driving, there may be something
wrong with the i-AWD system. Have the
system inspected by an authorized
SUZUKI dealer.
Tachometer:
Fuel Gauge:
Page 91 of 278
4-14
INSTRUMENT PANEL
80J21-03E
For details of the ESP
® systems, refer to
“Electronic Stability Program (ESP
®)” in
the “OPERATING YOUR VEHICLE” sec-
tion.
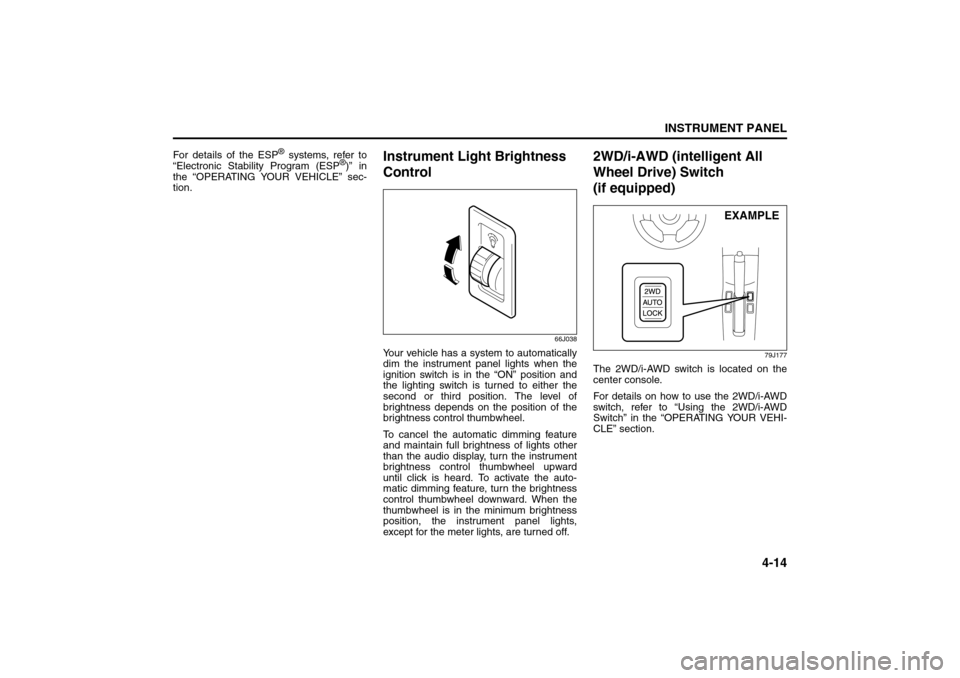
Instrument Light Brightness
Control
66J038
Your vehicle has a system to automatically
dim the instrument panel lights when the
ignition switch is in the “ON” position and
the lighting switch is turned to either the
second or third position. The level of
brightness depends on the position of the
brightness control thumbwheel.
To cancel the automatic dimming feature
and maintain full brightness of lights other
than the audio display, turn the instrument
brightness control thumbwheel upward
until click is heard. To activate the auto-
matic dimming feature, turn the brightness
control thumbwheel downward. When the
thumbwheel is in the minimum brightness
position, the instrument panel lights,
except for the meter lights, are turned off.
2WD/i-AWD (intelligent All
Wheel Drive) Switch
(if equipped)
79J177
The 2WD/i-AWD switch is located on the
center console.
For details on how to use the 2WD/i-AWD
switch, refer to “Using the 2WD/i-AWD
Switch” in the “OPERATING YOUR VEHI-
CLE” section.
EXAMPLE
Information Display:
Glove Box: 3
Page 108 of 278

4-31INSTRUMENT PANEL
80J21-03E
System Operating InstructionsAutomatic operation
80J097
You can let the climate control system work
automatically. To set the system in fully-
automatic operation, follow the procedure
below.
1) Set the desired temperature by turning
the temperature selector (1).
2) Turn the blower speed selector (2) to
the “AUTO” position.
3) Turn the air flow selector (3) to the
“AUTO” position.
Then the blower speed selector/air intake
selector (2) and air flow selector (3) are
controlled automatically to maintain the set
temperature.
The air conditioning switch (1) is to be
selected manually according to your taste.When you turn the air conditioning switch
off, the climate control system cannot
lower the inside temperature below outside
temperature.
To turn the climate control system off, turn
the blower speed selector (2) to the “OFF”
position
NOTE:
To find your comfortable zone, start with
the 75°F (25°C) setting.
If you turn the temperature selector (1) to
the highest or lowest limit, the climate
control system will operate at the maxi-
mum cooling or heating and the blower
will run at nearly full speed.
To avoid blowing cold air in cold weather
or hot air in hot weather, the system will
delay turning on the blower until warmed
or chilled air is available.
If your vehicle has been left in the sun
with the windows closed, it will cool
faster if you open the windows briefly.
Even under the automatic operation, you
can set some of the blower speed selec-
tor/air intake selector (2) and air flow
selector (3) into manual mode. Then the
manually selected function is maintained
preferentially, and the other functions
remain under automatic operation.
To return the air intake selector (2) to
automatic operation when both the
blower speed selector (2) and the air
flow selector (3) are in the “AUTO” posi-
tion, turn either the selector (2) or (3) toa position other than “AUTO”, then turn
to the “AUTO” position again.
79J071
Be careful not to cover the interior temper-
ature sensor (F) between the steering
wheel and the climate control panel, or the
solar sensor (G) located at the top of the
driver’s side dashboard. These sensors
are used by the automatic system to regu-
late temperature.
Manual operation
You can manually control the climate con-
trol system. Set the selectors to your
desired position.
EXAMPLE
(2) (3)
(1)
(G)
(F)
EXAMPLE
Audio Systems:
Page 130 of 278
4-53INSTRUMENT PANEL
80J21-03E
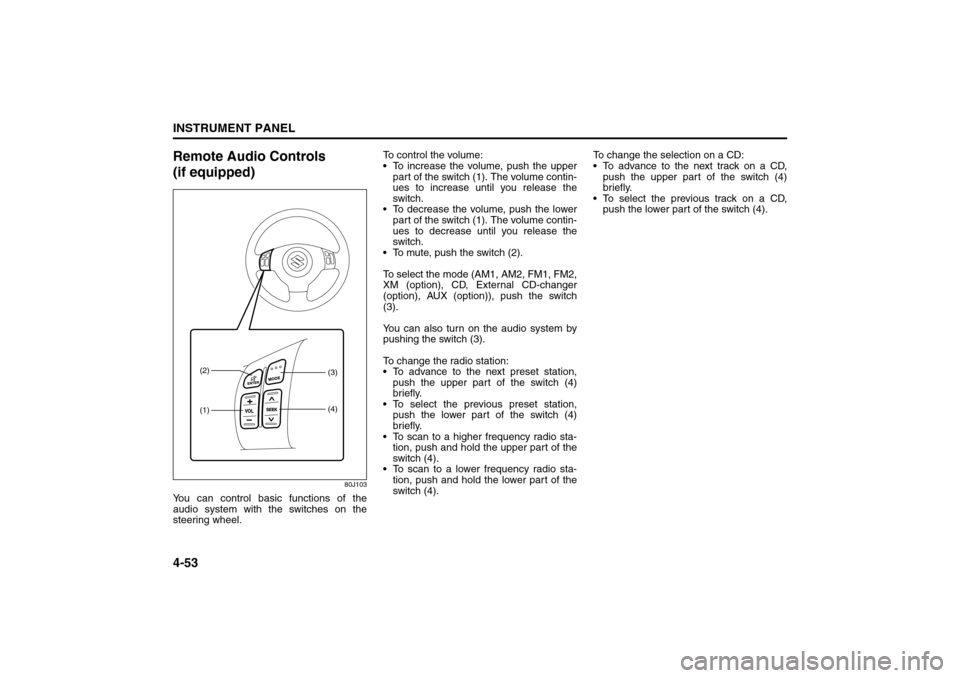
Remote Audio Controls
(if equipped)
80J103
You can control basic functions of the
audio system with the switches on the
steering wheel.To control the volume:
To increase the volume, push the upper
part of the switch (1). The volume contin-
ues to increase until you release the
switch.
To decrease the volume, push the lower
part of the switch (1). The volume contin-
ues to decrease until you release the
switch.
To mute, push the switch (2).
To select the mode (AM1, AM2, FM1, FM2,
XM (option), CD, External CD-changer
(option), AUX (option)), push the switch
(3).
You can also turn on the audio system by
pushing the switch (3).
To change the radio station:
To advance to the next preset station,
push the upper part of the switch (4)
briefly.
To select the previous preset station,
push the lower part of the switch (4)
briefly.
To scan to a higher frequency radio sta-
tion, push and hold the upper part of the
switch (4).
To scan to a lower frequency radio sta-
tion, push and hold the lower part of the
switch (4).To change the selection on a CD:
To advance to the next track on a CD,
push the upper part of the switch (4)
briefly.
To select the previous track on a CD,
push the lower part of the switch (4).
(1) (2)
(3)
(4)