2008 SUZUKI GRAND VITARA warning
[x] Cancel search: warningPage 88 of 290

4-13INSTRUMENT PANEL
66J22-03E
meter brightness becomes dimmest and
the other instrument panel lights are
turned off.
To brighten the instrument panel lights,
turn the knob (3) clockwise.
To cancel the automatic dimming feature
and maintain full brightness, turn the knob
(3) clockwise to position (5).
Tachometer
64J051
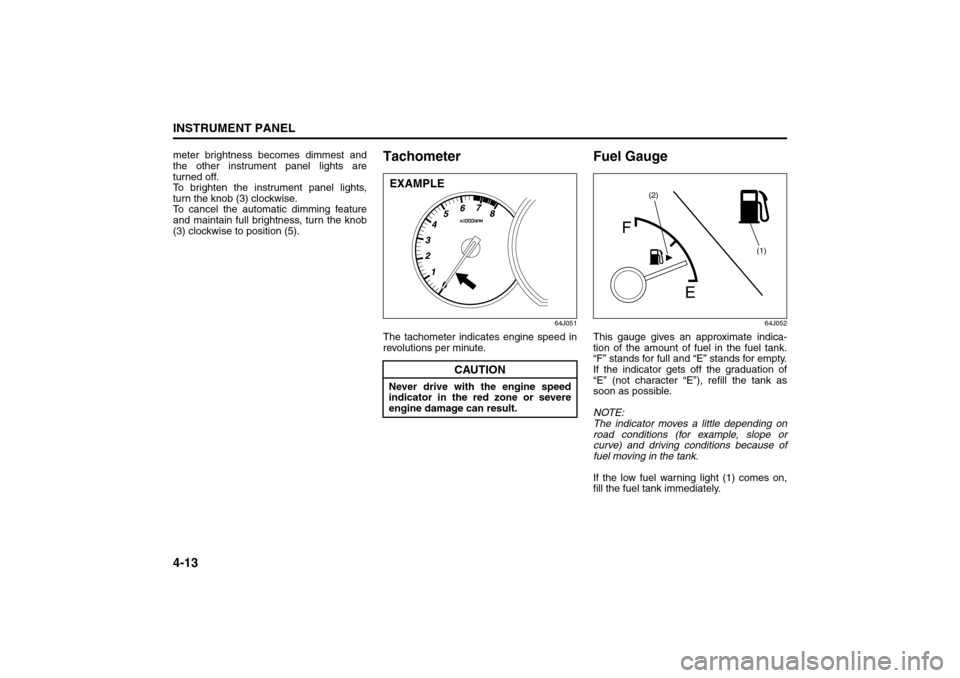
The tachometer indicates engine speed in
revolutions per minute.
Fuel Gauge
64J052
This gauge gives an approximate indica-
tion of the amount of fuel in the fuel tank.
“F” stands for full and “E” stands for empty.
If the indicator gets off the graduation of
“E” (not character “E”), refill the tank as
soon as possible.
NOTE:
The indicator moves a little depending on
road conditions (for example, slope or
curve) and driving conditions because of
fuel moving in the tank.
If the low fuel warning light (1) comes on,
fill the fuel tank immediately.
CAUTION
Never drive with the engine speed
indicator in the red zone or severe
engine damage can result.EXAMPLE
(1) (2)
Speedometer/Odometer/Trip meter/Meter Illumination Control: 8Tachometer: 8
Fuel Gauge: 8
Page 89 of 290

4-14
INSTRUMENT PANEL
66J22-03E
NOTE:
The activation point of the low fuel warning
light (1) varies depending on road condi-
tions (for example, slope or curve) and
driving conditions because of fuel moving
in the tank.
The mark (2) indicates that the fuel filler
door is located on the right side of the vehi-
cle.
Temperature Gauge
64J053
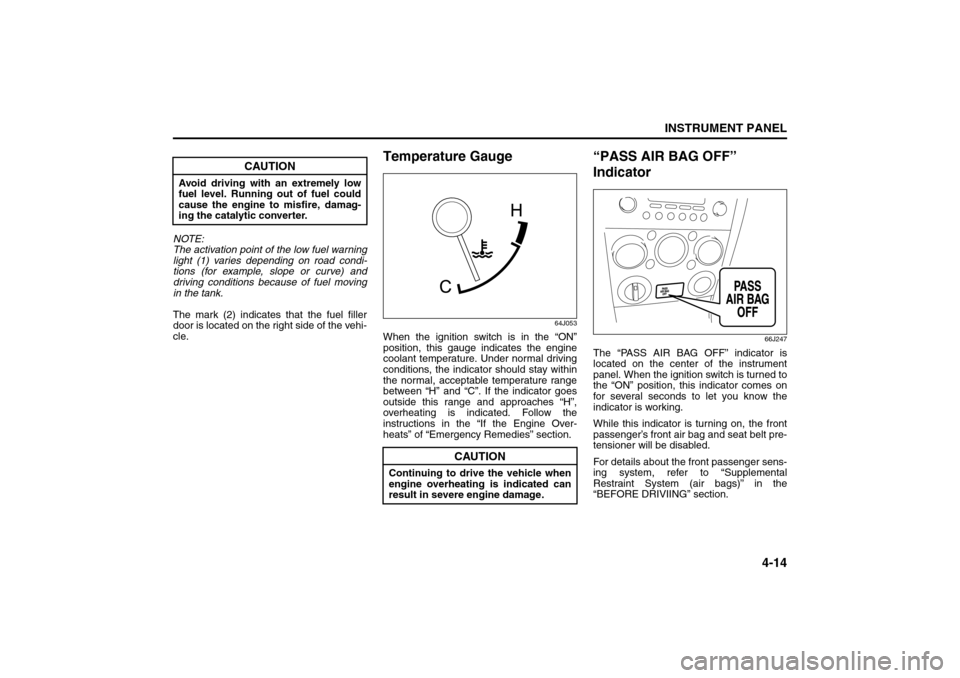
When the ignition switch is in the “ON”
position, this gauge indicates the engine
coolant temperature. Under normal driving
conditions, the indicator should stay within
the normal, acceptable temperature range
between “H” and “C”. If the indicator goes
outside this range and approaches “H”,
overheating is indicated. Follow the
instructions in the “If the Engine Over-
heats” of “Emergency Remedies” section.
“PASS AIR BAG OFF”
Indicator
66J247
The “PASS AIR BAG OFF” indicator is
located on the center of the instrument
panel. When the ignition switch is turned to
the “ON” position, this indicator comes on
for several seconds to let you know the
indicator is working.
While this indicator is turning on, the front
passenger’s front air bag and seat belt pre-
tensioner will be disabled.
For details about the front passenger sens-
ing system, refer to “Supplemental
Restraint System (air bags)” in the
“BEFORE DRIVIING” section.
CAUTION
Avoid driving with an extremely low
fuel level. Running out of fuel could
cause the engine to misfire, damag-
ing the catalytic converter.
CAUTION
Continuing to drive the vehicle when
engine overheating is indicated can
result in severe engine damage.
Fuel Gauge: 8
Temperature Gauge: 8
“PASS AIR BAG OFF” Indicator:
Page 90 of 290

4-15INSTRUMENT PANEL
66J22-03E
Hazard Warning Switch
64J054
Push in the hazard warning switch to acti-
vate the hazard warning lights. All four turn
signal lights and both turn signal indicators
will flash simultaneously. To turn off the
lights, push the switch again.
Use the hazard warning lights to warn
other traffic during emergency parking or
when your vehicle could otherwise become
a traffic hazard.
Rear Window Defroster and
Outside Rearview Mirrors
Defroster (if equipped) Switch
66J248
When the rear window is fogged, push this
switch to clear the window.
64J258
If the outside rearview mirror has the mark
(2), it is also equipped with the outside
rearview mirrors defroster. When you push
the switch (1), both the outside rearview
mirrors defroster and the rear window
defroster will operate simultaneously.An indicator light will be lit when the
defroster is on. The defroster will only work
when the engine is running. To turn off the
defroster, push the switch again.
(1)
(2)
CAUTION
The rear window defroster and the
outside rearview mirrors use a large
amount of electricity. Be sure to turn
off the defroster after the window has
become clear.
Hazard Warning Switch: 8
Instrument Light Brightness Control: Rear Window Defroster and Outside Rearview Mirrors Defroster Switch: 8
Page 92 of 290

4-17INSTRUMENT PANEL
66J22-03E
Transfer Switch (if equipped)
66J168
The transfer switch is located on the center
of the instrument panel.
For details on how to use this switch, refer
to “Using the Transfer Switch” in the
“OPERATING YOUR VEHICLE” section.
Glove Box
64J065
To open the glove box, pull the latch lever.
To close it, push the lid until it latches
securely. If a lock is equipped on the latch
lever, lock the glove box by inserting the
key and turning it clockwise and unlock the
glove box by turning the key counterclock-
wise.
Information Display
66J198
(1) Clock
(2) Thermometer
(3) Instantaneous fuel consumption/Aver-
age fuel consumption/Driving range
(4) “H” button
(5) “M” button
(6) “DISP” button
(7) Freezing mark
WARNING
Never drive with the glove box lid
open. It could cause injury if an acci-
dent occurs.UNLOCK
LOCK
(4)
(2)
(1)
(3)
(5)
(6)
(7)
EXAMPLE
“ESP OFF” Switch:
Transfer Switch:
Glove Box: 3
Page 94 of 290

4-19INSTRUMENT PANEL
66J22-03E
66J200
Every time you push the “DISP” button (6),
the display will be changed among the fol-
lowing four displays.
(a) Instantaneous fuel consumption
(b) Average fuel consumption
(c) Driving range
(d) No displayInstantaneous fuel consumption (a)
If you selected instantaneous fuel con-
sumption the last time you drove the vehi-
cle, the display indicates “--.-” when the
ignition switch is turned to the “ACC” or
“ON” position. Unless the vehicle is mov-
ing, the display will indicate “--.-”.
Average fuel consumption (b)
If you selected average fuel consumption
the last time you drove the vehicle, the dis-
play shows the last value of average fuel
consumption when the ignition switch is
turned to the “ACC” or “ON” position.
Unless you reset the value of average fuel
consumption, the display will show the
value of average fuel consumption which
includes average fuel consumption during
previous driving.
To reset the value of average fuel con-
sumption, hold in the “DISP” button (6) for
more than 2 seconds when the display
shows an average fuel consumption value.
The display will indicate “--.-” and then will
show a new average fuel consumption
value after driving for a short time.
Driving range (c)
If you selected driving range the last time
you drove the vehicle, the display shows “--
.-” for a few seconds and then shows the
current driving range when the ignition
switch is turned to the “ON” position.
The driving range shown in the display is
the approximate distance you can driveuntil the fuel gauge indicates “E” based a
current driving conditions.
When the remaining fuel in fuel tank
reaches a low level, the display “--.-” will
appear.
If the low fuel warning light comes on, fill
the fuel tank immediately regardless of the
value of driving range shown in the display.
As the driving range after refueling is cal-
culated based on the last driving condition,
the value is different each time you refuel.
NOTE:
When you reconnect the negative (–) ter-
minal to the battery, the value of driving
range will be shown after driving for a
while.
For new vehicle with low mileage, the
driving range may not be shown
promptly in the display when beginning
to drive. The driving range will be shown
after a while.
NOTE:
The values of fuel consumption and driving
range shown in the display are affected by
conditions such as the following;
road condition
surrounding traffic condition
driving condition
vehicle condition
when the malfunction indicator light
comes on or blinks
(a)
(b)
(c)(d)
Information Display:
Page 132 of 290

5-1OTHER CONTROLS AND EQUIPMENT
66J22-03E
Parking Brake Lever
64J081
(1) To set
(2) To release
(3) To release
The parking brake lever is located between
the seats. To set the parking brake, hold
the brake pedal down and pull the parking
brake lever all the way up. To release the
parking brake, hold the brake pedal down,
pull up slightly on the parking brake lever,
push the button on the end of the lever
with your thumb and lower the lever to its
original position.
For automatic transmission vehicles,
always set the parking brake before mov-
ing the gearshift lever to the “P” (Park)
position. If you park on an incline and shift
into “P” before you set the parking brake,
the weight of the vehicle may make it diffi-cult to shift out of “P” when you are ready
to drive the vehicle. When preparing to
drive the vehicle, move the gearshift lever
out of the “P” position before releasing the
parking brake.
PedalsManual transmission
64J082
Automatic transmission
64J083
EXAMPLE
(2)
(3)(1)
WARNING
Never drive your vehicle with the
parking brake set: rear brake effec-
tiveness can be reduced from over-
heating, brake life may be
shortened or permanent brake
damage may result.
If the parking brake does not hold
the vehicle securely or does not
fully release, have your vehicle
inspected immediately by an autho-
rized SUZUKI dealer.
WARNING
Always set the parking brake fully
before leaving your vehicle or it may
roll, causing injury or damage. When
parking, make sure the gearshift
lever for manual transmission vehi-
cles is in 1st gear or “R” (Reverse)
and the gearshift lever for automatic
transmission vehicles is in “P”
(Park). Never leave the transfer lever
in “N” (Neutral) when you are parked.
Remember, even though the trans-
mission is in gear or in Park, you
must set the parking brake fully.
(1)(2)(3)
EXAMPLE
(2)(3)
EXAMPLE
Parking Brake Lever: 6
Pedals: 6
Page 133 of 290

5-2
OTHER CONTROLS AND EQUIPMENT
66J22-03E
Clutch Pedal (1)(For manual transmission)
The clutch pedal is used to disengage the
drive to the wheels when starting the
engine, stopping or shifting the gearshift
lever or transfer lever. Depressing the
pedal disengages the clutch.Brake Pedal (2)Your SUZUKI vehicle is equipped with
front disc brakes and rear drum brakes.
Depressing the brake pedal applies both
sets of brakes.
You may hear occasional brake squeal
when you apply the brakes. This is a nor-
mal condition caused by environmental
factors such as cold, wet, snow, etc.
Accelerator Pedal (3)This pedal controls the speed of the
engine. Depressing the accelerator pedal
increases power output and speed.
Gearshift LeverManual transmission
65D449
5-speed automatic transmission
66J046
CAUTION
Do not drive with your foot resting on
the clutch pedal. It could result in
excessive clutch wear or clutch dam-
age.
WARNING
If brake squeal is excessive and
occurs each time the brakes are
applied, you should have the brakes
checked by your SUZUKI dealer.
WARNING
Do not “ride” the brakes by applying
them continuously or resting your
foot on the pedal. This will result in
overheating of the brakes which
could cause unpredictable braking
action, longer stopping distances or
permanent brake damage.
Pedals: 6
Gearshift Lever: 10
Page 134 of 290

5-3OTHER CONTROLS AND EQUIPMENT
66J22-03E
Your vehicle is equipped with either a
manual transmission or automatic trans-
mission. The gearshift lever for each trans-
mission type is shown in the illustrations.
For details on how to use the transmission,
refer to the “Using the Transmission” in
“OPERATING YOUR VEHICLE” section.
Fuel Filler Cap
64J085
64J253
The fuel filler cap is located on the right
rear side of the vehicle. The fuel filler door
can be unlocked by pulling up on the
opener lever located on the outboard sideof the driver’s seat and can be locked by
simply closing the door.
60G069
To remove the fuel filler cap:
1) Open the fuel filler door.
2) Remove the cap by turning it counter-
clockwise.
To reinstall the fuel filler cap:
1) Turn the cap clockwise until you hear
several clicks.
2) Close the fuel filler door.
EXAMPLE
WARNING
Remove the fuel filler cap slowly. The
fuel may be under pressure and may
spray out, causing injury.Open Close
Gearshift Lever: 10
Fuel Filler Cap: 5