2008 SUBARU TRIBECA door lock
[x] Cancel search: door lockPage 126 of 409
3-6
Instruments and controls
meter needles and gauges when the
ignition switch is turned to the“ON ”
position. To change the current setting,
press the trip knob for at least 2 seconds.
: Activated: Deactivated
With the function deactivated, the combi-
nation meter illuminates as follows:
1. Warning lights, indicator lights, meter
rims, meter needles, odometer, trip meter,
and gauge back lights illuminate.
2. Meter and gauge dials illuminate.
3. Regular illumination ( for driving) be-
gins.
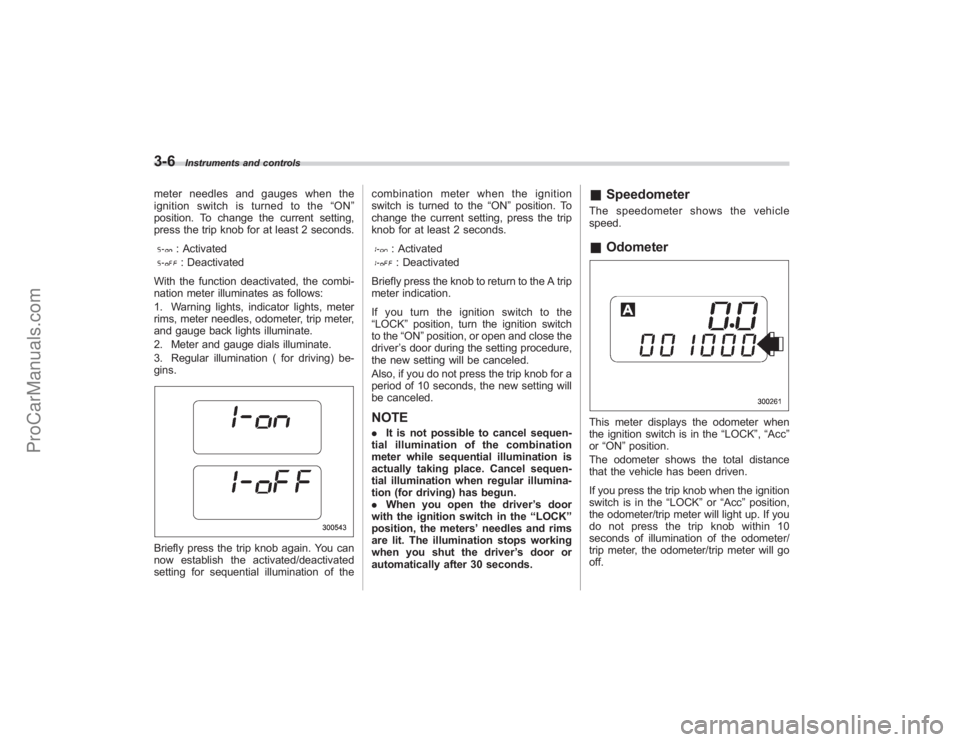
Briefly press the trip knob again. You can
now establish the activated/deactivated
setting for sequential illumination of the combination meter when the ignition
switch is turned to the
“ON”position. To
change the current setting, press the trip
knob for at least 2 seconds.
: Activated: Deactivated
Briefly press the knob to return to the A trip
meter indication.
If you turn the ignition switch to the
“LOCK” position, turn the ignition switch
to the “ON”position, or open and close the
driver ’s door during the setting procedure,
the new setting will be canceled.
Also, if you do not press the trip knob for a
period of 10 seconds, the new setting will
be canceled.
NOTE. It is not possible to cancel sequen-
tial illumination of the combination
meter while sequential illumination is
actually taking place. Cancel sequen-
tial illumination when regular illumina-
tion (for driving) has begun.
. When you open the driver ’s door
with the ignition switch in the “LOCK ”
position, the meters ’needles and rims
are lit. The illumination stops working
when you shut the driver ’s door or
automatically after 30 seconds.
& SpeedometerThe speedometer shows the vehicle
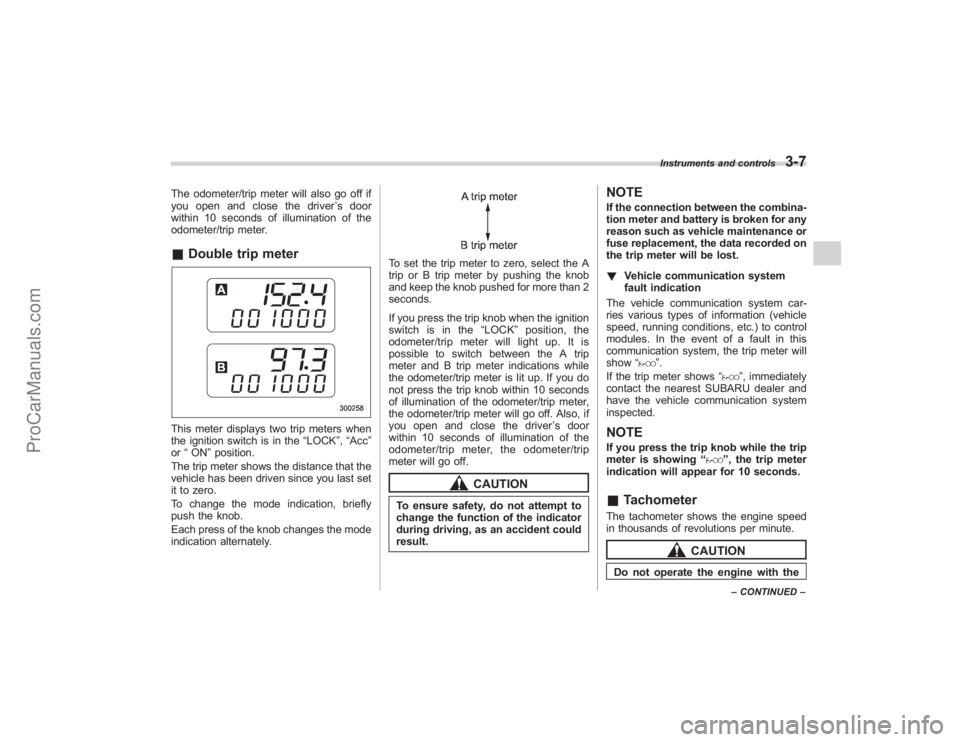
speed.&OdometerThis meter displays the odometer when
the ignition switch is in the “LOCK”,“Acc”
or “ON ”position.
The odometer shows the total distance
that the vehicle has been driven.
If you press the trip knob when the ignition
switch is in the “LOCK”or“Acc ”position,
the odometer/trip meter will light up. If you
do not press the trip knob within 10
seconds of illumination of the odometer/
trip meter, the odometer/trip meter will go
off.
ProCarManuals.com
Page 127 of 409
The odometer/trip meter will also go off if
you open and close the driver’sdoor
within 10 seconds of illumination of the
odometer/trip meter.& Double trip meterThis meter displays two trip meters when
the ignition switch is in the “LOCK”,“Acc ”
or “ON ”position.
The trip meter shows the distance that the
vehicle has been driven since you last set
it to zero.
To change the mode indication, briefly
push the knob.
Each press of the knob changes the mode
indication alternately.
To set the trip meter to zero, select the A
trip or B trip meter by pushing the knob
and keep the knob pushed for more than 2
seconds.
If you press the trip knob when the ignition
switch is in the “LOCK ”position, the
odometer/trip meter will light up. It is
possible to switch between the A trip
meter and B trip meter indications while
the odometer/trip meter is lit up. If you do
not press the trip knob within 10 seconds
of illumination of the odometer/trip meter,
the odometer/trip meter will go off. Also, if
you open and close the driver ’sdoor
within 10 seconds of illumination of the
odometer/trip meter, the odometer/trip
meter will go off.
CAUTION
To ensure safety, do not attempt to
change the function of the indicator
during driving, as an accident could
result.
NOTEIf the connection between the combina-
tion meter and battery is broken for any
reason such as vehicle maintenance or
fuse replacement, the data recorded on
the trip meter will be lost.
! Vehicle communication system
fault indication
The vehicle communication system car-
ries various types of information (vehicle
speed, running conditions, etc.) to control
modules. In the event of a fault in this
communication system, the trip meter will
show “
”.
If the trip meter shows “
”, immediately
contact the nearest SUBARU dealer and
have the vehicle communication system
inspected.
NOTEIf you press the trip knob while the trip
meter is showing “
”, the trip meter
indication will appear for 10 seconds.
& TachometerThe tachometer shows the engine speed
in thousands of revolutions per minute.
CAUTION
Do not operate the engine with the
Instruments and controls
3-7
–CONTINUED –
ProCarManuals.com
Page 128 of 409
3-8
Instruments and controls
pointer of the tachometer in the red
zone. In this range, fuel injection will
be cut by the engine control module
to protect the engine from overrev-
ving. The engine will resume run-
ning normally after the engine speed
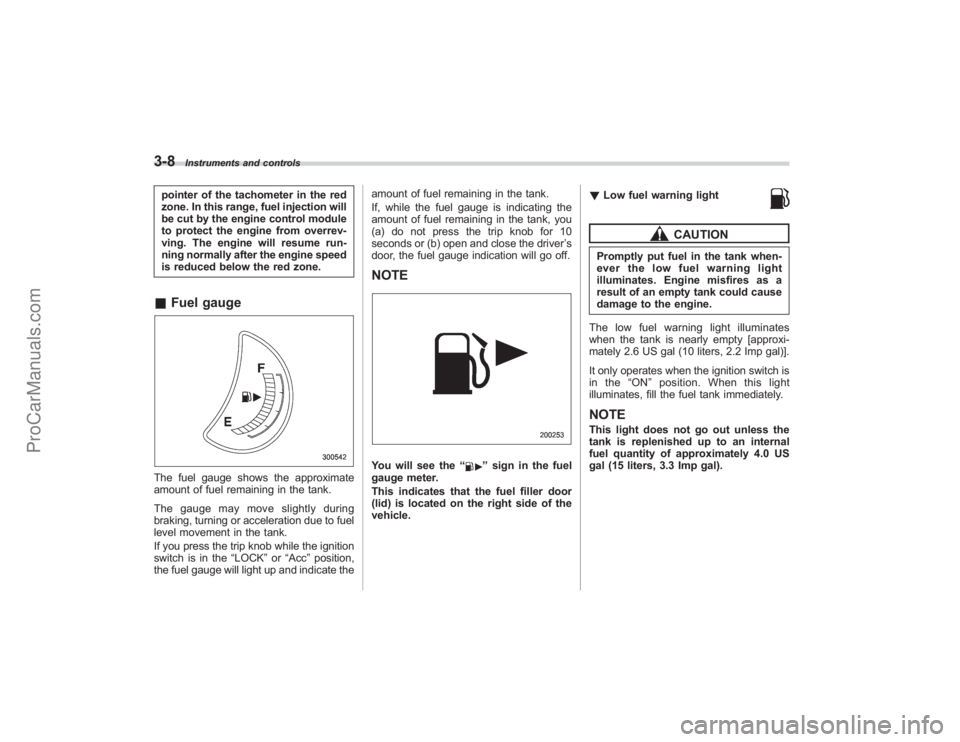
is reduced below the red zone.&Fuel gaugeThe fuel gauge shows the approximate
amount of fuel remaining in the tank.
The gauge may move slightly during
braking, turning or acceleration due to fuel
level movement in the tank.
If you press the trip knob while the ignition
switch is in the “LOCK”or“Acc ”position,
the fuel gauge will light up and indicate the amount of fuel remaining in the tank.
If, while the fuel gauge is indicating the
amount of fuel remaining in the tank, you
(a) do not press the trip knob for 10
seconds or (b) open and close the driver
’s
door, the fuel gauge indication will go off.
NOTEYou will see the “
”sign in the fuel
gauge meter.
This indicates that the fuel filler door
(lid) is located on the right side of the
vehicle. !
Low fuel warning light
CAUTION
Promptly put fuel in the tank when-
ever the low fuel warning light
illuminates. Engine misfires as a
result of an empty tank could cause
damage to the engine.
The low fuel warning light illuminates
when the tank is nearly empty [approxi-
mately 2.6 US gal (10 liters, 2.2 Imp gal)].
It only operates when the ignition switch is
in the “ON ”position. When this light
illuminates, fill the fuel tank immediately.NOTEThis light does not go out unless the
tank is replenished up to an internal
fuel quantity of approximately 4.0 US
gal (15 liters, 3.3 Imp gal).
ProCarManuals.com
Page 137 of 409

!Electronic Brake Force Distribution
(EBD) system warning
The brake system warning light also
illuminates if a malfunction occurs in the
EBD system. In that event, it comes on
together with the ABS warning light.
The EBD system may be faulty if the
brake system warning light and ABS
warning light illuminate simultaneously
during driving.
Even if the EBD system fails, the conven-
tional braking system will still function.
However, the rear wheels will be more
prone to locking when the brakes are
applied harder than usual and the vehi-
cle ’s motion may therefore become some-
what harder to control.
If the brake system warning light and ABS
warning light illuminate simultaneously,
take the following steps:
1. Stop the vehicle in the nearest safe,
flat place.
2. Shut down the engine, apply the
parking brake, and then restart it.
3. Release the parking brake. If both
warning lights go out, the EBD system
may be faulty.
Drive carefully to the nearest SUBARU
dealer and have the system inspected.
4. If both warning lights come on again
and stay illuminated after the engine has been restarted, shut down the engine
again, apply the parking brake, and check
the brake fluid level.
5. If the brake fluid level is not below the
“MIN
”mark, the EBD system may be
faulty. Drive carefully to the nearest
SUBARU dealer and have the system
inspected.
6. If the brake fluid level is below the
“MIN ”mark, DO NOT drive the vehicle.
Instead, have the vehicle towed to the
nearest SUBARU dealer for repair.
&
Low fuel warning light
CAUTION
Immediately put fuel in the tank
whenever the low fuel warning light
illuminates. Engine misfires as a
result of an empty tank could cause
damage to the engine.
The low fuel warning light illuminates
when the tank is nearly empty approxi-
mately 2.6 US gal (10 liters, or 2.2 Imp
gal). It only operates when the ignition
switch is in the “ON”position. When this
light illuminates, fill the fuel tank immedi-
ately.
NOTEThis light does not go out unless the
tank is replenished up to an internal
fuel quantity of approximately 4.0 US
gal (15 liters, 3.3 Imp gal).& Door open warning lightThe indicators are located in the center
portion of the dashboard.
When any of the doors or the rear gate is
not fully closed, it is indicated by the
corresponding part of the door open
warning light.
Always make sure this light is out before
you start to drive.
Instruments and controls
3-17
–CONTINUED –
ProCarManuals.com
Page 139 of 409
The Vehicle Dynamics Control system
provides its ABS control through the
electrical circuit of the ABS system.
Accordingly, if the ABS is inoperative, the
Vehicle Dynamics Control system be-
comes unable to provide ABS control. As
a result, the Vehicle Dynamics Control
system also becomes inoperative, caus-
ing the warning light to come on. Though
both the Vehicle Dynamics Control and
ABS systems are inoperative in this case,
the ordinary functions of the brake system
are still available. You will be safe while
driving with this condition, but have your
vehicle checked at a SUBARU dealer as
soon as possible.NOTEIf the warning light behavior is as
shown in the following, the Vehicle
Dynamics Control system may be con-
sidered normal.
.The warning light comes on right
after the engine is started but goes out
immediately, remaining off.
. The warning light comes on after
engine startup and goes off while the
vehicle is subsequently being driven.
. The warning light comes on during
driving, but it goes out immediately and
remains off. !
Traction Control system OFF indi-
cator light
. It comes on when the Traction Control
system OFF switch is pressed.
. It also comes on when the Traction
Control system is deactivated.
NOTE. The light may stay on for a while
after the engine has been started,
especially in cold weather. This does
not indicate the existence of a problem.
The light should go out as soon as the
engine has warmed up.
. The indicator light comes on when
the engine has developed a problem
and the CHECK ENGINE warning light/
Malfunction indicator lamp is on.
The Vehicle Dynamics Control system is
probably faulty under the following condi-
tion. Have your vehicle checked at a
SUBARU dealer as soon as possible.
. The light does not go out even after the
lapse of several minutes (the engine has
warmed up) after the engine has started.
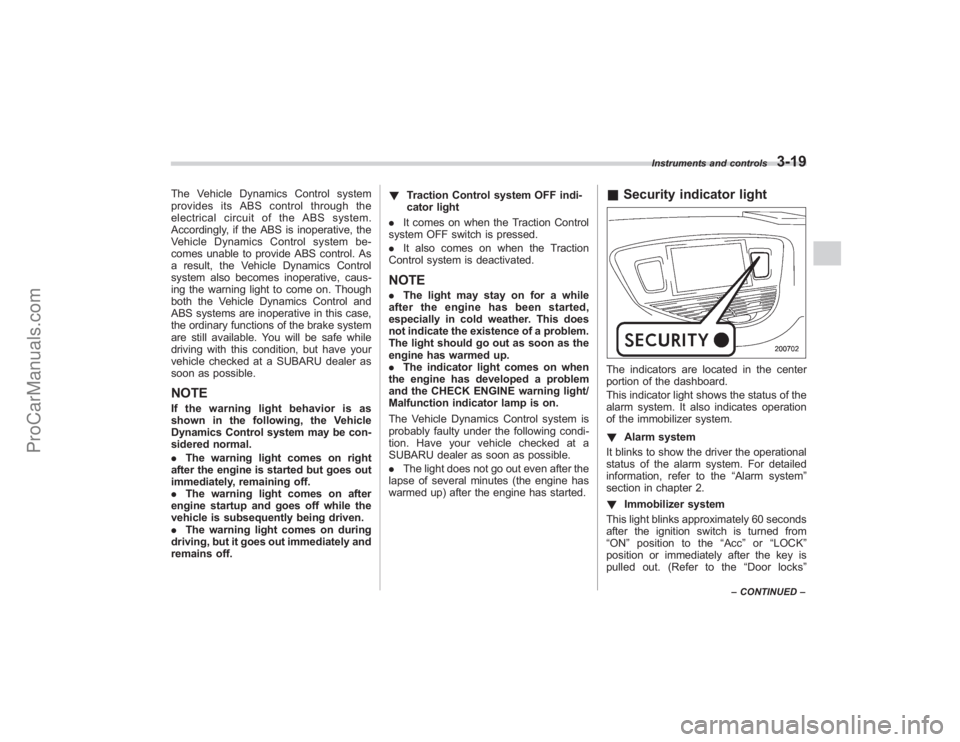
& Security indicator lightThe indicators are located in the center
portion of the dashboard.
This indicator light shows the status of the
alarm system. It also indicates operation
of the immobilizer system.
! Alarm system
It blinks to show the driver the operational
status of the alarm system. For detailed
information, refer to the “Alarm system”
section in chapter 2.
! Immobilizer system
This light blinks approximately 60 seconds
after the ignition switch is turned from
“ ON ”position to the “Acc ”or “LOCK ”
position or immediately after the key is
pulled out. (Refer to the “Door locks ”
Instruments and controls
3-19
–CONTINUED –
ProCarManuals.com
Page 224 of 409
6-16
Interior equipment
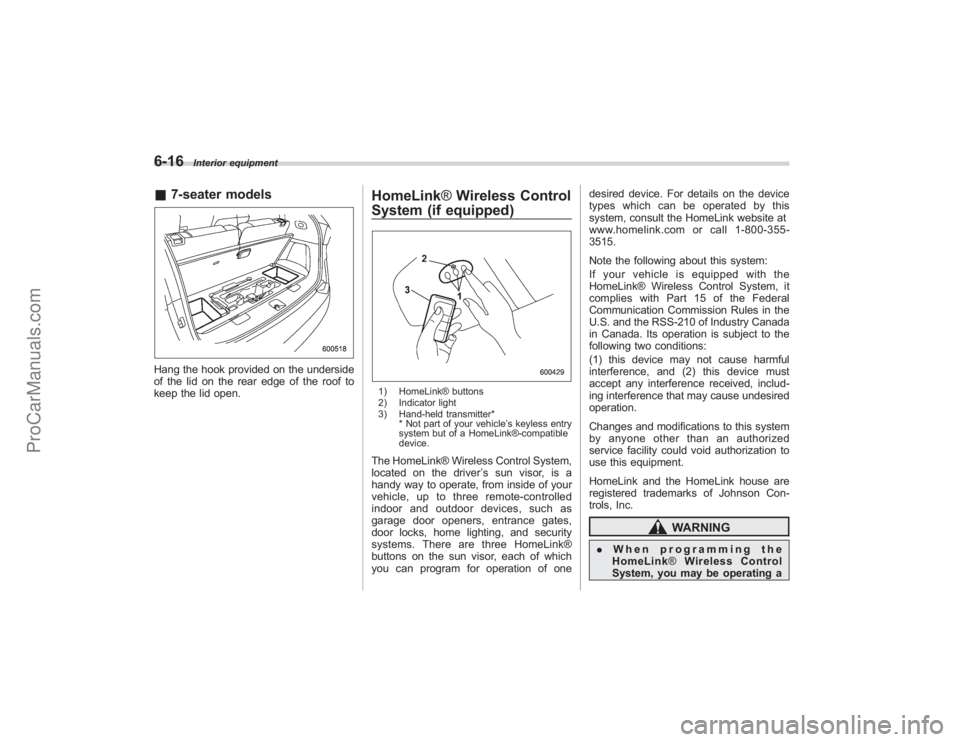
&7-seater modelsHang the hook provided on the underside
of the lid on the rear edge of the roof to
keep the lid open.
HomeLink ®Wireless Control
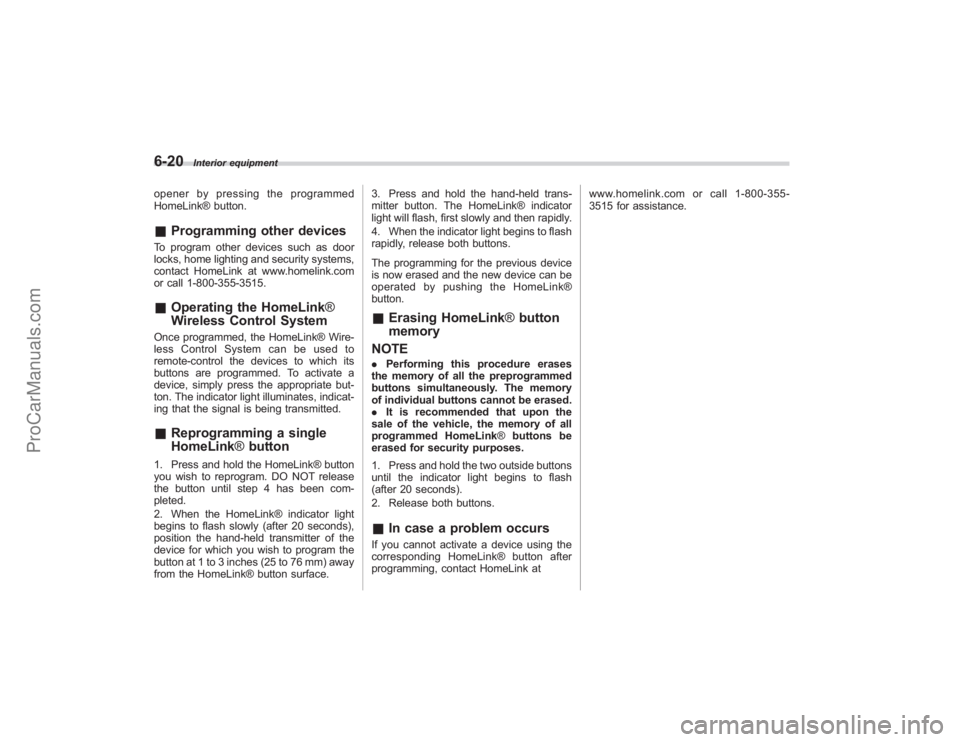
System (if equipped)1) HomeLink® buttons
2) Indicator light
3) Hand-held transmitter*
* Not part of your vehicle ’s keyless entry
system but of a HomeLink®-compatible
device.The HomeLink® Wireless Control System,
located on the driver ’s sun visor, is a
handy way to operate, from inside of your
vehicle, up to three remote-controlled
indoor and outdoor devices, such as
garage door openers, entrance gates,
door locks, home lighting, and security
systems. There are three HomeLink®
buttons on the sun visor, each of which
you can program for operation of one desired device. For details on the device
types which can be operated by this
system, consult the HomeLink website at
www.homelink.com or call 1-800-355-
3515.
Note the following about this system:
If your vehicle is equipped with the
HomeLink® Wireless Control System, it
complies with Part 15 of the Federal
Communication Commission Rules in the
U.S. and the RSS-210 of Industry Canada
in Canada. Its operation is subject to the
following two conditions:
(1) this device may not cause harmful
interference, and (2) this device must
accept any interference received, includ-
ing interference that may cause undesired
operation.
Changes and modifications to this system
by anyone other than an authorized
service facility could void authorization to
use this equipment.
HomeLink and the HomeLink house are
registered trademarks of Johnson Con-
trols, Inc.
WARNING
.
When programming the
HomeLink ®Wireless Control
System, you may be operating a
ProCarManuals.com
Page 228 of 409
6-20
Interior equipment
opener by pressing the programmed
HomeLink® button.&Programming other devicesTo program other devices such as door
locks, home lighting and security systems,
contact HomeLink at www.homelink.com
or call 1-800-355-3515.&Operating the HomeLink ®
Wireless Control SystemOnce programmed, the HomeLink® Wire-
less Control System can be used to
remote-control the devices to which its
buttons are programmed. To activate a
device, simply press the appropriate but-
ton. The indicator light illuminates, indicat-
ing that the signal is being transmitted.& Reprogramming a single
HomeLink ®button1. Press and hold the HomeLink® button
you wish to reprogram. DO NOT release
the button until step 4 has been com-
pleted.
2. When the HomeLink® indicator light
begins to flash slowly (after 20 seconds),
position the hand-held transmitter of the
device for which you wish to program the
button at 1 to 3 inches (25 to 76 mm) away
from the HomeLink® button surface. 3. Press and hold the hand-held trans-
mitter button. The HomeLink® indicator
light will flash, first slowly and then rapidly.
4. When the indicator light begins to flash
rapidly, release both buttons.
The programming for the previous device
is now erased and the new device can be
operated by pushing the HomeLink®
button.
&
Erasing HomeLink ®button
memory
NOTE. Performing this procedure erases
the memory of all the preprogrammed
buttons simultaneously. The memory
of individual buttons cannot be erased.
. It is recommended that upon the
sale of the vehicle, the memory of all
programmed HomeLink ®buttons be
erased for security purposes.
1. Press and hold the two outside buttons
until the indicator light begins to flash
(after 20 seconds).
2. Release both buttons.& In case a problem occursIf you cannot activate a device using the
corresponding HomeLink® button after
programming, contact HomeLink at www.homelink.com or call 1-800-355-
3515 for assistance.
ProCarManuals.com
Page 238 of 409
7-4
Starting and operating
WARNING
Before opening the fuel filler cap,
first touch the vehicle body or a
metal portion of the fuel pump or
similar object to discharge any
static electricity that may be present
on your body. If your body is carry-
ing an electrostatic charge, there is
a possibility that an electric spark
could ignite the fuel, which could
burn you. To avoid acquiring a new
static electric charge, do not get
back into the vehicle while refueling
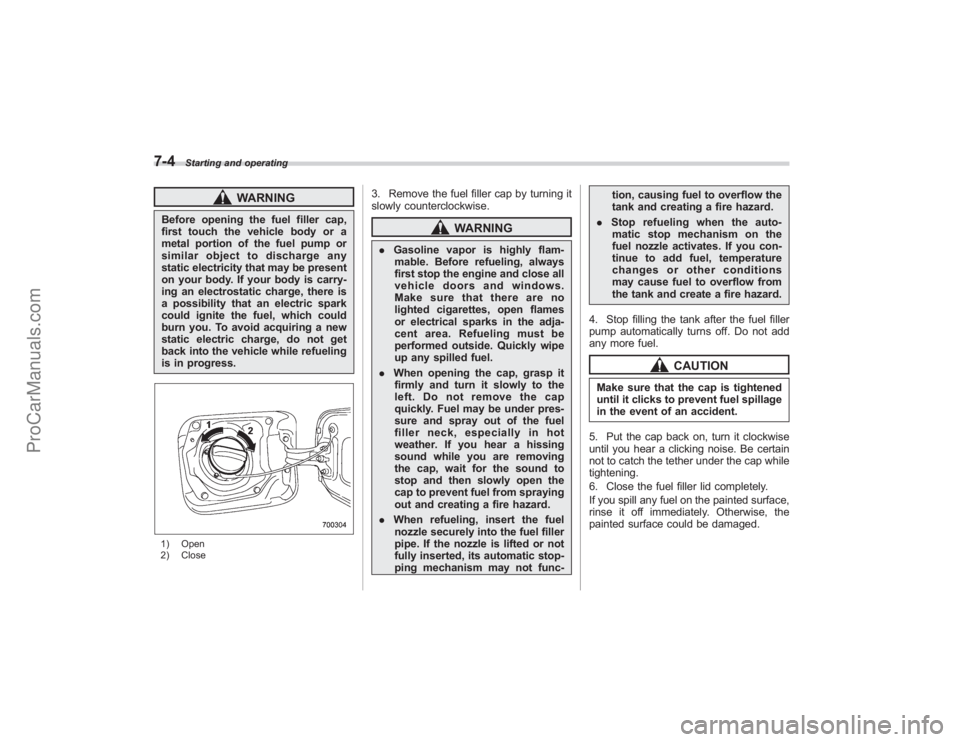
is in progress.1) Open
2) Close
3. Remove the fuel filler cap by turning it
slowly counterclockwise.
WARNING
.Gasoline vapor is highly flam-
mable. Before refueling, always
first stop the engine and close all
vehicle doors and windows.
Make sure that there are no
lighted cigarettes, open flames
or electrical sparks in the adja-
cent area. Refueling must be
performed outside. Quickly wipe
up any spilled fuel.
. When opening the cap, grasp it
firmly and turn it slowly to the
left. Do not remove the cap
quickly. Fuel may be under pres-
sure and spray out of the fuel
filler neck, especially in hot
weather. If you hear a hissing
sound while you are removing
the cap, wait for the sound to
stop and then slowly open the
cap to prevent fuel from spraying
out and creating a fire hazard.
. When refueling, insert the fuel
nozzle securely into the fuel filler
pipe. If the nozzle is lifted or not
fully inserted, its automatic stop-
ping mechanism may not func- tion, causing fuel to overflow the
tank and creating a fire hazard.
. Stop refueling when the auto-
matic stop mechanism on the
fuel nozzle activates. If you con-
tinue to add fuel, temperature
changes or other conditions
may cause fuel to overflow from
the tank and create a fire hazard.
4. Stop filling the tank after the fuel filler
pump automatically turns off. Do not add
any more fuel.
CAUTION
Make sure that the cap is tightened
until it clicks to prevent fuel spillage
in the event of an accident.
5. Put the cap back on, turn it clockwise
until you hear a clicking noise. Be certain
not to catch the tether under the cap while
tightening.
6. Close the fuel filler lid completely.
If you spill any fuel on the painted surface,
rinse it off immediately. Otherwise, the
painted surface could be damaged.
ProCarManuals.com