2008 SUBARU TRIBECA maintenance schedule
[x] Cancel search: maintenance schedulePage 336 of 409

11-14
Maintenance and service
Air cleaner element
WARNING
Do not operate the engine with the
air cleaner element removed. The air
cleaner element not only filters
intake air but also stops flames if
the engine backfires. If the air
cleaner element is not installed
when the engine backfires, you
could be burned.
CAUTION
When replacing the air cleaner ele-
ment, use a genuine SUBARU air
cleaner element. If it is not used,
there is the possibility of causing a
negative effect to the engine.
The air cleaner element functions as a
filter screen. When the element is perfo-
rated or removed, engine wear will be
excessive and engine life shortened.
The air cleaner element is a dry type. It is
unnecessary to clean or wash the ele-
ment.
& Replacing the air cleaner
elementReplace the air cleaner element according
to the maintenance schedule in the
“Warranty and Maintenance Booklet ”. Un-
der extremely dusty conditions, replace it
more frequently. It is recommended that
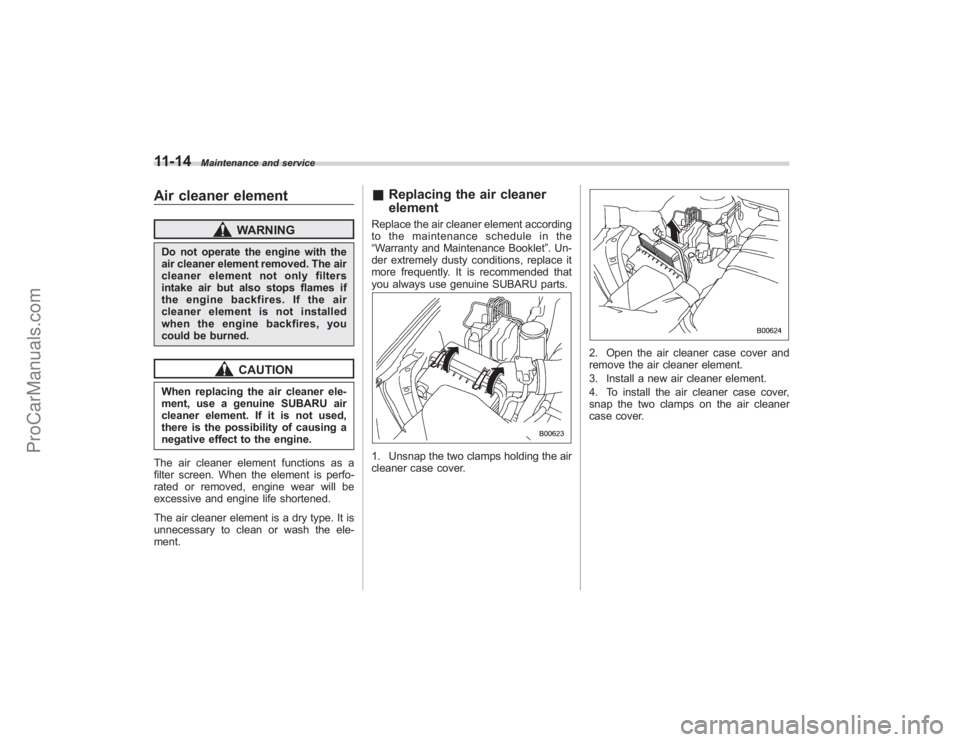
you always use genuine SUBARU parts.1. Unsnap the two clamps holding the air
cleaner case cover.
2. Open the air cleaner case cover and
remove the air cleaner element.
3. Install a new air cleaner element.
4. To install the air cleaner case cover,
snap the two clamps on the air cleaner
case cover.
ProCarManuals.com
Page 337 of 409

Spark plugsIt may be difficult to replace the spark
plugs. It is recommended that you have
the spark plugs replaced by your
SUBARU dealer.
The spark plugs should be replaced
according to the maintenance schedule
in the“Warranty and Maintenance Book-
let ”.& Recommended spark plugsSILFR6A (NGK)
Drive beltsThe alternator, power steering pump, and
air conditioner compressor depend on
drive belts. Satisfactory performance re-
quires that belt tension be correct.
It is unnecessary to check belt tension
periodically because your engine is
equipped with an automatic belt tension
adjuster. However, replacement of the belt
should be done according to the main-
tenance schedule in the “Warranty and
Maintenance Booklet ”. Consult your
SUBARU dealer for replacement.
If a belt is loose, cracked, or worn, contact
your SUBARU dealer.
Automatic transmission fluid& Checking the fluid levelThe automatic transmission fluid expands
largely as its temperature rises; the fluid
level differs according to fluid temperature.
Therefore, there are two different scales
for checking the level of hot fluid and cold
fluid on the dipstick.
Though the fluid level can be checked
without warming up the fluid on the
“COLD ”range, we recommend checking
the fluid level when the fluid is at operating
temperature.
! Checking the fluid level when the
fluid is hot
Check the fluid level monthly.
1. Drive the vehicle several miles to raise
the temperature of the transmission fluid
up to normal operating temperature; 158
to 1768 F (70 to 80 8C) is normal.
2. Park the vehicle on a level surface and
set the parking brake.
3. First shift the selector lever in each
position. Then shift it in the “P ” position,
and run the engine at idling speed.
Maintenance and service
11-15
– CONTINUED –
ProCarManuals.com
Page 343 of 409

Use only brake fluid from a sealed
container.&Recommended brake fluidFMVSS No. 116, fresh DOT 3 or 4 brake
fluid
Brake boosterIf the brake booster does not operate as
described in the following, have it checked
by your SUBARU dealer.
1. With the engine off, depress the brake
pedal several times, applying the same
pedal force each time. The distance the
pedal travels should not vary.
2. With the brake pedal depressed, start
the engine. The pedal should move
slightly down to the floor.
3. With the brake pedal depressed, stop
the engine and keep the pedal depressed
for 30 seconds. The pedal height should
not change.
4. Start the engine again and run for
approximately one minute then turn it off.
Depress the brake pedal several times to
check the brake booster. The brake
booster operates properly if the pedal
stroke decreases with each depression.
Brake pedalCheck the brake pedal free play and
reserve distance according to the main-
tenance schedule in the “Warranty and
Maintenance Booklet ”.&Checking the brake pedal
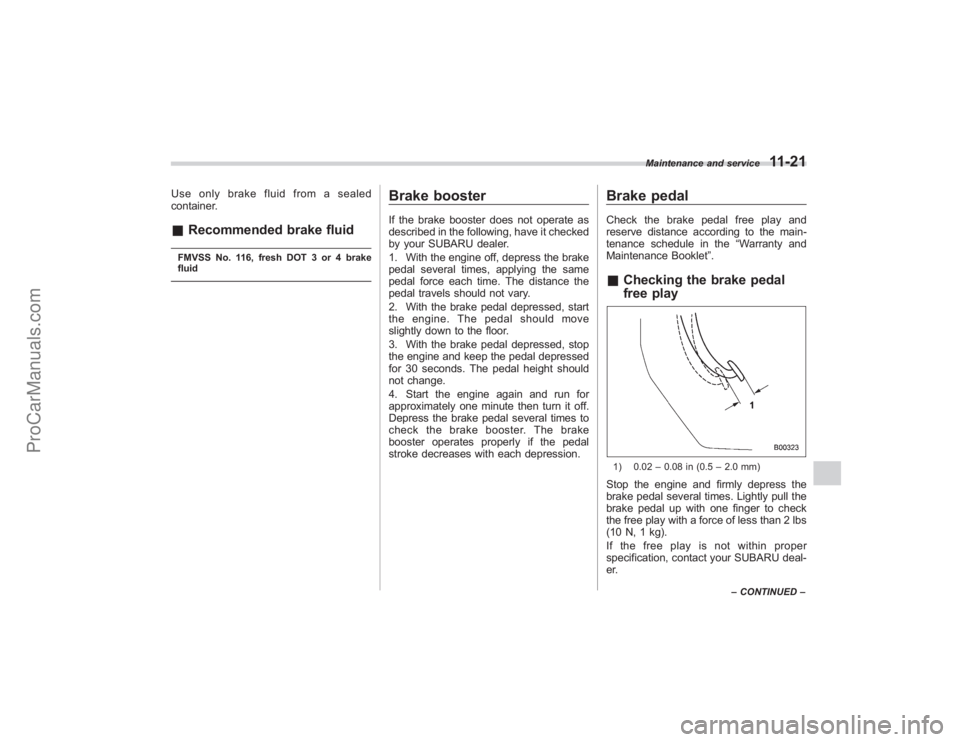
free play1) 0.02 –0.08 in (0.5 –2.0 mm)Stop the engine and firmly depress the
brake pedal several times. Lightly pull the
brake pedal up with one finger to check
the free play with a force of less than 2 lbs
(10 N, 1 kg).
If the free play is not within proper
specification, contact your SUBARU deal-
er.
Maintenance and service
11-21
–CONTINUED –
ProCarManuals.com
Page 345 of 409
![SUBARU TRIBECA 2008 Owners Manual 1.Drivethevehicleataspeedof
approximately 22 mph (35 km/h).
2. Press the parking brake pedal
SLOWLY and GENTLY. (Pressing with a
force of approximately 34 lbs [150 N, 15
kg].)
3. Drive the vehicle for SUBARU TRIBECA 2008 Owners Manual 1.Drivethevehicleataspeedof
approximately 22 mph (35 km/h).
2. Press the parking brake pedal
SLOWLY and GENTLY. (Pressing with a
force of approximately 34 lbs [150 N, 15
kg].)
3. Drive the vehicle for](/manual-img/17/58452/w960_58452-344.png)
1.Drivethevehicleataspeedof
approximately 22 mph (35 km/h).
2. Press the parking brake pedal
SLOWLY and GENTLY. (Pressing with a
force of approximately 34 lbs [150 N, 15
kg].)
3. Drive the vehicle for approximately
220 yards (200 meters) in this condition.
4. Wait 5 to 10 minutes for the parking
brake to cool down. Repeat this proce-
dure.
5. Check the parking brake stroke. If the
parking brake stroke is out of the specified
range, adjust it by turning the adjusting nut
located on the parking brake pedal.Parking brake stroke:5–6 notches / 67 lbs (300 N, 30 kg)
Parking brake strokeCheck the parking brake stroke according
to the maintenance schedule in the
“Warranty and Maintenance Booklet ”.
When the parking brake is properly
adjusted, braking power is fully applied
by pressing the pedal five to six notches
gently but firmly (approximately 67 lbs,
300 N, 30 kg). If the parking brake pedal
stroke is not within the specified range,
have the brake system checked and
adjusted at your SUBARU dealer.
Tires and wheels& Types of tiresYou should be familiar with type of tires
present on your vehicle.
! All season tires
The factory-installed tires on your new
vehicle are all season tires.
All season tires are designed to provide
an adequate measure of traction, handling
and braking performance in year-round
driving including snowy and icy road
conditions. However all season tires do
not offer as much traction performance as
winter (snow) tires in heavy or loose snow
or on icy roads.
All season tires are identified by “ALL
SEASON ”and/or “M+S”(Mud & Snow) on
the tire sidewall.
! Summer tires
Summer tires are high-speed capability
tires best suited for highway driving under
dry conditions.
Summer tires are inadequate for driving
on slippery roads such as on snow-
covered or icy roads.
If you drive your vehicle on snow-covered
or icy roads, we strongly recommend the
use of winter (snow) tires.
When installing winter tires, be sure to
Maintenance and service
11-23
– CONTINUED –
ProCarManuals.com
Page 401 of 409

High beam indicator light............................................ 3-20
High/low beam change (dimmer) .................................. 3-27
Horn ........................................................................\
. 3-42
Hose and connections .............................................. 11-11
I
Ignition switch ............................................................. 3-3
Light ...................................................................... 3-4
Illuminated entry ......................................................... 2-9
Illumination brightness control ...................................... 3-28
Immobilizer. ................................................................ 2-3
Indicator light .......................................................... 2-4
Immobilizer system Indicator light ......................................................... 3-19
Indicator light Cruise control ........................................................ 3-20
Cruise control set ................................................... 3-21
Front fog ............................................................... 3-21
Headlight .............................................................. 3-21
High beam ............................................................ 3-20
Security ................................................................ 3-19
Selector lever/Gear position .................................... 3-20
SPORT mode ........................................................ 3-20
Traction Control system OFF ................................... 3-18
Turn signal ............................................................ 3-20
Vehicle Dynamics Control operation ......................... 3-18
Indicator lights Vehicle Dynamics Control ............................... 7-25, 7-25
Inside mirror .............................................................. 3-38
Interior light ................................................................ 6-2 J
Jack and jack handle
................................................. 9-19
Jump starting ............................................................ 9-11
K
Key Keyless entry system ............................................... 2-7
Number .................................................................. 2-2
Reminder chime ...................................................... 3-4
Replacement. .......................................................... 2-4
Keys ........................................................................\
.. 2-2
L
Leather seat materials ................................................ 10-5
Light Cargo area ............................................................. 6-2
Control switch ....................................................... 3-26
Dome ..................................................................... 6-2
Map ....................................................................... 6-3
Rear gate ............................................................... 6-3
Loading your vehicle .................................................. 8-11
Low fuel warning light .......................................... 3-8, 3-17
Low tire pressure warning light .................................... 3-14
Lower and tether anchorage ....................................... 1-37
Lumbar support ........................................................... 1-6
M
Main fuse ................................................................ 11-39
Maintenance Precautions .......................................................... 11-3
Schedule .............................................................. 11-3
Index
14-5
ProCarManuals.com