Page 147 of 409
&High/low beam change (dim-
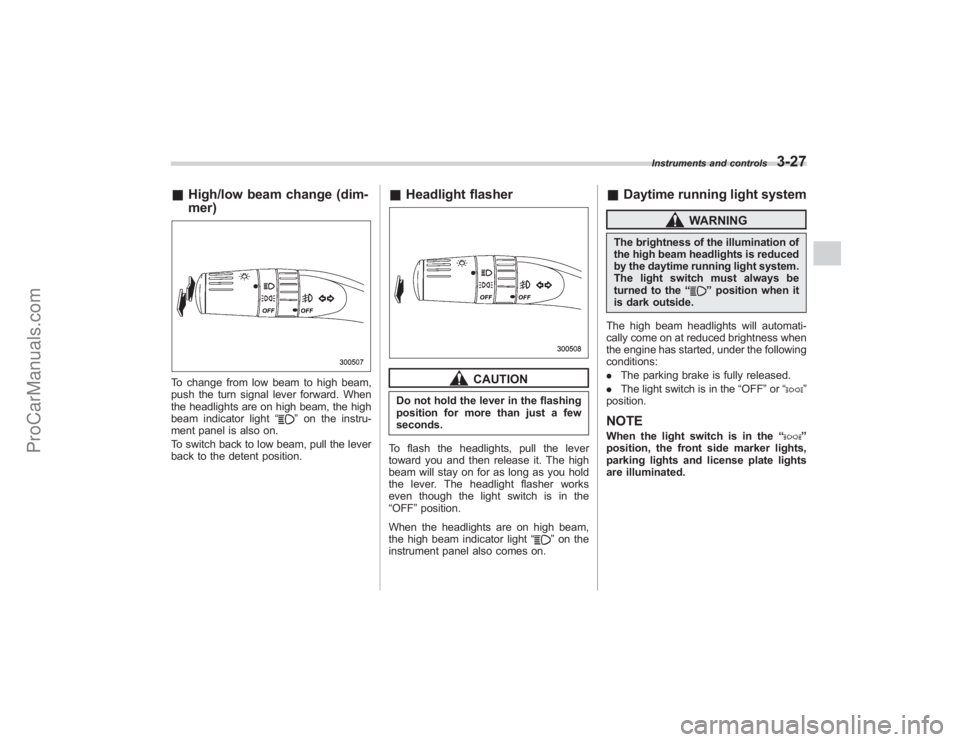
mer)To change from low beam to high beam,
push the turn signal lever forward. When
the headlights are on high beam, the high
beam indicator light “
”on the instru-
ment panel is also on.
To switch back to low beam, pull the lever
back to the detent position.
& Headlight flasher
CAUTION
Do not hold the lever in the flashing
position for more than just a few
seconds.
To flash the headlights, pull the lever
toward you and then release it. The high
beam will stay on for as long as you hold
the lever. The headlight flasher works
even though the light switch is in the
“OFF ”position.
When the headlights are on high beam,
the high beam indicator light “
”on the
instrument panel also comes on.
& Daytime running light system
WARNING
The brightness of the illumination of
the high beam headlights is reduced
by the daytime running light system.
The light switch must always be
turned to the “
”position when it
is dark outside.
The high beam headlights will automati-
cally come on at reduced brightness when
the engine has started, under the following
conditions:
. The parking brake is fully released.
. The light switch is in the “OFF”or “
”
position.
NOTEWhen the light switch is in the “
”
position, the front side marker lights,
parking lights and license plate lights
are illuminated.
Instruments and controls
3-27
ProCarManuals.com
Page 148 of 409
3-28
Instruments and controls
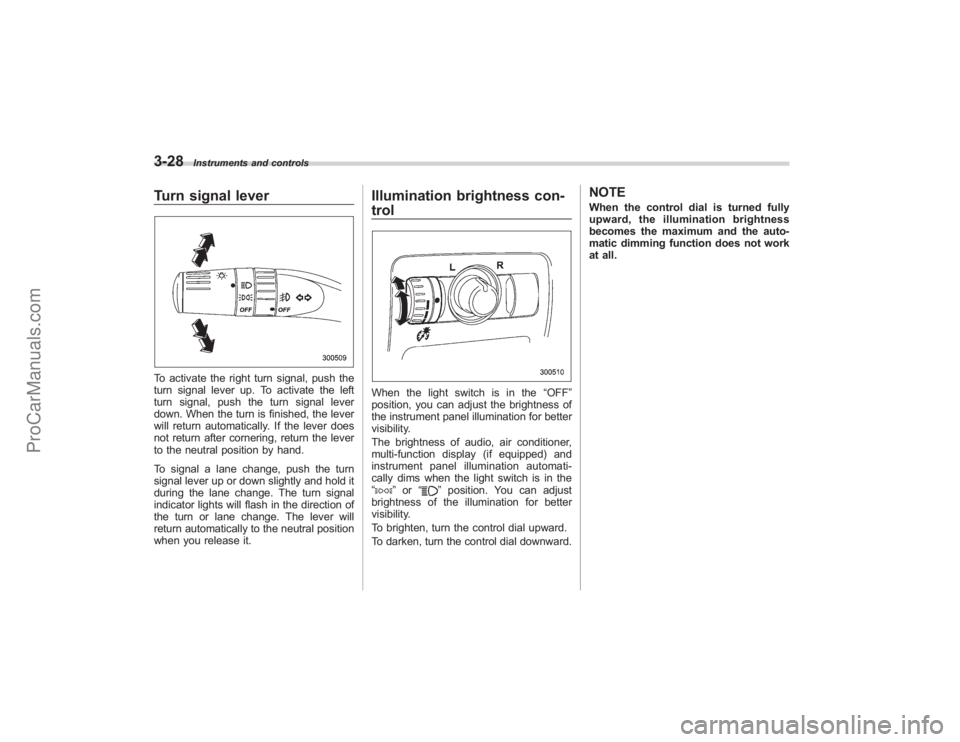
Turn signal leverTo activate the right turn signal, push the
turn signal lever up. To activate the left
turn signal, push the turn signal lever
down. When the turn is finished, the lever
will return automatically. If the lever does
not return after cornering, return the lever
to the neutral position by hand.
To signal a lane change, push the turn
signal lever up or down slightly and hold it
during the lane change. The turn signal
indicator lights will flash in the direction of
the turn or lane change. The lever will
return automatically to the neutral position
when you release it.
Illumination brightness con-
trolWhen the light switch is in the“OFF”
position, you can adjust the brightness of
the instrument panel illumination for better
visibility.
The brightness of audio, air conditioner,
multi-function display (if equipped) and
instrument panel illumination automati-
cally dims when the light switch is in the
“
” or “
”position. You can adjust
brightness of the illumination for better
visibility.
To brighten, turn the control dial upward.
To darken, turn the control dial downward.
NOTEWhen the control dial is turned fully
upward, the illumination brightness
becomes the maximum and the auto-
matic dimming function does not work
at all.
ProCarManuals.com
Page 157 of 409
Rear window defogger but-
tonThe rear window defogger operates only
when the ignition switch is in the“ON”
position.
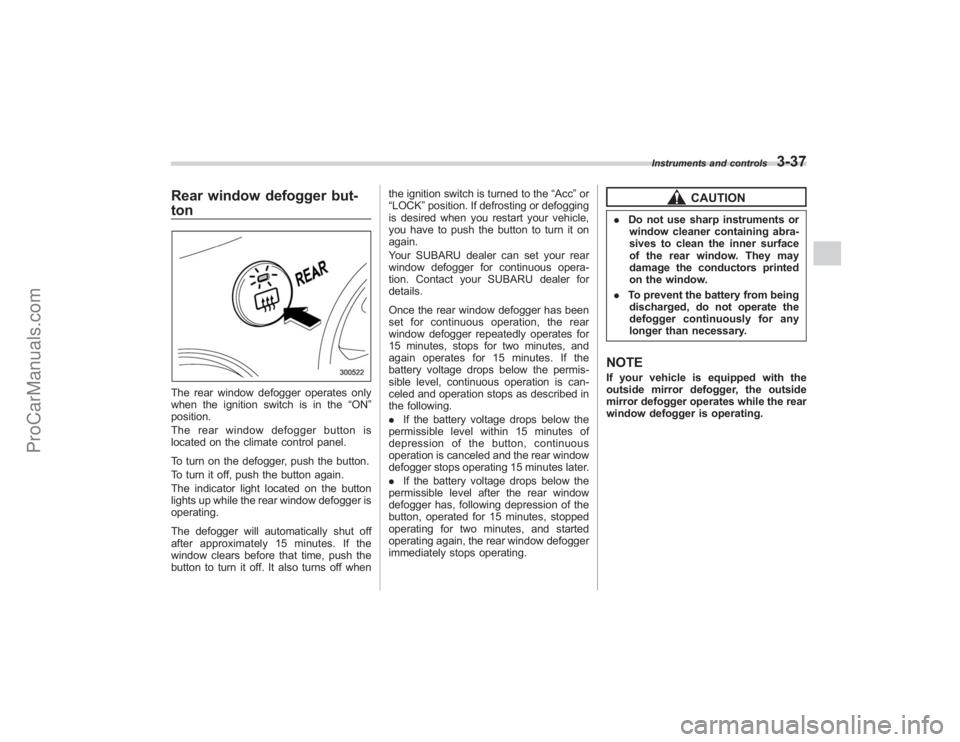
The rear window defogger button is
located on the climate control panel.
To turn on the defogger, push the button.
To turn it off, push the button again.
The indicator light located on the button
lights up while the rear window defogger is
operating.
The defogger will automatically shut off
after approximately 15 minutes. If the
window clears before that time, push the
button to turn it off. It also turns off when the ignition switch is turned to the
“Acc ”or
“LOCK” position. If defrosting or defogging
is desired when you restart your vehicle,
you have to push the button to turn it on
again.
Your SUBARU dealer can set your rear
window defogger for continuous opera-
tion. Contact your SUBARU dealer for
details.
Once the rear window defogger has been
set for continuous operation, the rear
window defogger repeatedly operates for
15 minutes, stops for two minutes, and
again operates for 15 minutes. If the
battery voltage drops below the permis-
sible level, continuous operation is can-
celed and operation stops as described in
the following.
. If the battery voltage drops below the
permissible level within 15 minutes of
depression of the button, continuous
operation is canceled and the rear window
defogger stops operating 15 minutes later.
. If the battery voltage drops below the
permissible level after the rear window
defogger has, following depression of the
button, operated for 15 minutes, stopped
operating for two minutes, and started
operating again, the rear window defogger
immediately stops operating.
CAUTION
. Do not use sharp instruments or
window cleaner containing abra-
sives to clean the inner surface
of the rear window. They may
damage the conductors printed
on the window.
. To prevent the battery from being
discharged, do not operate the
defogger continuously for any
longer than necessary.NOTEIf your vehicle is equipped with the
outside mirror defogger, the outside
mirror defogger operates while the rear
window defogger is operating.
Instruments and controls
3-37
ProCarManuals.com
Page 170 of 409
4-8
Climate control
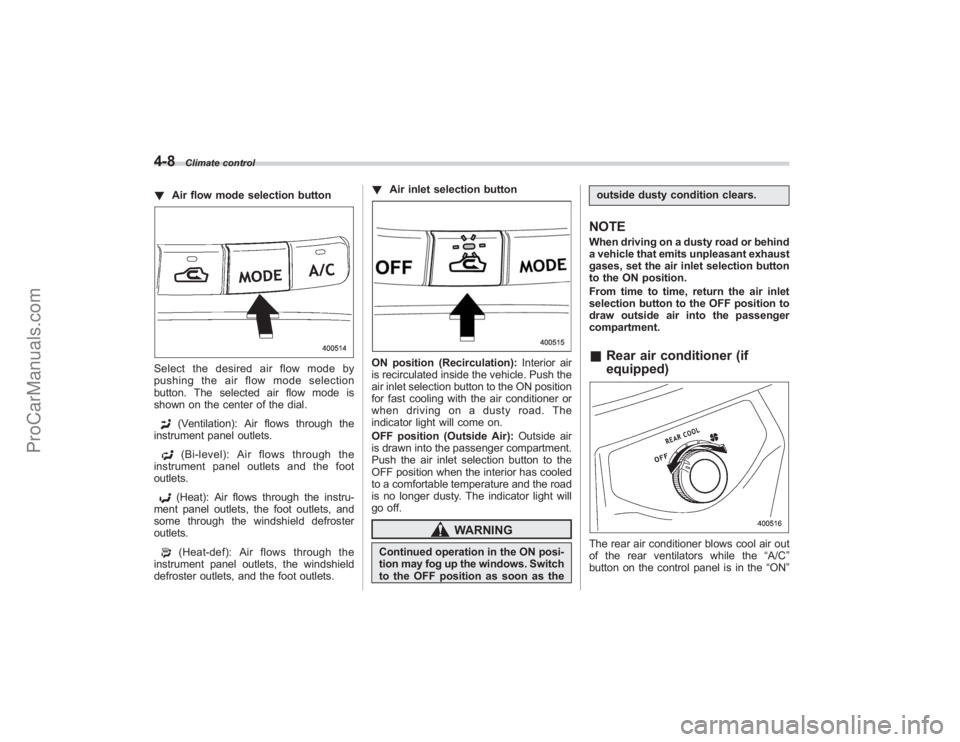
!Air flow mode selection buttonSelect the desired air flow mode by
pushing the air flow mode selection
button. The selected air flow mode is
shown on the center of the dial.
(Ventilation): Air flows through the
instrument panel outlets.(Bi-level): Air flows through the
instrument panel outlets and the foot
outlets.(Heat): Air flows through the instru-
ment panel outlets, the foot outlets, and
some through the windshield defroster
outlets.(Heat-def): Air flows through the
instrument panel outlets, the windshield
defroster outlets, and the foot outlets. !
Air inlet selection button
ON position (Recirculation): Interior air
is recirculated inside the vehicle. Push the
air inlet selection button to the ON position
for fast cooling with the air conditioner or
when driving on a dusty road. The
indicator light will come on.
OFF position (Outside Air): Outside air
is drawn into the passenger compartment.
Push the air inlet selection button to the
OFF position when the interior has cooled
to a comfortable temperature and the road
is no longer dusty. The indicator light will
go off.
WARNING
Continued operation in the ON posi-
tion may fog up the windows. Switch
to the OFF position as soon as the outside dusty condition clears.
NOTEWhen driving on a dusty road or behind
a vehicle that emits unpleasant exhaust
gases, set the air inlet selection button
to the ON position.
From time to time, return the air inlet
selection button to the OFF position to
draw outside air into the passenger
compartment.&
Rear air conditioner (if
equipped)The rear air conditioner blows cool air out
of the rear ventilators while the “A/C”
button on the control panel is in the “ON”
ProCarManuals.com
Page 173 of 409
Air filtration systemReplace the filter element according to the
replacement schedule shown in the fol-
lowing. This schedule should be followed
to maintain the filter’s dust collection
ability. Under extremely dusty conditions,
the filter should be replaced more fre-
quently. It is recommended that you have
your filter checked or replaced by your
SUBARU dealer. For replacement, we
recommend the use of a genuine
SUBARU air filter kit.Replacement schedule:
Every 15 months or 15,000 miles (24,000
km) whichever comes first
& Replacing the air filter1. Remove the instrument panel side
cover.NOTEThe instrument panel side cover is held
in place with four pins.
2. Unhook the strap.3. Remove the glove box by detaching
the one clip on the side.
Climate control
4-11
–CONTINUED –
ProCarManuals.com
Page 174 of 409
4-12
Climate control
4. Remove the air filter cover by detach-
ing the five clips.5. Unhook the air filter and draw it out.
6. Replace the air filter with a new one.
7. Install the air filter cover.
8. Install the glove box.9. Attach the strap to the hook.
10. Secure the glove box with the one clip.
11. Install the instrument panel side cover.12. Label installation
Attach the caution label to the driver’s
door.
ProCarManuals.com
Page 251 of 409
“R”position.
. Always set the parking brake when
parking your vehicle. Do not hold the
vehicle with only the transmission.
. Do not keep the vehicle in a stationary
position on an uphill grade by using the
“D ”position. Use the brake instead.
. The engine may, on rare occasions,
knock when the vehicle rapidly acceler-
ates or rapidly pulls away from a standstill.
This phenomenon does not indicate a
problem.
. A slight reduction in output torque may
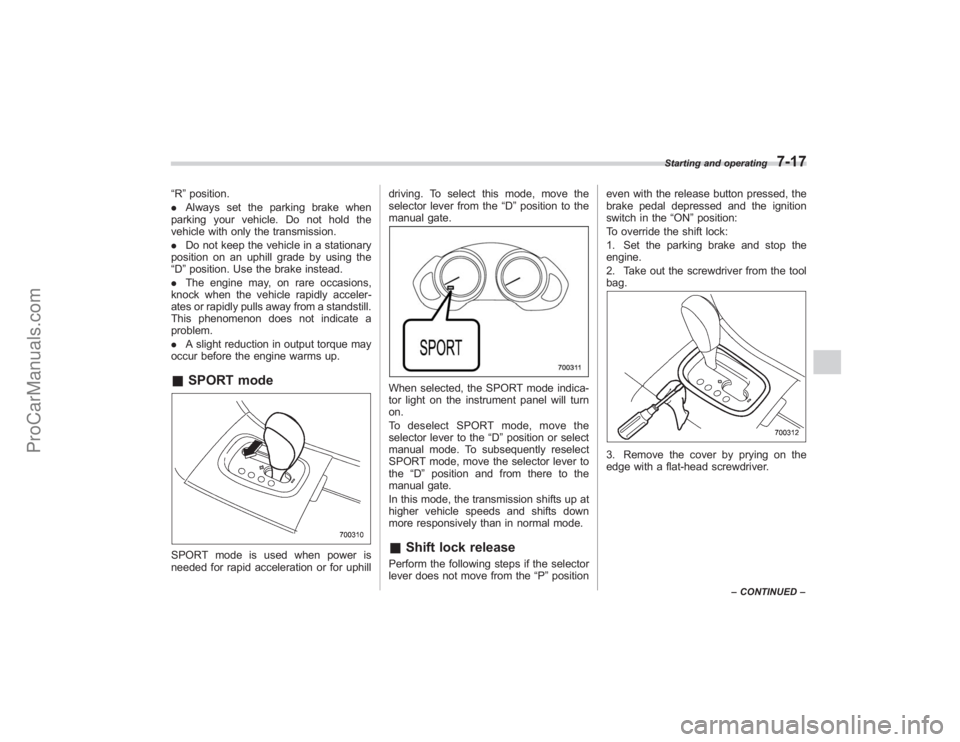
occur before the engine warms up.& SPORT modeSPORT mode is used when power is
needed for rapid acceleration or for uphill driving. To select this mode, move the
selector lever from the
“D”position to the
manual gate.
When selected, the SPORT mode indica-
tor light on the instrument panel will turn
on.
To deselect SPORT mode, move the
selector lever to the “D”position or select
manual mode. To subsequently reselect
SPORT mode, move the selector lever to
the “D”position and from there to the
manual gate.
In this mode, the transmission shifts up at
higher vehicle speeds and shifts down
more responsively than in normal mode.& Shift lock releasePerform the following steps if the selector
lever does not move from the “P”position even with the release button pressed, the
brake pedal depressed and the ignition
switch in the
“ON”position:
To override the shift lock:
1. Set the parking brake and stop the
engine.
2. Take out the screwdriver from the tool
bag.
3. Remove the cover by prying on the
edge with a flat-head screwdriver.
Starting and operating
7-17
– CONTINUED –
ProCarManuals.com
Page 317 of 409
Exterior care................................................... 10-2
Washing......................................................... 10-2
Waxing and polishing ..................................... 10-3
Cleaning aluminum wheels ............................. 10-3
Corrosion protection...................................... 10-4
Most common causes of corrosion ................. 10-4
To help prevent corrosion ............................... 10-4
Cleaning the interior...................................... 10-5
Seat fabric...................................................... 10-5
Leather seat materials ..................................... 10-5
Synthetic leather upholstery ............................ 10-5
Climate control panel, audio panel, instrument panel, console panel, switches, combination
meter, and other plastic surface .................... 10-5
Navigation monitor (if equipped) ........................ 10-6
Appearance care
10
ProCarManuals.com