2008 Seat Ibiza 5D service
[x] Cancel search: servicePage 27 of 70

Radio 24
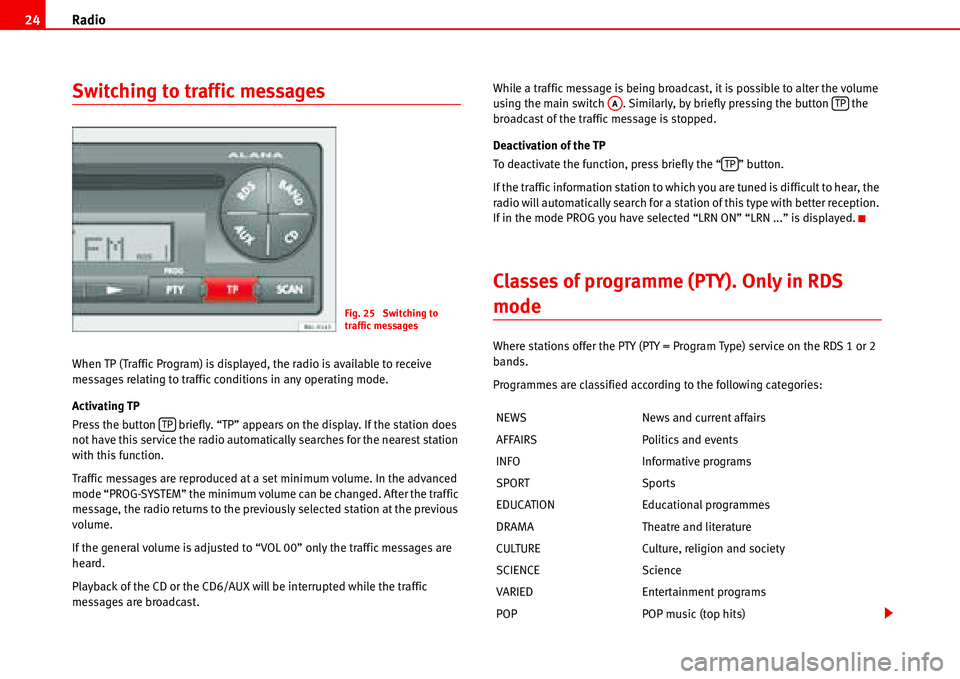
Switching to traffic messages
When TP (Traffic Program) is displayed, the radio is available to receive
messages relating to traffic conditions in any operating mode.
Activating TP
Press the button briefly. “TP” appears on the display. If the station does
not have this service the radio automatically searches for the nearest station
with this function.
Traffic messages are reproduced at a set minimum volume. In the advanced
mode “PROG-SYSTEM” the minimum volume can be changed. After the traffic
message, the radio returns to the previously selected station at the previous
volume.
If the general volume is adjusted to “VOL 00” only the traffic messages are
heard.
Playback of the CD or the CD6/AUX will be interrupted while the traffic
messages are broadcast.While a traffic message is being broadcast, it is possible to alter the volume
using the main switch . Similarly, by briefly pressing the button the
broadcast of the traffic message is stopped.
Deactivation of the TP
To deactivate the function, press briefly the “ ” button.
If the traffic information station to which you are tuned is difficult to hear, the
radio will automatically search for a station of this type with better reception.
If in the mode PROG you have selected “LRN ON” “LRN ...” is displayed.
Classes of programme (PTY). Only in RDS
mode
Where stations offer the PTY (PTY = Program Type) service on the RDS 1 or 2
bands.
Programmes are classified according to the following categories:
Fig. 25 Switching to
traffic messages
TPNEWS News and current affairs
AFFAIRS Politics and events
INFO Informative programs
SPORT Sports
EDUCATION Educational programmes
DRAMA Theatre and literature
CULTURE Culture, religion and society
SCIENCE Science
VARIED Entertainment programs
POP POP music (top hits)
AATP
TP
Page 45 of 70

USB* Connection 42
USB* Connection
Connecting a memory stick / MP3 player
A USB port is in the passenger glove compartment.
Connecting a memory stick in the passenger glove compartment
– Open the passenger glove compartment.
– Lower the top compartment.
– Connect the Memory stick in the USB port, or
– Connect the MP3 player in the USB port using a conventional
USB extension cable.
– Close the lid.Disconnecting the memory stick
– Change the input device, for example from CD to radio FM.
– Then disconnect the memory stick or the extension cable from
the USB port �Ÿ.
Once the device is connected the songs stored can be played using the car
radio fitted.
WARNING
Please keep your attention on driving as a priority!
•Adjust the volume so that external noise can be heard at all times, such
as police, fire and emergency services sirens.
•Never remove the memory stick or MP3 player when driving.
Caution
•The temperature range of the Memory stick and MP3 is limited and is
normally between 0° and 40°C. Therefore, do not leave it in the vehicle for
long.
•Never connect the MP3 player directly into the USB port, as it may be
damaged. Always use an extension cable.
•Never disconnect the device while USB port (CD) is selected as source.
The device may be damaged.
•The USB port is only for connectiing a memory stick or MP3 player. Hard
disks or USB hubs etc. cannot be connected
•The maximum voltage of the the memory stick or MP3 should not exceed
2.5 watts (500mA/5V)
Fig. 36 USB connection
Page 49 of 70

USB* Connection 46
As many as 99 tracks can be shown, although all those contained in the
folder can be played
A title with three figures will not show the hundreds on the screen, only the
last two.
The music can be controlled via the radio keys. Choosing and playing songs,
fast forward and rewind and random playback are described in the radio
manual of your vehicle.
If there are folders in the root directory individual files will not be played, so
all data in the root directory should be in folders.
Storing files in a memory stick or MP3 player
Store files in folders instead of using the root directory of the memory stick or
player. In this way the songs can be stored in order (eg all the songs in a
certain style in the same folder).
The function keys to of the radio can only select the first 5 folders.
If there are more than 6 folders in the memory stick or MP3 player their
content cannot be played.
The folders can be subdivided into subfolders eg different albums by an
artist.
Example of a music folder structure:
Playback of music via USB connection
Connect the memory stick or MP3 player with the USB extension cable to the
USB port.
The screen will show the first 6 folders detected by the USB port, displayed as
CD 1 to CD 6. Folders without music files will not be included.
If there are more than 6 music folders in the device, the exact number of
folders can be shown using the CD options.If the music files are not classified into folders, but stored directly in the root
directory, the radio will read the files and play them in the same order. The
display then shows CD 1.
Music files and folders will be played in alphabetical order, so files begin-
niing woth numbers will be selected first, before those with letters. A file with
the name 1XXXXXXXX will be played before another with the name AAAAAA.
Screen indications
When selecting a music file with the CD keys, it appears iin the radio equip-
ment screen Track 1.
As many as 99 tracks can be shown.
WARNING
Please keep your attention on driving as a priority!
•Adjust the volume so that external noise can be heard at all times, such
as police, fire and emergency services sirens.
•Never remove the memory stick or MP3 player when driving.
Note
•Before turning off the engine, the USB port memorises the position of the
song playing As long as the content is not changed, the system will start
again from this point.
•If many songs are skipped, there may be a delay during playback.
•The detection of the memory stick or MP3 playere requires a few seconds
depending on the type of memory used.
•The title of the song is not shown on the screen.
CD 1CD 6
Page 62 of 70

Coding59
Do not press button , as this number is already correctly entered. “1700”
appears on the display.
Press button three times. “1703” appears on the display.
To confirm the safety code which has been entered:
Press the button briefly. “SAFE” appears on the display.
To quit the PROG mode:
Press the button until the confirmation signal is heard.
Waiting times
To prevent the code from becoming deactivated by trial and error, there is a
one hour waiting time after each incorrect attempt. During this period, the
apparatus can be switched on and off, but no sound will be heard.
During the waiting time, the apparatus must be left on. Until the waiting time
is up, “2 SAFE” is displayed. When the time is up, the number of the next
attempt is displayed, for example, “2 1000”.
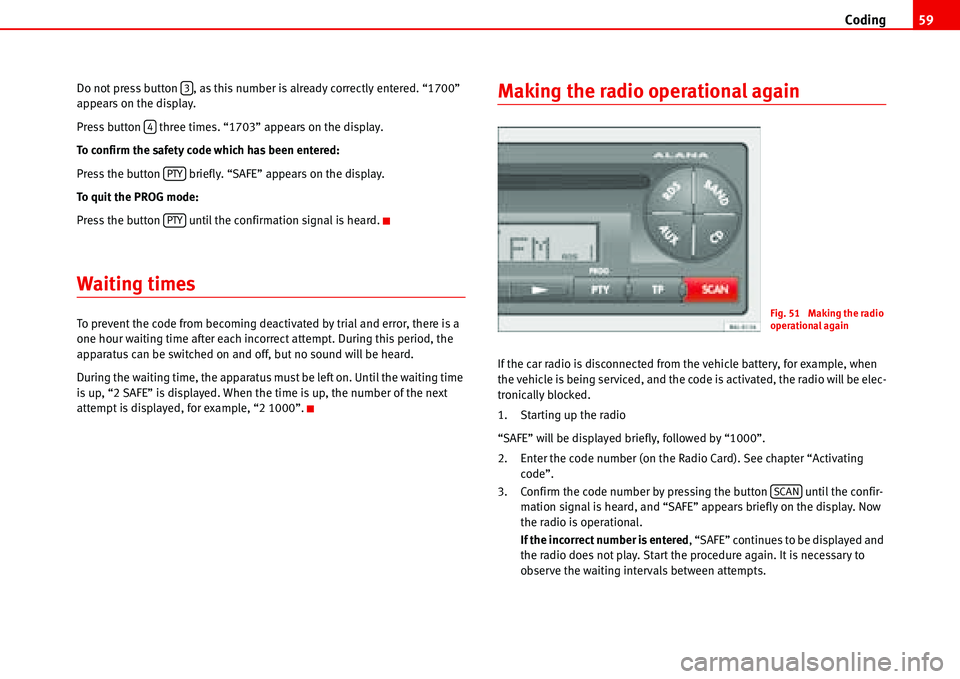
Making the radio operational again
If the car radio is disconnected from the vehicle battery, for example, when
the vehicle is being serviced, and the code is activated, the radio will be elec-
tronically blocked.
1. Starting up the radio
“SAFE” will be displayed briefly, followed by “1000”.
2. Enter the code number (on the Radio Card). See chapter “Activating
code”.
3. Confirm the code number by pressing the button until the confir-
mation signal is heard, and “SAFE” appears briefly on the display. Now
the radio is operational.
If the incorrect number is entered, “SAFE” continues to be displayed and
the radio does not play. Start the procedure again. It is necessary to
observe the waiting intervals between attempts.
3
4
PTY
PTY
Fig. 51 Making the radio
operational again
SCAN
Page 64 of 70

Other information61
Other information
Radio Data System (RDS)
The RDS is an information system whose signals are broadcast by many
stations, in addition to the radio programmes on FM.
Program Service
On RDS programmes, the name of the station is shown on the display, for
example, Flash FM at 105.7 of the dial.
Remember that RDS programmes may have different regional programmes
and different station names.
Enhanced Other Network (EON)
This function allows you to listen to traffic messages in the RDS 1 and 2
ranges, even when an RDS programme has been tuned without its own
service of traffic messages. Assuming that the radio station broadcasting the tuned RDS programme broadcasts another RDS programme with traffic
messages.
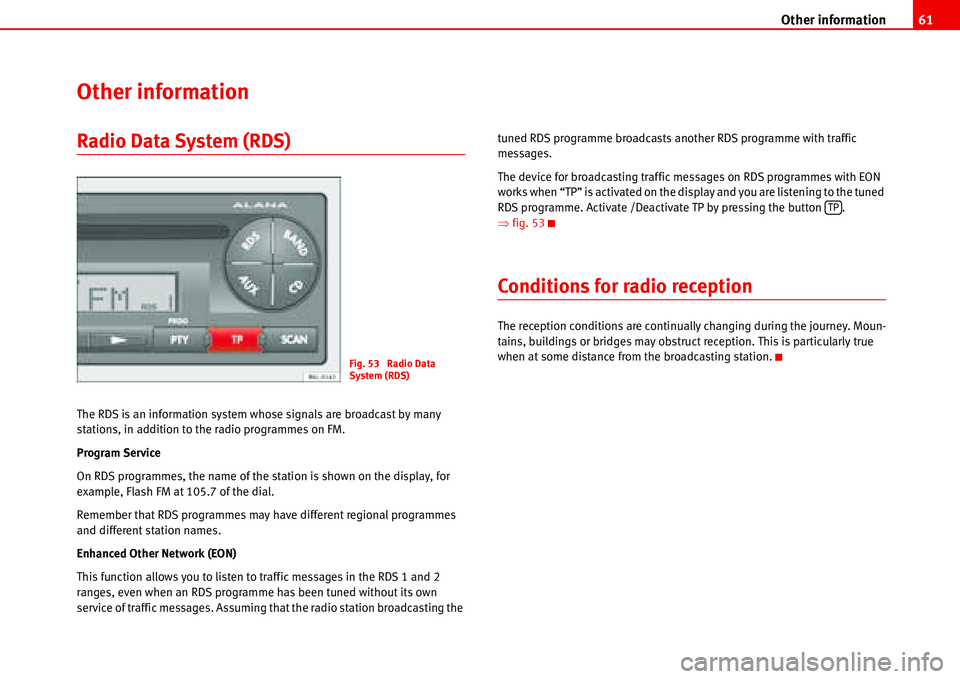
The device for broadcasting traffic messages on RDS programmes with EON
works when “TP” is activated on the display and you are listening to the tuned
RDS programme. Activate /Deactivate TP by pressing the button .
�Ÿfig. 53
Conditions for radio reception
The reception conditions are continually changing during the journey. Moun-
tains, buildings or bridges may obstruct reception. This is particularly true
when at some distance from the broadcasting station.
Fig. 53 Radio Data
System (RDS)
TP