2008 Seat Ibiza 5D ignition
[x] Cancel search: ignitionPage 197 of 260
Checking and refilling levels195
Safety First
Operating instructions
Practical tips
Te c h n i c a l D a t a
BatteryWarnings on handling the battery
WARNING
Always be aware of the danger of injury and chemical burns as well as the
risk of accident or fire when working on the battery and the electrical
system:•
Wear eye protection. Protect your eyes , skin and clothing from acid and
particles containing lead.
•
Battery acid is very corrosive and caustic. Wear protective gloves and
eye protection. Do not tilt the batteries. This could spill acid through the
vents. Rinse battery acid from eyes immediately for several minutes with
clear water. Then seek medical care immediately. Neutralize any acid
splashes on the skin or clothing with a soapy solution, and rinse off with
plenty of water. If acid is swallowed by mistake, consult a doctor immedi-
ately.
•
Fires, sparks, naked lights and smoking are prohibited. When handling
cables and electrical equipment, avoid causing sparks and electrostatic charge. Never short the battery terminals. High-energy sparks can cause
injury.
•
A highly explosive mixture of gases is released when the battery is
under charge. The batteries should be charged in a well-ventilated room
only.
•
Keep children away from acid and batteries.
•
Before working on the electrical system, you must switch off the
engine, the ignition and all consumers. The negative cable on the battery
must be disconnected. When a light bulb is changed, you need only switch
off the light.
•
Deactivate the anti-theft alarm by unlocking the vehicle before you
disconnect the battery! The alar m will otherwise be triggered.
•
When disconnecting the battery from the vehicle electrical system,
disconnect first the negative ca ble and then the positive cable.
•
Switch off all electrical consumers before reconnecting the battery.
Reconnect first the positive cable and then the negative cable. Never
reverse the polarity of the connections. This could cause an electrical fire.
•
Never charge a frozen battery, or one which has thawed. This could
result in explosions and chemical burns. Always replace a battery which
has frozen. A flat battery can freeze at temperatures around 0
°C.
•
Ensure that the vent hose is always connected to the battery.
•
Never use a defective battery. This may be fatally explosive. Replace a
damaged battery immediately.Caution
•
Never disconnect the battery if the ignition is switched on or if the engine
is running. This could damage the electrical system or electronic compo-
nents.
•
Do not expose the battery to direct sunlight over a long period of time, as
the intense ultraviolet radiation can damage the battery housing.
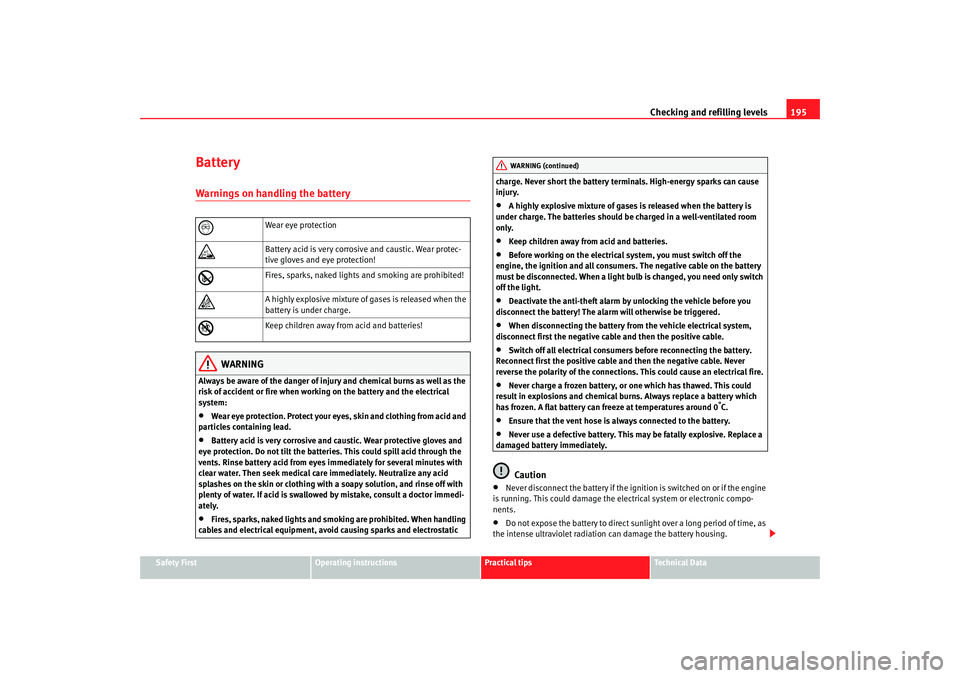
Wear eye protection
Battery acid is very corrosive and caustic. Wear protec-
tive gloves and eye protection!
Fires, sparks, naked lights and smoking are prohibited!
A highly explosive mixture of gases is released when the
battery is under charge.
Keep children away from acid and batteries!
WARNING (continued)
Ibiza250_angles Seite 195 Dienstag, 5. August 2008 1:11 13
Page 213 of 260
If and when211
Safety First
Operating instructions
Practical tips
Te c h n i c a l D a t a
Tyre repair
The following sections describe the procedures for repairing
a tyre.Using the sealing compound
– The instructions on the container give detailed information on
how to use the sealing compound.
Inflating the tyre.
– Remove the air compressor and hose from the container.
– Screw the retaining nut onto the valve.
– Plug the compressor cable into a 12 volt power point.
– Turn on compressor and monitor the pressure shown on the pres- sure gauge.
Completing the repair
– Remove the compressor hose from the valve.
– Fit the valve cap.
– Unplug the compressor from the socket.
– Return all tools to their proper storing location.
NoteThe compressor should never be allowed to run for longer than 6 minutes.
FusesChanging a fuse
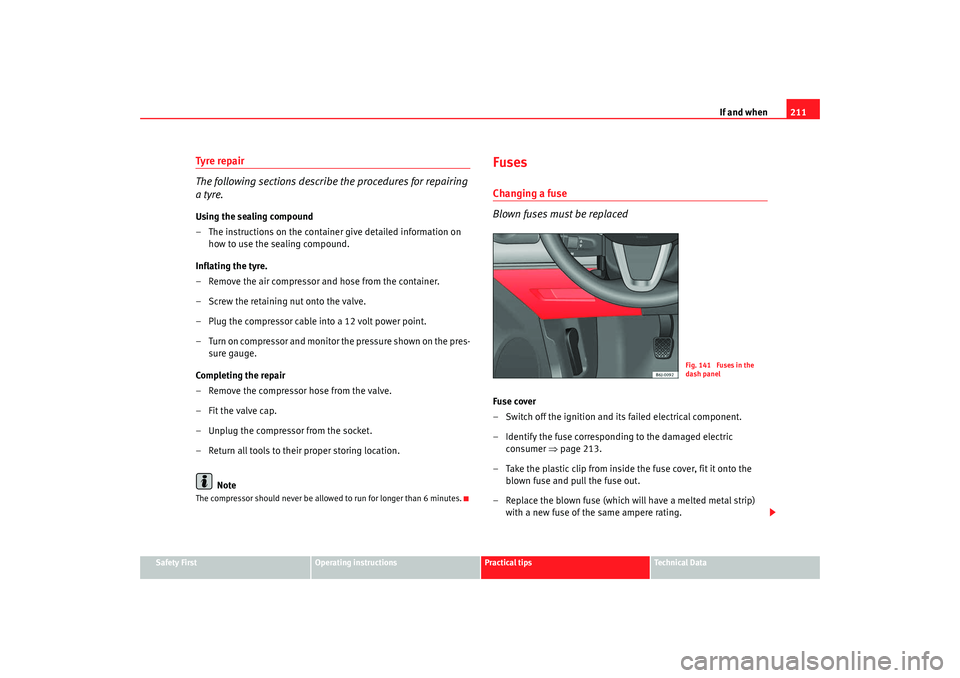
Blown fuses must be replacedFuse cover
– Switch off the ignition and its failed electrical component.
– Identify the fuse corresponding to the damaged electric consumer ⇒page 213.
– Take the plastic clip from inside the fuse cover, fit it onto the
blown fuse and pull the fuse out.
– Replace the blown fuse (which will have a melted metal strip) with a new fuse of the same ampere rating.
Fig. 141 Fuses in the
dash panel
Ibiza250_angles Seite 211 Dienstag, 5. August 2008 1:11 13
Page 229 of 260
If and when227
Safety First
Operating instructions
Practical tips
Te c h n i c a l D a t a
Jump leads
Jump leads must comply with the standard
DIN 72553 (see manufacturer's
documentation). The wire cross section must be at least 25 mm
2 for petrol
engines and at least 35 mm
2 for diesel engines.
Note
•
The vehicles must not touch each other, otherwise electricity could flow as
soon as the positive terminals are connected.
•
The discharged battery must be properly connected to the vehicle elec-
trical system.
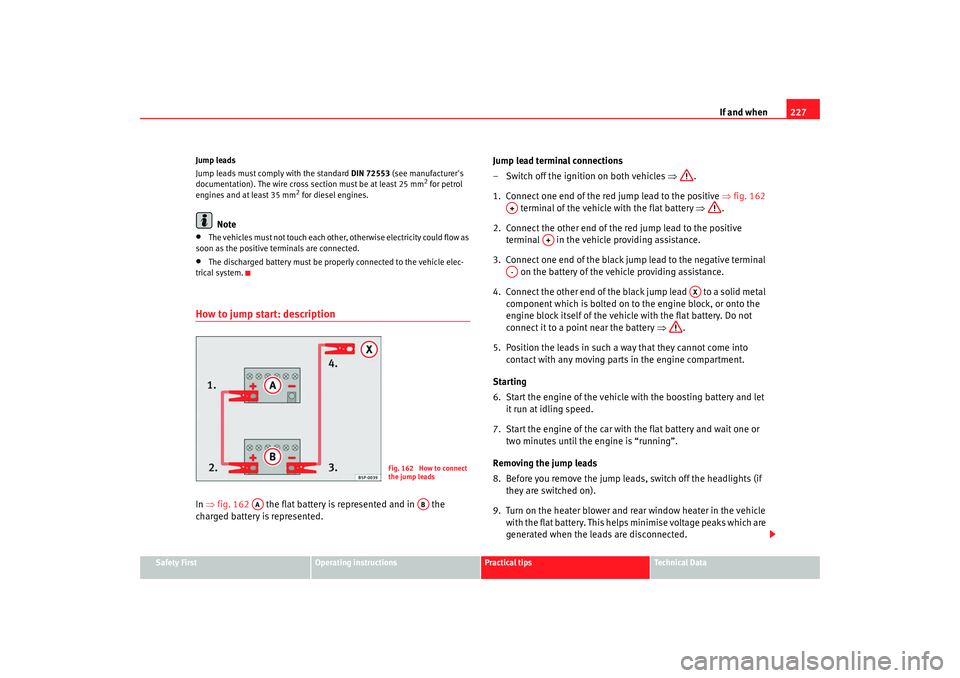
How to jump start: descriptionIn ⇒ fig. 162 the flat battery is represented and in the
charged battery is represented. Jump lead terminal connections
– Switch off the ignition on both vehicles
⇒.
1. Connect one end of the red jump lead to the positive ⇒fig. 162
terminal of the vehicle with the flat battery ⇒.
2. Connect the other end of the red jump lead to the positive terminal in the vehicle providing assistance.
3. Connect one end of the black jump lead to the negative terminal on the battery of the vehicle providing assistance.
4. Connect the other end of the black jump lead to a solid metal component which is bolted on to the engine block, or onto the
engine block itself of the vehicle with the flat battery. Do not
connect it to a point near the battery ⇒.
5. Position the leads in such a way that they cannot come into contact with any moving parts in the engine compartment.
Starting
6. Start the engine of the vehicle with the boosting battery and let
it run at idling speed.
7. Start the engine of the car with the flat battery and wait one or two minutes until the engine is “running”.
Removing the jump leads
8. Before you remove the jump leads, switch off the headlights (if they are switched on).
9. Turn on the heater blower and rear window heater in the vehicle with the flat battery. This helps minimise voltage peaks which are
generated when the leads are disconnected.
Fig. 162 How to connect
the jump leads
AA
AB
A+
A+
A-
AX
Ibiza250_angles Seite 227 Dienstag, 5. August 2008 1:11 13
Page 231 of 260
If and when229
Safety First
Operating instructions
Practical tips
Te c h n i c a l D a t a
Towing and tow-startingTo w - s t a r t i n g *
The use of jump leads is preferable to tow-starting.We recommend that you do not tow-start your vehicle. Jump-starting
is preferable ⇒page 226.
However, if your vehicle has to be tow-started:
–Engage the 2
nd or the 3
rd gear.
– Keep the clutch pressed down.
– Switch the ignition on.
– Once both vehicles are mo ving, release the clutch.
– As soon as the engine starts, press the clutch and move the gear lever into neutral. This helps to prevent driving into the towing
vehicle.
WARNING
The risk of accidents is high when tow-starting. The vehicle being towed
can easily collide with the towing vehicle.
Caution
When tow-starting, fuel could enter the catalytic converter and damage it.
CommentsPlease observe the following points if you use a tow-rope:
Notes for the driver of the towing vehicle
– Drive slowly at first until the tow-rope is taut. Then accelerate gradually.
– Begin and change gears cautiously. If you are driving an auto- matic vehicle, accelerate gently.
– Remember that the brake servo and power steering are not working in the vehicle you are towing. Brake earlier than you
would normally, but with a more gentle pressure on the brake.
Notes for the driver of the towed vehicle
– Ensure that the tow-rope remains taut at all times when towing.Tow-rope or tow-bar
It is easier and safer to tow a vehicle with a tow-bar. You should only use a
tow-rope if you do not have a tow-bar.
A tow-rope should be slightly elastic to reduce the loading on both vehicles.
It is advisable to use a tow-rope made of synthetic fibre or similarly elastic
material.
Attach the tow-rope or the tow-bar only to the towing eyes provided or a
towing bracket.
Driving style
Towing requires some experience, especially when using a tow-rope. Both
drivers should be familiar with the technique required for towing. Inexperi-
enced drivers should not attempt to tow-start or tow away another vehicle.
Ibiza250_angles Seite 229 Dienstag, 5. August 2008 1:11 13
Page 232 of 260
If and when
230Do not pull too hard with the towing vehicle and take care to avoid jerking the
tow-rope. When towing on an unpaved ro ad, there is always a risk of over-
loading and damaging the anchorage points.
The ignition of the vehicle being towed must be switched on to prevent the
steering wheel from locking and also to allow the use of the turn signals,
horn, windscreen wipers and washers.
As the brake servo does not work if the engine is not running, you must apply
considerably more pressure to the br ake pedal than you normally would.
As the power assisted steering does not wo rk if the engine is not running, you
will need more strength to steer than you normally would.
Towing vehicles with an automatic gearbox•
Put the selector lever into position “N”.
•
Do not drive faster than 50 km/h when towing a vehicle.
•
Do not tow further than 50 km.
•
If a breakdown vehicle is used, the vehicle must be towed with the front
wheels raised.Note
•
Observe legal requirements when towing or tow-starting.
•
Switch on the hazard warning lights of both vehicles. However, observe
any regulations to the contrary.
•
For technical reasons, vehicles with an automatic gearbox must not be
tow-started.
•
If damage to your vehicle means that there is no lubricant in the gearbox,
you must raise the drive wheels while the vehicle is being towed.
•
If the vehicle has to be towed more than 50 km, the front wheels must be
raised during towing, and towing should be carried out by a qualified person.
•
The steering wheel is locked when the vehicle has no electrical power. The
vehicle must then be towed with the front wheels raised. Towing should be
carried out by a qualified person.
•
The towing eye should always be kept in the vehicle.
Trailer eyesFitting the towing eye
– Take the towing ring from the onboard tools.
– Pull the lower front cover down and leave the cover hanging on the vehicle.
– Remove the cover of the screw hole, insert a screwdriver into the lower slot and lever gently.
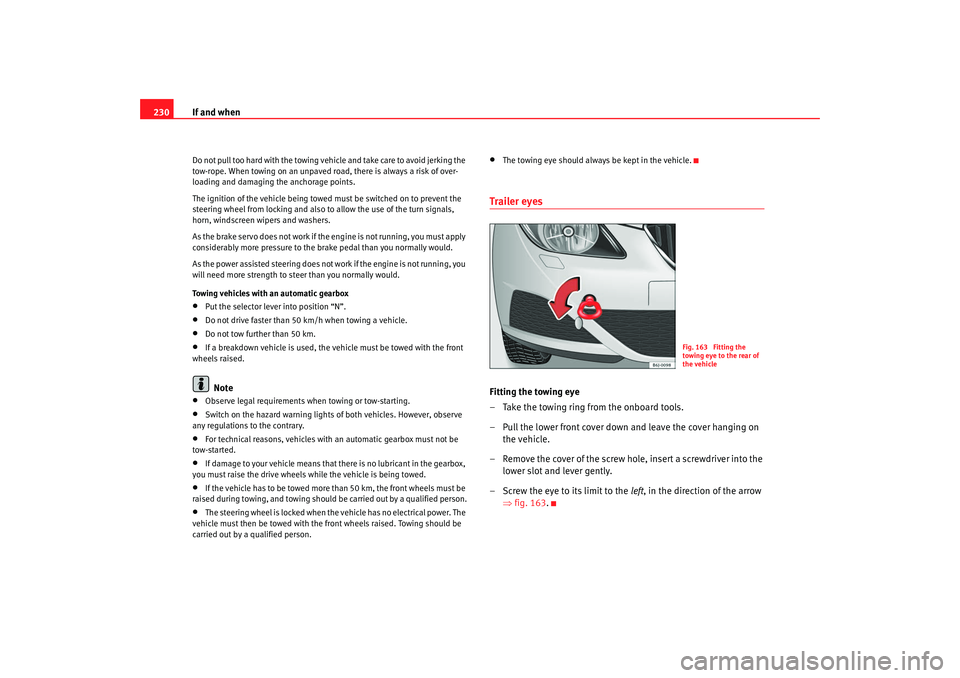
– Screw the eye to its limit to the left, in the direction of the arrow
⇒ fig. 163.
Fig. 163 Fitting the
towing eye to the rear of
the vehicle
Ibiza250_angles Seite 230 Dienstag, 5. August 2008 1:11 13
Page 254 of 260
Index
252Front airbags . . . . . . . . . . . . . . . . . . . . . . . . . . . . 29
Description . . . . . . . . . . . . . . . . . . . . . . . . . . 29
Front ashtray . . . . . . . . . . . . . . . . . . . . . . . . . . . 113
Front cup holder* . . . . . . . . . . . . . . . . . . . . . . . 112
Front interior light . . . . . . . . . . . . . . . . . . . . . . . . 95
Front passenger airbag deactivation . . . . . . . . . 38
Front reading light . . . . . . . . . . . . . . . . . . . . . . . . 96
Front seat adjustment Lumbar support . . . . . . . . . . . . . . . . . . . . . . 106
Frontal airbags Operation . . . . . . . . . . . . . . . . . . . . . . . . . . . . 30
safety notes . . . . . . . . . . . . . . . . . . . . . . . . . . 31
Fuel Diesel . . . . . . . . . . . . . . . . . . . . . . . . . . . . . . 180
Petrol . . . . . . . . . . . . . . . . . . . . . . . . . . . . . . 179
Fuel level Indicator . . . . . . . . . . . . . . . . . . . . . . . . . . . . . 52
Fuel reserve . . . . . . . . . . . . . . . . . . . . . . . . . . . . . 64
Fuel Tank Opening the fuel tank flap . . . . . . . . . . . . . 178
Fuel tank See Fuel reserve . . . . . . . . . . . . . . . . . . . . . . 64
Fuses . . . . . . . . . . . . . . . . . . . . . . . . . . . . . . . . . 211GG 12 . . . . . . . . . . . . . . . . . . . . . . . . . . . . . . . . . . 188
Gear shift pattern . . . . . . . . . . . . . . . . . . . . . . . 134
General overview of the engine compartment 238
Glove compartment . . . . . . . . . . . . . . . . . . . . . . 109 Glow plug system . . . . . . . . . . . . . . . . . . . . . . . 133
warning lamp . . . . . . . . . . . . . . . . . . . . . . . . . 60
HHandbrake . . . . . . . . . . . . . . . . . . . . . . . . . . . . . 142Warning lamp . . . . . . . . . . . . . . . . . . . . 63, 142
Hazard warning lights . . . . . . . . . . . . . . . . . . . . . 93
head restraints Adjusting . . . . . . . . . . . . . . . . . . . . . . . 104, 105
adjustment of the head restraint angle . . . 105
Removing . . . . . . . . . . . . . . . . . . . . . . . . . . . 105
Headlight flashers . . . . . . . . . . . . . . . . . . . . . . . . 94
Headlight range control . . . . . . . . . . . . . . . . . . . 90
Headlights Driving abroad . . . . . . . . . . . . . . . . . . . . . . . 157
Fog lights . . . . . . . . . . . . . . . . . . . . . . . . . . . . 89
Washer system . . . . . . . . . . . . . . . . . . . . . . 100
Heated front seats . . . . . . . . . . . . . . . . . . . . . . . 107
Heated wing mirrors* . . . . . . . . . . . . . . . . . . . . 101
Heating . . . . . . . . . . . . . . . . . . . . . . . . . . . . . . . 118
Heating system . . . . . . . . . . . . . . . . . . . . . . . . . 119
High pressure cleaners . . . . . . . . . . . . . . . . . . . 166
Horn . . . . . . . . . . . . . . . . . . . . . . . . . . . . . . . . . . . 49
How to jump start description . . . . . . . . . . . . . 227IIdentification number . . . . . . . . . . . . . . . . . . . . 234
Ignition key . . . . . . . . . . . . . . . . . . . . . . . . . . . . 131
Ignition lock . . . . . . . . . . . . . . . . . . . . . . . . . . . . 131 Indicators
indication lamp . . . . . . . . . . . . . . . . . . . . . . . 66
Instrument and switch lighting . . . . . . . . . . . . . 90
Instrument lighting . . . . . . . . . . . . . . . . . . . . . . . 49
Instrument panel . . . . . . . . . . . . . . . . . . . . . . . . . 49
Instruments . . . . . . . . . . . . . . . . . . . . . . . . . . . . . 51
Interior monitor and anti-towing alarm* Activation . . . . . . . . . . . . . . . . . . . . . . . . . . . . 80
Intermittent wipe, windscreen . . . . . . . . . . . . . . 97
ISOFIX system . . . . . . . . . . . . . . . . . . . . . . . . . . . 46
JJump leads . . . . . . . . . . . . . . . . . . . . . . . . . . . . . 226
Jump-starting . . . . . . . . . . . . . . . . . . . . . . . . . . . 226KKey tab . . . . . . . . . . . . . . . . . . . . . . . . . . . . . . . . . 77
Keys . . . . . . . . . . . . . . . . . . . . . . . . . . . . . . . . . . . 77LLeather cleaning . . . . . . . . . . . . . . . . . . . . . . . . 171
Lights . . . . . . . . . . . . . . . . . . . . . . . . . . . . . . . . . . 89
Load compartment in the boot See Luggage compartment . . . . . . . . . . . . . 15
Locks . . . . . . . . . . . . . . . . . . . . . . . . . . . . . . . . . 168
Luggage compartment . . . . . . . . . . . . . . . . . . . . 15 See also Luggage compartment . . . . . . . . . 15
Ibiza250_angles Seite 252 Dienstag, 5. August 2008 1:11 13