2008 Seat Ibiza 5D maintenance
[x] Cancel search: maintenancePage 189 of 260
Checking and refilling levels187
Safety First
Operating instructions
Practical tips
Te c h n i c a l D a t a
Topping up engine oil
Top up gradually with small quantities of oil.
Before opening the bonnet, read and observe the warnings ⇒ in
“Safety instructions on working in the engine compartment” on
page 181.
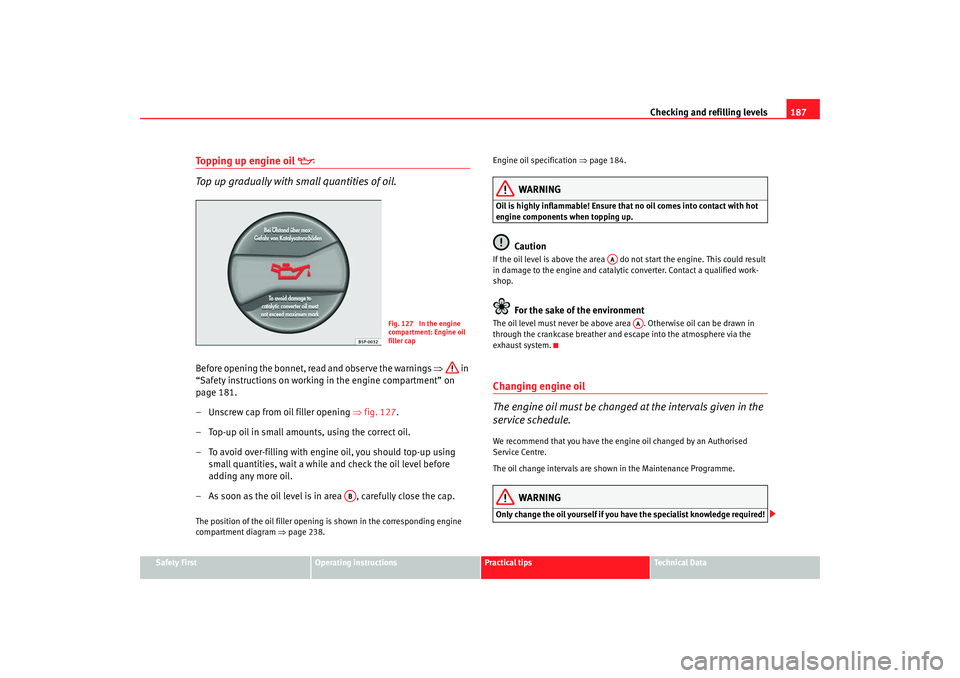
– Unscrew cap from oil filler opening ⇒fig. 127.
– Top-up oil in small amounts, using the correct oil.
– To avoid over-filling with engine oil, you should top-up using small quantities, wait a while and check the oil level before
adding any more oil.
– As soon as the oil level is in area , carefully close the cap.The position of the oil filler opening is shown in the corresponding engine
compartment diagram ⇒page 238. Engine oil specification
⇒page 184.
WARNING
Oil is highly inflammable! Ensure that no oil comes into contact with hot
engine components when topping up.
Caution
If the oil level is above the area do not start the engine. This could result
in damage to the engine and catalytic converter. Contact a qualified work-
shop.
For the sake of the environment
The oil level must never be above area . Otherwise oil can be drawn in
through the crankcase breather and escape into the atmosphere via the
exhaust system.Changing engine oil
The engine oil must be changed at the intervals given in the
service schedule.We recommend that you have the engine oil changed by an Authorised
Service Centre.
The oil change intervals are shown in the Maintenance Programme.
WARNING
Only change the oil yourself if you have the specialist knowledge required!
Fig. 127 In the engine
compartment: Engine oil
filler cap
AB
AA
AA
Ibiza250_angles Seite 187 Dienstag, 5. August 2008 1:11 13
Page 196 of 260
Checking and refilling levels
194However, if the level goes down noticeably in a short time, or drops below the
“MIN” mark, there may be a leak in the brake system. A display on the instru-
ment panel will warn you if the brake fluid level is too low ⇒page 57.
WARNING
Before opening the bonnet to check the brake fluid level, please read and
observe the warnings ⇒ page 181.Changing the brake fluid
The Maintenance Program indicates the brake fluid change
intervals.We recommend that you have the brake fluid changed by an Authorised
Service Centre.
Before opening the bonnet, please read and observe the warnings ⇒ in
“Safety instructions on working in the engine compartment” on page 181 in
“Working in the engine compartment”.
Brake fluid absorbs moisture. In the cour se of time, it will absorb water from
the ambient air. If the water content in the brake fluid is too high, the brake
system could corrode. This also considerably reduces the boiling point of the
brake fluid. Heavy use of the brakes may then cause a vapour lock which
could impair the braking effect.
It is important that you use only brake fluid compliant with the US standard
FMVSS 116 DOT 4. We recommend the use of Genuine SEAT brake fluid.
WARNING
Brake fluid is poisonous. Old brake fluid impairs the braking effect.
•
Before opening the bonnet to check the brake fluid level, please read
and observe the warnings ⇒page 181.
•
Brake fluid should be stored in the closed original container in a safe
place out of reach of children. There is a toxic risk.
•
Complete the brake fluid change according to the Maintenance
Program. Heavy use of the brakes may cause a vapour lock if the brake fluid
is left in the system for too long. Th is would seriously affect the efficiency
of the brakes and the safety of the vehicle. This may cause an accident.Caution
Brake fluid could damage the paintwork. Wipe off any brake fluid from the
paintwork immediately.
For the sake of the environment
Brake fluid must be drained and disposed of in the proper manner observing
environmental regulations.
WARNING (continued)
Ibiza250_angles Seite 194 Dienstag, 5. August 2008 1:11 13
Page 198 of 260
Checking and refilling levels
196•
If the vehicle is left standing in cold conditions for a long period, protect
the battery from frost. If it “freezes” it will be damaged.
Checking the electrolyte level
The electrolyte level should be checked regularly in high-
mileage vehicles, in hot countries and in older batteries.– Open the bonnet and open the battery cover at the front ⇒ in
“Safety instructions on working in the engine compartment” on
page 181 ⇒ in “Warnings on handling the battery” on
page 195.
– Check the colour display in the "magic eye" on the top of the battery.
– If there are air bubbles in the window, tap the window gently until they disperse.The position of the battery is shown in the corresponding engine compart-
ment diagram ⇒page 238.
The round window (“magic eye”) on the top of the battery changes colour,
depending on the charge level and electrolyte level of the battery.
If the colour in the window is colourless or bright yellow, the electrolyte level
of the battery is too low. Have the battery checked by a qualified workshop.
The colours green and black are used by the workshops for diagnostic
purposes.
Charging and changing the vehicle battery
The battery is maintenance-free and is checked during the
inspection service. All work on the vehicle battery requires
specialist knowledge.If you often drive short distances or if the vehicle is not driven for long
periods, the battery should be checked by a qualified workshop between the
scheduled services.
If the battery has discharged and you have problems starting the vehicle, the
battery might be damaged. If this happens, we recommend you have the
vehicle battery checked by an Authorised Service Centre where it will be re-
charged or replaced.
Charging the battery
The vehicle battery should be charged by a qualified workshop only, as
batteries using special technology have been installed and they must be
charged in a controlled environment.
Replacing a vehicle battery
The battery has been developed to suit the conditions of its location and has
special safety features.
Genuine SEAT batteries fulfil the maintenance, performance and safety spec-
ifications of your vehicle.
WARNING
•
We recommend you use only maintenance-free or cycle free leak-proof
batteries which comply with the standards T 825 06 and VW 7 50 73. This
standard applies as of 2001.
•
Before starting any work on the batteries, you must read and observe
the warnings ⇒ in “Warnings on handling the battery” on page 195.
Ibiza250_angles Seite 196 Dienstag, 5. August 2008 1:11 13
Page 235 of 260
General notes on the technical data 233
Safety First
Operating instructions
Practical tips
Te c h n i c a l D a t a
Te c h n i c a l D a t aGeneral notes on the technical dataOutstanding informationImportant considerations
All data in the official vehicle documents take precedence over this data.All data provided in this manual are valid for the standard model in Spain. The
vehicle data card included in the Maintenance Programme or the vehicle
registration documents sh ows which engine is installed in your vehicle. The figures may be different depending on
if additional equipment is fitted,
for different models, for special vehicles and for other countries.
Abbreviations used in this paragraph of the Technical Data Abbreviation MeaningkW Kilowatt, engine power measurement.
bhp Brake horse power, formerly used to denote engine power
at rpm Revolutions per minute - engine speed. Nm Newton metres, unit of engine torque.
l/100 km Fuel consumption in litres per 100 km. g/km Carbon dioxide emissions in grams per km travelled.CO
2
Carbon dioxide
CN Cetane number, indication of the diesel combustion power.
RON Research octane number, indication of the knock resistance of petrol.
Ibiza250_angles Seite 233 Dienstag, 5. August 2008 1:11 13
Page 236 of 260
General notes on the technical data
234Vehicle identification data
The most important data are given on the type plate and the
vehicle data sticker.Vehicles for certain export countries do not have a type plate.
Type plate
The type plate is located on the left rib inside the engine compartment.
Vehicle identification number
The vehicle identification number (chass is number) can be read from outside
the vehicle through a viewer in the windscreen. This is located on the left-
hand side of the vehicle in the lower area of the windscreen. It is also located
on the right hand side of the engine compartment. Vehicle data
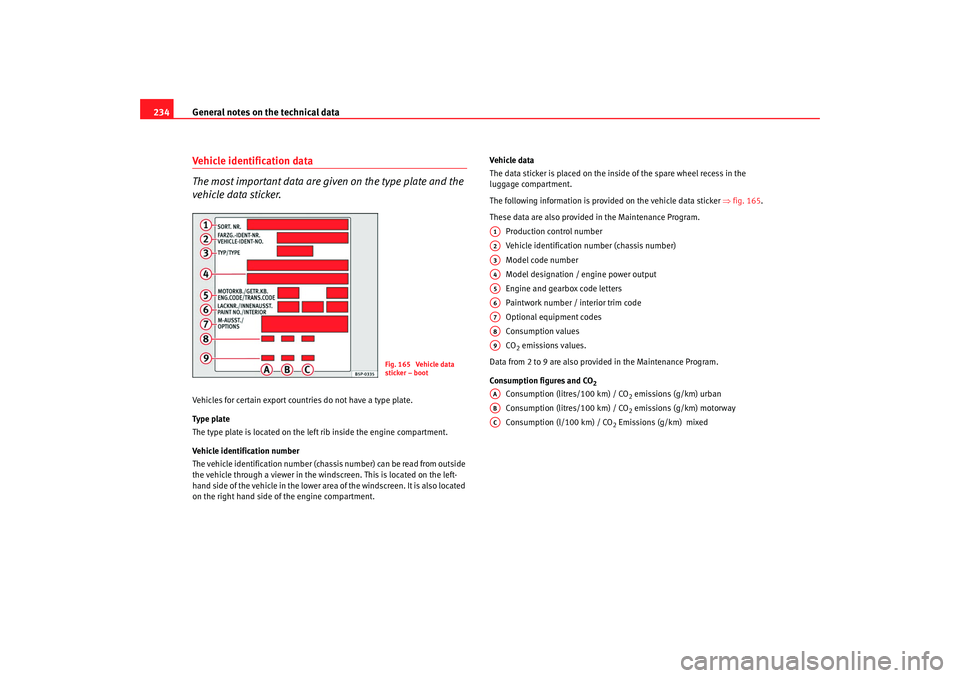
The data sticker is placed on the inside of the spare wheel recess in the
luggage compartment.
The following information is provided on the vehicle data sticker
⇒fig. 165 .
These data are also provided in the Maintenance Program. Production control number
Vehicle identification number (chassis number)
Model code number
Model designation / engine power output
Engine and gearbox code letters
Paintwork number / interior trim code
Optional equipment codes
Consumption values
CO
2 emissions values.
Data from 2 to 9 are also provided in the Maintenance Program.
Consumption figures and CO
2
Consumption (litres/100 km) / CO
2 emissions (g/km) urban
Consumption (litres/100 km) / CO2 emissions (g/km) motorway
Consumption (l/100 km) / CO
2 Emissions (g/km) mixed
Fig. 165 Vehicle data
sticker – boot
A1A2A3A4A5A6A7A8A9AAABAC
Ibiza250_angles Seite 234 Dienstag, 5. August 2008 1:11 13
Page 255 of 260
Index253
MMain beam . . . . . . . . . . . . . . . . . . . . . . . . . . . 89, 94
Main beam headlights
Indicator lamp . . . . . . . . . . . . . . . . . . . . . . . . 65
Main headlight lamps . . . . . . . . . . . . . . . 219, 221
Maintenance airbags . . . . . . . . . . . . . . . . . . . . . . . . . . . . . . 28
Maintenance and cleaning . . . . . . . . . . . . . . . . 164
Manual gearbox . . . . . . . . . . . . . . . . . . . . . . . . . 134
Manual heating . . . . . . . . . . . . . . . . . . . . . . . . . 119 controls . . . . . . . . . . . . . . . . . . . . . . . . . . . . 118
Manual heating system Defrosting the windscreen . . . . . . . . . . . . . 119
Demisting the windscreen and side windows . .119
MFD . . . . . . . . . . . . . . . . . . . . . . . . . . . . . . . . . . . . 53
Mileage display . . . . . . . . . . . . . . . . . . . . . . . . . . 56
Mirrors Interior mirror . . . . . . . . . . . . . . . . . . . . . . . . 100
vanity mirror . . . . . . . . . . . . . . . . . . . . . . . . . . 96
Wing mirrors . . . . . . . . . . . . . . . . . . . . . . . . . 101
Mobile phone . . . . . . . . . . . . . . . . . . . . . . . . . . . 174
Multi-function display . . . . . . . . . . . . . . . . . . . . . 53NNumber of seats . . . . . . . . . . . . . . . . . . . . . . . . . . 16
OObject compartment right-hand front seat . . . . . . . . . . . . . . . . . . 111
Observations . . . . . . . . . . . . . . . . . . . . . . . . . . . 157
Octane number . . . . . . . . . . . . . . . . . . . . . . . . . 179
Oil . . . . . . . . . . . . . . . . . . . . . . . . . . . . . . . . . . . . 184
Oil change . . . . . . . . . . . . . . . . . . . . . . . . . . . . . 187
Oil properties . . . . . . . . . . . . . . . . . . . . . . . . . . . 185
One-touch opening and closing Electric windows . . . . . . . . . . . . . . . . . . . . . . 85
Open stowage compartment . . . . . . . . . . . . . . 116
Opening and locking . . . . . . . . . . . . . . . . . . . . . . 82
Operation when a fault occurs Panoramic/ tilt ing roof . . . . . . . . . . . . . . . . . 88
Overview Control lamps . . . . . . . . . . . . . . . . . . . . . . . . . 57
Instrument panel . . . . . . . . . . . . . . . . . . . . . . 49
Instruments . . . . . . . . . . . . . . . . . . . . . . . . . . 51
Warning lamps . . . . . . . . . . . . . . . . . . . . . . . . 57PPaintworkPolishing . . . . . . . . . . . . . . . . . . . . . . . . . . . 167
Panoramic roof . . . . . . . . . . . . . . . . . . . . . . . . . . . 87
Parking . . . . . . . . . . . . . . . . . . . . . . . . . . . . . . . . 142
Parking lights . . . . . . . . . . . . . . . . . . . . . . . . . . . . 94
Pedals . . . . . . . . . . . . . . . . . . . . . . . . . . . . . . . . . . 14
Petrol . . . . . . . . . . . . . . . . . . . . . . . . . . . . . . . . . 179 Driving abroad . . . . . . . . . . . . . . . . . . . . . . . 157 Petrol additives . . . . . . . . . . . . . . . . . . . . . . . . . 179
Petrol engines, starting . . . . . . . . . . . . . . . . . . . 132
Physical principles of a frontal collision . . . . . . 18
Plastic key tab . . . . . . . . . . . . . . . . . . . . . . . . . . . 77
Plastic parts . . . . . . . . . . . . . . . . . . . . . . . . . . . . 167
Plastic parts cleaning . . . . . . . . . . . . . . . . . . . . 171
Pollen filter . . . . . . . . . . . . . . . . . . . . . . . . . . . . . 127
Products for vehicle maintenance . . . . . . . . . . 164
RRadio frequency remote control
Changing the battery . . . . . . . . . . . . . . . . . . . 79
Radio wave remote control . . . . . . . . . . . . . . . . . 78
Rain sensor* . . . . . . . . . . . . . . . . . . . . . . . . . . . . 98
Rear cupholder* . . . . . . . . . . . . . . . . . . . . . . . . . 112
Rear fog light Warning lamp . . . . . . . . . . . . . . . . . . . . . . . . 61
warning lamp . . . . . . . . . . . . . . . . . . . . . . . . . 89
Rear head restraints . . . . . . . . . . . . . . . . . . . . . . 13
Rear seat folding down . . . . . . . . . . . . . . . . . . . . . . . . 108
Rear seat bench . . . . . . . . . . . . . . . . . . . . . . . . . 108
Rear window heating Heating element wires . . . . . . . . . . . . . . . . 168
Rear window wiper . . . . . . . . . . . . . . . . . . . . . . . 99
Rear-view mirror . . . . . . . . . . . . . . . . . . . . . . . . . 100
Rearview mirrors . . . . . . . . . . . . . . . . . . . . . . . . 100
Refuelling . . . . . . . . . . . . . . . . . . . . . . . . . . . . . . 178
Ibiza250_angles Seite 253 Dienstag, 5. August 2008 1:11 13
Page 257 of 260
Index255
Stowage compartment
Front passenger side . . . . . . . . . . . . . . . . . . 109
Sun visors . . . . . . . . . . . . . . . . . . . . . . . . . . . . . . . 96
Sunroof blind Sliding/tilting roof . . . . . . . . . . . . . . . . . . . . . 87
Switch Hazard warning lights . . . . . . . . . . . . . . . . . . 93
Rear window heating . . . . . . . . . . . . . . . . . . . 92
Switches Electric windows . . . . . . . . . . . . . . . . . . . . . . 84
Sliding/tilting roof . . . . . . . . . . . . . . . . . . . . . 87
Switching off the engine . . . . . . . . . . . . . . . . . . 133TTailgate . . . . . . . . . . . . . . . . . . . . . . . . . . . . . . . . . 82 Emergency opening . . . . . . . . . . . . . . . . . . . . 83
warning lamp . . . . . . . . . . . . . . . . . . . . . . . . . 65
Tank fuel level . . . . . . . . . . . . . . . . . . . . . . . . . . . . . 52
reserve indicator . . . . . . . . . . . . . . . . . . . . . . 52
tank capacity . . . . . . . . . . . . . . . . . . . . . . . . . 52
TCS . . . . . . . . . . . . . . . . . . . . . . . . . . . . . . . . . . . 150
TCS (Traction control system) Warning lamp . . . . . . . . . . . . . . . . . . . . . . . . . 62
Technical modifications . . . . . . . . . . . . . . . . . . 173
The danger of not using the seat belt . . . . . . . . 19
Tightening torque of wheel bolts . . . . . . . . . . . 237
Tilting roof . . . . . . . . . . . . . . . . . . . . . . . . . . . . . . 87
Tools . . . . . . . . . . . . . . . . . . . . . . . . . . . . . . . . . . 203 Tow starting
Comments . . . . . . . . . . . . . . . . . . . . . . . . . . 229
Towing . . . . . . . . . . . . . . . . . . . . . . . . . . . . . . . . 229
Towing a trailer . . . . . . . . . . . . . . . . . . . . 161, 236
Towing bracket . . . . . . . . . . . . . . . . . . . . . . . . . 162
Towing bracket, fitting . . . . . . . . . . . . . . . . . . . 176
Towing eye . . . . . . . . . . . . . . . . . . . . . . . . . . . . . 229
Tow-starting . . . . . . . . . . . . . . . . . . . . . . . . . . . . 229
Traction control system warning lamp . . . . . . . . . . . . . . . . . . . . . . . . . 62
Trailer eyes . . . . . . . . . . . . . . . . . . . . . . . . . . . . . 230
Trailer turn signals Warning lamp . . . . . . . . . . . . . . . . . . . . . . . . . 94
Trailer weights . . . . . . . . . . . . . . . . . . . . . . . . . . 236
Trips, checklist . . . . . . . . . . . . . . . . . . . . . . . . . . . . 8
Turn signals . . . . . . . . . . . . . . . . . . . . . . . . . . . . . 94 Warning lamp . . . . . . . . . . . . . . . . . . . . . . 66, 94
Two-way radio . . . . . . . . . . . . . . . . . . . . . . . . . . 174
Type plate . . . . . . . . . . . . . . . . . . . . . . . . . . . . . . 234
Tyre Mobility-System (Tyre repair kit) . . . . . . . . 204
Tyre monitor indicator . . . . . . . . . . . . . . . . . . . . . 63
Tyre pressure . . . . . . . . . . . . . . . . . . . . . . . . . . . 197
Tyre pressures . . . . . . . . . . . . . . . . . . . . . . . . . . 236
Tyre repair kit . . . . . . . . . . . . . . . . . . . . . . 204, 209
Tyre-Mobility-System (Tyre repair kit) . . . . . . . . 209
Tyres and wheels Dimensions . . . . . . . . . . . . . . . . . . . . . . . . . 199
Tyres service life . . . . . . . . . . . . . . . . . . . . . . . . 198
Tyres tread depth . . . . . . . . . . . . . . . . . . . . . . . . 199
Tyres with directional tread pattern . . . . . . . . . 197
UUnderbody maintenance . . . . . . . . . . . . . . . . . . 170VVehicle battery . . . . . . . . . . . . . . . . . . . . . . . . . . 195
Vehicle data . . . . . . . . . . . . . . . . . . . . . . . . . . . . 234
Vehicle identification data . . . . . . . . . . . . . . . . 234
Vehicle identification number . . . . . . . . . . . . . 234
Vehicle interior heating or cooling system . . . 122
Vehicle Maintenance Exterior . . . . . . . . . . . . . . . . . . . . . . . . . . . . . 165
Vehicle modifications . . . . . . . . . . . . . . . . . . . . 173
Vehicle paintwork Products for vehicle maintenance . . . . . . . 164
Waxing . . . . . . . . . . . . . . . . . . . . . . . . . . . . . 167
Vehicle tools Storage . . . . . . . . . . . . . . . . . . . . . . . . . . . . . 203
Vehicle wallet storage . . . . . . . . . . . . . . . . . . . . 109
Vehicle washing . . . . . . . . . . . . . . . . . . . . . . . . 165
Ventilation . . . . . . . . . . . . . . . . . . . . . . . . . . . . . 119
Ventilation slits . . . . . . . . . . . . . . . . . . . . . . . . . . 15WWarning lamp . . . . . . . . . . . . . . . . . . . . . . . . . . . 27
Warning lamps . . . . . . . . . . . . . . . . . . . . . . . . . . . 57
Warning triangle . . . . . . . . . . . . . . . . . . . . . . . . 115
Washer fluid . . . . . . . . . . . . . . . . . . . . . . . . . . . . 190
Washing by hand . . . . . . . . . . . . . . . . . . . . . . . . 165
Ibiza250_angles Seite 255 Dienstag, 5. August 2008 1:11 13