2008 SAAB 9-7X remote control
[x] Cancel search: remote controlPage 1 of 426

Seats and Restraint Systems........................... 1-1
Front Seats
............................................... 1-2
Rear Seats
............................................... 1-8
Safety Belts
.............................................1-10
Child Restraints
.......................................1-28
Airbag System
.........................................1-52
Restraint System Check
............................1-68
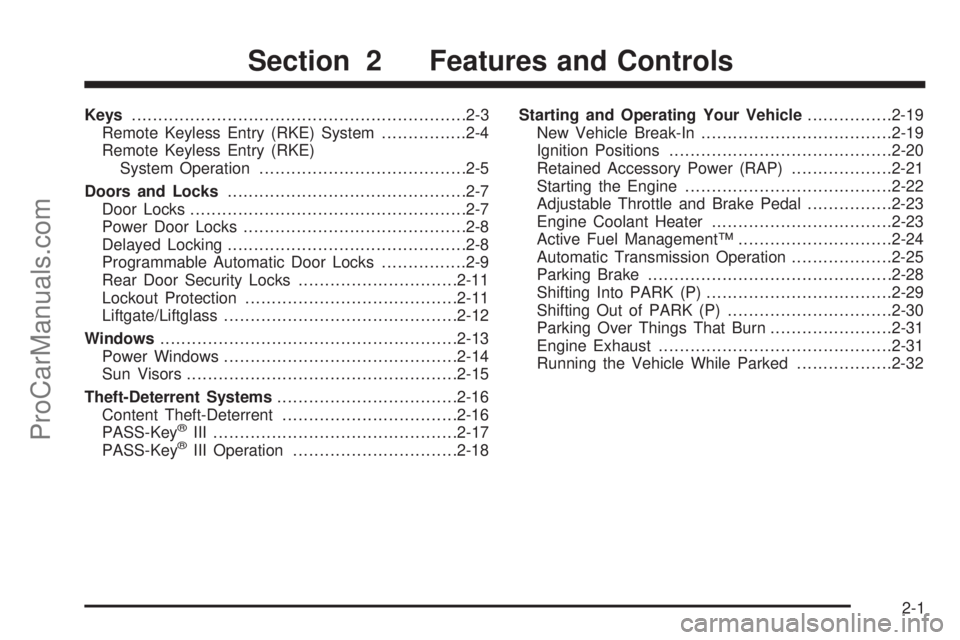
Features and Controls..................................... 2-1
Keys
........................................................ 2-3
Doors and Locks
....................................... 2-7
Windows
.................................................2-13
Theft-Deterrent Systems
............................2-16
Starting and Operating Your Vehicle
...........2-19
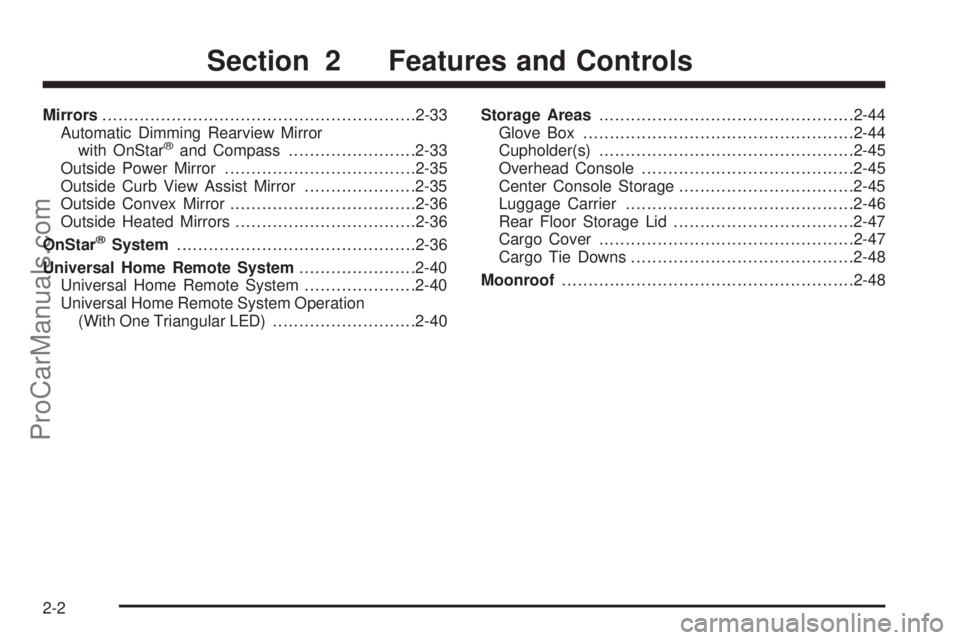
Mirrors
....................................................2-33
OnStar
®System
......................................2-36
Universal Home Remote System
................2-40
Storage Areas
.........................................2-44
Moonroof
................................................2-48
Instrument Panel............................................. 3-1
Instrument Panel Overview
.......................... 3-4
Climate Controls
......................................3-20
Warning Lights, Gages, and Indicators
........3-26
Driver Information Center (DIC)
..................3-45
Audio System(s)
.......................................3-60Driving Your Vehicle....................................... 4-1
Your Driving, the Road, and Your Vehicle
..... 4-2
Towing
...................................................4-28
Service and Appearance Care.......................... 5-1
Service
..................................................... 5-3
Fuel
......................................................... 5-4
Checking Things Under the Hood
...............5-10
All-Wheel Drive
........................................5-49
Rear Axle
...............................................5-50
Front Axle
...............................................5-51
Headlamp Aiming
.....................................5-52
Bulb Replacement
....................................5-52
Windshield Replacement
...........................5-57
Windshield Wiper Blade Replacement
.........5-57
Tires
......................................................5-60
Appearance Care
...................................5-101
Vehicle Identi�cation
...............................5-110
Electrical System
....................................5-111
Capacities and Speci�cations
...................5-122
Maintenance Schedule..................................... 6-1
Maintenance Schedule
................................ 6-2
Customer Assistance Information.................... 7-1
Customer Assistance and Information
........... 7-2
Reporting Safety Defects
...........................7-12
Vehicle Data Recording and Privacy
...........7-14
Index................................................................ 1
2008 Saab 9-7X Owner ManualM
ProCarManuals.com
Page 8 of 426

To store the memory settings, do the following:
1. Adjust the driver’s seat, including the seatback
recliner and lumbar, both of the outside mirrors,
and the adjustable pedals, if equipped, to the
desired position.
SeeAdjustable Throttle and Brake Pedal on
page 2-23for more information.
2. Press and hold the 1 or 2 button of the memory
control for three seconds. A double chime will
sound to let you know that the position has been
stored.
To repeat the procedure for a second driver, follow the
preceding steps, but press the other numbered
memory control button.
To recall the memory settings, do one of the following:
Press and release button 1 or 2 while the vehicle
is in PARK (P). A single chime will sound and
the memory position will be recalled.
If programmed to do so through the Driver
Information Center (DIC), pressing the unlock button
on the Remote Keyless Entry (RKE) transmitter
will recall the preset driver’s memory seat, mirrors,
and adjustable pedals position.
If programmed to do so through the DIC, placing
the key in the ignition will recall the driver’s
memory seat, mirrors, and adjustable pedals
positions.
See “Seat Recall” underDIC Vehicle Customization on
page 3-53for more information.
To stop recall movement of the memory seat feature at
any time, press one of the memory buttons or power
seat controls.
Easy Exit Seat
The control for the easy exit seat function is located on
the driver’s door below the memory buttons 1 and 2.
The easy exit seat button is used to program and recall
the desired driver’s seat position when exiting or
entering the vehicle. The mirrors, power lumbar, recline,
and adjustable pedals, if equipped, positions will not
be stored or recalled when using the easy exit seat
function. The seat position can be saved for up to
two drivers.
1-4
ProCarManuals.com
Page 75 of 426

Keys...............................................................2-3
Remote Keyless Entry (RKE) System................2-4
Remote Keyless Entry (RKE)
System Operation.......................................2-5
Doors and Locks.............................................2-7
Door Locks....................................................2-7
Power Door Locks..........................................2-8
Delayed Locking.............................................2-8
Programmable Automatic Door Locks................2-9
Rear Door Security Locks..............................2-11
Lockout Protection........................................2-11
Liftgate/Liftglass............................................2-12
Windows........................................................2-13
Power Windows............................................2-14
Sun Visors...................................................2-15
Theft-Deterrent Systems..................................2-16
Content Theft-Deterrent.................................2-16
PASS-Key
®III ..............................................2-17
PASS-Key®III Operation...............................2-18Starting and Operating Your Vehicle................2-19
New Vehicle Break-In....................................2-19
Ignition Positions..........................................2-20
Retained Accessory Power (RAP)...................2-21
Starting the Engine.......................................2-22
Adjustable Throttle and Brake Pedal................2-23
Engine Coolant Heater..................................2-23
Active Fuel Management™.............................2-24
Automatic Transmission Operation...................2-25
Parking Brake..............................................2-28
Shifting Into PARK (P)...................................2-29
Shifting Out of PARK (P)...............................2-30
Parking Over Things That Burn.......................2-31
Engine Exhaust............................................2-31
Running the Vehicle While Parked..................2-32
Section 2 Features and Controls
2-1
ProCarManuals.com
Page 76 of 426

Mirrors...........................................................2-33
Automatic Dimming Rearview Mirror
with OnStar
®and Compass........................2-33
Outside Power Mirror....................................2-35
Outside Curb View Assist Mirror.....................2-35
Outside Convex Mirror...................................2-36
Outside Heated Mirrors..................................2-36
OnStar
®System.............................................2-36
Universal Home Remote System......................2-40
Universal Home Remote System.....................2-40
Universal Home Remote System Operation
(With One Triangular LED)...........................2-40Storage Areas................................................2-44
Glove Box...................................................2-44
Cupholder(s)................................................2-45
Overhead Console........................................2-45
Center Console Storage.................................2-45
Luggage Carrier...........................................2-46
Rear Floor Storage Lid..................................2-47
Cargo Cover................................................2-47
Cargo Tie Downs..........................................2-48
Moonroof.......................................................2-48
Section 2 Features and Controls
2-2
ProCarManuals.com
Page 86 of 426

Liftgate/Liftglass
{CAUTION:
It can be dangerous to drive with the liftgate or
liftglass open because carbon monoxide (CO)
gas can come into your vehicle. You cannot see
or smell CO. It can cause unconsciousness and
even death. If you must drive with the liftgate
open or if electrical wiring or other cable
connections must pass through the seal
between the body and the liftgate or liftglass:
Make sure all other windows are shut.
Turn the fan on your climate control system
to its highest speed and select the control
setting that will force outside air into your
vehicle. See “Climate Control System”
in the Index.
If you have air outlets on or under the
instrument panel, open them all the way.
SeeEngine Exhaust on page 2-31.
Liftgate Release
To unlock the liftgate, use the power door lock switch
or the remote keyless entry transmitter. SeeRemote
Keyless Entry (RKE) System Operation on page 2-5.
The liftglass will also unlock when the liftgate is
unlocked.
Press the button on the liftglass to open it. To open the
entire liftgate, lift the handle located in the center of the
liftgate. When the liftgate is opened, the liftglass will lock
after a short delay.
Emergency Release for Opening
Liftgate
1. Remove the trim plug, located on the inside of the
liftgate in the center, to expose the access hole in
the trim panel.
2. Use a tool to reach through the access hole in the
trim panel.
3. Pry the left release lever up to the unlock position.
Pry the right release lever up to unlatch the liftgate.
4. Reinstall the trim plug.
2-12
ProCarManuals.com
Page 113 of 426

How OnStar Service Works
In order to provide you with OnStar services, your
vehicle’s OnStar system has the capability of recording
and transmitting vehicle information. This information
is automatically sent to an OnStar Call Center at
the time of an OnStar button press, Emergency button
press or if your airbags or AACN system deploys.
The vehicle information usually includes your GPS
location and, in the event of a crash, additional
information regarding the accident that your vehicle
has been involved in (e.g. the direction from which your
vehicle was hit). When you use the Virtual Advisor
feature of OnStar Hands-Free Calling, your vehicle
also sends OnStar your GPS location so that we can
provide you with location-based services.
OnStar service cannot work unless your vehicle is in a
place where OnStar has an agreement with a wireless
service provider for service in that area. OnStar service
also cannot work unless you are in a place where the
wireless service provider OnStar has hired for that area
has coverage, network capacity and reception when the
service is needed, and technology that is compatible
with the OnStar service. Not all services are available
everywhere, particularly in remote or enclosed areas,
or at all times.OnStar service that involves location information about
your vehicle cannot work unless GPS satellite signals
are unobstructed and available in that place as well.
Your vehicle must have a working electrical system
(including adequate battery power) for the OnStar
equipment to operate. There are other problems OnStar
cannot control that may prevent OnStar from providing
OnStar service to you at any particular time or place.
Some examples are damage to important parts of your
vehicle in an accident, hills, tall buildings, tunnels,
weather or wireless phone network congestion.
Your Responsibility
You may need to increase the volume of your radio
to hear the OnStar advisor. If the light next to the
OnStar buttons is red, this means that your system is not
functioning properly and should be checked by a dealer.
If the light appears clear (no light is appearing), your
OnStar subscription has expired. You can always press
the blue OnStar button to con�rm that your OnStar
equipment is active.
2-39
ProCarManuals.com
Page 114 of 426

Universal Home Remote
System
Universal Home Remote System
The Universal Home Remote System provides a way to
replace up to three hand-held Radio-Frequency (RF)
transmitters used to activate devices such as garage
door openers, security systems, and home lighting.
This device complies with Part 15 of the FCC Rules.
Operation is subject to the following two conditions:
1. This device may not cause harmful interference.
2. This device must accept any interference received,
including interference that may cause undesired
operation.
This device complies with RSS-210 of Industry Canada.
Operation is subject to the following two conditions:
1. This device may not cause interference.
2. This device must accept any interference received,
including interference that may cause undesired
operation of the device.
Changes or modi�cations to this system by other than
an authorized service facility could void authorization to
use this equipment.
Universal Home Remote System
Operation (With One Triangular LED)
If there is one triangular Light Emitting Diode (LED)
indicator light above the Universal Home Remote
buttons, follow the instructions below.
This system provides a way to replace up to three
remote control transmitters used to activate devices
such as garage door openers, security systems,
and home automation devices.
Do not use the Universal Home Remote with any
garage door opener that does not have the stop and
reverse feature. This includes any garage door opener
model manufactured before April 1, 1982.
Read the instructions completely before attempting to
program the Universal Home Remote. Because of
the steps involved, it may be helpful to have another
person available to assist you in the programming
the Universal Home Remote.
2-40
ProCarManuals.com
Page 116 of 426

3. At the same time, press and hold both the
Universal Home Remote button that you would
like to use to control the garage door and the
hand-held transmitter button. Do not release the
Universal Home Remote button or the hand-held
transmitter button until Step 4 has been completed.
Some entry gates and garage door openers may
require you to substitute Step 3 with the procedure
noted in “Gate Operator and Canadian
Programming” later in this section.
4. The indicator light on the Universal Home Remote
will �ash slowly at �rst and then rapidly after
Universal Home Remote successfully receives the
frequency signal from the hand-held transmitter.
Release both buttons.
5. Press and hold the newly-trained Universal Home
Remote button and observe the indicator light.
If the indicator light stays on continuously,
the programming is complete and your garage door
should move when the Universal Home Remote
button is pressed and released. You do not need to
continue the programming Steps 6 through 8 and
can stop here.
If the Universal Home Remote indicator light blinks
rapidly for two seconds and then turns to a
constant light, continue with the programming
Steps 6 through 8.It may be helpful to have another person available
to assist with the remaining steps.
6. After Steps 1 through 5 have been completed,
locate inside the garage the garage door opener
receiver (motor-head unit). Locate the “Learn”
or “Smart” button. The name and color of the button
may vary by manufacturer.
7. Firmly press and release the “Learn” or “Smart”
button. After you press this button, you will have
30 seconds to complete Step 8.
2-42
ProCarManuals.com