2008 PONTIAC GRAND PRIX manual transmission
[x] Cancel search: manual transmissionPage 73 of 450

Keys...............................................................2-2
Remote Keyless Entry (RKE) System................2-3
Remote Keyless Entry (RKE) System
Operation...................................................2-4
Remote Vehicle Start......................................2-7
Doors and Locks............................................2-10
Door Locks..................................................2-10
Power Door Locks........................................2-11
Delayed Locking...........................................2-11
Programmable Automatic Door Locks................2-12
Rear Door Security Locks..............................2-12
Lockout Protection........................................2-13
Trunk..........................................................2-14
Windows........................................................2-16
Power Windows............................................2-17
Sun Visors...................................................2-18
Theft-Deterrent Systems..................................2-18
Content Theft-Deterrent.................................2-18
PASS-Key
®III Electronic Immobilizer...............2-20
PASS-Key®III Electronic Immobilizer
Operation.................................................2-21
Starting and Operating Your Vehicle................2-23
New Vehicle Break-In....................................2-23
Ignition Positions..........................................2-23Retained Accessory Power (RAP)...................2-24
Starting the Engine.......................................2-25
Engine Coolant Heater..................................2-26
Active Fuel Management™.............................2-28
Automatic Transmission Operation...................2-28
Parking Brake..............................................2-33
Shifting Into PARK (P)...................................2-34
Shifting Out of PARK (P)...............................2-35
Parking Over Things That Burn.......................2-36
Engine Exhaust............................................2-36
Running the Vehicle While Parked..................2-37
Mirrors...........................................................2-38
Manual Rearview Mirror.................................2-38
Manual Rearview Mirror with OnStar
®..............2-38
Outside Power Mirrors...................................2-39
Outside Convex Mirror...................................2-39
OnStar
®System.............................................2-40
Storage Areas................................................2-43
Glove Box...................................................2-43
Cupholder(s)................................................2-43
Sunglasses Storage Compartment...................2-44
Center Console Storage.................................2-44
Convenience Net..........................................2-44
Sunroof.........................................................2-44
Section 2 Features and Controls
2-1
Page 103 of 450

SECOND (2):This position reduces vehicle speed
even more than THIRD (3) without using your brakes.
You can use SECOND (2) on hills. It can help control
the vehicle’s speed as it goes down steep mountain
roads, but then you would also want to use the brakes
off and on.
Notice:Driving in SECOND (2) for more than
25 miles (40 km) or at speeds over 55 mph (90 km/h),
can cause damage to your engine and/or
transmission. Also, shifting into SECOND (2) at
speeds above 65 mph (105 km/h) can cause damage.
Drive in DRIVE (D) instead of SECOND (2).
FIRST (1):This position reduces vehicle speed even
more than SECOND (2) without using your brakes.
It can be used on very steep hills, or in deep snow
or mud. If the shift lever is moved to FIRST (1),
while the vehicle is moving forward, the transmission
will not shift into �rst gear until the vehicle is going
slowly enough.
Notice:Spinning the tires or holding the vehicle
in one place on a hill using only the accelerator
pedal may damage the transmission. The repair will
not be covered by your warranty. If you are stuck,
do not spin the tires. When stopping on a hill,
use the brakes to hold the vehicle in place.Performance Shifting with TAP-Shift®
If the vehicle is equipped with a 5.3L V8 engine,
it may have this feature. It allows you to change
gears similar to a manual transmission.
To fully use this feature, do the following:
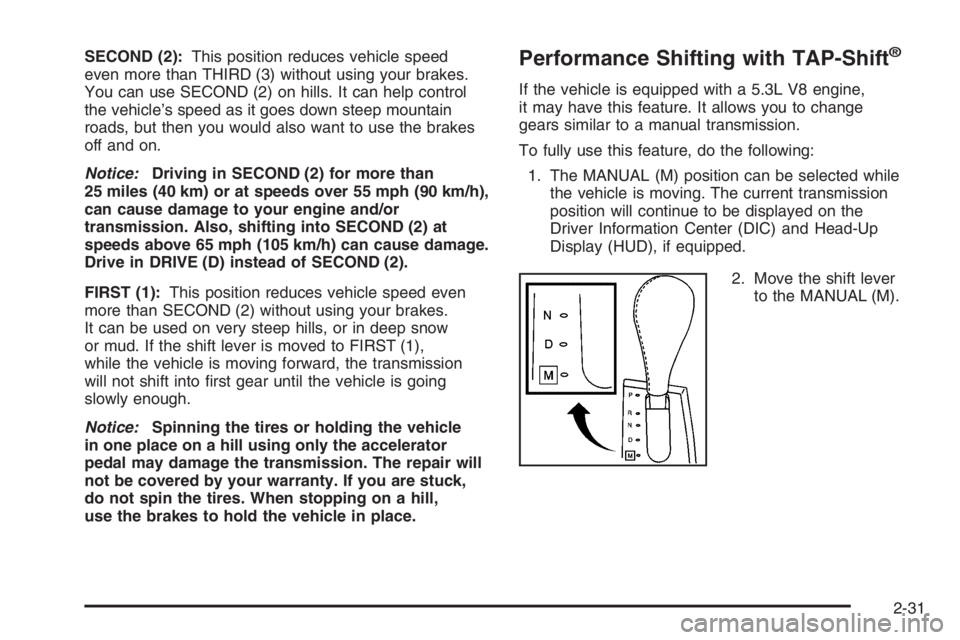
1. The MANUAL (M) position can be selected while
the vehicle is moving. The current transmission
position will continue to be displayed on the
Driver Information Center (DIC) and Head-Up
Display (HUD), if equipped.
2. Move the shift lever
to the MANUAL (M).
2-31
Page 104 of 450

3. The paddles are
located on the steering
wheel. They are used to
up-shift or down-shift
the transmission.
4. Push either paddle once to up-shift to the next
gear. Pull either paddle once to down-shift to
the next gear.
The vehicle will begin moving in �rst gear upon
acceleration. For better control in icy or slippery
conditions, the vehicle may start out in SECOND (2),
rather than FIRST (1). This will only occur if you
have “tapped up” to second gear.
The up-shift light on the
instrument panel cluster,
or the up-shift symbol on
the HUD, if equipped, is
given as a prompt to use
the TAP-Shift
®paddle.For more information, seeUp-Shift Light on page 3-45
The up-shift light will only appear in the instrument
panel cluster if the HUD is off or if the vehicle does
not have HUD.
This prompt to up-shift, as needed, will be given
throughout acceleration. If up-shifting does not occur
when prompted, the vehicle speed will be limited
to protect the engine.
The gear position will display on the DIC and HUD,
if equipped, when in manual mode.
Pressing the accelerator while driving in the highest
gear (FOURTH (4)) between 20 mph (32 km/h)
and 50 mph (80 km/h), will make the transmission
automatically downshift. As your speed gets closer to
50 mph (80 km/h), you will need to increase accelerator
pedal travel to get the vehicle to downshift. At 50 mph
(80 km/h), even with the accelerator fully depressed,
the transmission will always remain in FOURTH (4).
The transmission will also automatically downshift as
the vehicle decelerates and comes to a stop.
If a paddle is pushed or pulled and the vehicle cannot
respond to a transmission gear change, a chime will
sound. The system will not allow either an up-shift or a
down-shift if the vehicle speed is too fast or too slow,
nor will it allow a start from THIRD (3) or higher gear.
2-32
Page 161 of 450

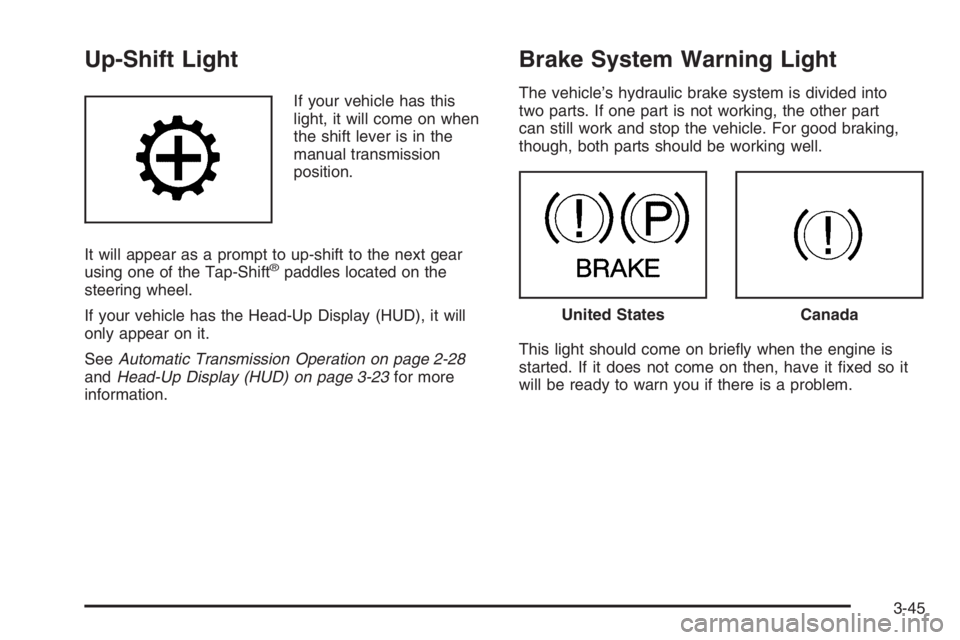
Up-Shift Light
If your vehicle has this
light, it will come on when
the shift lever is in the
manual transmission
position.
It will appear as a prompt to up-shift to the next gear
using one of the Tap-Shift
®paddles located on the
steering wheel.
If your vehicle has the Head-Up Display (HUD), it will
only appear on it.
SeeAutomatic Transmission Operation on page 2-28
andHead-Up Display (HUD) on page 3-23for more
information.
Brake System Warning Light
The vehicle’s hydraulic brake system is divided into
two parts. If one part is not working, the other part
can still work and stop the vehicle. For good braking,
though, both parts should be working well.
This light should come on brie�y when the engine is
started. If it does not come on then, have it �xed so it
will be ready to warn you if there is a problem.
United StatesCanada
3-45
Page 171 of 450

Driver Information Center (DIC)
The Driver Information Center (DIC) gives important
safety and maintenance facts. When the vehicle’s
ignition is turned on, all of the DIC lights illuminate for a
few seconds and an introductory message will appear.
After this, the DIC will begin working.
DIC Operation and Displays
(Uplevel DIC with Trip Computer)
The Driver Information Center (DIC) control buttons and
the message display screen are located above the
radio. The DIC gives important safety and maintenance
facts concerning the vehicle. The status of many of
the vehicle’s systems along with driver personalization
menus and warning messages about the vehicle’s
systems may display on the DIC screen.
The outside temperature automatically appears on
the bottom right corner of the DIC display screen.
If the outside temperature is below 38°F (3°C), the
temperature reading will toggle between displaying the
outside temperature and the word ICE for two minutes.
If there is a problem with the system that controls
the temperature display, the letters OC (Open Circuit)
or SC (Short Circuit) will appear on the display.
If this occurs, have the vehicle serviced by your
dealer/retailer.The vehicle’s shift lever position and the direction the
vehicle is traveling will also appear on the DIC screen.
The compass is self-calibrating, which eliminates
the need to manually set the compass. However, under
certain circumstances, such as during a long distance
cross-country trip, it will be necessary to compensate
for compass variance and reset the zone through
the DIC. SeeDIC Compass (Uplevel DIC) on page 3-65
for more information.
The buttons on the DIC trip computer are gages,
trip odometer, set/reset, options, and fuel.
Gages
2(Gages):Press this button to access the OIL LIFE
REMAINING, TRANSMISSION FLUID TEMPERATURE,
BATTERY, ENGINE HOURS, and MAXIMUM Gs modes.
3-55
Page 270 of 450

When You Are Ready to Leave After
Parking on a Hill
1. Apply the regular brakes and hold the pedal
down while you:
Start the engine
Shift into a gear
Release the parking brake
2. Let up on the brake pedal.
3. Drive slowly until the trailer is clear of the chocks.
4. Stop and have someone pick up and store
the chocks.
Maintenance When Trailer Towing
The vehicle will need service more often when it
pulls a trailer. SeeScheduled Maintenance on page 6-4
for more information. Things that are especially
important in trailer operation are automatic transmission
�uid, which should not be over�lled, engine oil, drive
belts, cooling, and brake systems. Each of these
is covered in this manual, and the Index will help locate
them quickly. If trailering, it is a good idea to review
this information before starting on a trip.
Check periodically to see that all hitch nuts and bolts
are tight.
Engine Cooling When Trailer Towing
The cooling system may temporarily overheat during
severe operating conditions. SeeEngine Overheating
on page 5-27.
4-36
Page 316 of 450

Jump Starting
If your vehicle’s battery has run down, you may want to
use another vehicle and some jumper cables to start
your vehicle. Be sure to use the following steps to do
it safely.
{CAUTION:
Batteries can hurt you. They can be dangerous
because:
They contain acid that can burn you.
They contain gas that can explode or
ignite.
They contain enough electricity to
burn you.
If you do not follow these steps exactly, some
or all of these things can hurt you.Notice:Ignoring these steps could result in costly
damage to your vehicle that would not be covered
by your warranty.
Trying to start your vehicle by pushing or pulling it
will not work, and it could damage your vehicle.
1. Check the other vehicle. It must have a 12-volt
battery with a negative ground system.
Notice:If the other vehicle’s system is not a 12-volt
system with a negative ground, both vehicles can
be damaged. Only use vehicles with 12-volt systems
with negative grounds to jump start your vehicle.
2. Get the vehicles close enough so the jumper cables
can reach, but be sure the vehicles are not touching
each other. If they are, it could cause a ground
connection you do not want. You would not be able
to start your vehicle, and the bad grounding
could damage the electrical systems.
To avoid the possibility of the vehicles rolling, set
the parking brake �rmly on both vehicles involved in
the jump start procedure. Put an automatic
transmission in PARK (P) or a manual transmission
in NEUTRAL before setting the parking brake.
Notice:If you leave your radio or other accessories
on during the jump starting procedure, they could
be damaged. The repairs would not be covered by
your warranty. Always turn off your radio and other
accessories when jump starting your vehicle.
5-46
Page 399 of 450

ApplicationCapacities
English Metric
Fuel Tank
3.8L Engine (with NU6 emissions) sold new in CA, ME,
VT, NY, MA (see your dealer/retailer for bordering states)17.0 gal 64.4 L
3.8L Engine (without NU6 emissions) sold new in all other
states (see your dealer/retailer for more information)17.5 gal 66.2 L
5.3L V8 Engine sold new in all states 17.5 gal 66.2 L
Wheel Nut Torque 100 ft lb 140Y
All capacities are approximate. When adding �uid, be sure to �ll to the appropriate level, as recommended in this
manual. Recheck �uid level after �lling.
Engine Speci�cations
Engine VIN Code Transmission Spark Plug Gap
3.8 V6 Engine 2 Automatic .060 inches (1.52 mm)
5.3 V8 Engine with Active Fuel
Management™C Automatic .040 inches (1.01 mm)
5-129