2008 PONTIAC GRAND PRIX instrument panel
[x] Cancel search: instrument panelPage 155 of 450

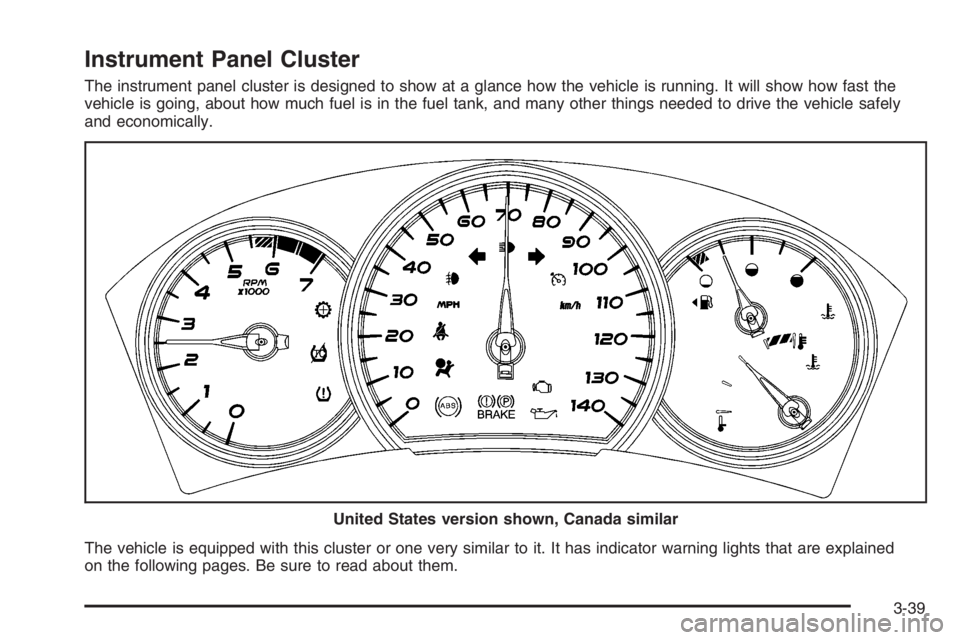
Instrument Panel Cluster
The instrument panel cluster is designed to show at a glance how the vehicle is running. It will show how fast the
vehicle is going, about how much fuel is in the fuel tank, and many other things needed to drive the vehicle safely
and economically.
The vehicle is equipped with this cluster or one very similar to it. It has indicator warning lights that are explained
on the following pages. Be sure to read about them.United States version shown, Canada similar
3-39
Page 157 of 450

Safety Belt Reminders
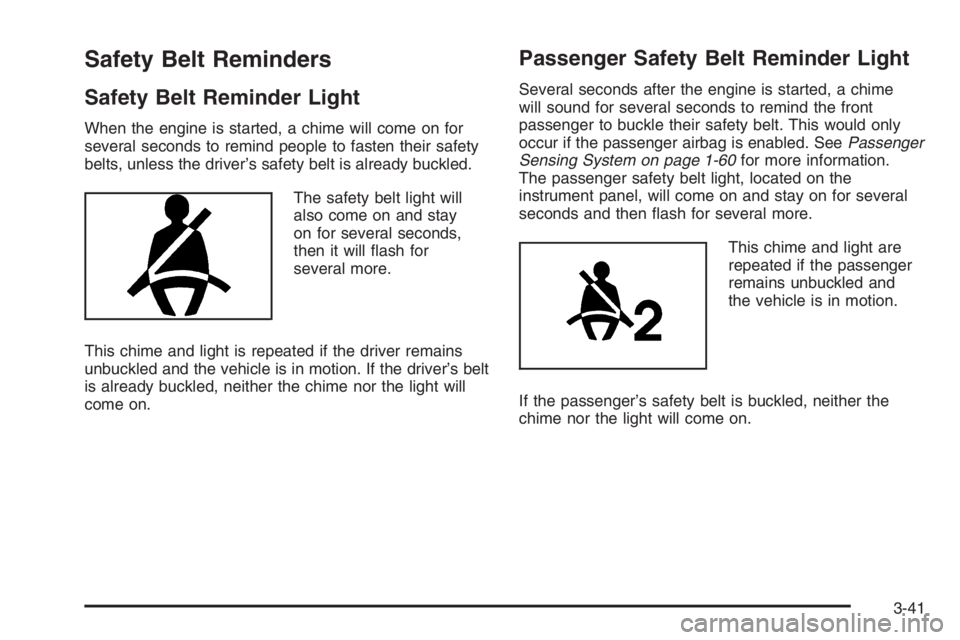
Safety Belt Reminder Light
When the engine is started, a chime will come on for
several seconds to remind people to fasten their safety
belts, unless the driver’s safety belt is already buckled.
The safety belt light will
also come on and stay
on for several seconds,
then it will �ash for
several more.
This chime and light is repeated if the driver remains
unbuckled and the vehicle is in motion. If the driver’s belt
is already buckled, neither the chime nor the light will
come on.
Passenger Safety Belt Reminder Light
Several seconds after the engine is started, a chime
will sound for several seconds to remind the front
passenger to buckle their safety belt. This would only
occur if the passenger airbag is enabled. SeePassenger
Sensing System on page 1-60for more information.
The passenger safety belt light, located on the
instrument panel, will come on and stay on for several
seconds and then �ash for several more.
This chime and light are
repeated if the passenger
remains unbuckled and
the vehicle is in motion.
If the passenger’s safety belt is buckled, neither the
chime nor the light will come on.
3-41
Page 158 of 450

Airbag Readiness Light
There is an airbag readiness light on the instrument
panel cluster, which shows the airbag symbol. The
system checks the airbag’s electrical system for
malfunctions. The light tells you if there is an electrical
problem. The system check includes the airbag
sensor, the pretensioners, the airbag modules, the
wiring and the crash sensing and diagnostic module.
For more information on the airbag system, seeAirbag
System on page 1-52.
This light will come on
when you start your
vehicle, and it will �ash
for a few seconds.
The light should go out
and the system is ready.
If the airbag readiness light stays on after you start
the vehicle or comes on when you are driving,
your airbag system may not work properly.
Have your vehicle serviced right away.{CAUTION:
If the airbag readiness light stays on after you
start your vehicle, it means the airbag system
may not be working properly. The airbags in
your vehicle may not in�ate in a crash, or they
could even in�ate without a crash. To help
avoid injury to yourself or others, have your
vehicle serviced right away if the airbag
readiness light stays on after you start your
vehicle.
The airbag readiness light should �ash for a few
seconds when you start the engine. If the light does not
come on then, have it �xed immediately. If there is a
problem with the airbag system, an airbag Driver
Information Center (DIC) message may also come on.
SeeDIC Warnings and Messages on page 3-67for
more information.
3-42
Page 159 of 450

Passenger Airbag Status Indicator
Your vehicle has the passenger sensing system.
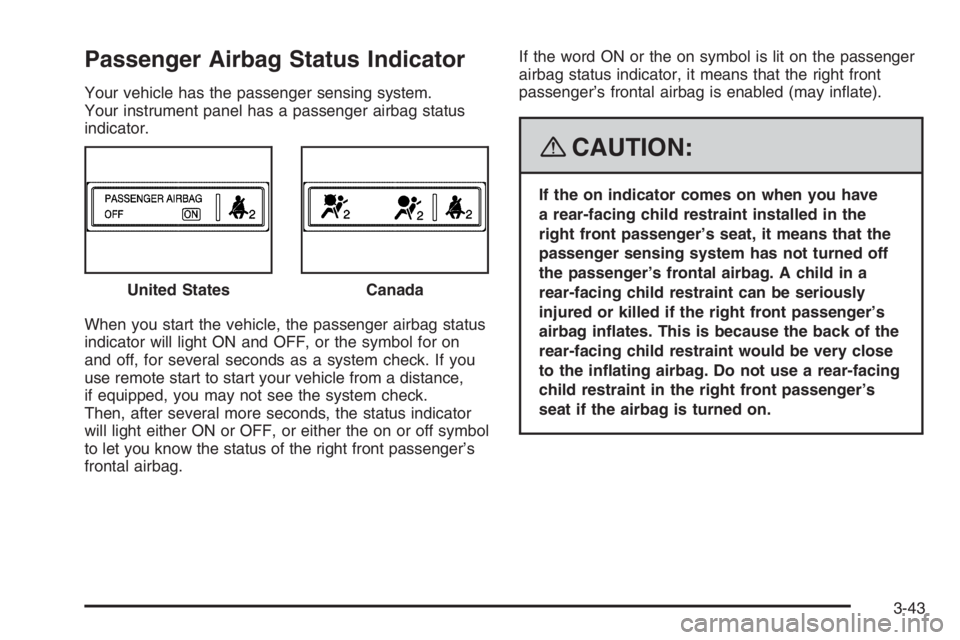
Your instrument panel has a passenger airbag status
indicator.
When you start the vehicle, the passenger airbag status
indicator will light ON and OFF, or the symbol for on
and off, for several seconds as a system check. If you
use remote start to start your vehicle from a distance,
if equipped, you may not see the system check.
Then, after several more seconds, the status indicator
will light either ON or OFF, or either the on or off symbol
to let you know the status of the right front passenger’s
frontal airbag.If the word ON or the on symbol is lit on the passenger
airbag status indicator, it means that the right front
passenger’s frontal airbag is enabled (may in�ate).
{CAUTION:
If the on indicator comes on when you have
a rear-facing child restraint installed in the
right front passenger’s seat, it means that the
passenger sensing system has not turned off
the passenger’s frontal airbag. A child in a
rear-facing child restraint can be seriously
injured or killed if the right front passenger’s
airbag in�ates. This is because the back of the
rear-facing child restraint would be very close
to the in�ating airbag. Do not use a rear-facing
child restraint in the right front passenger’s
seat if the airbag is turned on. United States
Canada
3-43
Page 160 of 450

{CAUTION:
Even though the passenger sensing system is
designed to turn off the right front passenger’s
frontal airbag if the system detects a rear-facing
child restraint, no system is fail-safe, and no
one can guarantee that an airbag will not deploy
under some unusual circumstance, even
though it is turned off. We recommend that
rear-facing child restraints be secured in the
rear seat, even if the airbag is off.
If the word OFF or the off symbol is lit on the airbag
status indicator, it means that the passenger sensing
system has turned off the right front passenger’s frontal
airbag. SeePassenger Sensing System on page 1-60
for more on this, including important safety information.If, after several seconds, both status indicator lights
remain on, or if there are no lights at all, there may
be a problem with the lights or the passenger sensing
system. See your dealer/retailer for service.
{CAUTION:
If the airbag readiness light in the instrument
panel cluster ever comes on and stays on,
it means that something may be wrong with
the airbag system. If this ever happens, have
the vehicle serviced promptly, because an
adult-size person sitting in the right front
passenger’s seat may not have the protection
of the airbag(s). SeeAirbag Readiness Light
on page 3-42for more on this, including
important safety information.
3-44
Page 175 of 450

5. Press the set/reset button to scroll through the
months of the year, releasing the button when
the correct month appears.
6. Press the options button to advance to the days
of the month.
7. Press the set/reset button to scroll through the
days of the month, releasing the button when
the correct day appears.
8. Press the options button again to advance to the
main date screen. The screen will now display
the new date.
9. Press the options button to advance to the
next screen.
Language:This menu allows selection of the language
in which the DIC messages will appear. The DIC can
be programmed in one of three languages: English,
French, or Spanish. The message on the HUD, if
equipped, will also appear in the language selected.
SeeHead-Up Display (HUD) on page 3-23.
To change the language:
1. Press the options button to enter the language
screen.
2. Press the set/reset button to scroll through and
set the language choice.
3. Press the options button again to advance to
the next screen.DISPLAY UNITS:This menu allows selection of
measurements to be displayed in English or metric
units. The messages on the HUD, if equipped, and the
instrument panel cluster will also appear in the type
of measurement selected.
To set the display units function:
1. Press the set/reset button to select ENGLISH
or METRIC.
2. Press the options button to advance to the next
screen.
DAYTIME DISPLAY ENHANCEMENT:This menu
allows selection of the color of the display message.
When ON is selected for the daytime enhancement,
the messages will appear black on a red screen. This
combination makes it easier to see the DIC messages
during the daytime. When OFF is selected, or when
the headlamps are on, the messages will appear red
on a black background.
To set the daytime display enhancement function:
1. Press the set/reset button to select OFF or ON.
2. Press the options button to advance to the
next screen.
3-59
Page 180 of 450

5. Press the set/reset button to scroll through the
months of the year, releasing the button when
the correct month appears.
6. Press the options button to advance to the days of
the month.
7. Press the set/reset button to scroll through the days
of the month, releasing the button when the correct
day appears.
8. Press the options button again to advance to the
main date screen. The screen will now display the
new date.
Language:This menu allows the selection of the
language in which the DIC messages will appear. The
DIC can be programmed to one of three languages:
English, French, or Spanish. The message on the HUD,
if equipped, will also appear in the language selected.
SeeHead-Up Display (HUD) on page 3-23.
To change the language:
1. Press the options button to enter the language
screen.
2. Press the set/reset button to scroll through and set
the language choice.
3. Press the options button again to advance to the
next screen.DISPLAY UNITS:This menu allows selection of
measurements to be displayed in English or metric units.
The messages on the HUD, if equipped, and the
instrument panel cluster will also appear with the type of
measurement selected.
To set the measurement when Display Units is shown:
1. Press the set/reset button to select ENGLISH
or METRIC.
2. Press the options button again to advance to the
next screen.
DAYTIME DISPLAY ENHANCEMENT:This menu
allows selection of the color of the display message.
When ON is selected for the daytime enhancement,
the messages will appear black on a red screen. This
combination makes it easier to see the DIC messages
during the daytime. When OFF is selected, or when
the headlamps are on, the messages will appear red on
a black background.
To set the daytime display enhancement:
1. Press the set/reset button to select OFF or ON.
2. Press the options button again to advance to
the next screen.
3-64
Page 187 of 450

CRUISE SET
This symbol comes on
with this message.
This message and symbol display brie�y whenever the
cruise control is set. The cruise control light on the
instrument panel cluster also comes on when cruise
control is set. SeeCruise Control Light on page 3-53.
CRUISE SET also appears brie�y in the Head-Up
Display (HUD), if your vehicle has this feature. This
message displays when the ignition is in ON/RUN.
SeeCruise Control on page 3-12for more information.
This message does not need to be acknowledged.
DELAYED LOCKING
This message displays when the doors of the vehicle
are closed and the delayed locking feature has
been programmed through the DIC. See “DELAYED
LOCKING” underDIC Vehicle Customization on
page 3-89for more information.This message displays when the ignition is in
LOCK/OFF. A chime sounds for two seconds
when this message is displayed.
This message cannot be acknowledged.
HEADLAMPS SUGGESTED
This message displays when the amount of available
light outside the vehicle is low and the exterior
lamps control has been turned off. This condition
happens when the headlamps are turned off at night
or the Daytime Running Lamps (DRL) are turned
off during the day. This message informs the driver
that it has become dark enough outside to require the
headlamps to be turned on. When the headlamps
are turned on, this message clears from the screen.
SeeExterior Lamps on page 3-16andDaytime Running
Lamps (DRL) on page 3-17for more information.
This message displays while the ignition is in ON/RUN.
A chime sounds for two seconds when this message
is displayed. Press the set/reset button to acknowledge
this warning message and to clear it from the screen.
This message continues to display if it has not
been acknowledged when the engine is turned off.
It also re-displays for three seconds if the message has
been acknowledged, but the condition still exists
when the engine is turned off.
If the condition still exists, the message re-appears
when the engine is turned on.
3-71