2008 PONTIAC GRAND PRIX parking brake
[x] Cancel search: parking brakePage 133 of 450

;(Parking Lamp):Turn the band to this position to
turn on the parking lamps together with the following:
Taillamps
License Plate Lamps
Instrument Panel Lights
The parking brake indicator light comes on and stays
on when the parking lamps are on with the engine
in LOCK/OFF and the ignition to ACC/ACCESSORY.
5(Headlamps):Turn the control to this position
to turn on the headlamps together with the following
lamps listed below. A warning chime sounds if the
driver’s door is opened while the ignition switch is off
and the headlamps are on.
Parking Lamps
Taillamps
License Plate Lamps
Instrument Panel Lights
Headlamps on Reminder
A warning chime will sound if the vehicle’s ignition is
off and the driver’s door is opened when the exterior
lamp control is left on in either the headlamp or
parking lamp position.
Daytime Running Lamps (DRL)
Daytime Running Lamps (DRL) can make it easier
for others to see the front of your vehicle during the day.
DRL can be helpful in many different driving conditions,
but they can be especially helpful in the short periods
after dawn and before sunset. Daytime running
lamps are required to function at all times on all
vehicles �rst sold in Canada.
A light sensor on top of the instrument panel makes
the DRL work, so be sure it is not covered.
The DRL system will make the low-beam headlamps
come on at reduced brightness when the following
conditions are met:
The ignition is on.
The exterior lamps control is off.
The parking brake is released.
While the DRL are on, only the vehicle’s low-beam
headlamps will be on at reduced brightness. The turn
signal, taillamps, sidemarker and other lamps will not be
on. The instrument panel cluster will not be lit up either.
3-17
Page 162 of 450
When the ignition is on, the brake system warning light
will also come on when the parking brake is set.
The light will stay on if the parking brake does not
release fully. If it stays on after the parking brake is fully
released, it means the vehicle has a brake problem.
The PARKING BRAKE ON message will also appear in
the Driver Information Center (DIC) when the parking
brake is set and the vehicle is going faster than 5 mph.
SeeDIC Warnings and Messages on page 3-67for
more information.
The brake warning light may also come on when the
brake �uid is low. If this occurs, the LOW BRAKE FLUID
message will also appear in the Driver Information
Center (DIC). SeeDIC Warnings and Messages
on page 3-67for more information.If the brake warning light comes on while the vehicle is
being driven, pull off the road and stop carefully.
The brake pedal may be harder to push, or it may go
closer to the �oor. It may also take the vehicle longer to
stop. If the light is still on, have the vehicle towed for
service. SeeTowing Your Vehicle on page 4-27.
{CAUTION:
Your brake system may not be working
properly if the brake system warning light is on.
Driving with the brake system warning light on
can lead to an accident. If the light is still on
after you have pulled off the road and stopped
carefully, have the vehicle towed for service.
3-46
Page 194 of 450
PARKING BRAKE ON
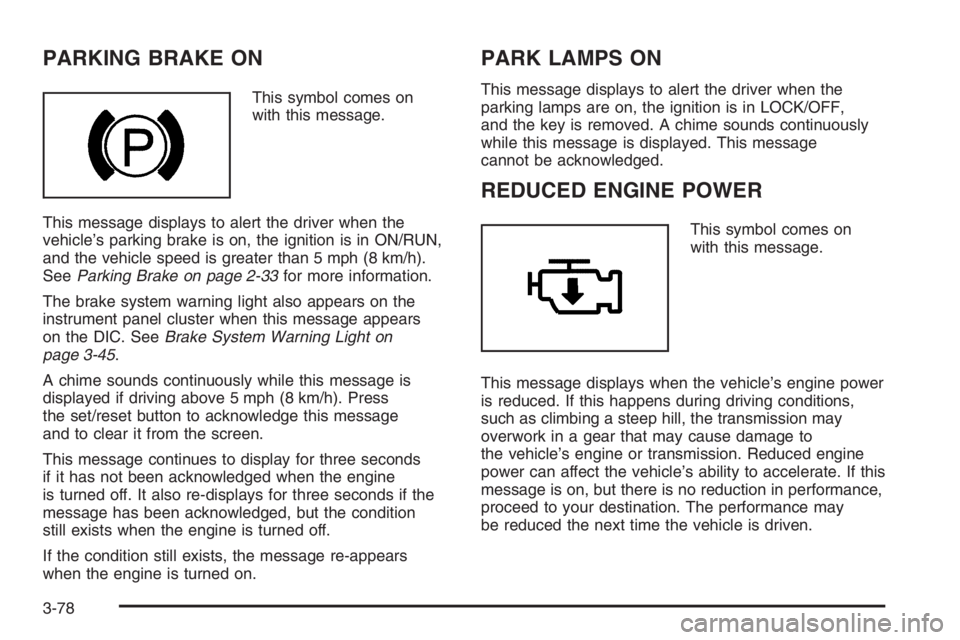
This symbol comes on
with this message.
This message displays to alert the driver when the
vehicle’s parking brake is on, the ignition is in ON/RUN,
and the vehicle speed is greater than 5 mph (8 km/h).
SeeParking Brake on page 2-33for more information.
The brake system warning light also appears on the
instrument panel cluster when this message appears
on the DIC. SeeBrake System Warning Light on
page 3-45.
A chime sounds continuously while this message is
displayed if driving above 5 mph (8 km/h). Press
the set/reset button to acknowledge this message
and to clear it from the screen.
This message continues to display for three seconds
if it has not been acknowledged when the engine
is turned off. It also re-displays for three seconds if the
message has been acknowledged, but the condition
still exists when the engine is turned off.
If the condition still exists, the message re-appears
when the engine is turned on.
PARK LAMPS ON
This message displays to alert the driver when the
parking lamps are on, the ignition is in LOCK/OFF,
and the key is removed. A chime sounds continuously
while this message is displayed. This message
cannot be acknowledged.
REDUCED ENGINE POWER
This symbol comes on
with this message.
This message displays when the vehicle’s engine power
is reduced. If this happens during driving conditions,
such as climbing a steep hill, the transmission may
overwork in a gear that may cause damage to
the vehicle’s engine or transmission. Reduced engine
power can affect the vehicle’s ability to accelerate. If this
message is on, but there is no reduction in performance,
proceed to your destination. The performance may
be reduced the next time the vehicle is driven.
3-78
Page 198 of 450

SERVICE BRAKE APPLY SENSOR
This message displays when the brake apply sensor is
not functioning properly. The vehicle still has brakes
when this warning message displays, but you should
have the vehicle serviced by your dealer/retailer as soon
as possible.
This message displays only while the ignition is in
ON/RUN. A chime sounds for two seconds while this
message is displayed. Press the set/reset button
to acknowledge this message and to clear it from
the screen.
This message continues to display if it has not
been acknowledged when the engine is turned off.
It also re-displays for three seconds if the message
has been acknowledged, but the condition still exists
when the engine is turned off.
If the condition still exists, the message re-appears
when the engine is turned on.
SERVICE PARK LAMPS
This message displays if one of the vehicle’s parking
lamps needs to be replaced. SeeFront Turn Signal,
Parking and Fog Lamps on page 5-57for bulb
replacement procedures.
This message displays only while the ignition is in
ON/RUN. A chime sounds for two seconds while this
message is displayed. Press the set/reset button
to acknowledge this message and to clear it from
the screen.
This message continues to display if it has not
been acknowledged when the engine is turned off.
It also re-displays for three seconds if the message
has been acknowledged, but the condition still exists
when the engine is turned off.
If the condition still exists, the message re-appears
when the engine is turned on.
3-82
Page 210 of 450

Audio System(s)
Determine which radio your vehicle has and then read the
pages following to familiarize yourself with its features.
{CAUTION:
This system provides you with far greater
access to audio stations and song listings.
Giving extended attention to entertainment
tasks while driving can cause a crash and
you or others can be injured or killed. Always
keep your eyes on the road and your mind
on the drive — avoid engaging in extended
searching while driving.
Keeping your mind on the drive is important for
safe driving. SeeDefensive Driving on page 4-2.
Here are some ways in which you can help avoid
distraction while driving.
While your vehicle is parked:
Familiarize yourself with all of its controls.
Familiarize yourself with its operation.
Set up your audio system by presetting your
favorite radio stations, setting the tone, and
adjusting the speakers. Then, when driving
conditions permit, you can tune to your favorite
radio stations using the presets and steering wheel
controls if the vehicle has them.
Notice:Before adding any sound equipment to
your vehicle, such as an audio system, CD player,
CB radio, mobile telephone, or two-way radio, make
sure that it can be added by checking with your
dealer/retailer. Also, check federal rules covering
mobile radio and telephone units. If sound
equipment can be added, it is very important to do
it properly. Added sound equipment may interfere
with the operation of your vehicle’s engine, radio,
or other systems, and even damage them. Your
vehicle’s systems may interfere with the operation
of sound equipment that has been added.
Notice:The chime signals related to safety belts,
parking brake, and other functions of your vehicle
operate through the radio/entertainment system.
If that equipment is replaced or additional equipment
is added to your vehicle, the chimes may not
work. Make sure that replacement or additional
equipment is compatible with your vehicle before
installing it. SeeAccessories and Modifications
on page 5-3.
3-94
Page 244 of 450
Steering
Power Steering
If you lose power steering assist because the engine
stops or the system is not functioning, you can steer
but it will take much more effort.
Variable Effort Steering
If your vehicle has this steering system, the system
provides less steering effort for parking and when driving
at speeds below 20 mph (32 km/h). Steering effort will
increase at higher speeds for improved road feel.
Steering Tips
It is important to take curves at a reasonable speed.
A lot of the “driver lost control” accidents mentioned
on the news happen on curves. Here is why:
Experienced driver or beginner, each of us is subject
to the same laws of physics when driving on curves.
The traction of the tires against the road surface
makes it possible for the vehicle to change its path
when you turn the front wheels. If there is no traction,
inertia will keep the vehicle going in the same direction.
If you have ever tried to steer a vehicle on wet ice,
you will understand this.The traction you can get in a curve depends on the
condition of the tires and the road surface, the angle at
which the curve is banked, and your speed. While you
are in a curve, speed is the one factor you can control.
Suppose you are steering through a sharp curve.
Then you suddenly apply the brakes. Both control
systems — steering and braking — have to do their
work where the tires meet the road. Unless you have
antilock brakes, adding the hard braking can demand
too much of those places. You can lose control.
The same thing can happen if you are steering through
a sharp curve and you suddenly accelerate. Those
two control systems — steering and acceleration — can
overwhelm those places where the tires meet the
road and make you lose control. SeeTraction Control
System (TCS) on page 4-6orEnhanced Traction
System (ETS) on page 4-7.
What should you do if this ever happens? Ease up on
the brake or accelerator pedal, steer the vehicle the way
you want it to go, and slow down.
Speed limit signs near curves warn that you should
adjust your speed. Of course, the posted speeds
are based on good weather and road conditions. Under
less favorable conditions you will want to go slower.
If you need to reduce your speed as you approach
a curve, do it before you enter the curve, while the
front wheels are straight ahead.
4-10
Page 262 of 450
Here are some important things to consider before you
do recreational vehicle towing:
What is the towing capacity of the towing vehicle?
Be sure to read the tow vehicle manufacturer’s
recommendations.
How far will the vehicle be towed? Some vehicles
have restrictions on how far and how long they
can tow.
Do you have the proper towing equipment? See
your dealer/retailer or trailering professional for
additional advice and equipment recommendations.
Is the vehicle ready to be towed? Just as you would
prepare your vehicle for a long trip, you will want to
make sure the vehicle is prepared to be towed.
SeeBefore Leaving on a Long Trip on page 4-15.
Dinghy Towing
Notice:If you tow your vehicle with all four wheels
on the ground, the drivetrain components could
be damaged. The repairs would not be covered
by your warranty. Do not tow your vehicle with all
four wheels on the ground.
The vehicle was not designed to be towed with all
four wheels on the ground. If the vehicle must be
towed, use a dolly. See “Dolly Towing” following for
more information.
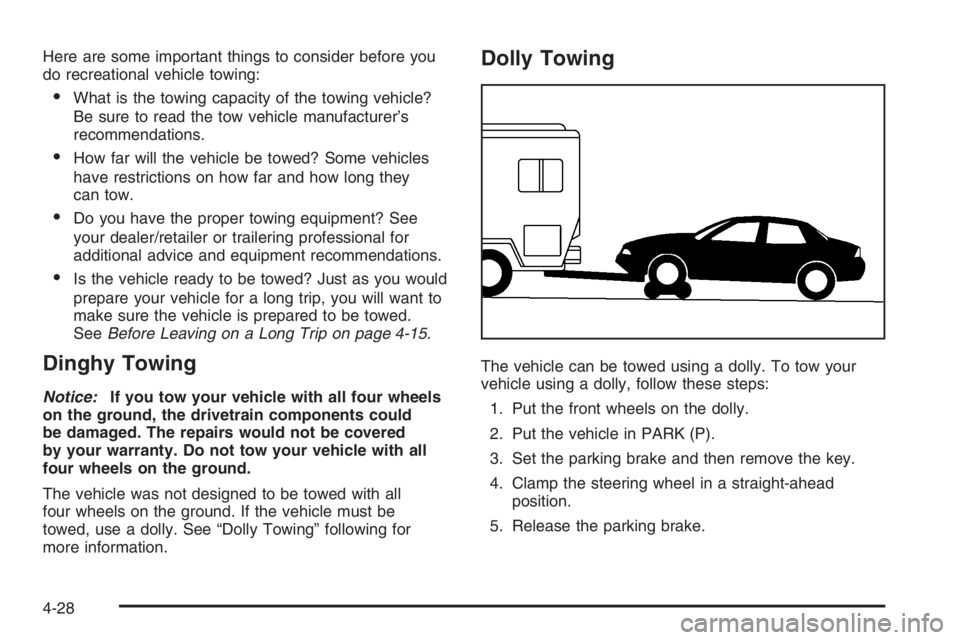
Dolly Towing
The vehicle can be towed using a dolly. To tow your
vehicle using a dolly, follow these steps:
1. Put the front wheels on the dolly.
2. Put the vehicle in PARK (P).
3. Set the parking brake and then remove the key.
4. Clamp the steering wheel in a straight-ahead
position.
5. Release the parking brake.
4-28
Page 269 of 450
The vehicle has bulb warning lights. When a trailer
lighting system is plugged into the vehicle’s lighting
system, its bulb warning lights may not indicate if one of
the lamps goes out. So, when a trailer lighting system
is plugged in, be sure to check the vehicle and
trailer lamps from time to time to be sure they are all
working. Once the trailer lamps have been disconnected,
the bulb warning lights can once again indicate if one
of the vehicle lamps is out.
Driving On Grades
Reduce speed and shift to a lower gear before starting
down a long or steep downgrade. If the vehicle is
not shifted down, the brakes may have to be used so
much that they would get hot and no longer work well.
On a long uphill grade, shift down and reduce the
vehicle’s speed to around 45 mph (70 km/h) to reduce
the possibility of engine and transmission overheating.
If the vehicle has overdrive, it may be driven in
THIRD (3) instead of DRIVE (D).
Parking on Hills
{CAUTION:
You really should not park your vehicle, with
a trailer attached, on a hill. If something goes
wrong, your rig could start to move. People
can be injured, and both your vehicle and the
trailer can be damaged.
But if the rig ever has to be parked on a hill, here is
how to do it:
1. Apply the regular brakes, but do not shift into
PARK (P) yet.
2. Have someone place chocks under the trailer
wheels.
3. When the wheel chocks are in place, release the
regular brakes until the chocks absorb the load.
4. Reapply the regular brakes. Then apply the
parking brake, and then shift to PARK (P).
5. Release the regular brakes.
4-35