Page 25 of 217
Black plate (28,1)
Model "NAV2-N" EDITED: 2007/ 3/ 9
INFO:
You can also adjust the volume by turning the
audio system volume knob or tiltingon
the steering switch while voice guidance is
being announced.
CHARACTER (letter and number) INPUT
SCREEN
You will have to enter alphanumeric characters
when setting a destination, searching for a
facility or editing the stored locations, etc.
1. Use the touch panel, center dial, main
directional buttons or additional directional
buttons to highlight a character on the
displayed keyboard.
2. Push. The highlighted character
is entered.
3. Push, or highlight [Delete] and
pushto delete the last character
entered.
Push and holdto delete all the
characters entered.
Highlight [Space] and pushto
enter a space.
4. After finishing the entry, highlight [List] and
push.
HOW TO INPUT LETTERS AND
NUMBERS
2-20Getting started
Page 26 of 217

Black plate (29,1)
Model "NAV2-N" EDITED: 2007/ 3/ 9
INFO:
.You can pushon the control
panel to return to the previous screen,
but only after deleting all the characters
entered.
.When you touch [BACK] on the screen,
the screen returns to the previous
screen even when characters have been
entered.
.When the character that you have
entered can only be followed by one
other character, that character is en-
tered automatically.
.When you have entered text and nar-
rowed down the matching list items to a
number that will fit on the screen, the list
screen appears automatically.
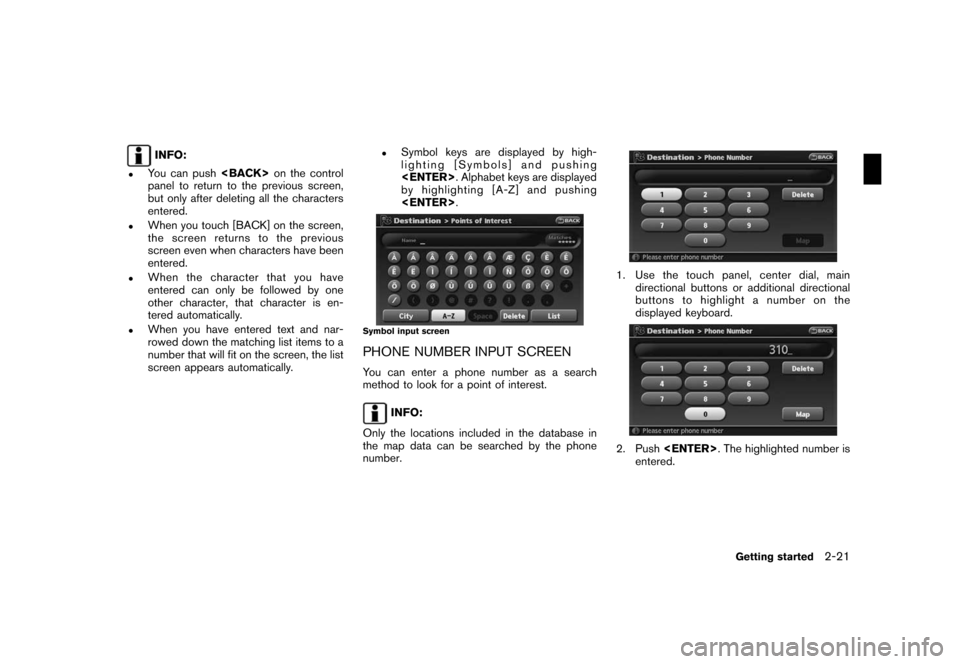
.Symbol keys are displayed by high-
lighting [Symbols] and pushing
. Alphabet keys are displayed
by highlighting [A-Z] and pushing
.
Symbol input screen
PHONE NUMBER INPUT SCREEN
You can enter a phone number as a search
method to look for a point of interest.
INFO:
Only the locations included in the database in
the map data can be searched by the phone
number.
1. Use the touch panel, center dial, main
directional buttons or additional directional
buttons to highlight a number on the
displayed keyboard.
2. Push. The highlighted number is
entered.
Getting started2-21
Page 27 of 217
![NISSAN XTERRA 2008 N50 / 2.G 06IT Navigation Manual Black plate (30,1)
Model "NAV2-N" EDITED: 2007/ 3/ 9
3. Push<BACK>, or highlight [Delete] and
push<ENTER>to delete the last number
entered.
Push and hold<BACK>to delete all the
numbers entered.
4. Aft NISSAN XTERRA 2008 N50 / 2.G 06IT Navigation Manual Black plate (30,1)
Model "NAV2-N" EDITED: 2007/ 3/ 9
3. Push<BACK>, or highlight [Delete] and
push<ENTER>to delete the last number
entered.
Push and hold<BACK>to delete all the
numbers entered.
4. Aft](/manual-img/5/795/w960_795-26.png)
Black plate (30,1)
Model "NAV2-N" EDITED: 2007/ 3/ 9
3. Push, or highlight [Delete] and
pushto delete the last number
entered.
Push and holdto delete all the
numbers entered.
4. After finishing the entry, highlight [Map] and
push.
INFO:
.You can pushon the control
panel to return to the previous screen, but
only after deleting all the numbers entered.
.When you touch [BACK] on the screen, the
screen returns to the previous screen even
when numbers have been entered.NISSAN Voice Recognition allows hands-free
operation of the navigation system and other
systems equipped on this vehicle, such as the
display, audio, climate control and phone.
INFO:
For the voice commands for the audio, air
conditioner and other systems (except naviga-
tion system) , refer to the vehicle Owner’s
Manual.
CONFIRMING VOICE COMMANDS
If you are controlling the system by voice
commands for the first time or do not know the
appropriate voice command, confirm the voice
command lists.
The following information describes how to
display the navigation command list and the
help list. For information about the operations of
other functions, refer to the vehicle Owner’s
Manual.
NISSAN VOICE RECOGNITION
2-22Getting started
Page 28 of 217
![NISSAN XTERRA 2008 N50 / 2.G 06IT Navigation Manual Black plate (31,1)
Model "NAV2-N" EDITED: 2007/ 3/ 9
Example: Displaying the navigation command list
1. Push<INFO>.
2. Highlight [Others] and push<ENTER>.
3. Highlight [Voice Recognition] and push
<EN NISSAN XTERRA 2008 N50 / 2.G 06IT Navigation Manual Black plate (31,1)
Model "NAV2-N" EDITED: 2007/ 3/ 9
Example: Displaying the navigation command list
1. Push<INFO>.
2. Highlight [Others] and push<ENTER>.
3. Highlight [Voice Recognition] and push
<EN](/manual-img/5/795/w960_795-27.png)
Black plate (31,1)
Model "NAV2-N" EDITED: 2007/ 3/ 9
Example: Displaying the navigation command list
1. Push.
2. Highlight [Others] and push.
3. Highlight [Voice Recognition] and push
.
4. Highlight [Command List] and push
.
5. Highlight [Navigation] and push.
6. Highlight the preferred item and push
.
Available items:
.Destination:
Allows you to set a destination.
.Search:
Allows you to search for a location.
.Map:
Allows you to change the map settings.
.Route:
Allows you to set a route in detail.
.Others:
Allows you to store locations or set the
route guidance.
7. You can confirm the list by scrolling the
screen using the up and down switches of
the main directional buttons or the center
dial.
8. Pressto return to the previous
screen.
For further details about the displayed command
list, refer to section 9.
“Command List” (page 9-3)
BEFORE STARTING
To get the best recognition performance out of
NISSAN Voice Recognition, observe the follow-
ing:
.The interior of the vehicle should be as quiet
as possible. Close the windows to eliminate
the surrounding noises (traffic noise and
vibration sounds, etc.) , which may prevent
the system from correctly recognizing the
voice commands.
Getting started2-23
Page 29 of 217

Black plate (32,1)
Model "NAV2-N" EDITED: 2007/ 3/ 9
.Wait until the tone sounds before speaking a
command. Otherwise, the command will not
be recognized properly.
.Speak in a natural conversational voice
without pausing between words.
.If the air conditioner is set to “Auto”, the fan
speed is automatically lowered so that your
commands can be recognized more easily.
VOICE COMMAND EXAMPLES
To use the voice recognition function, speaking
one command is sometimes sufficient, but at
other times it is necessary to speak two or more
commands.
As examples, some additional basic operations
by voice commands are described here.
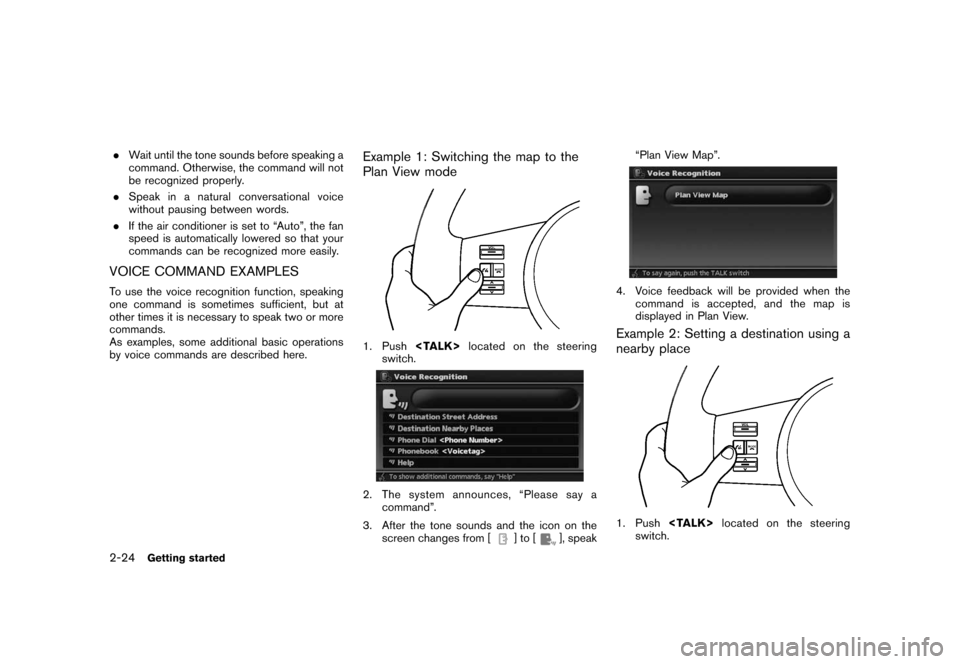
Example 1: Switching the map to the
Plan View mode
1. Pushlocated on the steering
switch.
2. The system announces, “Please say a
command”.
3. After the tone sounds and the icon on the
screen changes from [
]to[], speak“Plan View Map”.
4. Voice feedback will be provided when the
command is accepted, and the map is
displayed in Plan View.
Example 2: Setting a destination using a
nearby place
1. Pushlocated on the steering
switch.
2-24Getting started
Page 34 of 217

Black plate (7,1)
3 Map settings
Model "NAV2-N" EDITED: 2007/ 3/ 8
Map types........................................................ 3-2
Plan view..................................................... 3-2
Birdview
TM.................................................... 3-3
Building graphics........................................... 3-3
Returning to the current vehicle location.................. 3-4
Operating with the touch operation.................... 3-5
Moving a map................................................... 3-5
Plan view..................................................... 3-5
Birdview
TM.................................................... 3-7
Changing the scale of a map................................ 3-9
Operating with the buttons on the control panel.... 3-9
Operating with the center dial.........................3-10Operating with the touch operation..................3-10
Map scale..................................................3-11
Other settings for the map screen........................3-12
Switching the map view.................................3-12
Settings of heading/long range map view...........3-14
Changing the Birdview
TMangle.......................3-16
Operation with split screen display...................3-18
Looking at information on the map.......................3-19
Displaying landmark icons..............................3-19
Map scrolling information...............................3-20
Map symbols...............................................3-22
Page 35 of 217
Black plate (38,1)
Model "NAV2-N" EDITED: 2007/ 3/ 9
Two types of map views are available: Plan View
and BirdviewTM.
PLAN VIEW
Plan View displays the map in a 2-dimensional
environment similar to a road map.
Screen information
&1Vehicle icon:
Indicates the current vehicle location and
the direction that you are traveling.
&2Guide point:
Indicates a guide point on the route.
&3Remaining time and distance to the
destination:Indicates the approximate remaining time
and distance to the destination or waypoint.
This indicator will appear when you set the
destination or waypoint and start route
guidance.
When you are not driving on the suggested
route, the screen displays the direction to
the destination and the distance to the
destination from the current vehicle position.&4Suggested route:
Appears in bold yellow during route gui-
dance.
MAP TYPES
3-2Map settings
Page 36 of 217

Black plate (39,1)
Model "NAV2-N" EDITED: 2007/ 3/ 9
&5/Direction indicator:
Indicates the direction of the map.
Touch the icon to switch the direction of the
map.
&6Scale indicator:
Indicates the scale of the map.
Touch the icon to display the scale bar.
This allows the map scale to be adjusted.
&7Arrow:
Indicates the distance to the next guide
point and the turning direction at that guide
point.
&8Stored location:
Displays the locations that are stored in the
Address Book. You can change the icons
according to your preferences.
&9Avoid Area:
Displays the areas to avoid that are stored in
the Address Book with green or blue icons.
During the route search, the route guidance
is performed by searching for a route that
avoids those areas.
&10Street name:
Displays the name of the street that you are
currently driving on.
&11Traffic indicator:
Displays the reception condition of traffic
information transmitted from the provider.
Green: Reception condition is good.
Gray: Reception condition is not good.
No mark: Subscription to XM
®NavTrafficTM
service is not detected.
BirdviewTM
BirdviewTMdisplays the map from an elevated
perspective. In BirdviewTM, it is easy to recog-
nize an image of the route because it provides a
panoramic view over a long distance.
INFO:
About the Birdview
TMdisplay
.“BirdviewTM” is a registered trademark of
Xanavi Informatics Corporation.
.The map in Birdview
TMalways appears with
the current forward direction facing up.
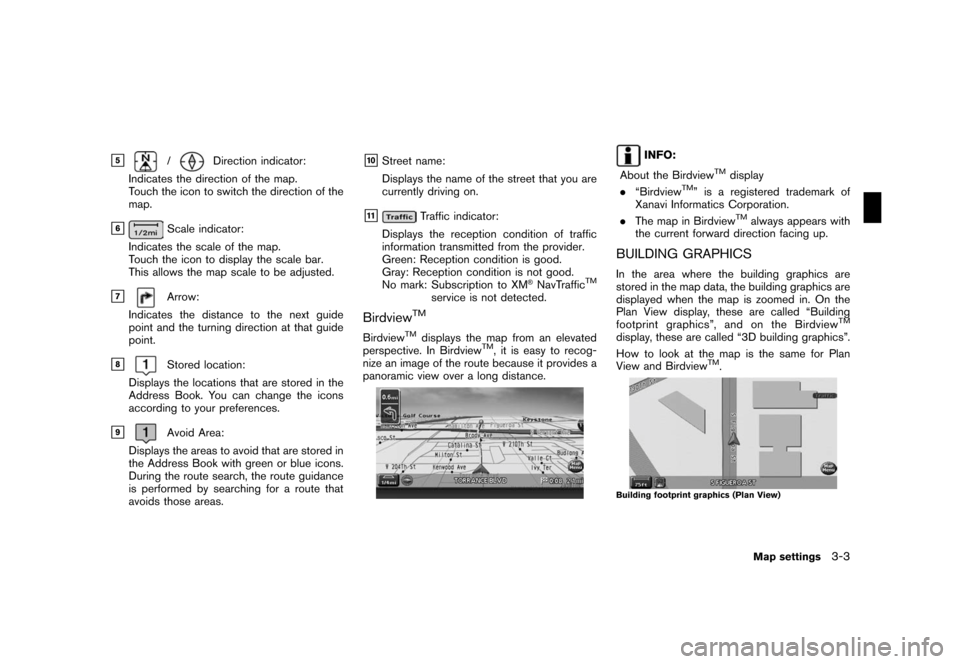
BUILDING GRAPHICS
In the area where the building graphics are
stored in the map data, the building graphics are
displayed when the map is zoomed in. On the
Plan View display, these are called “Building
footprint graphics”, and on the Birdview
TM
display, these are called “3D building graphics”.
How to look at the map is the same for Plan
View and Birdview
TM.
Building footprint graphics (Plan View)
Map settings3-3