Page 49 of 217
Black plate (52,1)
Model "NAV2-N" EDITED: 2007/ 3/ 9
Other settings
You can also set the orientation of the map using
the following procedure.
1) Push.
2) Highlight [Navigation] and push.
3) Highlight [Map Settings] and push
.
4) Highlight [Settings] and push.
INFO:
Touching the icon on the map can also change
the direction of the map.
Setting by voice command
1. Pushlocated on the steering
switch.
2. After the tone sounds, speak a command.
To charge the map direction:
“North Up”
“Heading Up”
CHANGING THE BirdviewTMANGLE
This changes the BirdviewTMangle.
This setting is available only in the BirdviewTMor
Split (BirdviewTM) mode.
1. Pushwhile the current location
map screen is displayed.
2. Highlight [Map settings] and push
.
3-16Map settings
Page 53 of 217

Black plate (56,1)
Model "NAV2-N" EDITED: 2007/ 3/ 9
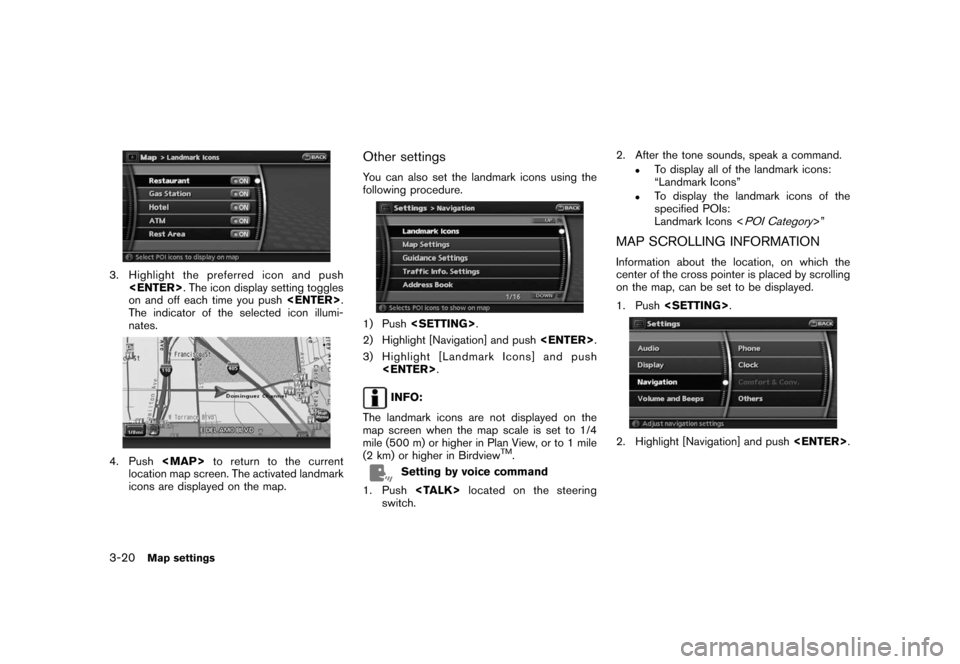
3. Highlight the preferred icon and push
. The icon display setting toggles
on and off each time you push.
The indicator of the selected icon illumi-
nates.
4. Push
Page 62 of 217

Black plate (65,1)
Model "NAV2-N" EDITED: 2007/ 3/ 9
the list screen. If this occurs, enter more
characters to further reduce the number of
matches.
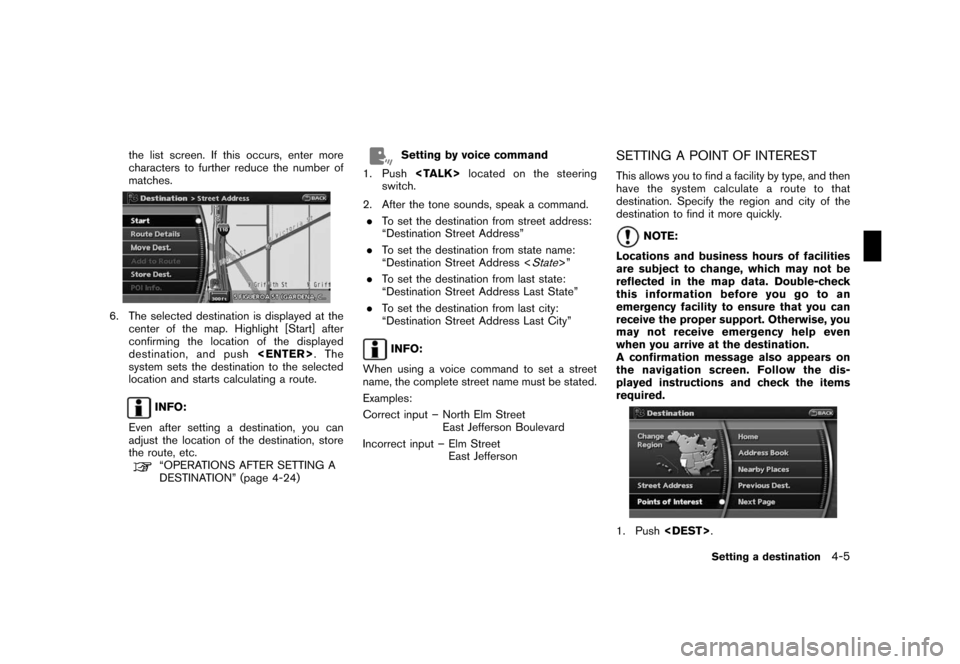
6. The selected destination is displayed at the
center of the map. Highlight [Start] after
confirming the location of the displayed
destination, and push.The
system sets the destination to the selected
location and starts calculating a route.
INFO:
Even after setting a destination, you can
adjust the location of the destination, store
the route, etc.
“OPERATIONS AFTER SETTING A
DESTINATION” (page 4-24)
Setting by voice command
1. Pushlocated on the steering
switch.
2. After the tone sounds, speak a command.
.To set the destination from street address:
“Destination Street Address”
.To set the destination from state name:
“Destination Street Address <
State>”
.To set the destination from last state:
“Destination Street Address Last State”
.To set the destination from last city:
“Destination Street Address Last City”
INFO:
When using a voice command to set a street
name, the complete street name must be stated.
Examples:
Correct input – North Elm Street
East Jefferson Boulevard
Incorrect input – Elm Street
East Jefferson
SETTING A POINT OF INTEREST
This allows you to find a facility by type, and then
have the system calculate a route to that
destination. Specify the region and city of the
destination to find it more quickly.
NOTE:
Locations and business hours of facilities
are subject to change, which may not be
reflected in the map data. Double-check
this information before you go to an
emergency facility to ensure that you can
receive the proper support. Otherwise, you
may not receive emergency help even
when you arrive at the destination.
A confirmation message also appears on
the navigation screen. Follow the dis-
played instructions and check the items
required.
1. Push.
Setting a destination4-5
Page 70 of 217

Black plate (73,1)
Model "NAV2-N" EDITED: 2007/ 3/ 9
SETTING YOUR HOME
This allows you to set your home as the
destination and have the system calculate a
route. It is useful especially when you are
searching for a route to return to your home.
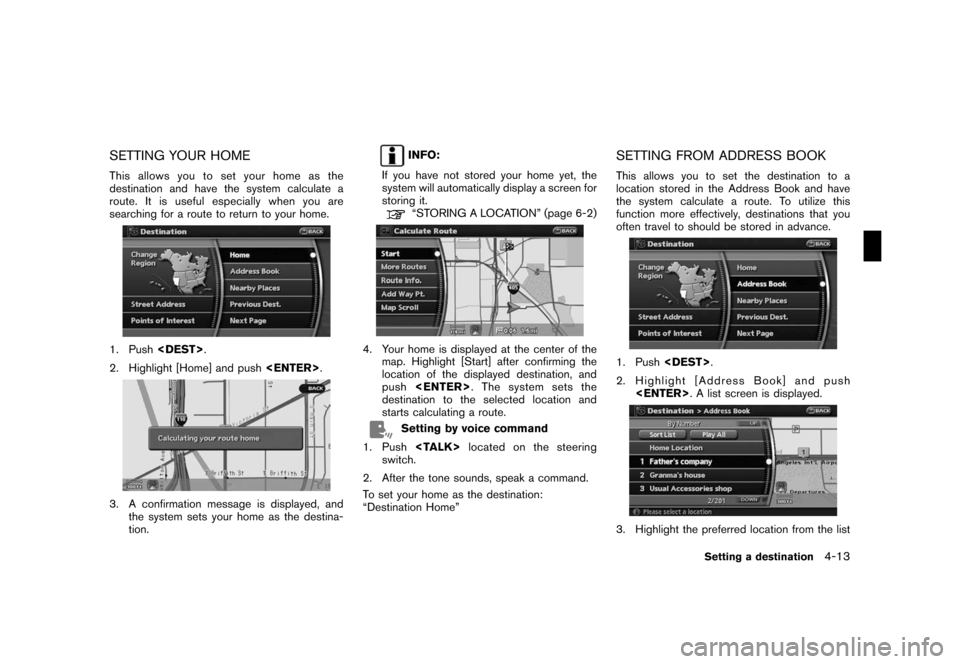
1. Push.
2. Highlight [Home] and push.
3. A confirmation message is displayed, and
the system sets your home as the destina-
tion.
INFO:
If you have not stored your home yet, the
system will automatically display a screen for
storing it.
“STORING A LOCATION” (page 6-2)
4. Your home is displayed at the center of the
map. Highlight [Start] after confirming the
location of the displayed destination, and
push. The system sets the
destination to the selected location and
starts calculating a route.
Setting by voice command
1. Pushlocated on the steering
switch.
2. After the tone sounds, speak a command.
To set your home as the destination:
“Destination Home”
SETTING FROM ADDRESS BOOK
This allows you to set the destination to a
location stored in the Address Book and have
the system calculate a route. To utilize this
function more effectively, destinations that you
often travel to should be stored in advance.
1. Push.
2. Highlight [Address Book] and push
. A list screen is displayed.
3. Highlight the preferred location from the list
Setting a destination4-13
Page 71 of 217
![NISSAN XTERRA 2008 N50 / 2.G 06IT Navigation Manual Black plate (74,1)
Model "NAV2-N" EDITED: 2007/ 3/ 9
and push<ENTER>.
INFO:
.Selecting [Sort List] displays a list of
various sort functions.
To use the sort functions, stored loca-
tions must be set NISSAN XTERRA 2008 N50 / 2.G 06IT Navigation Manual Black plate (74,1)
Model "NAV2-N" EDITED: 2007/ 3/ 9
and push<ENTER>.
INFO:
.Selecting [Sort List] displays a list of
various sort functions.
To use the sort functions, stored loca-
tions must be set](/manual-img/5/795/w960_795-70.png)
Black plate (74,1)
Model "NAV2-N" EDITED: 2007/ 3/ 9
and push.
INFO:
.Selecting [Sort List] displays a list of
various sort functions.
To use the sort functions, stored loca-
tions must be set in advance.
“EDITING THE STORED HOME
AND LOCATION” (page 6-9)
.Select [Play All] to play back the stored
voicetag.
INFO:
&1Sort by number:
The Address Book entries are displayed
in ascending numerical order.
&2Sort by name:
The Address Book entries are displayed
in alphabetic order.
&3Sort by icon:
By selecting a particular icon, a list that
contains only the Address Book entries
associated with that icon is displayed.
&4Sort by group:
By selecting a particular group (family,
friends, leisure, etc.) , the selected group
is displayed at the top of the list.
4. The selected destination is displayed at the
center of the map. Highlight [Start] after
confirming the location of the displayed
destination, and push.The
system sets the destination to the selected
location and starts calculating a route.
INFO:
Even after setting a destination, you can adjust
the location of the destination, store the route,
etc.
“OPERATIONS AFTER SETTING A
DESTINATION” (page 4-24)
Setting by voice command
1. Pushlocated on the steering
switch.
2. After the tone sounds, speak a command.
.To set the destination from the Address
Book:
“Destination Address book”
.To set the destination from a voicetag:
“Destination <
voicetag>”
SETTING A NEARBY PLACE
This allows you to set the destination to a facility
located near the current vehicle location or
another location that you move to by scrolling
the map, and then have the system calculate a
route.
If there is any particular Points of Interest type
that you intend to use frequently, you can store it
in the list of nearby Points of Interest.
“CUSTOMIZING NEARBY PLACES”
(page 8-5)
4-14Setting a destination
Page 73 of 217
![NISSAN XTERRA 2008 N50 / 2.G 06IT Navigation Manual Black plate (76,1)
Model "NAV2-N" EDITED: 2007/ 3/ 9
You can also set the destination by pushing
<ENTER>in the current location map screen
and selecting [Nearby].
Setting by voice command
1. Push<TALK NISSAN XTERRA 2008 N50 / 2.G 06IT Navigation Manual Black plate (76,1)
Model "NAV2-N" EDITED: 2007/ 3/ 9
You can also set the destination by pushing
<ENTER>in the current location map screen
and selecting [Nearby].
Setting by voice command
1. Push<TALK](/manual-img/5/795/w960_795-72.png)
Black plate (76,1)
Model "NAV2-N" EDITED: 2007/ 3/ 9
You can also set the destination by pushing
in the current location map screen
and selecting [Nearby].
Setting by voice command
1. Pushlocated on the steering
switch.
2. After the tone sounds, speak a command.
.To display the 5 nearest Points of Interest
and select the destination from them:
“Show nearby <
POI Category>”
.To display the nearby category list and
select the destination from it:
“Destination Nearby Places”
“Destination Nearby <
POI Category>”
SETTING A PREVIOUS DESTINATION
This allows you to set the destination to a
location that you have previously set as the
destination and have the system calculate a
route. Up to 100 previous destinations will be
automatically stored.
If the number of previous destinations exceeds
100, the oldest one will be replaced by the new
one.
1. Push.
2. Highlight [Previous Dest.] and push
. A list screen is displayed.
3. Highlight the preferred destination from the
list and push.
4. The selected destination is displayed at the
center of the map. Highlight [Start] after
confirming the location of the displayed
destination, and push.The
system sets the destination to the selected
location and starts calculating a route.
INFO:
Even after setting a destination, you can adjust
the location of the destination, store the route,
etc.
“OPERATIONS AFTER SETTING A
DESTINATION” (page 4-24)
Setting by voice command
1. Pushlocated on the steering
switch.
2. After the tone sounds, speak a command.
To display the Previous Destinations list:
“Destination Previous Destinations”
4-16Setting a destination
Page 74 of 217

Black plate (77,1)
Model "NAV2-N" EDITED: 2007/ 3/ 9
SETTING THE PREVIOUS STARTING
POINT
This allows you to set the destination to the
starting point of the previous route guidance and
have the system calculate a route.
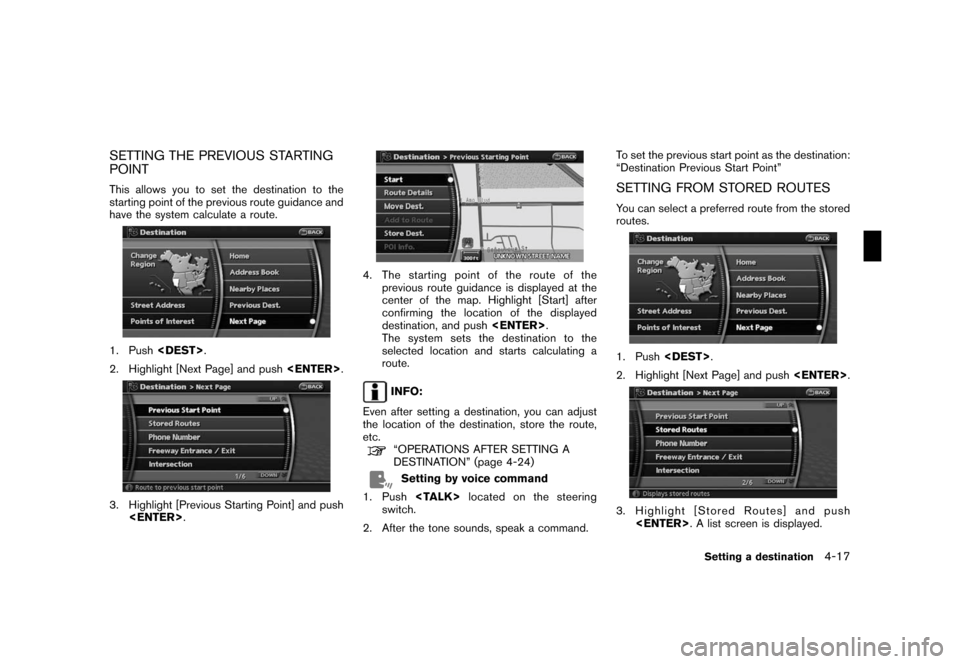
1. Push.
2. Highlight [Next Page] and push.
3. Highlight [Previous Starting Point] and push
.
4. The starting point of the route of the
previous route guidance is displayed at the
center of the map. Highlight [Start] after
confirming the location of the displayed
destination, and push.
The system sets the destination to the
selected location and starts calculating a
route.
INFO:
Even after setting a destination, you can adjust
the location of the destination, store the route,
etc.
“OPERATIONS AFTER SETTING A
DESTINATION” (page 4-24)
Setting by voice command
1. Pushlocated on the steering
switch.
2. After the tone sounds, speak a command.To set the previous start point as the destination:
“Destination Previous Start Point”
SETTING FROM STORED ROUTES
You can select a preferred route from the stored
routes.
1. Push.
2. Highlight [Next Page] and push.
3. Highlight [Stored Routes] and push
. A list screen is displayed.
Setting a destination4-17
Page 76 of 217
![NISSAN XTERRA 2008 N50 / 2.G 06IT Navigation Manual Black plate (79,1)
Model "NAV2-N" EDITED: 2007/ 3/ 9
4. Enter the telephone number including the
area code.
5. After finishing the entry, highlight [Map] and
push<ENTER>.
“PHONE NUMBER INPUT SCREEN� NISSAN XTERRA 2008 N50 / 2.G 06IT Navigation Manual Black plate (79,1)
Model "NAV2-N" EDITED: 2007/ 3/ 9
4. Enter the telephone number including the
area code.
5. After finishing the entry, highlight [Map] and
push<ENTER>.
“PHONE NUMBER INPUT SCREEN�](/manual-img/5/795/w960_795-75.png)
Black plate (79,1)
Model "NAV2-N" EDITED: 2007/ 3/ 9
4. Enter the telephone number including the
area code.
5. After finishing the entry, highlight [Map] and
push.
“PHONE NUMBER INPUT SCREEN”
(page 2-21)
6. Displays a list screen if there are two or
more search results. Highlight the preferred
destination from the list and push
.
7. The selected destination is displayed at the
center of the map. Highlight [Start] after
confirming the location of the displayed
destination, and push.The
system sets the destination to the selected
location and starts calculating a route.
INFO:
Even after setting a destination, you can adjust
the location of the destination, store the route,
etc.
“OPERATIONS AFTER SETTING A
DESTINATION” (page 4-24)
Setting by voice command
1. Pushlocated on the steering
switch.
2. After the tone sounds, speak a command.
To set the destination from Phone Number:
“Destination Phone Number”
SETTING A FREEWAY ENTRANCE/
EXIT
This allows you to set the destination to an
entrance or exit of a freeway, and then have the
system calculate a route.
1. Push.
2. Highlight [Next Page] and push.
3. Highlight [Freeway Entrance/Exit] and push
. A character input screen is
displayed.
Setting a destination4-19