2008 NISSAN QUEST change time
[x] Cancel search: change timePage 207 of 376
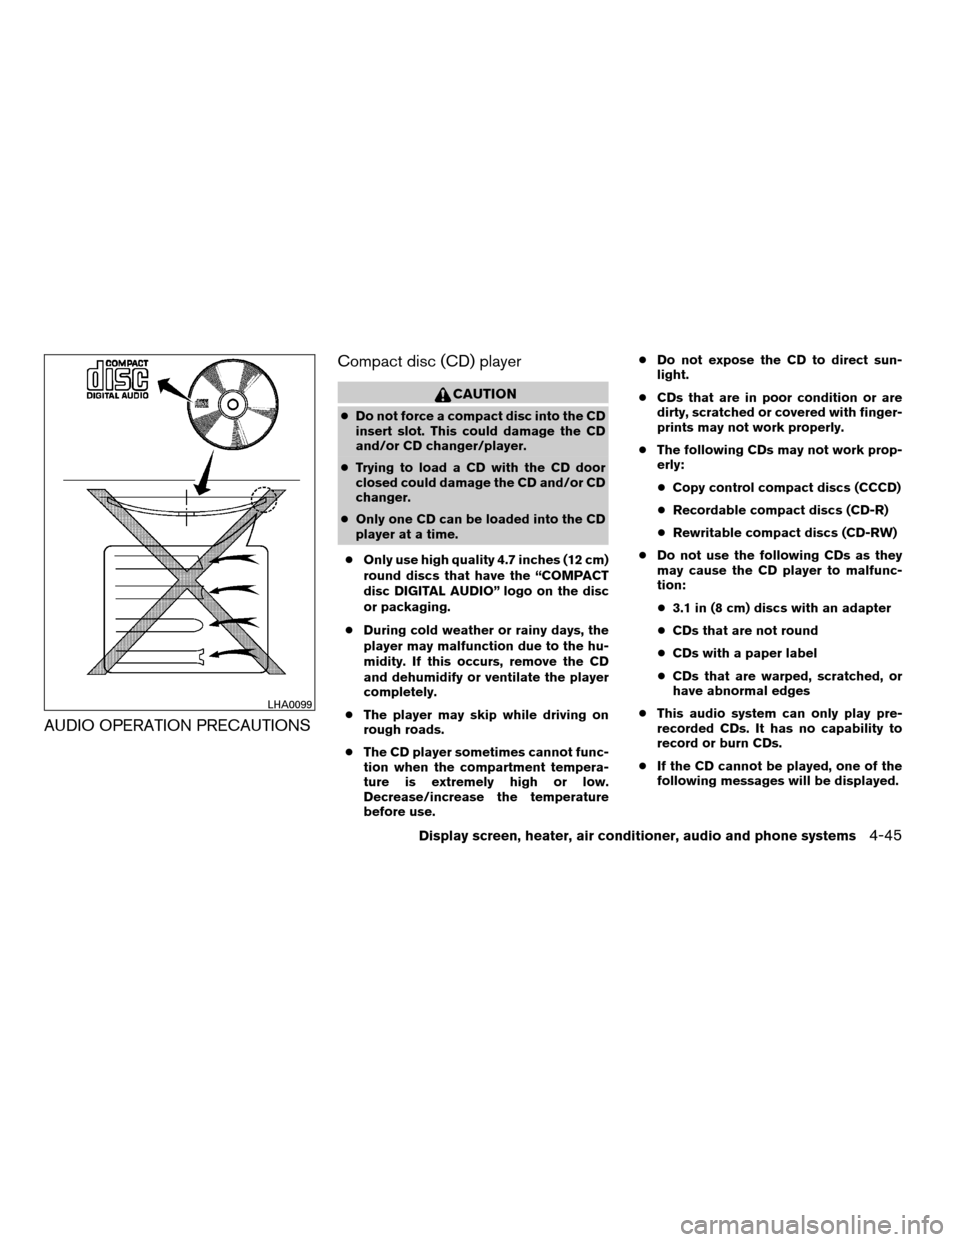
AUDIO OPERATION PRECAUTIONSCompact disc (CD) player
CAUTION
cDo not force a compact disc into the CD
insert slot. This could damage the CD
and/or CD changer/player.
cTrying to load a CD with the CD door
closed could damage the CD and/or CD
changer.
cOnly one CD can be loaded into the CD
player at a time.
cOnly use high quality 4.7 inches (12 cm)
round discs that have the “COMPACT
disc DIGITAL AUDIO” logo on the disc
or packaging.
cDuring cold weather or rainy days, the
player may malfunction due to the hu-
midity. If this occurs, remove the CD
and dehumidify or ventilate the player
completely.
cThe player may skip while driving on
rough roads.
cThe CD player sometimes cannot func-
tion when the compartment tempera-
ture is extremely high or low.
Decrease/increase the temperature
before use.cDo not expose the CD to direct sun-
light.
cCDs that are in poor condition or are
dirty, scratched or covered with finger-
prints may not work properly.
cThe following CDs may not work prop-
erly:
cCopy control compact discs (CCCD)
cRecordable compact discs (CD-R)
cRewritable compact discs (CD-RW)
cDo not use the following CDs as they
may cause the CD player to malfunc-
tion:
c3.1 in (8 cm) discs with an adapter
cCDs that are not round
cCDs with a paper label
cCDs that are warped, scratched, or
have abnormal edges
cThis audio system can only play pre-
recorded CDs. It has no capability to
record or burn CDs.
cIf the CD cannot be played, one of the
following messages will be displayed.
LHA0099
Display screen, heater, air conditioner, audio and phone systems4-45
ZREVIEW COPYÐ2008 Quest(van)
Owners ManualÐUSA_English(nna)
06/29/07Ðdebbie
X
Page 215 of 376

3. The channel indicator will then come on and
the sound will resume. Memorizing is now
complete.
4. Other buttons can be set in the same man-
ner.
* SAT presets are only available on SAT equipped
vehicles.
If the battery cable is disconnected, or if the fuse
opens, the radio memory will be canceled. In that
case, reset the desired stations.
Radio data system (RDS):
RDS stands for Radio Data System, and is a data
information service transmitted by some radio
stations on the FM band (not AM band) and/or
SAT radio encoded within a regular radio broad-
cast. Currently, most RDS stations are in large
cities, but many stations are now considering
broadcasting RDS data.
Compact disc (CD) player operation
Turn the ignition key to the ACC or ON position
and insert the compact disc into the slot with the
label side facing up. The compact disc will be
guided automatically into the slot and start play-
ing.
If the radio is already operating, it will automati-
cally turn off and the compact disc will play.If the system has been turned off while the com-
pact disc was playing, pressing the
POWER/VOLUME control knob will start the
compact disc.
CD/DVD button:
When the CD/DVD button is pressed with the
system off and the compact disc loaded, the
system will turn on and the compact disc will start
to play.
When the CD/DVD button is pressed with the
compact disc loaded but the radio playing, the
radio will automatically be turned off and the
compact disc will start to play.
SEEK/TRACK (Fast For-
ward and Rewind):
When the SEEK/TRACK button is pressed for
more than 1.5 seconds,
(fast forward)
or(rewind) while the compact disc is be-
ing played, the compact disc will play while fast
forwarding or rewinding. When the button is re-
leased, the compact disc will return to normal
play speed.
SEEK/TRACK:
When the
button is pressed for less than
1.5 seconds while a compact disc is playing, the
track being played returns to its beginning. Pressseveral times to skip back through tracks. The
compact disc will go back the number of times
the button is pressed.
When the
button is pressed for less than
1.5 seconds while a compact disc is playing, the
next track will start to play from its beginning.
Press several times to skip through tracks. The
compact disc will advance the number of times
the button is pressed. (When the last track on the
compact disc is skipped through, the first track
will be played.)
When the
orbutton is pressed for
more than 1.5 seconds, the CD will fast forward
or rewind.
SCAN/RPT:
When the SCAN/RPT button is pressed while
the compact disc is being played, the play pattern
can be changed as follows:
1 DISC RPT!1 TRACK RPT!1 DISC RDM
1 DISC RPT: The disc that is currently playing will
be repeated
1 TRACK RPT: The track that is currently playing
will be repeated.
1 DISC RDM: Tracks from the disc that is cur-
rently playing will be played randomly.
Display screen, heater, air conditioner, audio and phone systems4-53
ZREVIEW COPYÐ2008 Quest(van)
Owners ManualÐUSA_English(nna)
06/29/07Ðdebbie
X
Page 221 of 376

SCAN button is not pressed within 5 seconds,
SCAN tuning moves to the next station.
Station memory operations:
18 stations can be set for the FM, AM and SAT
radio to the A, B and C preset button in any
combination of AM, FM or SAT* stations.
1. Press the PRESET A·B·C button to change
between storage banks. The radio displays
the icon A, B or C to indicate which set of
presets are active.
2. Tune to the desired station using manual,
SEEK or SCAN tuning. Press and hold any
of the desired station memory buttons (1 –
6) until a beep sound is heard. (The radio
mutes when the select button is pressed) .
3. The channel indicator will then come on and
the sound will resume. Memorizing is now
complete.
4. Other buttons can be set in the same man-
ner.
* SAT presets are only available on SAT equipped
vehicles.
If the battery cable is disconnected, or if the fuse
opens, the radio memory will be canceled. In that
case, reset the desired stations.Radio data system (RDS):
RDS stands for Radio Data System, and is a data
information service transmitted by some radio
stations on the FM band (not AM band) and/or
SAT radio encoded within a regular radio broad-
cast. Currently, most RDS stations are in large
cities, but many stations are now considering
broadcasting RDS data.
Compact disc (CD) changer operation
Turn the ignition key to the ACC or ON position.
To insert the disc, first press the LOAD button.
Insert the compact disc into the slot with the label
side facing up. The compact disc will be guided
automatically into the slot and start playing.
If the radio is already operating, it will automati-
cally turn off and the compact disc will play.
If the system has been turned off while the com-
pact disc was playing, pressing the
POWER/VOLUME control knob will start the
compact disc.
CD LOAD button:
To insert a CD in the CD changer, press
the
load button for less than 1.5 seconds.
Select the loading slot by pressing the CD insert
select button (1 – 6) , then insert the CD.To insert 6 CDs to the CD changer, press
the
load button for more than 1.5 seconds.
The slot numbers (1 – 6) will illuminate on the
display when CDs are loaded into the changer.
CD/DVD button:
When the CD/DVD button is pressed with the
system off and the compact disc loaded, the
system will turn on and the compact disc will start
to play.
When the CD/DVD button is pressed with the
compact disc loaded with the radio playing, the
radio will automatically be turned off and the
compact disc will start to play.
SEEK/TRACK:
When the
button is pressed while a com-
pact disc is playing, the track being played re-
turns to its beginning. Press several times to skip
back through tracks. The compact disc will go
back the number of times the button is pressed.
When the
button is pressed while the
compact disc is playing, the next track will start to
play from its beginning. Press several times to
skip through tracks. The compact disc will ad-
vance the number of times the button is pressed.
(When the last track on the compact disc is
skipped through, the first track will be played.)
Display screen, heater, air conditioner, audio and phone systems4-59
ZREVIEW COPYÐ2008 Quest(van)
Owners ManualÐUSA_English(nna)
06/29/07Ðdebbie
X
Page 225 of 376

Next/Previous track (CD):
Push the tuning switch
orfor less
than 1.5 seconds to return to the beginning of the
present track or skip to the next track. Push
several times to skip back or skip through tracks.
This system searches for the blank intervals be-
tween selections. If there is a blank interval within
1 program or there is no interval between pro-
grams, the system may not stop in the desired or
expected location.
Change disc (CD) (if so equipped):
Push the SEEK tuning switch
orfor
more than 1.5 seconds to change the playing
disc up or down.
1. VOL (volume) control button
2. MODE select button
3.
speaker control button
4. NEXT button
5. SEEK button
6. Headphone jacks7. Infrared headphone transmitter lens*
*Red transmitters will be visible when
infrared headphones are on.
LHA0322
Display screen, heater, air conditioner, audio and phone systems4-63
ZREVIEW COPYÐ2008 Quest(van)
Owners ManualÐUSA_English(nna)
06/29/07Ðdebbie
X
Page 231 of 376
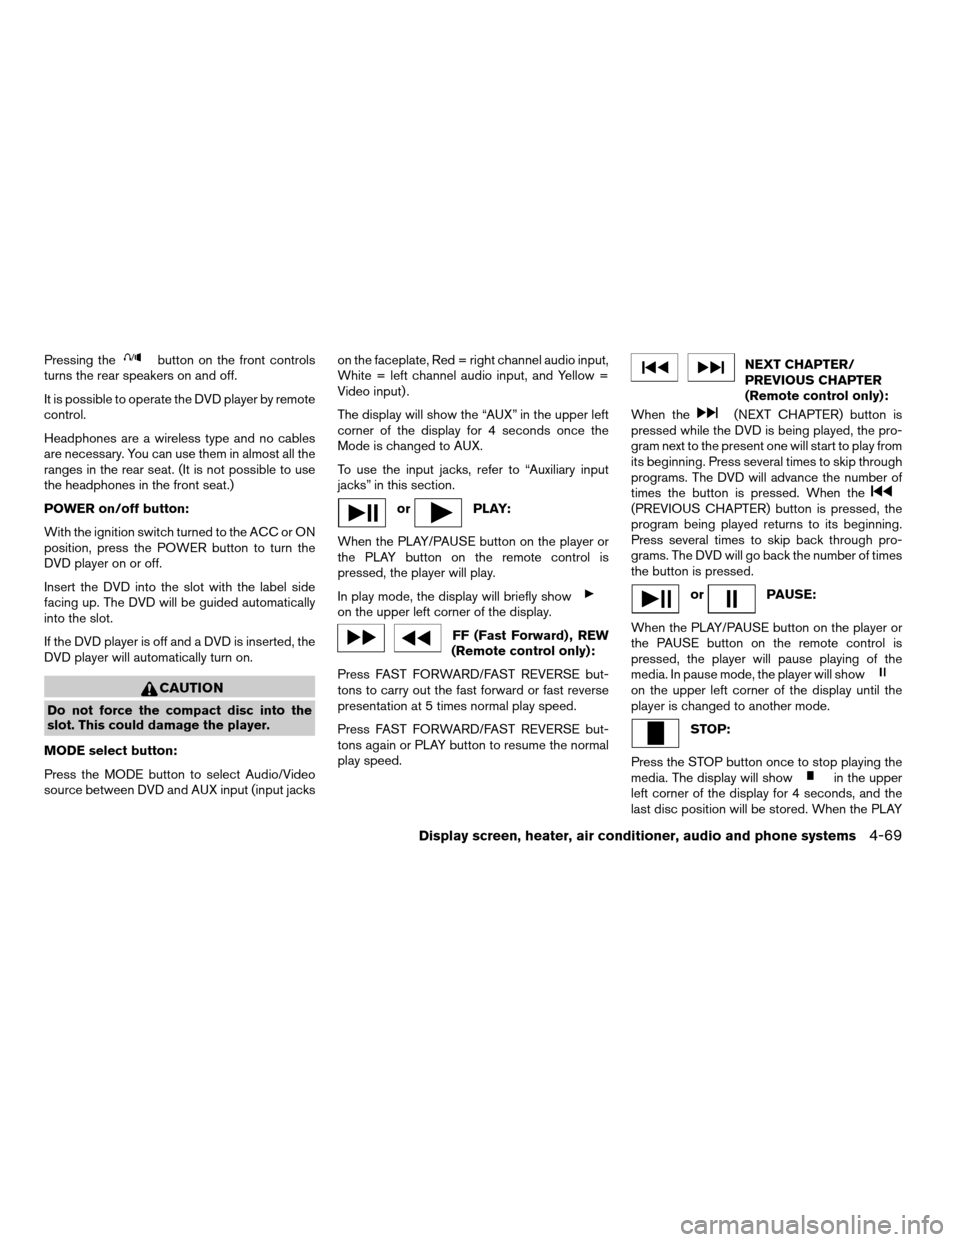
Pressing thebutton on the front controls
turns the rear speakers on and off.
It is possible to operate the DVD player by remote
control.
Headphones are a wireless type and no cables
are necessary. You can use them in almost all the
ranges in the rear seat. (It is not possible to use
the headphones in the front seat.)
POWER on/off button:
With the ignition switch turned to the ACC or ON
position, press the POWER button to turn the
DVD player on or off.
Insert the DVD into the slot with the label side
facing up. The DVD will be guided automatically
into the slot.
If the DVD player is off and a DVD is inserted, the
DVD player will automatically turn on.
CAUTION
Do not force the compact disc into the
slot. This could damage the player.
MODE select button:
Press the MODE button to select Audio/Video
source between DVD and AUX input (input jackson the faceplate, Red = right channel audio input,
White = left channel audio input, and Yellow =
Video input) .
The display will show the “AUX” in the upper left
corner of the display for 4 seconds once the
Mode is changed to AUX.
To use the input jacks, refer to “Auxiliary input
jacks” in this section.
orPLAY:
When the PLAY/PAUSE button on the player or
the PLAY button on the remote control is
pressed, the player will play.
In play mode, the display will briefly show
on the upper left corner of the display.
FF (Fast Forward) , REW
(Remote control only):
Press FAST FORWARD/FAST REVERSE but-
tons to carry out the fast forward or fast reverse
presentation at 5 times normal play speed.
Press FAST FORWARD/FAST REVERSE but-
tons again or PLAY button to resume the normal
play speed.
NEXT CHAPTER/
PREVIOUS CHAPTER
(Remote control only):
When the
(NEXT CHAPTER) button is
pressed while the DVD is being played, the pro-
gram next to the present one will start to play from
its beginning. Press several times to skip through
programs. The DVD will advance the number of
times the button is pressed. When the
(PREVIOUS CHAPTER) button is pressed, the
program being played returns to its beginning.
Press several times to skip back through pro-
grams. The DVD will go back the number of times
the button is pressed.
orPAUSE:
When the PLAY/PAUSE button on the player or
the PAUSE button on the remote control is
pressed, the player will pause playing of the
media. In pause mode, the player will show
on the upper left corner of the display until the
player is changed to another mode.
STOP:
Press the STOP button once to stop playing the
media. The display will show
in the upper
left corner of the display for 4 seconds, and the
last disc position will be stored. When the PLAY
Display screen, heater, air conditioner, audio and phone systems4-69
ZREVIEW COPYÐ2008 Quest(van)
Owners ManualÐUSA_English(nna)
06/29/07Ðcathy
X
Page 236 of 376
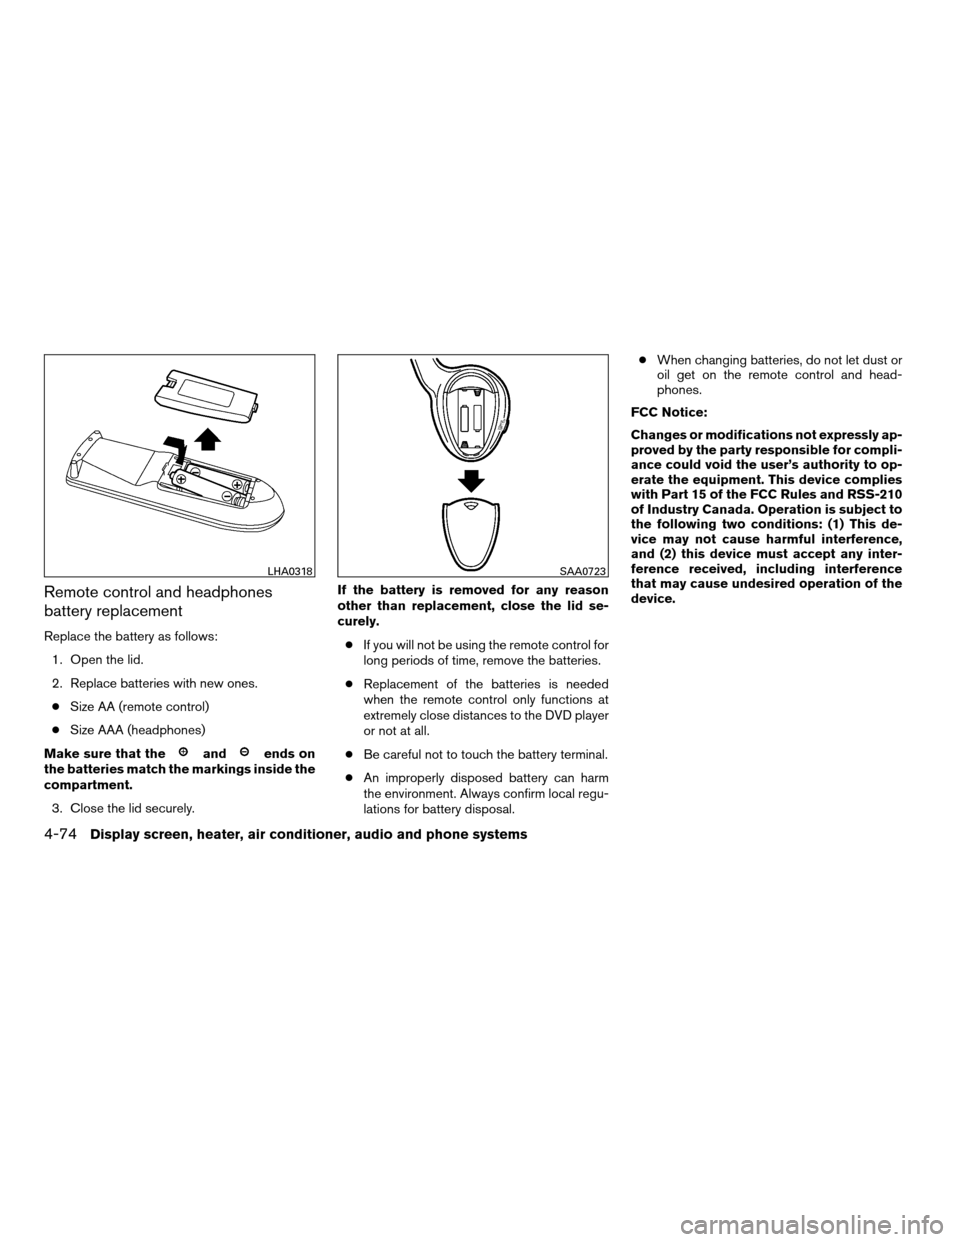
Remote control and headphones
battery replacement
Replace the battery as follows:
1. Open the lid.
2. Replace batteries with new ones.
cSize AA (remote control)
cSize AAA (headphones)
Make sure that the
andends on
the batteries match the markings inside the
compartment.
3. Close the lid securely.If the battery is removed for any reason
other than replacement, close the lid se-
curely.
cIf you will not be using the remote control for
long periods of time, remove the batteries.
cReplacement of the batteries is needed
when the remote control only functions at
extremely close distances to the DVD player
or not at all.
cBe careful not to touch the battery terminal.
cAn improperly disposed battery can harm
the environment. Always confirm local regu-
lations for battery disposal.cWhen changing batteries, do not let dust or
oil get on the remote control and head-
phones.
FCC Notice:
Changes or modifications not expressly ap-
proved by the party responsible for compli-
ance could void the user’s authority to op-
erate the equipment. This device complies
with Part 15 of the FCC Rules and RSS-210
of Industry Canada. Operation is subject to
the following two conditions: (1) This de-
vice may not cause harmful interference,
and (2) this device must accept any inter-
ference received, including interference
that may cause undesired operation of the
device.
LHA0318SAA0723
4-74Display screen, heater, air conditioner, audio and phone systems
ZREVIEW COPYÐ2008 Quest(van)
Owners ManualÐUSA_English(nna)
06/29/07Ðdebbie
X
Page 247 of 376
“Play”sB
The system plays back all the memos in the order
of newest to oldest. The system ends the VR
session.
If there are no memos recorded, the system an-
nounces “No messages to play.” The system
ends the VR session.
“Delete”
sC
The Delete command erases all memos. The
system asks you to confirm this action before
deleting all memos.
“Setup”
Main Menu
“Setup”
“Pair Phone”
sA
“List Phone”sB
“Select Phone”sC
“Change Priority”sD
“Delete Phone”sE
“Select Ringtone”sF
“Bluetooth Off”sG
Use the Setup command to change options as-
sociated with the BluetoothTHands-Free Phone
System.
“Pair phone”
sA
Use the Pair Phone command to pair a phone to
the BluetoothTHands-Free Phone System.
NOTE:
The pairing procedure must be performed
when the vehicle is stationary. If the vehicle
starts moving during the procedure, the
procedure will be cancelled. Also, see
“Pairing procedure” earlier in this section
for additional information.
Up to 5 phones can be paired. If you try to pair a
sixth phone, the system announces that you must
first delete one phone or replace an existing
phone.
If you try to pair a phone that has already been
paired to your vehicle’s system, the system an-
nounces the name the phone is already using.
The pairing procedure will then be cancelled.
When prompted by the system, choose from the
following commands:
c“New phone” — Refer to “Pairing a phone”
earlier in this section.c“Replace phone” — The system announces
the names of the phones already paired and
asks which you would like to replace.
Once you say the name of the phone you
wish to replace, the pairing procedure will
begin. Refer to “Pairing procedure” earlier in
this section.
c“List phone” – See the description below.
“List phone”
sB
Use the List Phone command to hear the names
of the phones currently paired. If no phones are
paired, the system announces, “No paired
phones to list.” The system then ends the VR
session.
“Select phone”
sC
Use the Select Phone command to select a
phone of lesser priority when two or more phones
paired with BluetoothTHands-Free Phone Sys-
tem are in the vehicle at the same time.
The system asks you to name the phone and
confirm the selection.
Once the selection is confirmed, the selected
phone remains active until the ignition switch is
turned OFF or you select a new phone.
Display screen, heater, air conditioner, audio and phone systems4-85
ZREVIEW COPYÐ2008 Quest(van)
Owners ManualÐUSA_English(nna)
06/29/07Ðdebbie
X
Page 254 of 376
WARNING
cDo not leave children or adults who
would normally require the assistance
of others alone in your vehicle. Pets
should also not be left alone. They
could accidentally injure themselves or
others through inadvertent operation of
the vehicle. Also, on hot, sunny days,
temperatures in a closed vehicle could
quickly become high enough to cause
severe or possibly fatal injuries to
people or animals.
cProperly secure all cargo with ropes or
straps to help prevent it from sliding or
shifting. Do not place cargo higher than
the seatbacks. In a sudden stop or col-
lision, unsecured cargo could cause
personal injury.
EXHAUST GAS (carbon monoxide)
WARNING
cDo not breathe exhaust gases; they
contain colorless and odorless carbon
monoxide. Carbon monoxide is danger-
ous. It can cause unconsciousness or
death.cIf you suspect that exhaust fumes are
entering the vehicle, drive with all win-
dows fully open, and have the vehicle
inspected immediately.
cDo not run the engine in closed spaces
such as a garage.
cDo not park the vehicle with the engine
running for any extended length of time.
cKeep the lift gate and rear vent windows
closed while driving, otherwise exhaust
gases could be drawn into the passen-
ger compartment. If you must drive with
the lift gate or rear vent windows open,
follow these precautions:
1. Open all the windows.
2. Set the
air recirculation but-
ton to off and the fan control dial to
high to circulate the air.
cIf electrical wiring or other cable con-
nections must pass to a trailer through
the seal on the lift gate or the body,
follow the manufacturer’s recommen-
dation to prevent carbon monoxide en-
try into the vehicle.
cThe exhaust system and body should be
inspected by a qualified mechanic
whenever:a. The vehicle is raised for service.
b. You suspect that exhaust fumes are
entering into the passenger
compartment.
c. You notice a change in the sound of
the exhaust system.
d. You have had an accident involving
damage to the exhaust system, un-
derbody, or rear of the vehicle.
THREE-WAY CATALYST
The three-way catalyst is an emission control
device installed in the exhaust system. Exhaust
gases in the three-way catalyst are burned at
high temperatures to help reduce pollutants.
WARNING
cThe exhaust gas and the exhaust sys-
tem are very hot. Keep people, animals
or flammable materials away from the
exhaust system components.
cDo not stop or park the vehicle over
flammable materials such as dry grass,
waste paper or rags. They may ignite
and cause a fire.
PRECAUTIONS WHEN STARTING
AND DRIVING
5-2Starting and driving
ZREVIEW COPYÐ2008 Quest(van)
Owners ManualÐUSA_English(nna)
06/29/07Ðdebbie
X