2008 NISSAN QUEST steering
[x] Cancel search: steeringPage 87 of 376

17. Shift selector lever (P. 5-8)
18. Ignition switch (P. 5-6)
19. Tilt steering wheel control (P. 3-21)
20. Rear sonar system off switch
(if so equipped) (P. 2-25)
21. Vehicle Dynamic Control (VDC) off
switch (if so equipped) or Traction
Control System (TCS) off switch
(if so equipped) (P. 2-25, P. 2-25)
22. Lights on demand switch (P. 2-41)
*: Refer to the separate Navigation System Own-
er’s Manual (if so equipped) .
See the page number indicated in paren-
theses for operating details.
1. Tachometer
2. Warning/indicator lights
3. Speedometer
4. Engine coolant temperature gauge
5. Fuel gauge
6. Odometer/Twin trip odometer
LIC0929
METERS AND GAUGES
Instruments and controls2-3
ZREVIEW COPYÐ2008 Quest(van)
Owners ManualÐUSA_English(nna)
06/29/07Ðdebbie
X
Page 94 of 376

cIf the light illuminates while driving,
avoid sudden steering maneuvers or
abrupt braking, reduce vehicle speed,
pull off the road to a safe location and
stop the vehicle as soon as possible.
Driving with under-inflated tires may
permanently damage the tires and in-
crease the likelihood of tire failure. Se-
rious vehicle damage could occur and
may lead to an accident and could re-
sult in serious personal injury. Check
the tire pressure for all four tires. Adjust
the tire pressure to the recommended
COLD tire pressure shown on the Tire
and Loading Information label to turn
the low tire pressure warning light OFF.
If the light still comes on while driving
after adjusting the tire pressure, a tire
may be flat. If you have a flat tire, re-
place it with a spare tire as soon as
possible.
cWhen a spare tire is mounted or a wheel
is replaced, tire pressure will not be
indicated, the TPMS will not function
and the low tire pressure warning light
will flash for approximately 1 minute.
The light will remain on after 1 minute.
Contact your NISSAN dealer as soon as
possible for tire replacement and/or
system resetting.cReplacing tires with those not originally
specified by NISSAN could affect the
proper operation of the TPMS.
CAUTION
cThe TPMS is not a substitute for the
regular tire pressure check. Be sure to
check the tire pressure regularly.
cIf the vehicle is being driven at speeds
of less than 16 MPH (25 km/h) , the
TPMS may not operate correctly.
cBe sure to install the specified size of
tires to the 4 wheels correctly.
Low windshield washer fluid
warning light
This light comes on when the windshield washer
fluid is at a low level. Add windshield washer fluid
as necessary. See “Window washer fluid” in the
“Maintenance and do-it-yourself” section of this
manual.
Seat belt warning light and
chime
The light and chime remind you to fasten your
seat belts. The light illuminates whenever the
ignition key is turned to the ON or START position
and remains illuminated until the driver’s seat beltis fastened. At the same time, the chime sounds
for about 6 seconds unless the driver’s seat belt
is securely fastened.
The seat belt warning light may also illuminate if
the front passenger’s seat belt is not fastened
when the front passenger’s seat is occupied . For
7 seconds after the ignition switch is in the ON
position, the system does not activate the warn-
ing light for the front passenger.
Refer to “Seat belts” in the “Safety—Seats, seat
belts and supplemental restraint system” section
for precautions on seat belt usage.
Supplemental air bag warning
light
When the ignition key is in the ON or START
position, the supplemental air bag warning light
illuminates for about 7 seconds and then turns
off. This means the system is operational.
If any of the following conditions occur, the front
air bag, side air bag, curtain air bag and preten-
sioner systems need servicing and your vehicle
must be taken to a NISSAN dealer:
cThe supplemental air bag warning light re-
mains on after approximately 7 seconds.
cThe supplemental air bag warning light
flashes intermittently.
2-10Instruments and controls
ZREVIEW COPYÐ2008 Quest(van)
Owners ManualÐUSA_English(nna)
06/29/07Ðcathy
X
Page 108 of 376

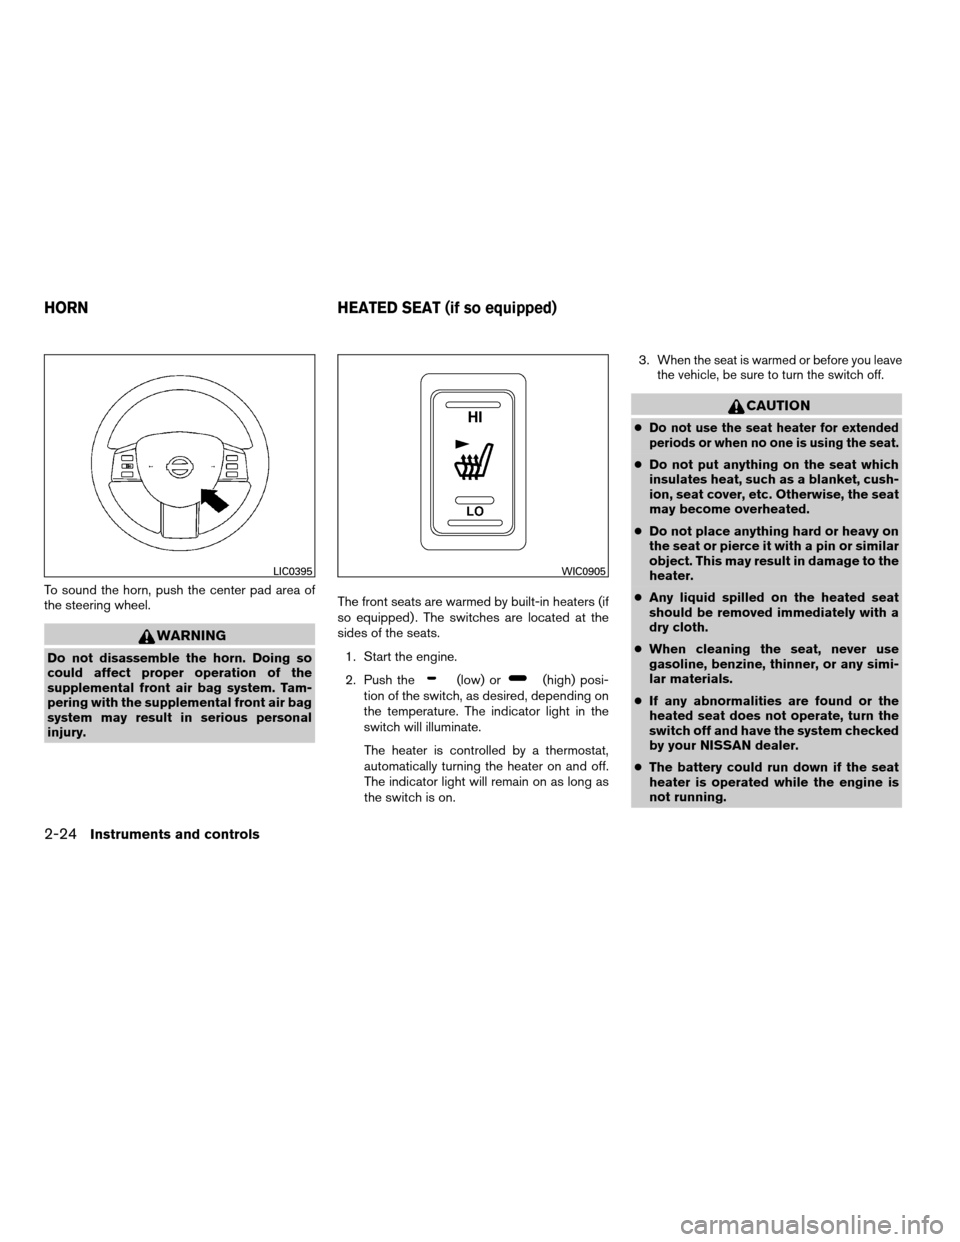
To sound the horn, push the center pad area of
the steering wheel.
WARNING
Do not disassemble the horn. Doing so
could affect proper operation of the
supplemental front air bag system. Tam-
pering with the supplemental front air bag
system may result in serious personal
injury.The front seats are warmed by built-in heaters (if
so equipped) . The switches are located at the
sides of the seats.
1. Start the engine.
2. Push the
(low) or(high) posi-
tion of the switch, as desired, depending on
the temperature. The indicator light in the
switch will illuminate.
The heater is controlled by a thermostat,
automatically turning the heater on and off.
The indicator light will remain on as long as
the switch is on.3.
When the seat is warmed or before you leave
the vehicle, be sure to turn the switch off.
CAUTION
cDo not use the seat heater for extended
periods or when no one is using the seat.
cDo not put anything on the seat which
insulates heat, such as a blanket, cush-
ion, seat cover, etc. Otherwise, the seat
may become overheated.
cDo not place anything hard or heavy on
the seat or pierce it with a pin or similar
object. This may result in damage to the
heater.
cAny liquid spilled on the heated seat
should be removed immediately with a
dry cloth.
cWhen cleaning the seat, never use
gasoline, benzine, thinner, or any simi-
lar materials.
cIf any abnormalities are found or the
heated seat does not operate, turn the
switch off and have the system checked
by your NISSAN dealer.
cThe battery could run down if the seat
heater is operated while the engine is
not running.
LIC0395WIC0905
HORN HEATED SEAT (if so equipped)
2-24Instruments and controls
ZREVIEW COPYÐ2008 Quest(van)
Owners ManualÐUSA_English(nna)
06/29/07Ðdebbie
X
Page 133 of 376

3 Pre-driving checks and adjustments
Keys .............................................3-2
NISSAN vehicle immobilizer system keys..........3-2
Doors............................................3-3
Locking with key................................3-3
Locking with inside lock knob....................3-4
Locking with power door lock switch.............3-5
Operating the manual sliding door
(if so equipped)................................3-5
Using the main ON/OFF switch for the
power sliding door (if so equipped)...............3-6
Operating the power sliding door
(if so equipped)................................3-6
Child safety sliding door lock....................3-9
Remote keyless entry system.......................3-9
How to use remote keyless entry system.........3-10
Hood...........................................3-14
Lift gate.........................................3-14
Operating the manual lift gate...................3-15
Using the main ON/OFF switch for the
power lift gate (if so equipped)..................3-15Operating the power lift gate
(if so equipped)...............................3-16
Lift gate release...............................3-18
Fuel-filler door...................................3-19
Opener operation..............................3-19
Fuel-filler cap.................................3-19
Steering wheel...................................3-21
Tilt operation..................................3-21
Pedal position adjustment (if so equipped)..........3-21
Sun visors.......................................3-22
Vanity mirrors.................................3-22
Mirrors..........................................3-23
Rearview mirror (if so equipped).................3-23
Automatic anti-glare rearview mirror
(if so equipped)...............................3-23
Outside mirrors...............................3-24
Automatic drive positioner (if so equipped)..........3-25
Memory storage function.......................3-26
Entry/exit function.............................3-27
System operation..............................3-27
ZREVIEW COPYÐ2008 Quest(van)
Owners ManualÐUSA_English(nna)
06/29/07Ðdebbie
X
Page 153 of 376

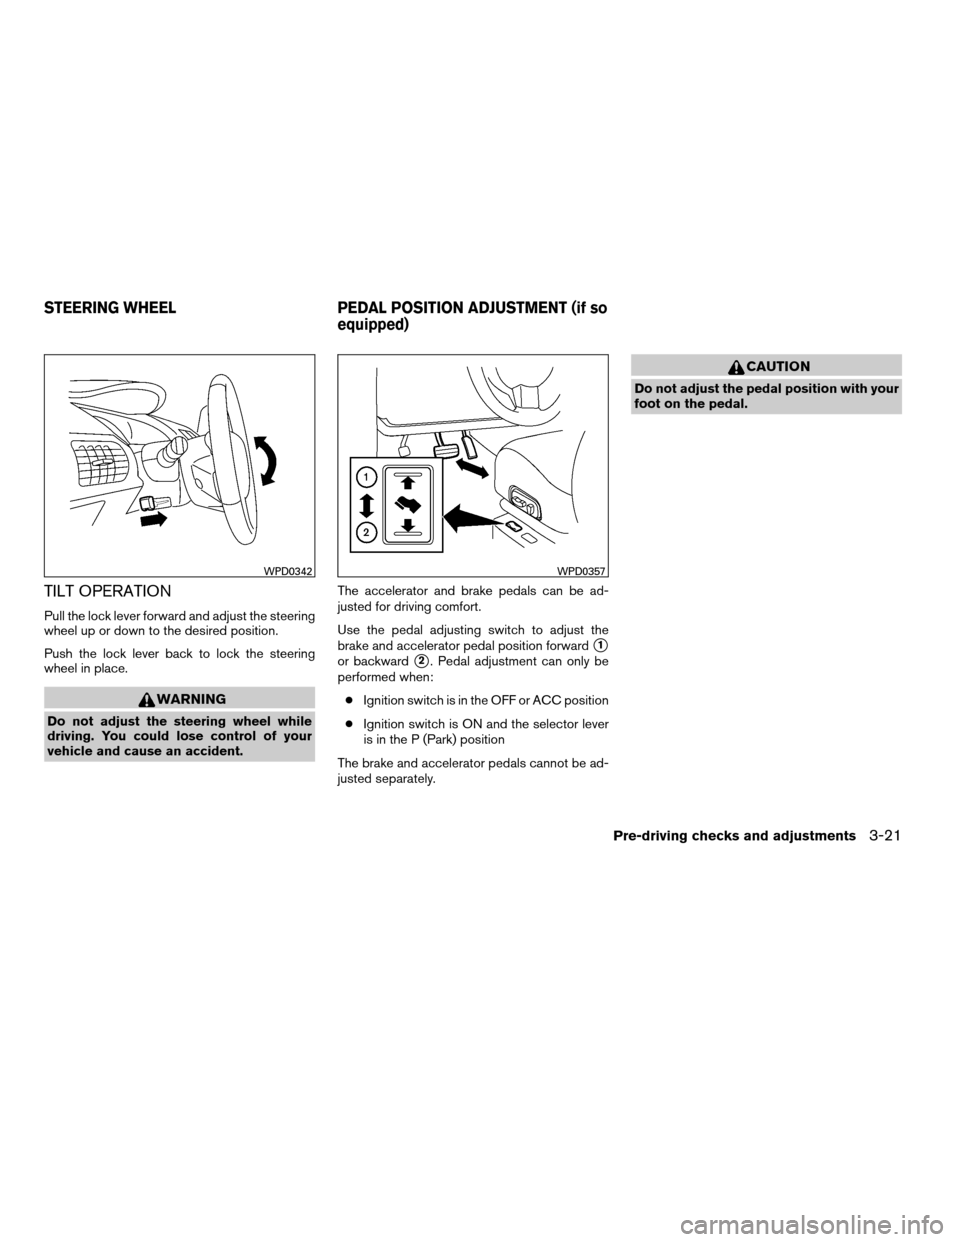
TILT OPERATION
Pull the lock lever forward and adjust the steering
wheel up or down to the desired position.
Push the lock lever back to lock the steering
wheel in place.
WARNING
Do not adjust the steering wheel while
driving. You could lose control of your
vehicle and cause an accident.The accelerator and brake pedals can be ad-
justed for driving comfort.
Use the pedal adjusting switch to adjust the
brake and accelerator pedal position forward
s1
or backwards2. Pedal adjustment can only be
performed when:
cIgnition switch is in the OFF or ACC position
cIgnition switch is ON and the selector lever
is in the P (Park) position
The brake and accelerator pedals cannot be ad-
justed separately.
CAUTION
Do not adjust the pedal position with your
foot on the pedal.
WPD0342WPD0357
STEERING WHEEL PEDAL POSITION ADJUSTMENT (if so
equipped)
Pre-driving checks and adjustments3-21
ZREVIEW COPYÐ2008 Quest(van)
Owners ManualÐUSA_English(nna)
06/29/07Ðdebbie
X
Page 163 of 376

FM/AM/SAT radio with compact disc (CD)
changer (Type A and B) (if so equipped).........4-56
CD care and cleaning..........................4-61
Steering wheel switch for audio control..........4-62
Rear audio controls (if so equipped).............4-64
Antenna......................................4-65
DVD entertainment system (if so equipped)..........4-65
Digital video disc (DVD) player controls..........4-66
Remote control................................4-67
Flip-down screen..............................4-67
Playing a digital video disc (DVD)...............4-68Care and maintenance.........................4-71
How to handle the DVD........................4-72
Car phone or CB radio............................4-75
BluetoothTHands-Free Phone System
(if so equipped)..................................4-75
Using the system..............................4-77
Control buttons...............................4-79
Getting started................................4-79
List of voice commands........................4-81
Speaker adaptation (SA) mode..................4-86
Troubleshooting guide.........................4-89
ZREVIEW COPYÐ2008 Quest(van)
Owners ManualÐUSA_English(nna)
06/29/07Ðdebbie
X
Page 224 of 376

1. Volume control switch
2. MODE select switch
3. POWER on/off switch
4. Tuning switch1. Volume control switch
2. Phone operation switch
3. POWER on and MODE select switch
4. Tuning switch
STEERING WHEEL SWITCH FOR
AUDIO CONTROL
The audio system can be operated using the
controls on the steering wheel.
POWER on/off switch
With the ignition key turned to the ACC or ON
position, push the POWER switch to turn the
audio system on or off.If you have the Type B switch, with the ignition key
turned to the ACC or ON position, push the
MODE switch to turn the audio system on.
MODE select switch
Push the MODE select switch to change the
mode in the following sequence: PRESET A!
PRESET B!PRESET C!CD!DVD (if so
equipped)!AUX.
While in one of the preset radio station banks (A,
B or C) , use the tuning switch
orto
select one of the preset radio stations (1-6) .
Volume control switch
Push the volume control switch up or down to
increase or decrease the volume.
Tuning
Memory change (radio):
While in one of the preset radio station banks (A,
B or C) , push the tuning switch
orfor less than 1.5 seconds to change to the next
preset station in memory.
Seek tuning (radio):
Push the tuning switch
orfor more
than 1.5 seconds to seek the next or previous
radio station.
Type A
WHA0640
Type B
WHA0637
4-62Display screen, heater, air conditioner, audio and phone systems
ZREVIEW COPYÐ2008 Quest(van)
Owners ManualÐUSA_English(nna)
06/29/07Ðdebbie
X
Page 240 of 376

Giving voice commands
To operate NISSAN Voice Recognition, press
and release thebutton located on the
steering wheel. The light on the overhead con-
sole flashes to signal you have entered a voice
recognition (VR) session. After the tone sounds,
speak a command.
The command given is picked up by the micro-
phone, and voice feedback is given when the
command is accepted.
cIf you need to hear the available commands
for the current menu again, say “Help” and
the system will repeat them.
cIf a command is not recognized, the system
announces, “Command not recognized.
Please try again.” Repeat the command in a
clear voice.
c
If you want to go back to the previous com-
mand, you can say “Go back” or “Correction”
any time the system is waiting for a response.
cYou can cancel a command when the sys-
tem is waiting for a response by saying,
“Cancel” or “Quit.” The system announces
“Cancel” and ends the VR session. You can
also press the
button on the steering
wheel at any time. Whenever the VR session
is cancelled, a double beep is played to
indicate you have exited the system.cIf you want to adjust the volume of the voice
feedback, press the volume control switches
(+ or -) on the steering wheel while being
provided with feedback. You can also use
the radio volume control knob.
c
In most cases you can interrupt the voice feed-
back to speak the next command by pressing
the
button on the steering wheel.
cTo speed the operation you can say multiple
commands. For example, press the
button then say “Phonebook, New entry”
rather than “Phonebook.” Wait for the voice
feedback prompt then say “New entry”.
How to say numbers
NISSAN Voice Recognition requires a certain
way to speak numbers in voice commands. Refer
to the following rules and examples.
cEither “zero” or “oh” can be used for “0”.
Example: 1-800-662-6200
– “One eight oh oh six six two six two oh
oh”, or
– “One eight zero zero six six two six two oh
oh”
cWords can be used for the first 4 digits
places only.
Example: 1-800-662-6200– “One eight hundred six six two six two oh
oh”,
– NOT “One eight hundred six six two sixty
two hundred, and
– NOT “One eight oh oh six six two sixty two
hundred.
cNumbers can be spoken in small groups.
The system will prompt you to continue en-
tering digits, if desired.
Example: 1-800-662-6200
– “One eight oh oh”
The system repeats the numbers and
prompts you to enter more.
– “six six two”
The system repeats the numbers and
prompts you to enter more.
– “six two oh oh”
c
You can say “Star” for * and “Pound” for # at
any time in any position of the phone number.
Example: 1-555-1212 *123
– “One five five five one two one two star
one two three”
NOTE:
For best results, say phone numbers as
single digits.
4-78Display screen, heater, air conditioner, audio and phone systems
ZREVIEW COPYÐ2008 Quest(van)
Owners ManualÐUSA_English(nna)
06/29/07Ðdebbie
X