2008 NISSAN QUEST navigation system
[x] Cancel search: navigation systemPage 190 of 376

The GPS time (manual time) corresponding to
the selected zone will be displayed. Pacific zone
has been set as the initial (default) setting.
Beep setting
With this option ON, a beep will sound if any
audio button is pressed.
Navigation settings
Refer to the separate Navigation System Own-
er’s Manual for information regarding these set-
tings.
Guidance voice settings
Refer to the separate Navigation System Own-
er’s Manual for information regarding these set-
tings.
BUTTON
To change the display brightness, press
thebutton. Pressing the button again will
change the display to “DAY” or “NIGHT” display.
Then, adjust the brightness by moving the joy-
stick right or left.
If no operation is done within 10 seconds, or if the
BACK button is pressed, the display will return to
the previous display.When the shift selector lever is shifted into the R
(Reverse) position, the monitor display shows the
view directly to the rear of the vehicle.
WARNING
cThe system is designed as an aid to the
driver in detecting large stationary ob-
jects to help avoid damaging the ve-
hicle. The system will not detect small
objects below the bumper, and may not
detect objects close to the bumper or
on the ground.
cThe rearview camera is a convenience
but it is not a substitute for proper back-
ing. Always turn and check that it is safe
to do so before backing up. Always
back up slowly.
cObjects viewed in the rearview monitor
differ from actual distance because a
wide-angle lens is used.
cMake sure that the lift gate is securely
closed when backing up.
cDo not put anything on the rearview
camera. The rearview camera is in-
stalled beside the license plate light.cWhen washing the vehicle with high-
pressure water, be sure not to spray it
around the camera. Otherwise, water
may enter the camera unit causing wa-
ter condensation on the lens, a mal-
function, fire or an electric shock.
cDo not strike the camera. It is a preci-
sion instrument. Otherwise, it may mal-
function or cause damage resulting in a
fire or an electric shock.
CAUTION
There is a plastic cover over the camera.
Do not scratch the cover when cleaning
dirt or snow from the cover.
HOW TO READ THE DISPLAYED
LINES
Lines which indicate the vehicle clearance and
distances to objects with reference to the
bumper line
sAare displayed on the monitor.
REARVIEW MONITOR (if so
equipped)
4-28Display screen, heater, air conditioner, audio and phone systems
ZREVIEW COPYÐ2008 Quest(van)
Owners ManualÐUSA_English(nna)
06/29/07Ðdebbie
X
Page 228 of 376

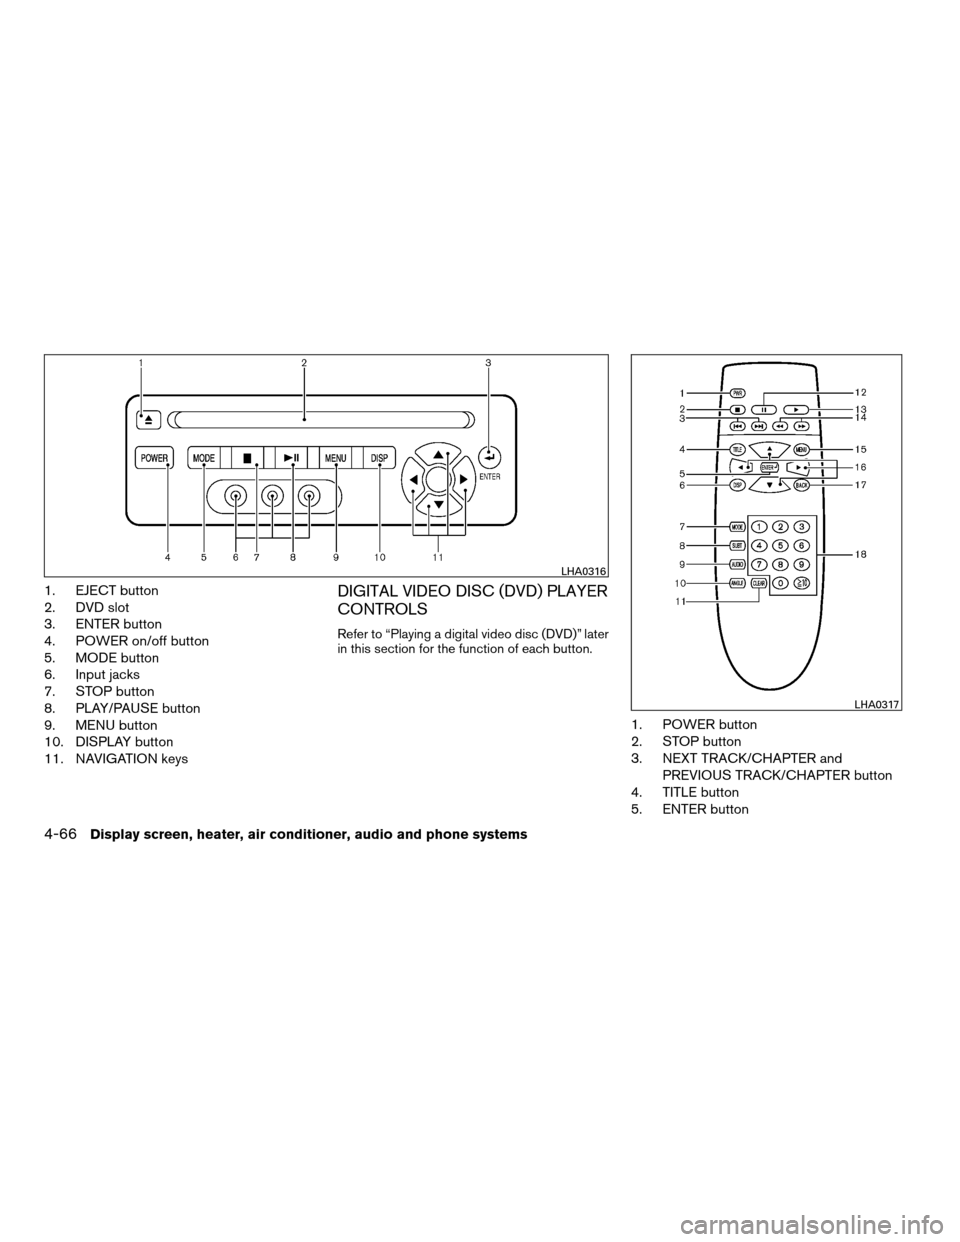
1. EJECT button
2. DVD slot
3. ENTER button
4. POWER on/off button
5. MODE button
6. Input jacks
7. STOP button
8. PLAY/PAUSE button
9. MENU button
10. DISPLAY button
11. NAVIGATION keysDIGITAL VIDEO DISC (DVD) PLAYER
CONTROLS
Refer to “Playing a digital video disc (DVD)” later
in this section for the function of each button.
1. POWER button
2. STOP button
3. NEXT TRACK/CHAPTER and
PREVIOUS TRACK/CHAPTER button
4. TITLE button
5. ENTER button
LHA0316
LHA0317
4-66Display screen, heater, air conditioner, audio and phone systems
ZREVIEW COPYÐ2008 Quest(van)
Owners ManualÐUSA_English(nna)
06/29/07Ðcathy
X
Page 229 of 376

6. DISPLAY button
7. MODE button
8. SUBTITLE button
9. AUDIO button
10. ANGLE button
11. CLEAR button
12. PAUSE button
13. PLAY button
14. FAST FORWARD/FAST REVERSE
button
15. MENU button
16. NAVIGATION keys
17. BACK button
18. NUMERIC KEYPAD
REMOTE CONTROL
Refer to “Playing a digital video disc (DVD)” later
in this section for the function of each button.
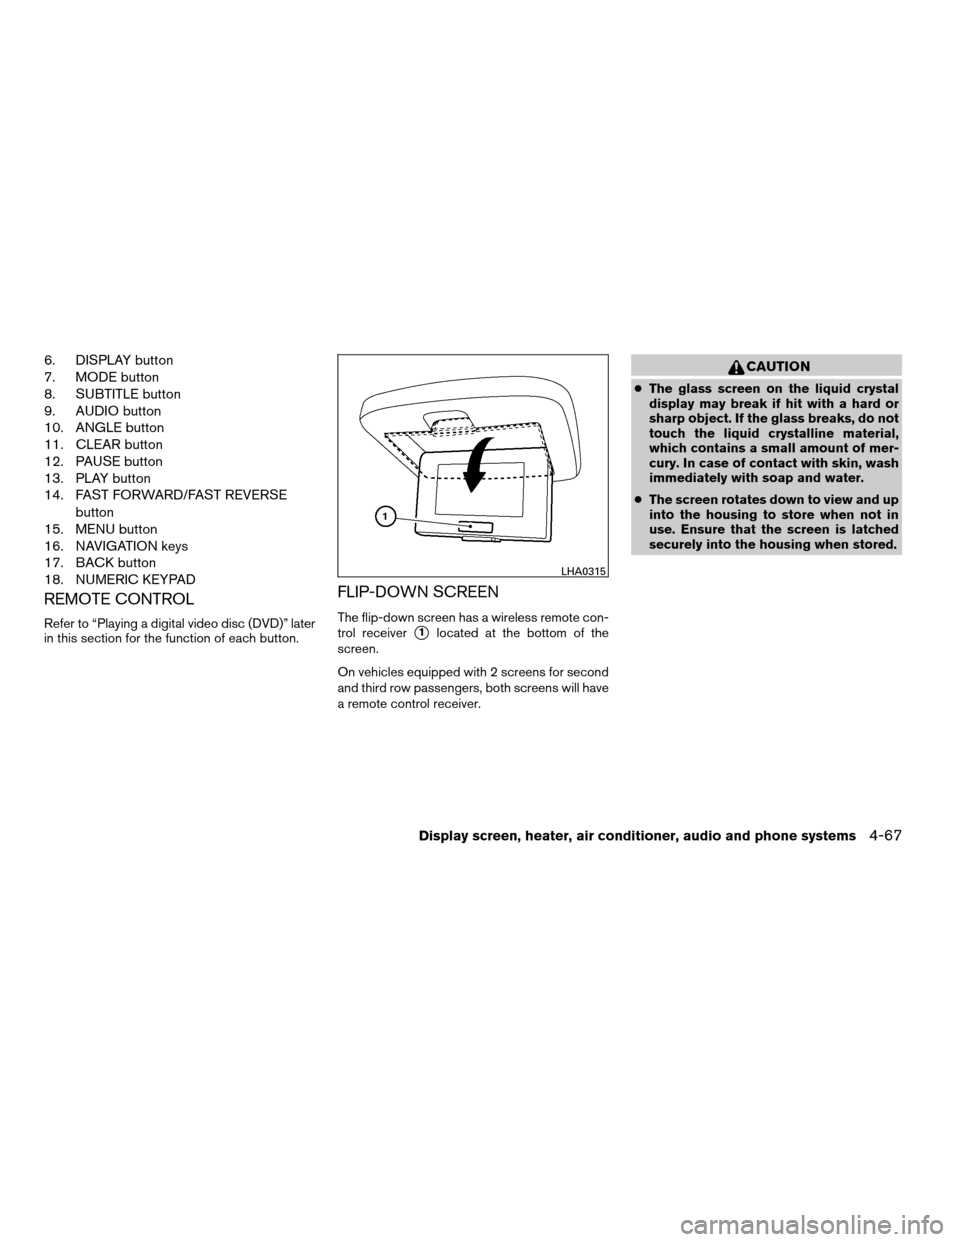
FLIP-DOWN SCREEN
The flip-down screen has a wireless remote con-
trol receiver
s1located at the bottom of the
screen.
On vehicles equipped with 2 screens for second
and third row passengers, both screens will have
a remote control receiver.
CAUTION
cThe glass screen on the liquid crystal
display may break if hit with a hard or
sharp object. If the glass breaks, do not
touch the liquid crystalline material,
which contains a small amount of mer-
cury. In case of contact with skin, wash
immediately with soap and water.
cThe screen rotates down to view and up
into the housing to store when not in
use. Ensure that the screen is latched
securely into the housing when stored.
LHA0315
Display screen, heater, air conditioner, audio and phone systems4-67
ZREVIEW COPYÐ2008 Quest(van)
Owners ManualÐUSA_English(nna)
06/29/07Ðdebbie
X
Page 232 of 376

button is pressed again, it will resume at the
stored disc track and time position.
If the STOP button is pressed again when the
player is already in Stop mode, it will reinitialize
the pointer to the beginning of the disc. In effect it
will ignore the last stored disc position and upon
receipt of the next play message it will begin at
the Title Menu, or at “the beginning of the disc”.
EJECT:
When the EJECT button is pressed with the DVD
loaded, it will be ejected.
The display will show the EJECT symbol
in
the upper left corner of the display for 4 seconds
once the EJECT button is pressed.
If the DVD is not loaded, the display will show
“NO DISC”.
If the DVD comes out and is not removed within
25 seconds, it will be pulled back into the slot to
protect it.
DISPLAY:
If the DISPLAY control is pressed for less than 2
seconds, the display menu will appear on the
screen.
cThe display menu will remain on the screen
for 10 seconds if no subsequent control
activations occur.cUse NAVIGATION KEYS to navigate within
the display menu, and use ENTER to select
the item.
cHolding the DISPLAY control on the face-
plate for longer than approximately 2 sec-
onds while in the display menu will reset the
display characteristics to their nominal val-
ues. (Faceplate feature only)
If the DISPLAY control button on the faceplate is
pressed for more than 2 seconds, the media
track/time information will be displayed along the
bottom of the display. Pressing the DISPLAY
control for more than 2 seconds will remove the
media track/time information from the display.
(Faceplate feature only)
NAVIGATION KEYS:
If media is in PLAY mode, activation of the NAVI-
GATION KEYS (Up, Down, Left, and Right) will
perform the following functions: next
chapter/track, previous chapter/track, fast re-
verse and fast forward, and the display will
show
,,andrespec-
tively in the upper left corner of the display for 4
seconds. (Faceplate feature only)
If media is in PAUSE mode, activation of the
NAVIGATION KEYS (Up, Down and Right) will
perform the following functions: next
chapter/track, previous chapter/track and slowforward, and the display will show
,and a forward arrow symbol respectively in the
upper left corner of the display for 4 seconds.
(Faceplate feature only)
If media is in activated MENU mode, the NAVI-
GATION KEYS will be used to navigate Up,
Down, Left, and Right within the menu.
If display control menu is on, the NAVIGATION
KEYS will be used to navigate Up, Down, Left,
and Right within the menu.
ENTER:
In MENU mode, press the ENTER button to se-
lect MENU items.
In the display menu, press the ENTER button to
select items for modification, as per the on-
screen instructions.
MENU:
If the media is in PLAY mode and the MENU
button is pressed, the DVD menu will appear on
the screen. Use Navigation Keys to navigate
within the menu, and use ENTER to select the
item.
Press the MENU button again to return to PLAY
mode.
4-70Display screen, heater, air conditioner, audio and phone systems
ZREVIEW COPYÐ2008 Quest(van)
Owners ManualÐUSA_English(nna)
06/29/07Ðdebbie
X
Page 364 of 376

CD changer (See audio system)........4-59
CD player (See audio system).........4-53
Child restraint with top tether strap......1-30
Child restraints.......1-17, 1-18, 1-26, 1-28
Precautions on child
restraints............1-26, 1-41, 1-47
Top tether strap anchor point locations . .1-30
Child safety sliding door lock..........3-9
Chimes, audible reminders...........2-13
Cleaning exterior and interior..........7-2
Clock
(models with navigation system)......4-26
(models without navigation system). .4-5, 4-16
Clock set..............4-5, 4-16, 4-26
C.M.V.S.S. certification label..........9-10
Cold weather driving..............5-22
Compact disc (CD) player...........4-53
Console box...................2-28
Control panel buttons
Brightness/contrast button . .4-6, 4-16, 4-28
Back button..............4-7, 4-18
Enter button..............4-7, 4-17
Setting button.........4-5, 4-11, 4-22
Startup screen...............4-18
Trip button............4-3, 4-8, 4-18
With navigation system...........4-17
Without navigation system.......4-2, 4-7
Controls
Audio controls (steering wheel)......4-62
Heater and air conditioner
controls................4-31, 4-40
Rear audio controls.............4-64
Rear seat air conditioner..........4-42
Coolant
Capacities and recommended
fuel/lubricants.................9-2Changing engine coolant..........8-8
Checking engine coolant level........8-7
Engine coolant temperature gauge.....2-5
Cornering light.................2-23
Corrosion protection...............7-5
Cruise control..................5-13
Cup holders............2-32, 2-33, 2-34
Curtain side-impact air bag system
(See supplemental side air bag and curtain
side-impact air bag system)..........1-63
D
Daytime running light system
(Canada only)..................2-20
Defroster switch
Rear window and outside mirror defroster
switch....................2-18
Digital video disc DVD.............4-65
Dimensions and weights.............9-8
Dimmer switch for instrument panel......2-21
Display controls
(see control panel buttons).....4-2, 4-7, 4-17
Distance to empty..........4-3, 4-9, 4-19
Door locks....................3-3
Door open warning................4-6
Door open warning light.............2-8
Drive belt....................8-14
Drive positioner, Automatic...........3-25
Driving
Cold weather driving............5-22
Driving with automatic transmission.....5-8
Precautions when starting and driving . . .5-2
DVD entertainment system...........4-65E
Economy - fuel.................5-15
Emission control information label.......9-10
Emission control system warranty.......9-24
Engine
Before starting the engine..........5-7
Block heater.................5-24
Capacities and recommended
fuel/lubricants.................9-2
Changing engine coolant..........8-8
Changing engine oil.............8-9
Changing engine oil filter..........8-10
Checking engine coolant level........8-7
Checking engine oil level..........8-8
Engine compartment check locations. . . .8-6
Engine coolant temperature gauge.....2-5
Engine cooling system............8-7
Engine oil...................8-8
Engine oil and oil filter recommendation . .9-5
Engine oil pressure warning light......2-9
Engine oil viscosity..............9-5
Engine serial number............9-10
Engine specifications.............9-7
Starting the engine..............5-8
English/metric setting.......4-5, 4-15, 4-25
Enter button................4-7, 4-17
Event data recorders..............9-26
Exhaust gas (Carbon monoxide)........5-2
Eyeglass case..................2-27
10-2
ZREVIEW COPYÐ2008 Quest(van)
Owners ManualÐUSA_English(nna)
06/29/07Ðdebbie
X