2008 NISSAN PATHFINDER engine
[x] Cancel search: enginePage 4 of 36

reMote keyless entry systeM
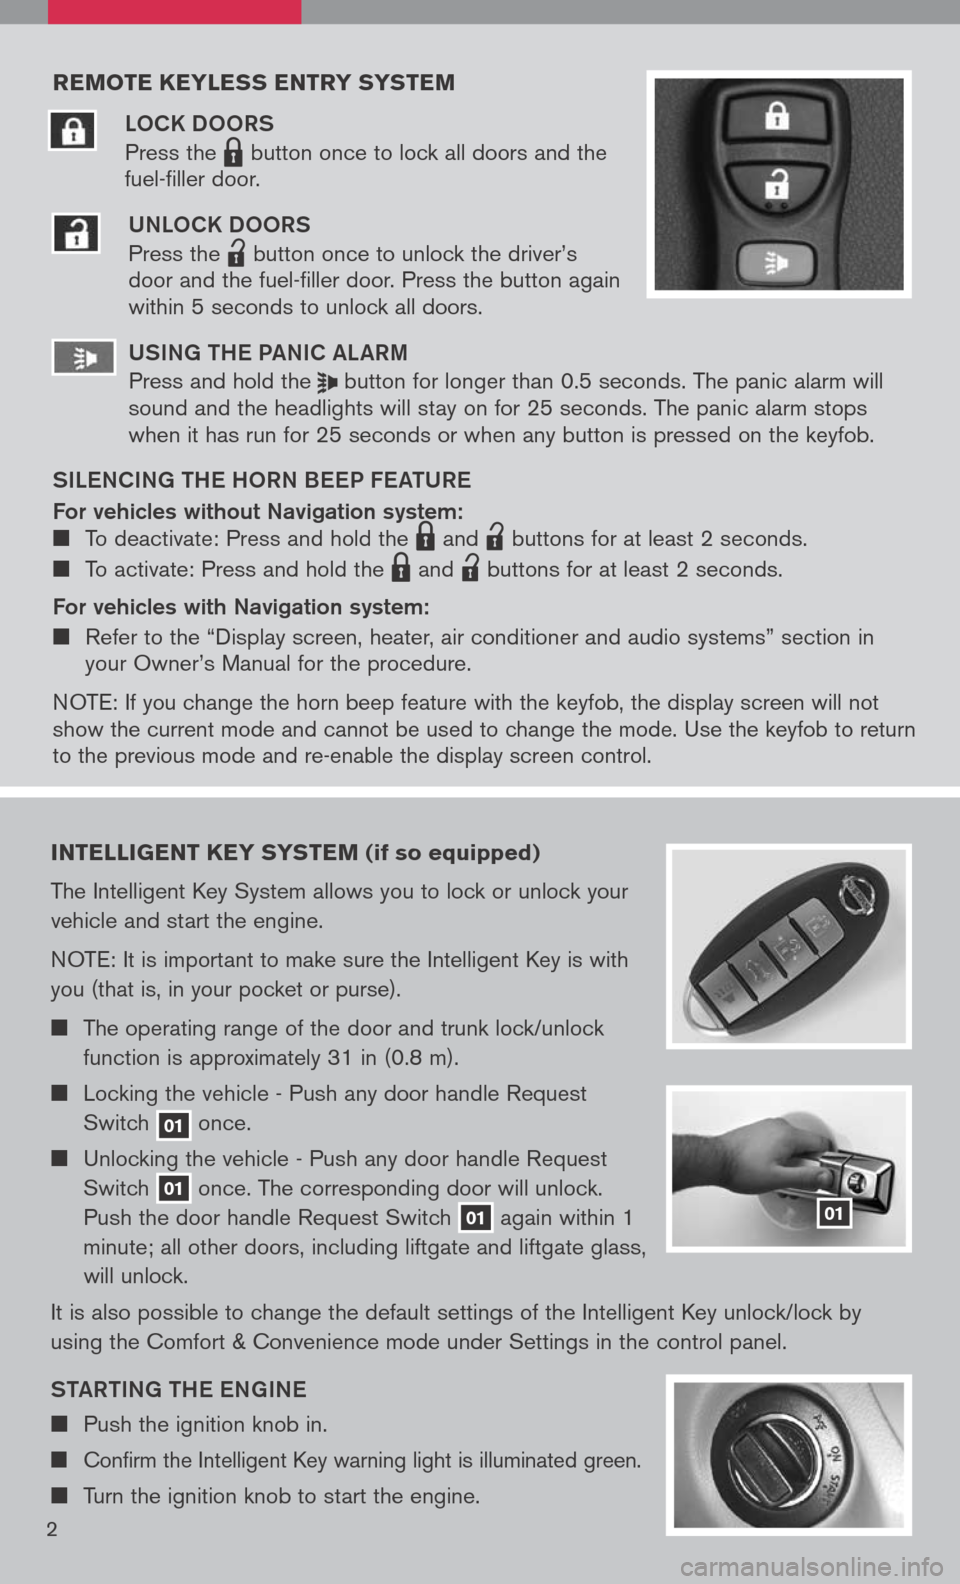
LOCK DOORS
Press the LPD0150 button once to lock all doors and the
fuel-filler door.
UNLOCK DOORS
Press the
lpd0151
button once to unlock the driver’s door and the fuel-filler door. Press the button again within 5 seconds to unlock all doors.
U SiN g the Pa NiC aL aR m
Press and hold the button for longer than 0.5 seconds. The panic alarm will sound and the headlights will stay on for 25 seconds. The panic alarm stops when it has run for 25 seconds or when any button is pressed on the keyfob.
S iL e NC iN g the h ORN B eeP F eat URe
For vehicles without Navigation system: To deactivate: Press and hold the LPD0150 and
lpd0151
buttons for at least 2 seconds.
To activate: Press and hold the LPD0150 and
lpd0151
buttons for at least 2 seconds.
For vehicles with Navigation system:
Refer to the “Display screen, heater, air conditioner and audio systems” section in your Owner’s Manual for the procedure.
N OTE: If you change the horn beep feature with the keyfob, the display screen will not show the current mode and cannot be used to change the mode. Use the keyfob to return to the previous mode and re-enable the display screen control.
intelligent key syste M (if so equipped)
The Intelligent Key System allows you to lock or unlock your
vehicle and start the engine.
NOTE: It is important to make sure the Intelligent Key is with
you (that is, in your pocket or purse).
The operating range of the door and trunk lock/unlock
function is approximately 31 in (0.8 m).
Locking the vehicle - Push any door handle Request
Switch 01 once.
Unlocking the vehicle - Push any door handle Request
Switch 01 once. The corresponding door will unlock.
Push the door handle Request Switch 01 again within 1
minute; all other doors, including liftgate and liftgate glass,
will unlock.
It is also possible to change the default settings of the Intelligent Key unlock/lock by
using the Comfort & Convenience mode under Settings in the control panel.
Sta Rti Ng the eN gi Ne
Push the ignition knob in.
Confirm the Intelligent Key warning light is illuminated green.
Turn the ignition knob to start the engine.
01
2
Page 17 of 36

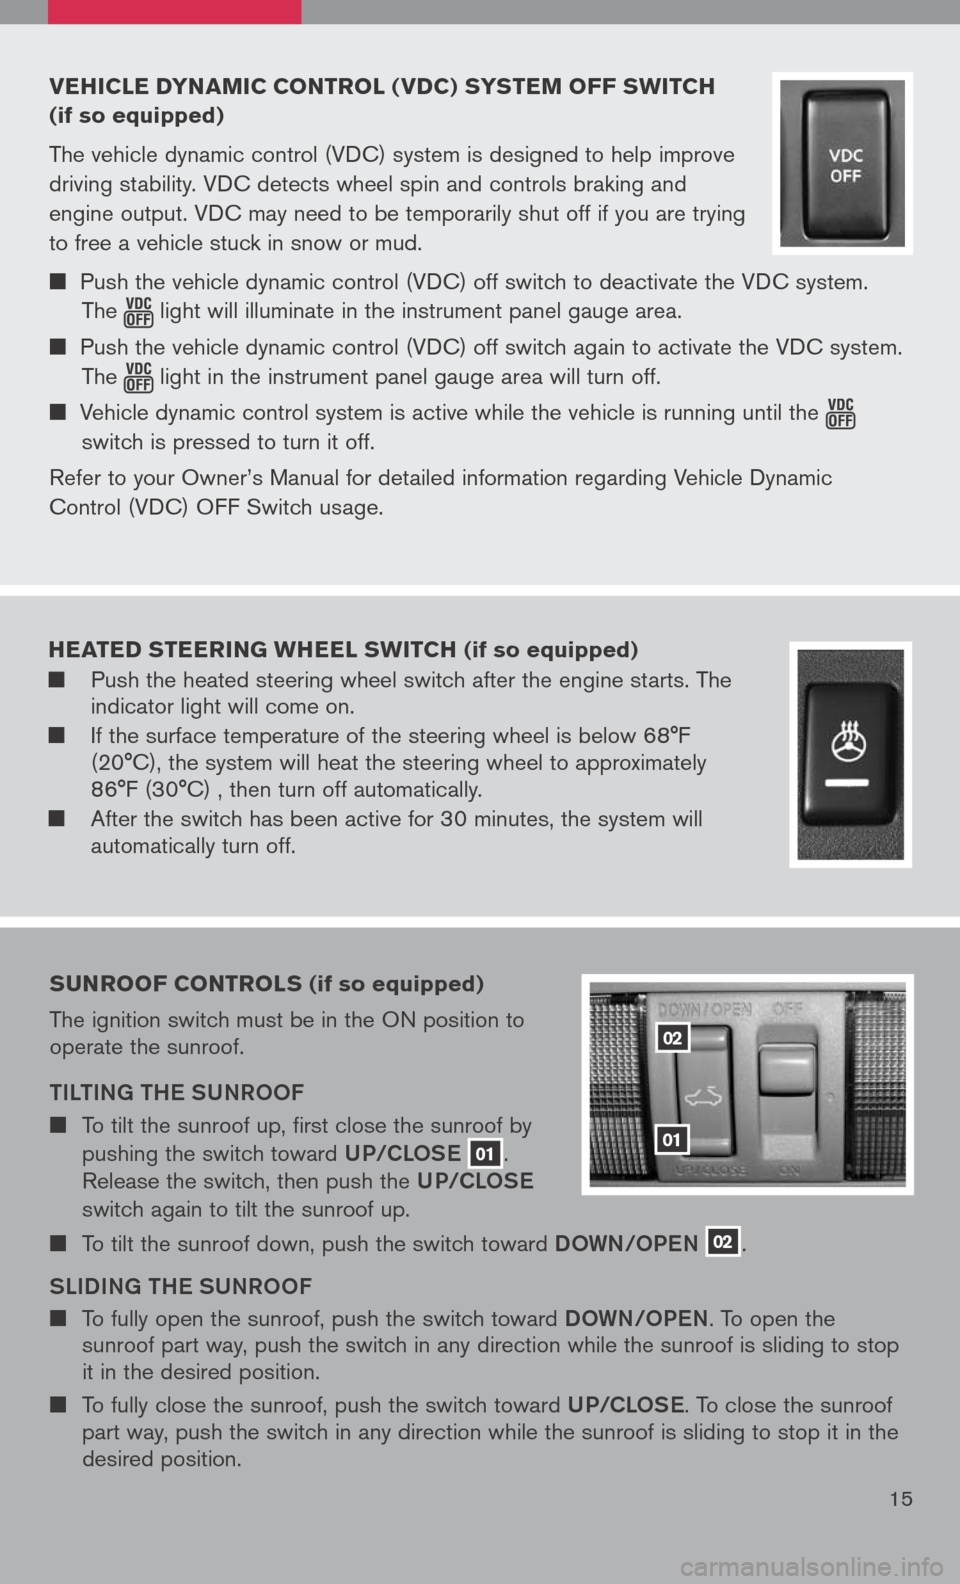
vehicle dyna Mic control ( vdc) s yste M oFF sWitch
(if so equipped)
The vehicle dynamic control (VDC) system is designed to help improve
driving stability. VDC detects wheel spin and controls braking and
engine output. VDC may need to be temporarily shut off if you are trying
to free a vehicle stuck in snow or mud.
Push the vehicle dynamic control (VDC) off switch to deactivate the VDC system.
The light will illuminate in the instrument panel gauge area.
Push the vehicle dynamic control (VDC) off switch again to activate the VDC system.
The light in the instrument panel gauge area will turn off.
Vehicle dynamic control system is active while the vehicle is running until the
switch is pressed to turn it off.
Refer to your Owner’s Manual for detailed information regarding Vehicle Dynamic
Control (VDC) OFF Switch usage.
15
02
01
sunroo F controls (if so equipped)
The ignition switch must be in the ON position to operate the sunroof.
tiLti Ng the SUNROOF
To tilt the sunroof up, first close the sunroof by
pushing the switch toward UP/CLOSe 01.
Release the switch, then push the UP/CLOSe
switch again to tilt the sunroof up.
To tilt the sunroof down, push the switch toward DOWN/OPeN 02.
SL iD iN g the SUNROOF
To fully open the sunroof, push the switch toward DOWN/OPeN. To open the sunroof part way, push the switch in any direction while the sunroof is sliding to stop it in the desired position.
To fully close the sunroof, push the switch toward UP/CLOSe. To close the sunroof part way, push the switch in any direction while the sunroof is sliding to stop it in the desired position.
heated steering Wheel sWitch (if so equipped)
Push the heated steering wheel switch after the engine starts. The indicator light will come on.
If the surface temperature of the steering wheel is below 68°F (20°C), the system will heat the steering wheel to approximately 86°F (30°C) , then turn off automatically.
After the switch has been active for 30 minutes, the system will automatically turn off.
Page 19 of 36

hoMelink® universal transceiver (if so equipped)
SYS tem OPeR ati Ng ti PS
Garage doors, electrical gates, entry doors, etc. will be activated during programming. To avoid injury, make sure that people and objects are clear of all doors or gates during programming. Your vehicle’s engine should be turned off while programming the HomeLink® Transceiver. Refer to your Owner’s Manual for complete details.
To program your HomeLink® Transceiver to operate a garage door, gate, or entry door
opener, home or office lighting, you need to be at the same location as the device.
NO te: g arage door openers (manufactured after 1996) have “rolling code
protection”. to program a garage door opener equipped with “rolling code
protection”, you will need to use a ladder to get up to the garage door opener
motor to be able to access the “smart or learn” program button.
PRO gRammi Ng YOUR hO me LiNK
®
UNi Ve RS aL tR aNSC eiVe R ( mirror,
Sun Visor or Overhead Console)
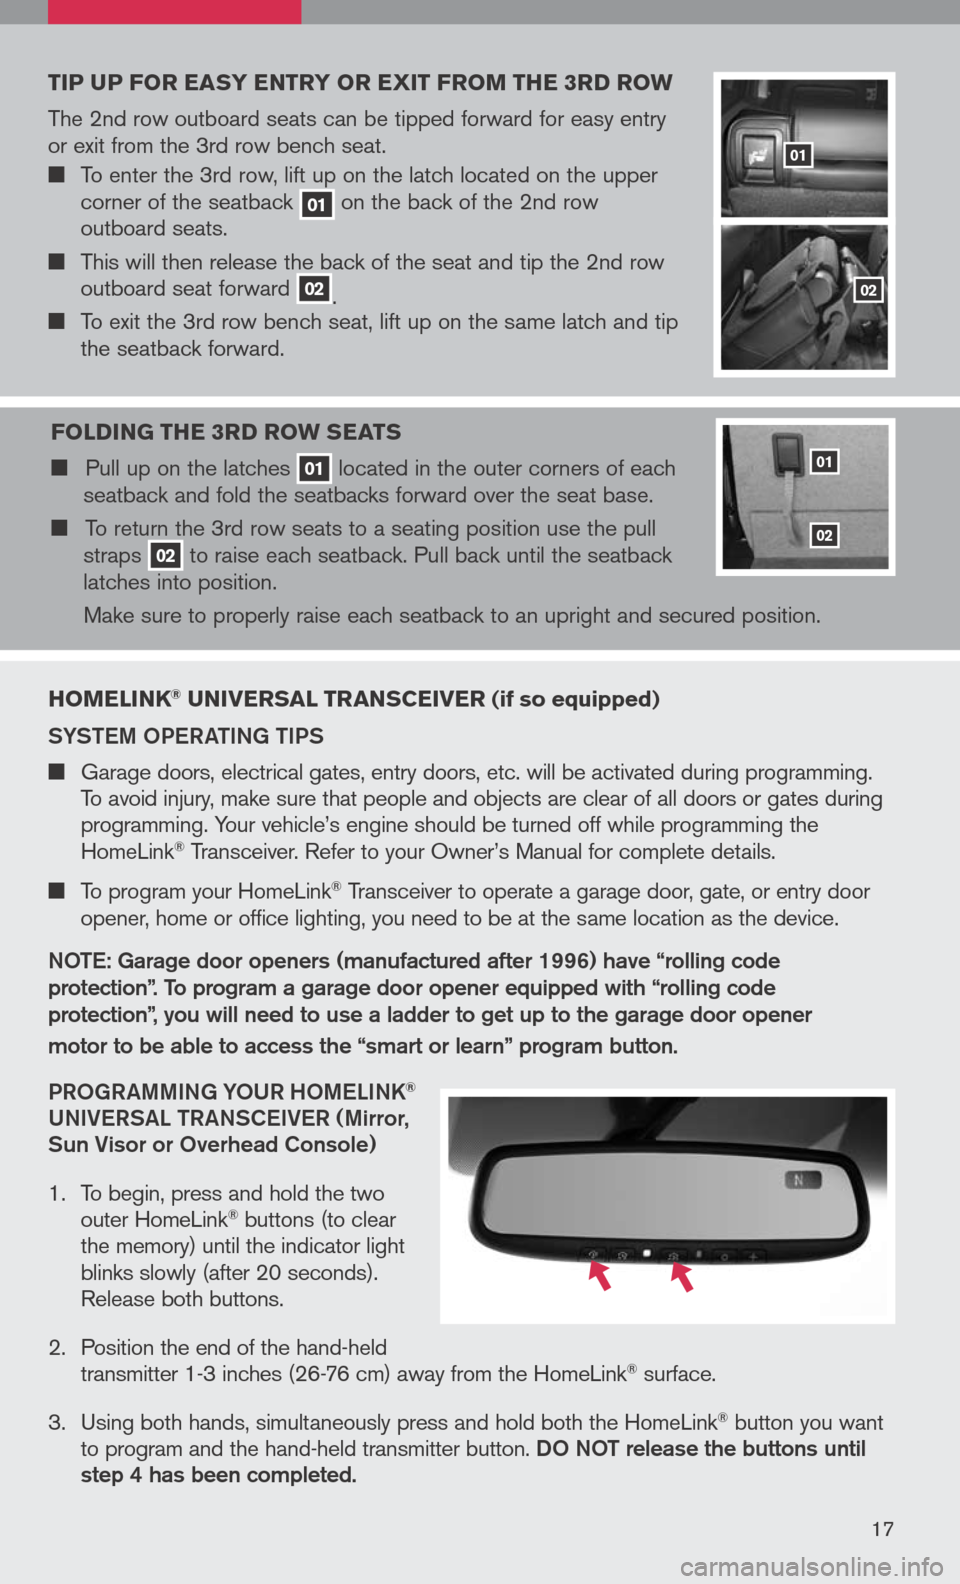
1. To begin, press and hold the two
outer HomeLink® buttons (to clear the memory) until the indicator light blinks slowly (after 20 seconds). Release both buttons.
2. Position the end of the hand-held
transmitter 1-3 inches (26-76 cm) away from the HomeLink® surface.
3. Using both hands, simultaneously press and hold both the HomeLink
® button you want to program and the hand-held transmitter button. DO NOt release the buttons until step 4 has been completed.
17
tip up For easy entry or exit Fro M the 3rd ro W
The 2nd row outboard seats can be tipped forward for easy entry or exit from the 3rd row bench seat.
To enter the 3rd row, lift up on the latch located on the upper corner of the seatback 01 on the back of the 2nd row outboard seats.
This will then release the back of the seat and tip the 2nd row outboard seat forward 02. To exit the 3rd row bench seat, lift up on the same latch and tip the seatback forward.
F olding the 3rd ro W seats
Pull up on the latches 01 located in the outer corners of each seatback and fold the seatbacks forward over the seat base.
To return the 3rd row seats to a seating position use the pull straps 02 to raise each seatback. Pull back until the seatback latches into position.
Make sure to properly raise each seatback to an upright and secured position.
01
02
01
02