2008 NISSAN FRONTIER adding
[x] Cancel search: addingPage 58 of 217
Black plate (10,1)
4 Setting a destination
Model "NAV2-N" EDITED: 2007/ 3/ 8
Destination screen.............................................. 4-2
Basic operation............................................. 4-2
Changing the region....................................... 4-3
Setting a Street Address................................. 4-4
Setting a point of interest................................. 4-5
Setting your home........................................4-13
Setting from Address Book............................4-13
Setting a nearby place..................................4-14
Setting a previous destination.........................4-16
Setting the previous starting point....................4-17
Setting from stored routes..............................4-17
Setting by phone number...............................4-18Setting a freeway entrance/exit........................4-19
Setting an Intersection..................................4-21
Setting a City Center....................................4-22
Setting from map.........................................4-23
Operations after setting a destination....................4-24
Available setting items...................................4-25
Adjusting the location of the destination............4-25
Adding additional destinations to a route...........4-26
Storing a location.........................................4-26
Viewing information about the searched
location......................................................4-26
Page 83 of 217
Black plate (86,1)
Model "NAV2-N" EDITED: 2007/ 3/ 9
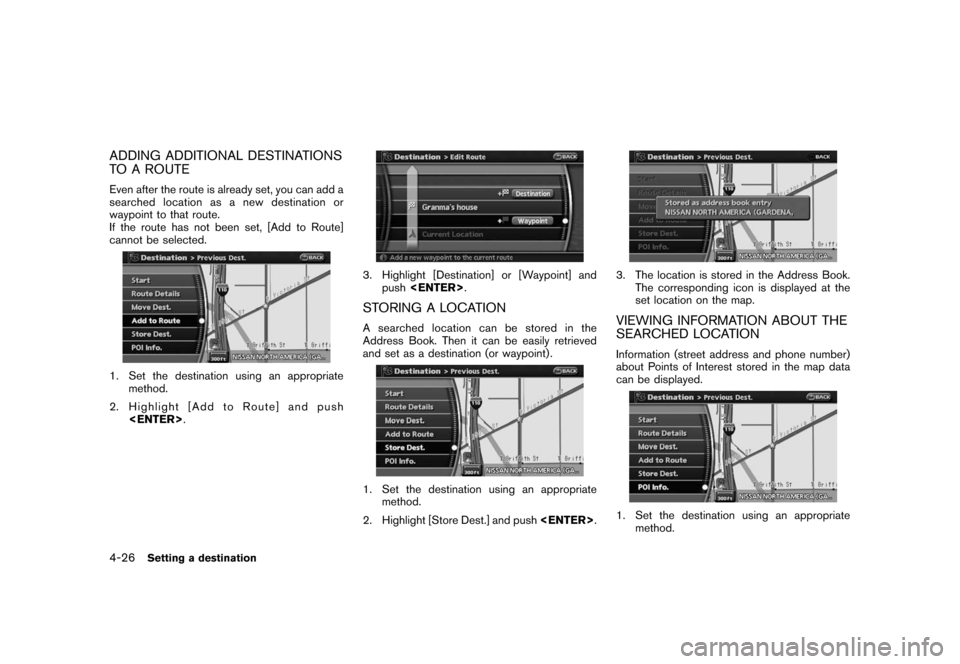
ADDING ADDITIONAL DESTINATIONS
TO A ROUTE
Even after the route is already set, you can add a
searched location as a new destination or
waypoint to that route.
If the route has not been set, [Add to Route]
cannot be selected.
1. Set the destination using an appropriate
method.
2. Highlight [Add to Route] and push
3. Highlight [Destination] or [Waypoint] and
push
STORING A LOCATION
A searched location can be stored in the
Address Book. Then it can be easily retrieved
and set as a destination (or waypoint) .
1. Set the destination using an appropriate
method.
2. Highlight [Store Dest.] and push
3. The location is stored in the Address Book.
The corresponding icon is displayed at the
set location on the map.
VIEWING INFORMATION ABOUT THE
SEARCHED LOCATION
Information (street address and phone number)
about Points of Interest stored in the map data
can be displayed.
1. Set the destination using an appropriate
method.
4-26Setting a destination
Page 86 of 217
Black plate (13,1)
5 Route guidance
Model "NAV2-N" EDITED: 2007/ 3/ 8
Procedures after setting a destination..................... 5-2
Available items after setting a destination............. 5-2
Starting route guidance................................... 5-2
Selecting a route........................................... 5-2
Confirming a route.......................................... 5-3
Adding a destination or waypoint....................... 5-4
Route screen.................................................... 5-5
Basic operation............................................. 5-5
Deleting/reactivating a route............................. 5-6
Editing a route............................................... 5-7Confirming a route........................................5-11
Searching for a detour route taking traffic
information into consideration..........................5-12
Setting conditions for the route calculation.........5-14
Recalculate route.........................................5-16
Setting a detour route...................................5-17
Route guidance settings................................5-18
About route guidance........................................5-23
Voice guidance during route guidance...............5-23
Guidance screens and preview mode...............5-24
Page 87 of 217
Black plate (90,1)
Model "NAV2-N" EDITED: 2007/ 3/ 9
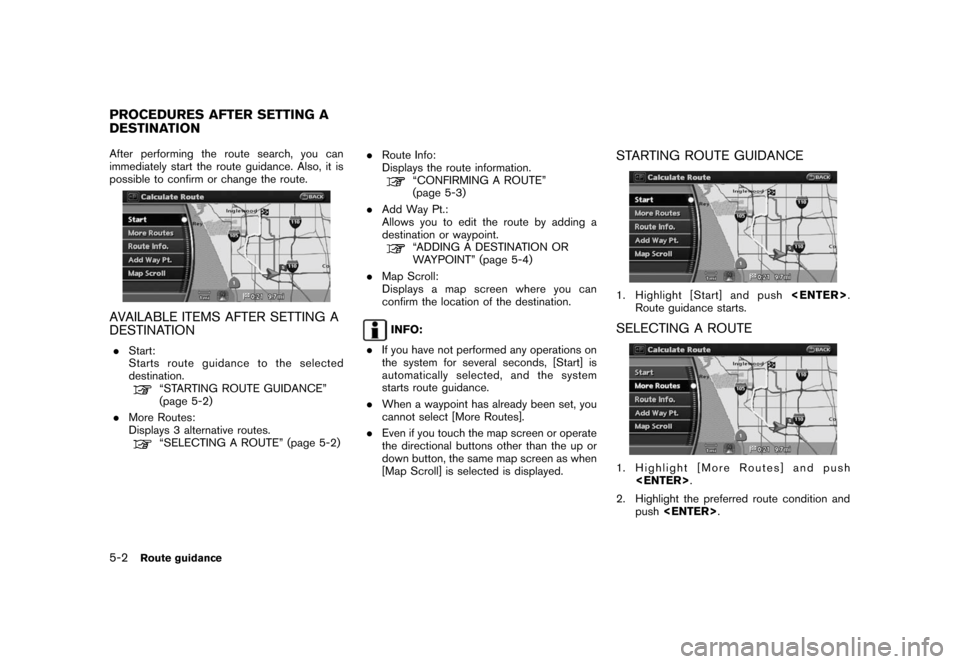
After performing the route search, you can
immediately start the route guidance. Also, it is
possible to confirm or change the route.
AVAILABLE ITEMS AFTER SETTING A
DESTINATION
.Start:
Starts route guidance to the selected
destination.
“STARTING ROUTE GUIDANCE”
(page 5-2)
.More Routes:
Displays 3 alternative routes.
“SELECTING A ROUTE” (page 5-2).Route Info:
Displays the route information.
“CONFIRMING A ROUTE”
(page 5-3)
.Add Way Pt.:
Allows you to edit the route by adding a
destination or waypoint.
“ADDING A DESTINATION OR
WAYPOINT” (page 5-4)
.Map Scroll:
Displays a map screen where you can
confirm the location of the destination.
INFO:
.If you have not performed any operations on
the system for several seconds, [Start] is
automatically selected, and the system
starts route guidance.
.When a waypoint has already been set, you
cannot select [More Routes].
.Even if you touch the map screen or operate
the directional buttons other than the up or
down button, the same map screen as when
[Map Scroll] is selected is displayed.
STARTING ROUTE GUIDANCE
1. Highlight [Start] and push
Route guidance starts.
SELECTING A ROUTE
1. Highlight [More Routes] and push
2. Highlight the preferred route condition and
push
PROCEDURES AFTER SETTING A
DESTINATION
5-2Route guidance
Page 89 of 217
Black plate (92,1)
Model "NAV2-N" EDITED: 2007/ 3/ 9
.Map Scroll:
Displays a map screen where you can
confirm the location of the destination.
Even if you touch the map screen or operate
the directional buttons other than the up or
down button, the same map screen as when
[Map Scroll] is selected is displayed.
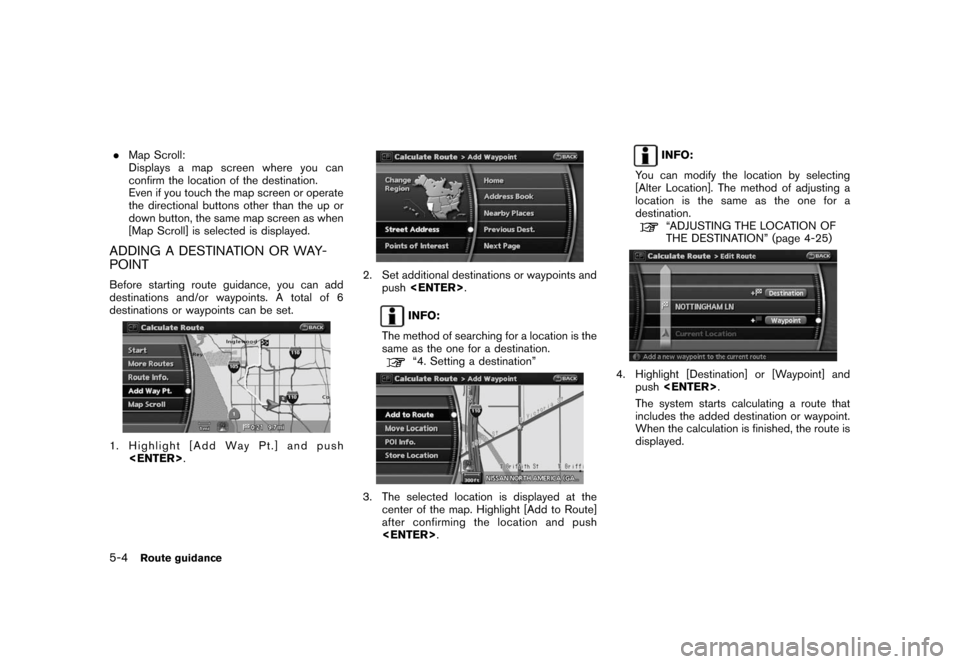
ADDING A DESTINATION OR WAY-
POINT
Before starting route guidance, you can add
destinations and/or waypoints. A total of 6
destinations or waypoints can be set.
1. Highlight [Add Way Pt.] and push
2. Set additional destinations or waypoints and
push
INFO:
The method of searching for a location is the
same as the one for a destination.
“4. Setting a destination”
3. The selected location is displayed at the
center of the map. Highlight [Add to Route]
after confirming the location and push
INFO:
You can modify the location by selecting
[Alter Location]. The method of adjusting a
location is the same as the one for a
destination.
“ADJUSTING THE LOCATION OF
THE DESTINATION” (page 4-25)
4. Highlight [Destination] or [Waypoint] and
push
The system starts calculating a route that
includes the added destination or waypoint.
When the calculation is finished, the route is
displayed.
5-4Route guidance
Page 214 of 217
Black plate (1,1)
A
About route guidance............................. 5-23
About the map data.............................. 10-14
Adding a destination or waypoint................... 5-4
Adding additional destinations to a route........ 4-26
Address book...................................... 10-2
Adjusting the current vehicle location.............. 8-7
Adjusting the location of the destination......... 4-25
Adjusting voice guidance volume................. 2-19
Automatic reroute.................................. 10-2
Avoid area.......................................... 10-2
B
Background color.................................... 8-3
Basics of voice guidance......................... 10-9
Birdview
TM............................... 3-3, 3-7, 10-3
Brightness............................................ 8-3
Building graphics.................................... 3-3
C
Changing the BirdviewTMangle.................. 3-16
Changing the region................................. 4-3
Changing the scale of a map....................... 3-9
Character (letter and number) input screen..... 2-20
Characteristics of a liquid crystal display....... 10-18
Clock settings...................................... 8-10
Confirming a route............................ 5-3, 5-11
Confirming by simulation.......................... 5-12
Confirming how to use voice commands.......... 9-7
Confirming voice commands................. 2-22, 9-2
Contrast.............................................. 8-3
Control buttons and functions...................... 2-2Control panel......................................... 2-2
Current location map screen...................... 2-11
Current vehicle location........................... 10-3
Customer assistance.............................. 11-2
Customizing nearby places......................... 8-5
D
Deleting a route.................................... 2-16
Deleting a stored item............................. 6-21
Deleting a stored item individually................ 6-21
Deleting all stored items.......................... 6-22
Deleting an individual item on the map.......... 6-22
Deleting/reactivating a route........................ 5-6
Destination screen................................... 4-2
Detailed Map Coverage Areas (MCA) for the
navigation system.................................. 10-7
Detour.............................................. 10-3
Directions provided and the distances to
guide points....................................... 10-10
Display................................................ 8-3
Display of current vehicle location................ 10-3
Display settings...................................... 8-2
Display urgent traffic information................... 7-6
Displaying how to operate the voice
recognition system................................... 9-2
Displaying landmark icons......................... 3-19
Displaying the AV information on the map
screen................................................ 8-6
E
Editing a route....................................... 5-7
Editing the address book........................... 6-9
Editing the avoid area............................. 6-19
Editing the stored home and location.............. 6-9Editing the stored route........................... 6-17
Editing the stored tracking........................ 6-17
End-user terms.................................... 10-16
Example of touch panel operation................ 2-10
F
Features of this navigation system............... 10-2
For safe operation................................... 1-2
Functions disabled while driving.................... 2-6
G
Giving voice commands........................... 9-10
Guidance screens and preview mode........... 5-24
H
How to handle the display....................... 10-18
How to input letters and numbers................ 2-20
How to order map data updates................ 10-14
How to store your home.......................... 2-12
How to use this manual............................. 1-2
How to view map screen.......................... 2-17
I
Incorrect display of vehicle position.............. 10-5
Info on route.......................................... 7-4
Information screen................................... 7-2
L
Language and unit settings....................... 8-11
Language settings................................. 8-11
Laser product........................................ 1-4
Model "NAV2-N" EDITED: 2007/ 3/ 8