2008 NISSAN ARMADA clock
[x] Cancel search: clockPage 378 of 456

If the oil filter is to be changed, remove and
replace it at this time. See “Changing engine
oil filter” later in this section.
WARNING
cProlonged and repeated contact with
used engine oil may cause skin cancer.
cTry to avoid direct skin contact with
used oil. If skin contact is made, wash
thoroughly with soap or hand cleaner
as soon as possible.
cKeep used engine oil out of reach of
children.
CAUTION
Be careful not to burn yourself. The engine
oil may be hot.
cWaste oil must be disposed of prop-
erly.
cCheck your local regulations.
6. Clean and reinstall the drain plug and a new
washer. Securely tighten the drain plug with
a wrench. Do not use excessive force.
Drain plug tightening torque:
22 - 29 ft-lb (29 - 39 N·m)7. Refill engine with recommended oil through
the oil filler opening, then install the oil filler
cap securely.
See “Capacities and recommended
fuel/lubricants” in the “Technical and con-
sumer information” section of this manual for
drain and refill capacity.
The drain and refill capacity depends on the
oil temperature and drain time. Use these
specifications for reference only. Always use
the dipstick to determine when the proper
amount of oil is in the engine.
8. Start the engine. Check for leakage around
the drain plug and oil filter. Correct as re-
quired.
9. Turn the engine off and wait more than 10
minutes. Check the oil level with the dipstick.
Add engine oil if necessary.
CHANGING ENGINE OIL FILTER
1. Park the vehicle on a level surface and apply
the parking brake.
2. Turn the engine off.
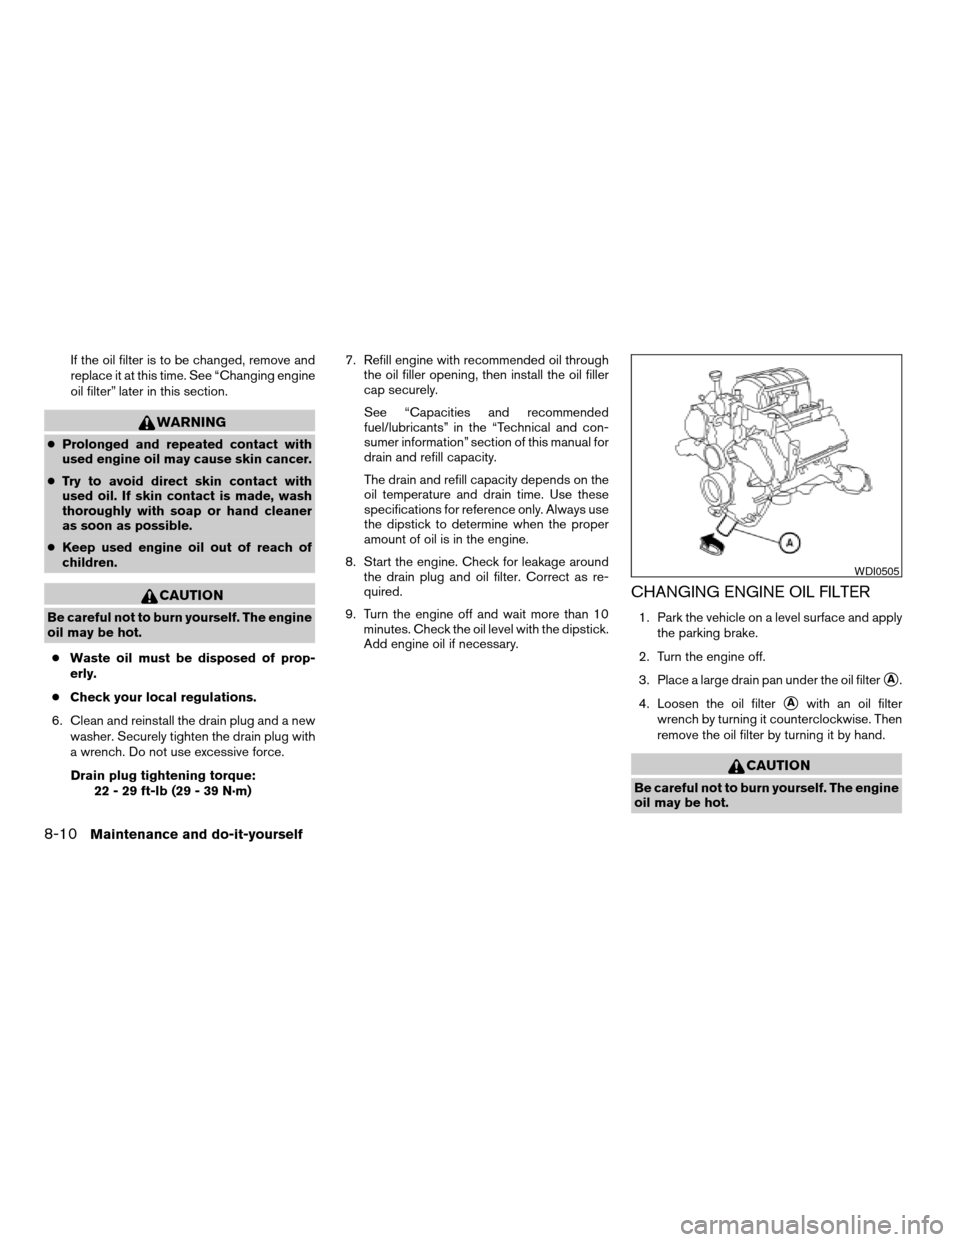
3. Place a large drain pan under the oil filter
sA.
4. Loosen the oil filter
sAwith an oil filter
wrench by turning it counterclockwise. Then
remove the oil filter by turning it by hand.
CAUTION
Be careful not to burn yourself. The engine
oil may be hot.
WDI0505
8-10Maintenance and do-it-yourself
ZREVIEW COPYÐ2008 Armada(wzw)
Owners ManualÐUSA_English(nna)
03/05/07Ðarosenma
X
Page 397 of 456

FOG LIGHTS (if so equipped)
Replacing the fog light bulb
CAUTION
cHigh pressure halogen gas is sealed
inside the halogen bulb. The bulb may
break if the glass envelope is scratched
or the bulb is dropped.
cWhen handling the bulb, do not touch
the glass envelope.
cUse the same number and wattage as
originally installed:
Wattage 37.5 Bulb No. 899*
*: Always check with the Parts Depart-
ment at a NISSAN dealer for the latest
parts information.
cDo not leave the bulb out of the fog light
for a long period of time as dust, mois-
ture and smoke may enter the fog light
body and affect the performance of the
fog light.1. Disconnect the negative (-) battery cable.
2. The fog light is accessible in front of the front
tire and behind the bumper.
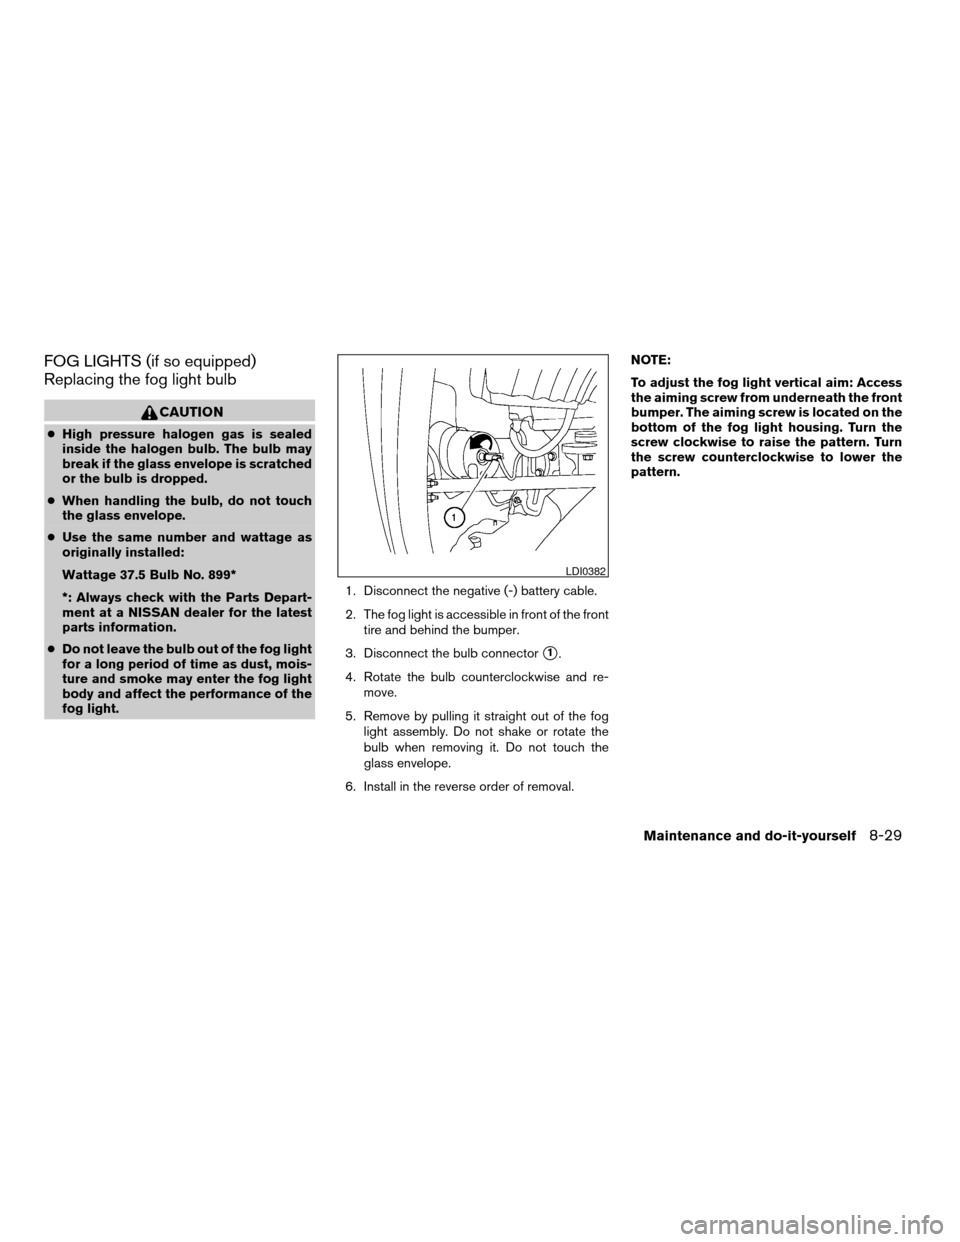
3. Disconnect the bulb connector
s1.
4. Rotate the bulb counterclockwise and re-
move.
5. Remove by pulling it straight out of the fog
light assembly. Do not shake or rotate the
bulb when removing it. Do not touch the
glass envelope.
6. Install in the reverse order of removal.NOTE:
To adjust the fog light vertical aim: Access
the aiming screw from underneath the front
bumper. The aiming screw is located on the
bottom of the fog light housing. Turn the
screw clockwise to raise the pattern. Turn
the screw counterclockwise to lower the
pattern.
LDI0382
Maintenance and do-it-yourself8-29
ZREVIEW COPYÐ2008 Armada(wzw)
Owners ManualÐUSA_English(nna)
03/05/07Ðarosenma
X
Page 438 of 456

Pre-towing tips
cBe certain your vehicle maintains a level
position when a loaded and/or unloaded
trailer is hitched. Do not drive the vehicle if it
has an abnormal nose-up or nose-down
condition; check for improper tongue load,
overload, worn suspension or other possible
causes of either condition.
cAlways secure items in the trailer to prevent
load shift while driving.
cKeep the cargo load as low as possible in
the trailer to keep the trailer center of gravity
low.
cLoad the trailer so approximately 60% of the
trailer load is in the front half and 40% is in
the back half. Also make sure the load is
balanced side to side.
cCheck your hitch, trailer tire pressure, ve-
hicle tire pressure, trailer light operation, and
trailer wheel lug nuts every time you attach a
trailer to the vehicle.
cBe certain your rearview mirrors conform to
all federal, state or local regulations. If not,
install any mirrors required for towing before
driving the vehicle.cDetermine the overall height of the vehicle
and trailer so the required clearance is
known.
Trailer towing tips
In order to gain skill and an understanding of the
vehicle’s behavior, you should practice turning,
stopping and backing up in an area which is free
from traffic. Steering stability and braking perfor-
mance will be somewhat different than under
normal driving conditions.
cAlways secure items in the trailer to prevent
load shift while driving.
cLock the trailer hitch coupler with a pin or
lock to prevent the coupler from inadvert-
ently becoming unlatched.
cAvoid abrupt starts, acceleration or stops.
cAvoid sharp turns or lane changes.
cAlways drive your vehicle at a moderate
speed.
cWhen backing up, hold the bottom of the
steering wheel with one hand. Move your
hand in the direction in which you want the
trailer to go. Make small corrections and
back up slowly. If possible, have someone
guide you when you are backing up.Always block the wheels on both vehicle and
trailer when parking. Parking on a slope is not
recommended; however, if you must do so:
CAUTION
If you move the shift selector lever to the P
(Park) position before blocking the
wheels and applying the parking brake,
transmission damage could occur.
1. Apply and hold the brake pedal.
2. Have someone place blocks on the downhill
side of the vehicle and trailer wheels.
3. After the wheel blocks are in place, slowly
release the brake pedal until the blocks ab-
sorb the vehicle load.
4. Apply the parking brake.
5. Shift the transmission into P (Park) .
6. Make sure the
indicator light (if so
equipped) indicates the transfer case is in
4H, 4L, or 2H and that the ATP light is off. If
the
indicator light is flashing, or the
ATP light is ON, make sure the transmission
is in P (Park) (AT) and turn the 4WD switch
to 2WD or 4H. See9Automatic transmission
park warning light9in the9Instruments and
controls9section and9Using four wheel
drive9in the9Starting and driving9section.
7. Turn off the engine.
9-26Technical and consumer information
ZREVIEW COPYÐ2008 Armada(wzw)
Owners ManualÐUSA_English(nna)
03/05/07Ðarosenma
X
Page 448 of 456

C
Capacities and recommended
fuel/lubricants...................9-2
Captain’s chair adjustment (2nd row)......1-5
Car phone or CB radio.............4-93
Cargo light...................2-60
Cargo (See vehicle loading information) . . .9-13
CD care and cleaning.............4-73
CD changer (See audio system)........4-52
CD player (See audio system).........4-60
Child restraint with top tether strap......1-31
Child restraints.......1-18, 1-19, 1-26, 1-28
Precautions on child
restraints............1-26, 1-37, 1-43
Top tether strap anchor point locations . .1-31
Child safety rear door lock............3-6
Chimes, audible reminders...........2-20
Cigarette lighter.................2-41
Cleaning exterior and interior..........7-2
Clock...................4-50, 4-58
(models with navigation system) . .4-11, 4-28
Clock set.................4-11, 4-28
C.M.V.S.S. certification label..........9-11
Cold weather driving..............5-32
Compact disc (CD) player...........4-60
CompactFlash (CF) player...........4-62
Compass display.................2-9
Console box...............2-42, 2-49
Control panel buttons
Brightness/contrast
button.............4-16, 4-17, 4-34
Enter button..............4-2, 4-17
Setting button.............4-9, 4-26
Startup screen...............4-20Without navigation system..........4-2
Controls
Audio controls (steering wheel)......4-75
Heater and air conditioner controls. . . .4-38
Rear audio controls.............4-77
Rear seat air conditioner..........4-40
Coolant
Capacities and recommended
fuel/lubricants.................9-2
Changing engine coolant..........8-8
Checking engine coolant level........8-7
Engine coolant temperature gauge.....2-6
Corrosion protection...............7-5
Cruise control..................5-17
Cup holders...................2-46
Curtain side-impact and rollover air bag . . .1-60
D
Daytime running light system
(Canada only)..................2-34
Defroster switch
Rear window and outside mirror defroster
switch....................2-31
Digital video disc DVD.............4-78
Dimensions and weights.............9-9
Dimmer switch for instrument panel......2-35
Display controls
(see control panel buttons)........4-2, 4-17
Distance to empty.............4-5, 4-21
Door locks....................3-4
Drive belt....................8-15
Drive positioner, Automatic...........3-31
Driving
Cold weather driving............5-32Driving with automatic
transmission.............5-12, 5-13
Precautions when starting and driving . . .5-2
E
Economy - fuel.................5-19
Emission control information label.......9-11
Emission control system warranty.......9-30
Engine
Before starting the engine.........5-11
Block heater.................5-34
Capacities and recommended
fuel/lubricants.................9-2
Changing engine coolant..........8-8
Changing engine oil.............8-9
Changing engine oil filter..........8-10
Checking engine coolant level........8-7
Checking engine oil level..........8-8
Engine compartment check locations. . . .8-6
Engine coolant temperature gauge.....2-6
Engine cooling system............8-7
Engine oil...................8-8
Engine oil and oil filter
recommendation...............9-6
Engine oil viscosity..............9-6
Engine serial number............9-11
Engine specifications.............9-8
Starting the engine.............5-11
Engine oil pressure gauge............2-7
Engine oil pressure low/engine coolant
temperature high warning light.........2-15
Enter button................4-2, 4-17
Event data recorders..............9-32
Exhaust gas (Carbon monoxide)........5-2
10-2
ZREVIEW COPYÐ2008 Armada(wzw)
Owners ManualÐUSA_English(nna)
03/05/07Ðarosenma
X