2008 NISSAN ARMADA fuel cap
[x] Cancel search: fuel capPage 10 of 456

1. Roof rack (P. 2-52)
2. Vehicle loading (P. 9-13)
3. Glass hatch (P. 3-25)
4. Rear window washer (P.2-31)
5. Glass hatch release (P.3-25)
6. Lift gate release (P. 3-23)
7. Rearview monitor (if so equipped)
(P.4-34)
8. Replacing bulbs (P. 8-31)
9. Fuel-filler cap, fuel recommendation
(P. 3-25, P. 9-3, 9-4)
10. Fuel-filler door (P. 3-25)
11. Child safety rear door locks
See the page number indicated in paren-
theses for operating details.
WII0111
EXTERIOR REAR
0-4Illustrated table of contents
ZREVIEW COPYÐ2008 Armada(wzw)
Owners ManualÐUSA_English(nna)
03/05/07Ðarosenma
X
Page 100 of 456
The seat belt warning light may also illuminate if
the front passenger’s seat belt is not fastened
when the front passenger’s seat is occupied . For
7 seconds after the ignition switch is in the ON
position, the system does not activate the warn-
ing light for the front passenger.
Refer to “Seat belts” in the “Safety—Seats, seat
belts and supplemental restraint system” section
for precautions on seat belt usage.
Supplemental air bag warning
light
When the ignition key is in the ON or START
position, the supplemental air bag warning light
illuminates for about 7 seconds and then turns
off. This means the system is operational.
If any of the following conditions occur, the
supplemental front air bags, front seat-mounted
side-impact supplemental air bags (if so
equipped) , roof-mounted curtain side-impact
and rollover supplemental air bags and seat belt
with pretensioner systems need servicing and
your vehicle must be taken to a NISSAN dealer:
cThe supplemental air bag warning light re-
mains on after approximately 7 seconds.
cThe supplemental air bag warning light
flashes intermittently.cThe supplemental air bag warning light does
not come on at all.
Unless checked and repaired, the supplemental
restraint system (air bag system) and/or the seat
belts with pretensioner systems may not function
properly. For additional details see “Supplemen-
tal restraint system” in the “Safety—Seats, seat
belts and supplemental restraint system” section
of this manual.
WARNING
If the supplemental air bag warning light
is on, it could mean that the supplemental
front air bag, front seat-mounted side-
impact supplemental air bags (if so
equipped) , roof-mounted curtain side-
impact and rollover supplemental air bags
and/or seat belts with pretensioner sys-
tems will not operate in an accident. To
help avoid injury to yourself or others,
have your vehicle checked by a NISSAN
dealer as soon as possible.
INDICATOR LIGHTS
For additional information on warnings and indi-
cators, see “Vehicle information display” later in
this section.
Front passenger air bag
status light
The front passenger air bag status light ()
will be lit and the passenger front air bag will be
OFF depending on how the front passenger seat
is being used.
For front passenger air bag status light operation,
see “Front passenger air bag and status light” in
the “Safety — Seats, seat belts and supplemental
restraint system” section of this manual.
High beam indicator light
(blue)
This blue light comes on when the headlight high
beams are on and goes out when the low beams
are selected.
The high beam indicator light also comes on
when the passing signal is activated.
Malfunction indicator light
(MIL)
If this indicator light comes on steady or blinks
while the engine is running, it may indicate a
potential emission control malfunction.
The malfunction indicator light may also come on
steady if the fuel-filler cap is loose or missing, or if
the vehicle runs out of fuel. Check to make sure
the fuel-filler cap is installed and closed tightly,
2-18Instruments and controls
ZREVIEW COPYÐ2008 Armada(wzw)
Owners ManualÐUSA_English(nna)
03/05/07Ðarosenma
X
Page 101 of 456
and that the vehicle has at least 3 gallons (11.4
liters) of fuel in the fuel tank.
After a few driving trips, the
light should
turn off if no other potential emission control
system malfunction exists.
If this indicator light comes on steady for 20
seconds and then blinks for 10 seconds when
the engine is not running, it indicates that the
vehicle is not ready for an emission control sys-
tem inspection/maintenance test. See “Readi-
ness for inspection/maintenance (I/M) test” in the
“Technical and consumer information” section of
this manual.
Operation
The malfunction indicator light will come on in
one of two ways:
cMalfunction indicator light on steady — An
emission control system malfunction has
been detected. Check the fuel-filler cap. If
the fuel-filler cap is loose or missing, tighten
or install the cap and continue to drive the
vehicle. The
light should turn off after
a few driving trips. If thelight does not
turn off after a few driving trips, have the
vehicle inspected by a NISSAN dealer. You
do not need to have your vehicle towed to
the dealer.cMalfunction indicator light blinking — An en-
gine misfire has been detected which may
damage the emission control system. To re-
duce or avoid emission control system dam-
age:
– do not drive at speeds above 45 MPH
(72 km/h) .
– avoid hard acceleration or deceleration.
– avoid steep uphill grades.
– if possible, reduce the amount of cargo
being hauled or towed.
The malfunction indicator light may stop blinking
and come on steady. Have the vehicle inspected
by a NISSAN dealer. You do not need to have
your vehicle towed to the dealer.
CAUTION
Continued vehicle operation without hav-
ing the emission control system checked
and repaired as necessary could lead to
poor driveability, reduced fuel economy,
and possible damage to the emission con-
trol system.
Security indicator light
This light blinks whenever the ignition switch is in
the LOCK, OFF or ACC position. This function
indicates the security system equipped on the
vehicle is operational.
For additional information, see “Security sys-
tems” later in this section.
Slip indicator light
This indicator light will blink when the traction
control system is limiting wheel spin. Slippery
road conditions may exist if the slip indicator
blinks on. If this happens, adjust your driving
accordingly.
The slip indicator light also comes on when you
turn the ignition key to the ON position. The light
will turn off after about 2 seconds if the system is
operational. If the light does not come on or does
not go off, have the traction control system
checked by a NISSAN dealer.
Turn signal/hazard indicator
lights
The appropriate light flashes when the turn signal
switch is activated.
Both lights flash when the hazard switch is turned
on.
Instruments and controls2-19
ZREVIEW COPYÐ2008 Armada(wzw)
Owners ManualÐUSA_English(nna)
03/05/07Ðarosenma
X
Page 122 of 456
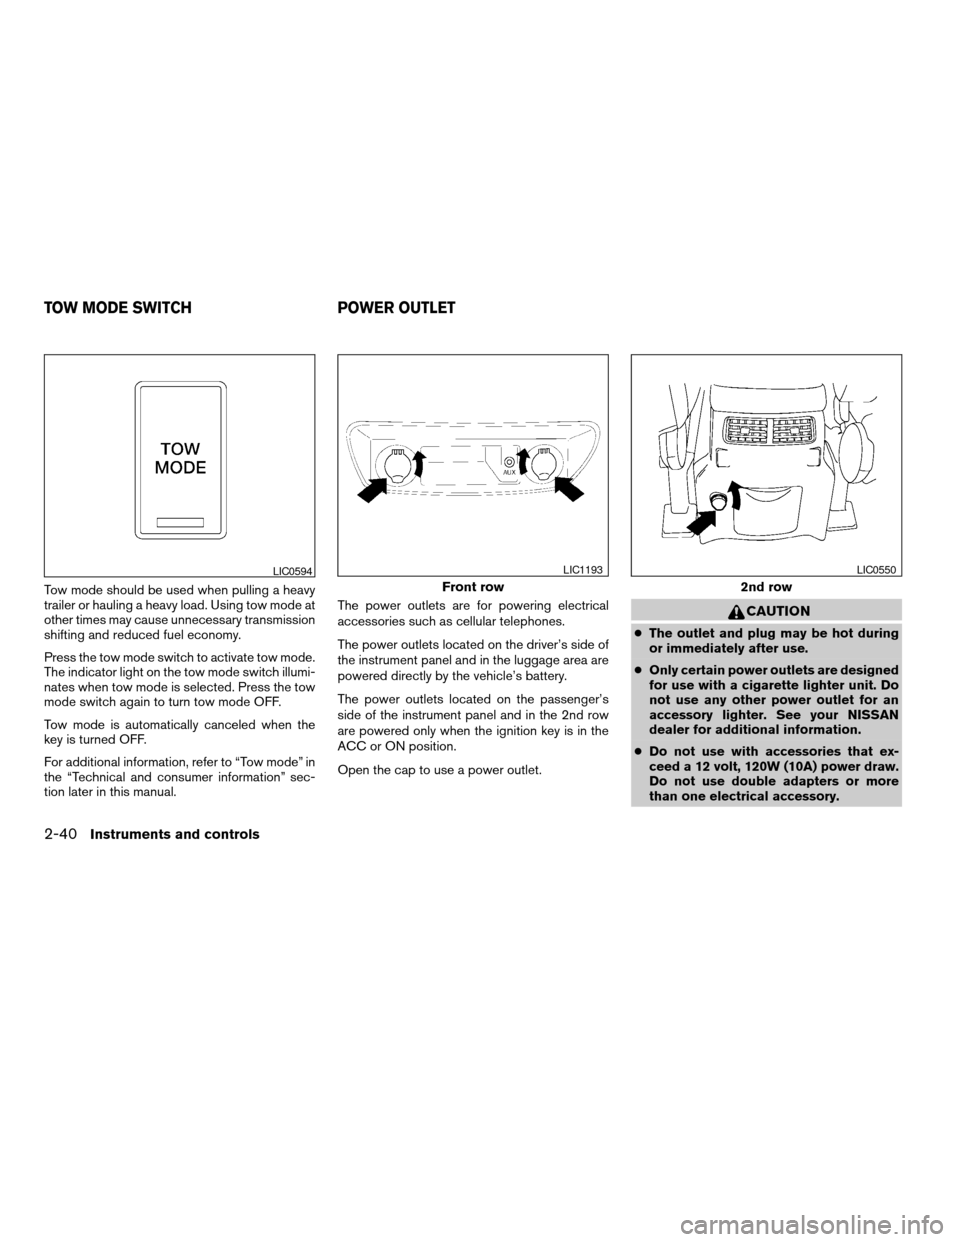
Tow mode should be used when pulling a heavy
trailer or hauling a heavy load. Using tow mode at
other times may cause unnecessary transmission
shifting and reduced fuel economy.
Press the tow mode switch to activate tow mode.
The indicator light on the tow mode switch illumi-
nates when tow mode is selected. Press the tow
mode switch again to turn tow mode OFF.
Tow mode is automatically canceled when the
key is turned OFF.
For additional information, refer to “Tow mode” in
the “Technical and consumer information” sec-
tion later in this manual.The power outlets are for powering electrical
accessories such as cellular telephones.
The power outlets located on the driver’s side of
the instrument panel and in the luggage area are
powered directly by the vehicle’s battery.
The power outlets located on the passenger’s
side of the instrument panel and in the 2nd row
are powered only when the ignition key is in the
ACC or ON position.
Open the cap to use a power outlet.
CAUTION
cThe outlet and plug may be hot during
or immediately after use.
cOnly certain power outlets are designed
for use with a cigarette lighter unit. Do
not use any other power outlet for an
accessory lighter. See your NISSAN
dealer for additional information.
cDo not use with accessories that ex-
ceed a 12 volt, 120W (10A) power draw.
Do not use double adapters or more
than one electrical accessory.
LIC0594
Front row
LIC1193
2nd row
LIC0550
TOW MODE SWITCH POWER OUTLET
2-40Instruments and controls
ZREVIEW COPYÐ2008 Armada(wzw)
Owners ManualÐUSA_English(nna)
03/05/07Ðarosenma
X
Page 147 of 456

3 Pre-driving checks and adjustments
Keys .............................................3-2
Intelligent keys (if so equipped)..................3-2
NISSAN vehicle immobilizer system keys..........3-3
Doors............................................3-4
Locking with key................................3-4
Locking with inside lock knob....................3-5
Locking with power door lock switch.............3-5
Child safety rear door lock.......................3-6
Remote keyless entry system.......................3-6
How to use remote keyless entry system..........3-7
Intelligent Key system (if so equipped)..............3-10
Operating range...............................3-12
Door locks/unlocks precaution..................3-12
Intelligent Key operation........................3-13
How to use the remote keyless entry
function......................................3-16
Warning signals...............................3-18
Troubleshooting guide.........................3-18
Hood...........................................3-20
Lift gate.........................................3-20Operating the manual lift gate...................3-21
Operating the power lift gate
(if so equipped)...............................3-21
Cancel switch.................................3-23
Lift gate release...............................3-23
Glass hatch......................................3-25
Fuel-filler door...................................3-25
Fuel-filler cap.................................3-25
Steering wheel...................................3-27
Tilt operation..................................3-27
Pedal position adjustment.........................3-27
Sun visors.......................................3-28
Vanity mirrors.................................3-28
Mirrors..........................................3-29
Automatic anti-glare rearview mirror.............3-29
Outside mirrors...............................3-29
Automatic drive positioner (if so equipped)..........3-31
Memory storage function.......................3-31
Entry/exit function.............................3-33
System operation..............................3-33
ZREVIEW COPYÐ2008 Armada(wzw)
Owners ManualÐUSA_English(nna)
03/05/07Ðarosenma
X
Page 171 of 456
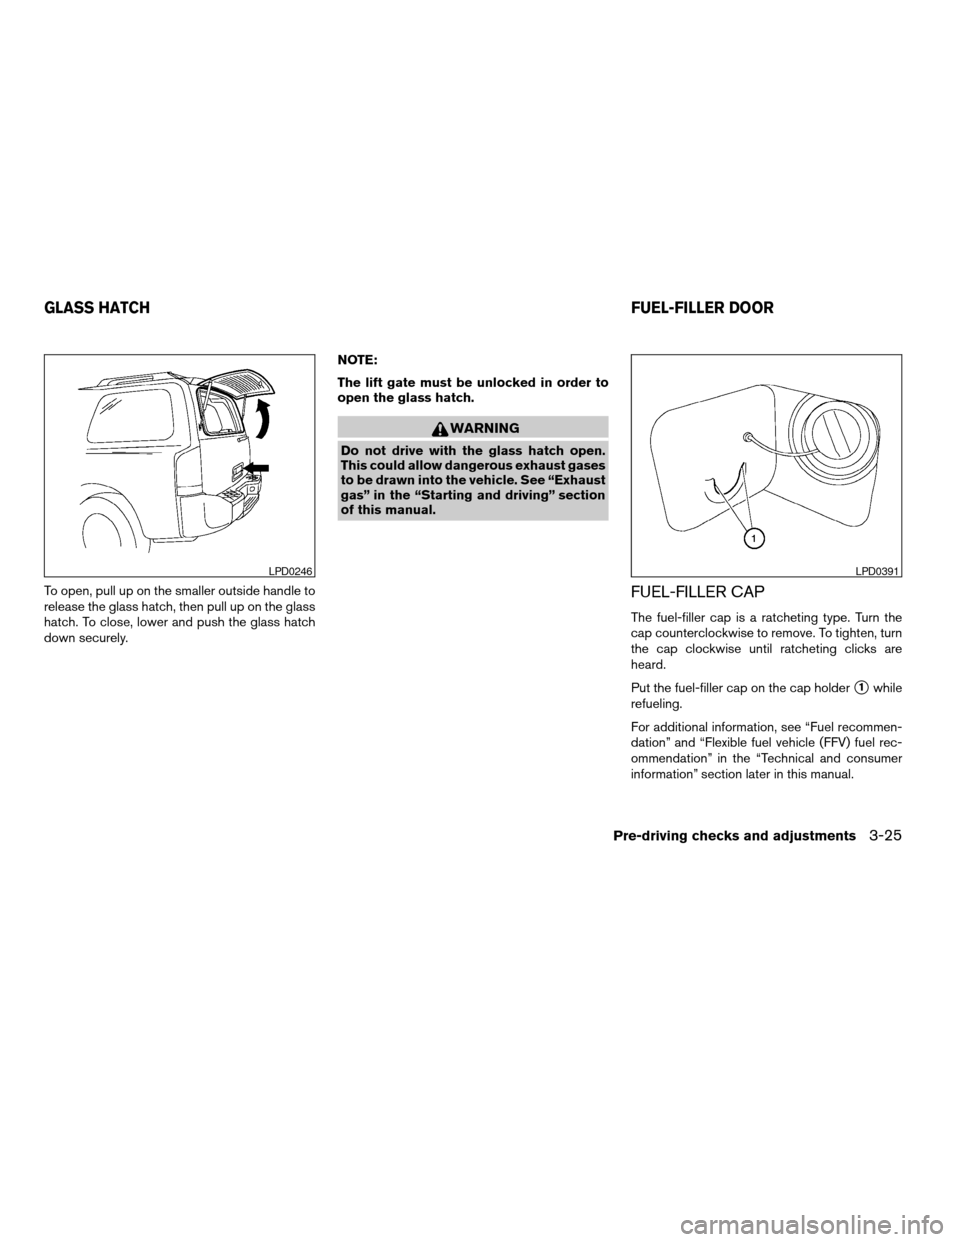
To open, pull up on the smaller outside handle to
release the glass hatch, then pull up on the glass
hatch. To close, lower and push the glass hatch
down securely.NOTE:
The lift gate must be unlocked in order to
open the glass hatch.
WARNING
Do not drive with the glass hatch open.
This could allow dangerous exhaust gases
to be drawn into the vehicle. See “Exhaust
gas” in the “Starting and driving” section
of this manual.
FUEL-FILLER CAP
The fuel-filler cap is a ratcheting type. Turn the
cap counterclockwise to remove. To tighten, turn
the cap clockwise until ratcheting clicks are
heard.
Put the fuel-filler cap on the cap holder
s1while
refueling.
For additional information, see “Fuel recommen-
dation” and “Flexible fuel vehicle (FFV) fuel rec-
ommendation” in the “Technical and consumer
information” section later in this manual.
LPD0246LPD0391
GLASS HATCHFUEL-FILLER DOOR
Pre-driving checks and adjustments3-25
ZREVIEW COPYÐ2008 Armada(wzw)
Owners ManualÐUSA_English(nna)
03/05/07Ðarosenma
X
Page 172 of 456
WARNING
cGasoline is extremely flammable and
highly explosive under certain condi-
tions. You could be burned or seriously
injured if it is misused or mishandled.
Always stop the engine and do not
smoke or allow open flames or sparks
near the vehicle when refueling.
cDo not attempt to top off the fuel tank
after the fuel pump nozzle shuts off
automatically. Continued refueling may
cause fuel overflow, resulting in fuel
spray and possibly a fire.
cUse only an original equipment type
fuel-filler cap as a replacement. It has a
built-in safety valve needed for proper
operation of the fuel system and emis-
sion control system. An incorrect cap
can result in a serious malfunction and
possible injury. It could also cause the
malfunction indicator light to come on.
cNever pour fuel into the throttle body to
attempt to start your vehicle.cDo not fill a portable fuel container in
the vehicle or trailer. Static electricity
can cause an explosion of flammable
liquid, vapor or gas in any vehicle or
trailer. To reduce the risk of serious
injury or death when filling portable fuel
containers:
– Always place the container on the
ground when filling.
– Do not use electronic devices when
filling.
– Keep the pump nozzle in contact
with the container while you are fill-
ing it.
– Use only approved portable fuel con-
tainers for flammable liquid.
CAUTION
cOnly vehicles with the E-85 filler door
label can operate on E-85. Fuel system
or other damage can occur if E-85 is
used in vehicles that are not designed
to run on E-85.
cIf fuel is spilled on the vehicle body,
flush it away with water to avoid paint
damage.cTighten until the fuel-filler cap clicks.
Failure to tighten the fuel-filler cap
properly may cause the
mal-
function indicator light (MIL) to illumi-
nate. If the
light illuminates be-
cause the fuel-filler cap is loose or
missing, tighten or install the cap and
continue to drive the vehicle.
The
light should turn off after a
few driving trips. If the
light
does not turn off after a few driving
trips, have the vehicle inspected by a
NISSAN dealer.
cFor additional information, see the
“Malfunction indicator light (MIL)” in
the “Instruments and Controls” section
earlier in this manual.
3-26Pre-driving checks and adjustments
ZREVIEW COPYÐ2008 Armada(wzw)
Owners ManualÐUSA_English(nna)
03/05/07Ðarosenma
X
Page 317 of 456
CAUTION
cDo not use leaded gasoline. Deposits
from leaded gasoline will seriously re-
duce the three-way catalyst’s ability to
help reduce exhaust pollutants.
cKeep your engine tuned up. Malfunc-
tions in the ignition, fuel injection, or
electrical systems can cause overrich
fuel flow into the three-way catalyst,
causing it to overheat. Do not keep driv-
ing if the engine misfires, or if notice-
able loss of performance or other un-
usual operating conditions are
detected. Have the vehicle inspected
promptly by a NISSAN dealer.
cAvoid driving with an extremely low fuel
level. Running out of fuel could cause
the engine to misfire, damaging the
three-way catalyst.
cDo not race the engine while warming it
up.
cDo not push or tow your vehicle to start
the engine.
ON-PAVEMENT AND OFF-ROAD
DRIVING PRECAUTIONS
Utility vehicles have a significantly higher
rollover rate than other types of vehicles.
They have higher ground clearance than passen-
ger cars to make them capable of performing in a
variety of on-pavement and off-road applications.
This gives them a higher center of gravity than
ordinary cars. An advantage of higher ground
clearance is a better view of the road, allowing
you to anticipate problems. However, they are not
designed for cornering at the same speeds as
conventional two-wheel drive vehicles any more
than low-slung sports cars are designed to per-
form satisfactorily under off-road conditions. If at
all possible, avoid sharp turns at high speeds. As
with other vehicles of this type, failure to operate
this vehicle correctly may result in loss of control
or vehicle rollover. In a rollover crash, an unbelted
person is significantly more likely to die than a
person wearing a seat belt.
Be sure to read the driving safety precautions
later in this section.
TIRE PRESSURE MONITORING
SYSTEM (TPMS)
Each tire, including the spare (if provided) ,
should be checked monthly when cold and in-
flated to the inflation pressure recommended by
the vehicle manufacturer on the vehicle placard
or tire inflation pressure label. (If your vehicle has
tires of a different size than the size indicated on
the vehicle placard or tire inflation pressure label,
you should determine the proper tire inflation
pressure for those tires.)
As an added safety feature, your vehicle has been
equipped with a Tire Pressure Monitoring System
(TPMS) that illuminates a low tire pressure telltale
when one or more of your tires is significantly
under-inflated. Accordingly, when the low tire
pressure telltale illuminates, you should stop and
check your tires as soon as possible, and inflate
them to the proper pressure. Driving on a signifi-
cantly under-inflated tire causes the tire to over-
heat and can lead to tire failure. Under-inflation
also reduces fuel efficiency and tire tread life, and
may affect the vehicle’s handling and stopping
ability.
Please note that the TPMS is not a substitute for
proper tire maintenance, and it is the driver’s
responsibility to maintain correct tire pressure,
Starting and driving5-3
ZREVIEW COPYÐ2008 Armada(wzw)
Owners ManualÐUSA_English(nna)
03/05/07Ðarosenma
X