Page 9 of 36

06
Refer to the Owner’s Manual for detailed information regarding the audio system.
XM® presets are only available on XM® Satellite Radio equipped vehicles.
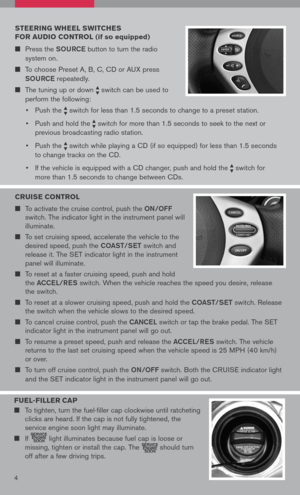
CD/AUX BUttoN
Press the CD/AUX button to play a CD loaded into the CD changer. Press the CD/AUX button again to play a compatible device such as an MP3 player when it is plugged into the auxiliary jack (cable not included).
e Je C t BU tto N
e Je C t A SINGL e DISC
- Press the button for less than 1.5 seconds. Select the eject slot by pressing the CD insert select button (1-6). The CD will then eject.
eJe C t ALL DISCS
- Press and hold the button for more than 1.5 seconds.
CD S eLe C t/L oAD BU ttoNS
L o AD A SINGL e DISC
- Press one of the CD insert select buttons (1-6) for less than 1.5 seconds, wait for the CD slot door to open, then insert the CD.
Lo AD UP to 6 DISCS
- Press and hold one of the CD insert select buttons (1-6) for more than 1.5 seconds. Wait for the CD slot door to open before loading each disc. The slot numbers (1-6) will illuminate on the display when CDs are loaded into the changer.
07
08
0708
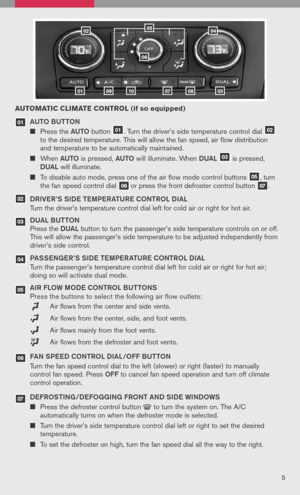
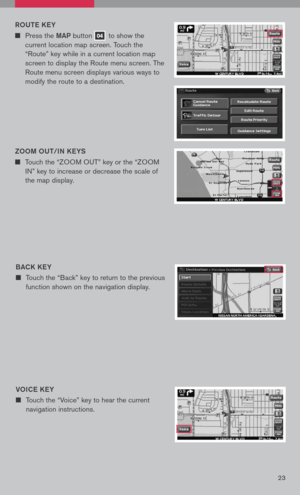
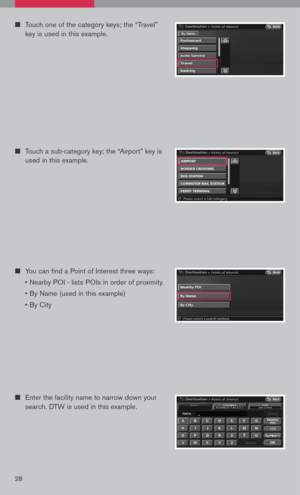
CLOCK SET/ADJUSTMENT
(Navigation System only)
Press the SetUP button, then touch the
“Clock” key to access the following clock
settings:
On-screen Clock – When this item
is turned to ON, a clock is always
displayed in the upper right corner of
the screen. The clock is automatically adjusted by the GPS system.
Clock Format – Choose either the 12-hour clock display or the 24-hour clock display.
Offset Adjust – Adjust the time by increasing or decreasing per minute.
Daylight Savings Time – Turn this item to ON for daylight savings time application.
Time Zone – Choose the time zone.
Refer to your Owner’s Manual and Navigation System Owner’s Manual for additional information on your navigation system.
CLOCK SET/ADJUSTMENT (Non Navigation System only)
Press and hold the CLOCK button for approximately 2 seconds.
The display will show “H-Seek M-Tune,”
Press the SEEK/TRACK button to adjust the hours.
Press the TUNE/FF·REW button to adjust the minutes.
Press the CLOCK button again to exit the clock set mode.
Refer to your Owner’s Manual for additional information on the clock.7
Page 10 of 36

MPG (instant fuel economy)")
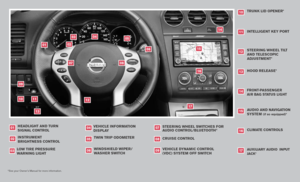
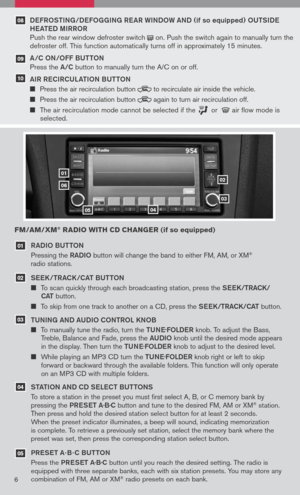
VEHICLE INFORMATION DISPLAY
When the selection button 01 is pressed, the following modes will display on the screen:
Setting
Warnings (if there are any)
MPG (instant fuel economy)
MPG/MPH (average fuel economy and speed)
Time/Miles (elapsed time since last reset)
Range (average distance to empty)
Exterior temperature
S ett ING M oDe
When the setting mode 02 is selected, you are able to set reminders for alerts, maintenance intervals or language displays.
The ALERT mode allows you to set alerts notifying yourself of time to rest or icy traveling conditions.
The MAINTENANCE mode allows you to set alerts for the reminding of maintenance intervals for engine oil, oil filter, tires and others.
The DISPLAY mode allows you to change the language (English or French) or unit of measurement (US or metric) display.
0102
TWIN TRIP ODOMETER
The twin trip odometer records the distance of individual trips.
Press the button 01 to change the display as follows: Trip A Trip B Trip A.
Press and hold the button for more than 1 second to reset the trip odometer to zero.
01
XTRONIC CONTINUOUSLY VARIA bLE
TRANSMISSION (CV T) (if so equipped)
The Xtronic CVT does not produce a gear
change sensation like traditional automatic
transmissions.
The transmission in your vehicle requires a
special fluid available only at your NISSAN
dealer. No other fluid will meet the exact
requirements of the Xtronic CVT.
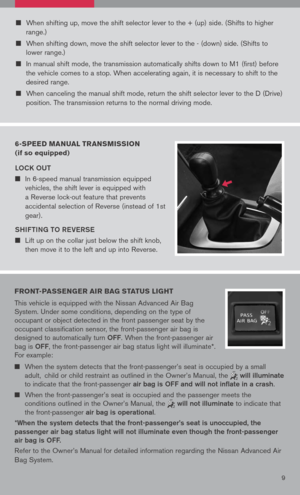
MANUAL SHIF t MoDe
When the shift selector lever is shifted from D
(Drive) to the manual shift gate, the
transmission enters the manual shift mode.
In the manual shift mode, shift range is
displayed on the position indicator in the meter.
8
Page 11 of 36
 side. (Shifts to higher
range.)
When shifting down, move the shift selector lever to the - (down) side. (Shifts to
lower range.")
When shifting up, move the shift selector lever to the + (up) side. (Shifts to higher
range.)
When shifting down, move the shift selector lever to the - (down) side. (Shifts to
lower range.)
In manual shift mode, the transmission automatically shifts down to M1 (first) before
the vehicle comes to a stop. When accelerating again, it is necessary to shift to the
desired range.
When canceling the manual shift mode, return the shift selector lever to the D (Drive)
position. The transmission returns to the normal driving mode.
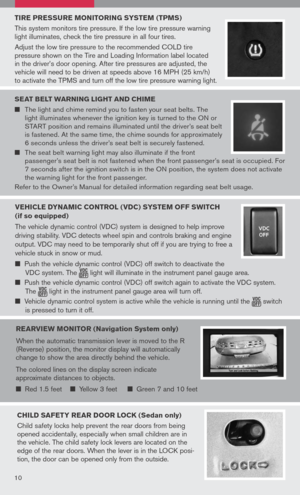
FRONT-PASSENGER AIR bAG STATUS LIGHT
This vehicle is equipped with the Nissan Advanced Air Bag
System. Under some conditions, depending on the type of
occupant or object detected in the front passenger seat by the
occupant classification sensor, the front-passenger air bag is
designed to automatically turn oFF. When the front-passenger air
bag is oFF, the front-passenger air bag status light will illuminate*.
For example:
When the system detects that the front-passenger’s seat is occupied by a small
adult, child or child restraint as outlined in the Owner’s Manual, the
will illuminate
to indicate that the front-passenger air bag is oFF and will not inflate in a crash.
When the front-passenger’s seat is occupied and the passenger meets the
conditions outlined in the Owner’s Manual, the will not illuminate to indicate that
the front-passenger air bag is operational.
*When the system detects that the front-passenger’s seat is unoccupied, the
passenger air bag status light will not illuminate even though the front-passenger
air bag is oFF.
Refer to the Owner’s Manual for detailed information regarding the Nissan Advanced Air
Bag System.
9
6-SPEED MANUAL TRANSMISSION
(if so equipped)
Lo CK oUt
In 6-speed manual transmission equipped
vehicles, the shift lever is equipped with
a Reverse lock-out feature that prevents
accidental selection of Reverse (instead of 1st
gear).
SHIF tING to R eVe RS e
Lift up on the collar just below the shift knob,
then move it to the left and up into Reverse.
Page 12 of 36

This system monitors tire pressure. If the low tire pressure warning light illuminates, check the tire pressure in all four tires.
Adjust the low tire pressure")
TIRE PRESSURE MONITORING SYSTEM (TPMS)
This system monitors tire pressure. If the low tire pressure warning light illuminates, check the tire pressure in all four tires.
Adjust the low tire pressure to the recommended COLD tire pressure shown on the Tire and Loading Information label located in the driver’s door opening. After tire pressures are adjusted, the vehicle will need to be driven at speeds above 16 MPH (25 km/h) to activate the TPMS and turn off the low tire pressure warning light.
SEAT bELT WARNING LIGHT AND CHIME
The light and chime remind you to fasten your seat belts. The light illuminates whenever the ignition key is turned to the ON or START position and remains illuminated until the driver’s seat belt is fastened. At the same time, the chime sounds for approximately 6 seconds unless the driver’s seat belt is securely fastened.
The seat belt warning light may also illuminate if the front passenger’s seat belt is not fastened when the front passenger’s seat is occupied. For 7 seconds after the ignition switch is in the ON position, the system does not activate the warning light for the front passenger.
Refer to the Owner’s Manual for detailed information regarding seat belt usage.
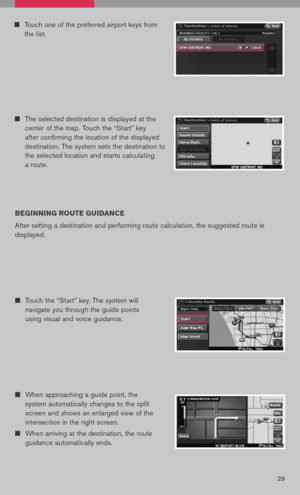
REARVIEW MONITOR (Navigation System only)
When the automatic transmission lever is moved to the R (Reverse) position, the monitor display will automatically change to show the area directly behind the vehicle.
The colored lines on the display screen indicate approximate distances to objects.
Red 1.5 feet Yellow 3 feet Green 7 and 10 feet
CHILD SAFETY REAR DOOR LOCK (Sedan only)
Child safety locks help prevent the rear doors from being opened accidentally, especially when small children are in the vehicle. The child safety lock levers are located on the edge of the rear doors. When the lever is in the LOCK posi-tion, the door can be opened only from the outside.
10
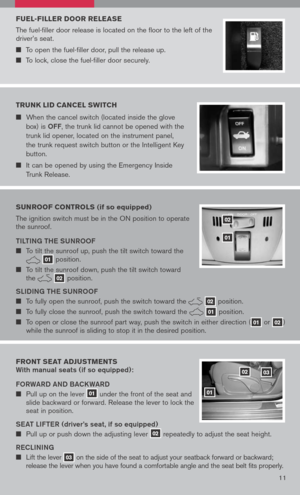
VEHICLE DYNAMIC CONTROL (VDC) SYSTEM OFF SWITCH
(if so equipped)
The vehicle dynamic control (VDC) system is designed to help improve
driving stability. VDC detects wheel spin and controls braking and engine
output. VDC may need to be temporarily shut off if you are trying to free a
vehicle stuck in snow or mud.
Push the vehicle dynamic control (VDC) off switch to deactivate the
VDC system. The light will illuminate in the instrument panel gauge area.
Push the vehicle dynamic control (VDC) off switch again to activate the VDC system.
The light in the instrument panel gauge area will turn off.
Vehicle dynamic control system is active while the vehicle is running until the switch
is pressed to turn it off.
Page 13 of 36

FUEL-FILLER DOOR RELEASE
The fuel-filler door release is located on the floor to the left of the driver’s seat.
To open the fuel-filler door, pull the release up.
To lock, close the fuel-filler door securely.
SUNROOF CONTROLS (if so equipped)
The ignition switch must be in the ON position to operate the sunroof.
tIL tING tH e SUNR ooF
To tilt the sunroof up, push the tilt switch toward the 01 position.
To tilt the sunroof down, push the tilt switch toward the 02 position.
SLIDING tH e SUNR ooF
To fully open the sunroof, push the switch toward the 02 position.
To fully close the sunroof, push the switch toward the 01 position.
To open or close the sunroof part way, push the switch in either direction (01 or 02) while the sunroof is sliding to stop it in the desired position.
02
01
TRUNK LID CANCEL SWITCH
When the cancel switch (located inside the glove
box) is oFF, the trunk lid cannot be opened with the
trunk lid opener, located on the instrument panel,
the trunk request switch button or the Intelligent Key
button.
It can be opened by using the Emergency Inside
Trunk Release.
11
FRONT SEAT ADJUSTMENTS With manual seats (if so equipped):
Fo RWARD AND BACKWARD
Pull up on the lever 01 under the front of the seat and slide backward or forward. Release the lever to lock the seat in position.
S eAt LIF teR
(driver’s seat , if so equipped)
Pull up or push down the adjusting lever 02 repeatedly to adjust the seat height.
Re CLINING
Lift the lever 03 on the side of the seat to adjust your seatback forward or backward; release the lever when you have found a comfortable angle and the seat belt fits properly.
01
0203
Page 14 of 36
:
The control lever 01 allows you to make the following adjustments.
Move the control level 01 forward or back-ward to adjust the seat cushion forward or backwar")
With power seats (if so equipped):
The control lever 01 allows you to make the following adjustments.
Move the control level 01 forward or back-ward to adjust the seat cushion forward or backward.
Pull up or press down on the front of the control lever A to adjust the front portion of the driver’s seat cushion.
Pull up or press down on the rear of the control lever b to raise or lower the rear portion of the driver’s seat cushion.
Re CLINING
Push the switch 02 forward to move the seatback forward; pull it back to move the seatback backward.
L UMBAR S UPPoRt
(driver’s seat , if so equipped):
Pull up or push down the adjusting lever 03 repeatedly to adjust the lumbar support.
FOLDING DOWN THE REAR SEATS
FR oM INSID e tH e V eHICL e
Open the access cover and press the release button 01 to fold down the center/passenger’s side rear seat.
Reach through the opening and pull on the strap 02 located behind the seat to fold down the driver’s side rear seat.
FR oM tH e tRUNK
Pull the strap 03 located behind the seat to fold down the center/passenger’s side rear seat.
Pull on the strap 04 located behind the seat to fold down the driver’s side rear seat.
FOLDING DOWN THE FRONT SEATS
FR oM INSID e tH e V eHICL e
From the driver’s seat :
Pull the upper seatback release lever 01, located on the inboard side of the passenger front seat, to the uppermost position and slide the seat forward.
From the back seat :
Step or push down on the lower seatback release lever 02 located on the backside lower portion of the passenger seat and push the seatback, sliding it forward.
FR oM oU tSID e tH e V eHICL e
From the driver’s side :
Pull the upper seatback release lever 01 , located on the outboard side of the driver front seat.
From the passenger side :
Pull the seatback release lever 02 fully up until the seatback releases, and push the seatback, sliding it forward.
12
01
02
03Ab
01
02
0304
01
01
02
02
Page 15 of 36

1. To begin, press and hold the two
outer HomeLink® buttons (to clear
the memory) un")
13
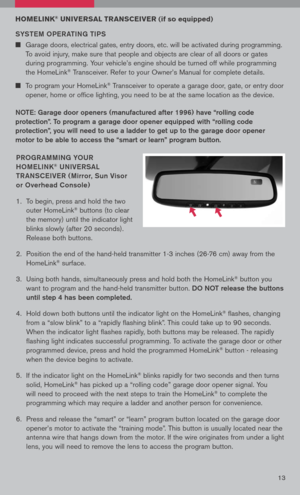
PRoGR AMMING Y oUR
H o M eLINK® UNIV eRSAL
t R ANSC eIV eR ( Mirror, Sun Visor
or overhead Console)
1. To begin, press and hold the two
outer HomeLink® buttons (to clear
the memory) until the indicator light
blinks slowly (after 20 seconds).
Release both buttons.
2. Position the end of the hand-held transmitter 1-3 inches (26-76 cm) away from the
HomeLink® surface.
3. Using both hands, simultaneously press and hold both the HomeLink
® button you
want to program and the hand-held transmitter button. Do Not release the buttons
until step 4 has been completed.
4. Hold down both buttons until the indicator light on the HomeLink
® flashes, changing
from a “slow blink” to a “rapidly flashing blink”. This could take up to 90 seconds.
When the indicator light flashes rapidly, both buttons may be released. The rapidly
flashing light indicates successful programming. To activate the garage door or other
programmed device, press and hold the programmed HomeLink® button - releasing
when the device begins to activate.
5. If the indicator light on the HomeLink
® blinks rapidly for two seconds and then turns
solid, HomeLink® has picked up a “rolling code” garage door opener signal. You
will need to proceed with the next steps to train the HomeLink® to complete the
programming which may require a ladder and another person for convenience.
6. Press and release the “smart” or “learn” program button located on the garage door
opener’s motor to activate the “training mode”. This button is usually located near the
antenna wire that hangs down from the motor. If the wire originates from under a light
lens, you will need to remove the lens to access the program button.
HOMELINK® UNIVERSAL TRANSCEIVER (if so equipped)
SYS teM oPe R A tING tIPS
Garage doors, electrical gates, entry doors, etc. will be activated during programming.
To avoid injury, make sure that people and objects are clear of all doors or gates
during programming. Your vehicle’s engine should be turned off while programming
the HomeLink® Transceiver. Refer to your Owner’s Manual for complete details.
To program your HomeLink® Transceiver to operate a garage door, gate, or entry door
opener, home or office lighting, you need to be at the same location as the device.
Note: Garage door openers (manufactured after 1996) have “rolling code
protection”. to program a garage door opener equipped with “rolling code
protection”, you will need to use a ladder to get up to the garage door opener
motor to be able to access the “smart or learn” program button.
Page 16 of 36

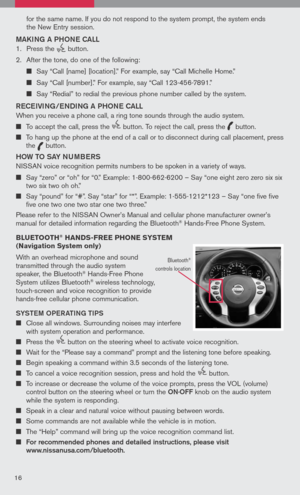
With an overhead microphone and sound transmitted through the audio system speaker, the Bluetooth® Hands-Free Phone")
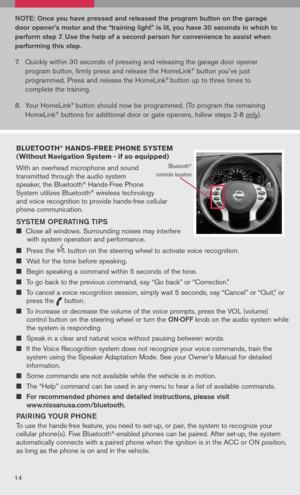
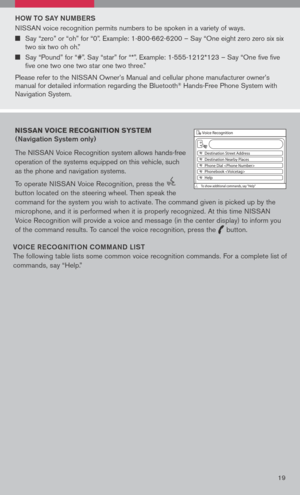
bLUETOOTH® HANDS-FREE PHONE SYSTEM (Without Navigation System - if so equipped)
With an overhead microphone and sound transmitted through the audio system speaker, the Bluetooth® Hands-Free Phone System utilizes Bluetooth® wireless technology and voice recognition to provide hands-free cellular phone communication.
SYS teM oPe RA tING tIPS
Close all windows. Surrounding noises may interfere with system operation and performance.
Press the
icon C
button on the steering wheel to activate voice recognition.
Wait for the tone before speaking.
Begin speaking a command within 5 seconds of the tone.
To go back to the previous command, say “Go back” or “Correction.”
To cancel a voice recognition session, simply wait 5 seconds, say “Cancel” or “Quit,” or press the
icon C
button.
To increase or decrease the volume of the voice prompts, press the VOL (volume) control button on the steering wheel or turn the oN· oFF knob on the audio system while the system is responding.
Speak in a clear and natural voice without pausing between words.
If the Voice Recognition system does not recognize your voice commands, train the system using the Speaker Adaptation Mode. See your Owner’s Manual for detailed information.
Some commands are not available while the vehicle is in motion.
The “Help” command can be used in any menu to hear a list of available commands.
For recommended phones and detailed instructions, please visit www.nissanusa.com/bluetooth.
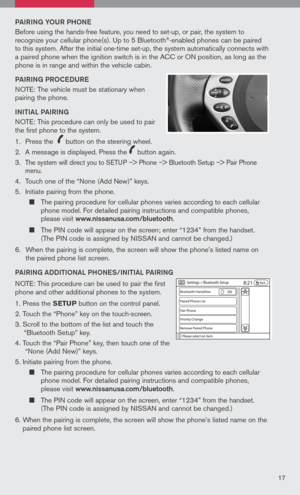
PAIRING Y oUR PH oNe
To use the hands-free feature, you need to set-up, or pair, the system to recognize your cellular phone(s). Five Bluetooth®-enabled phones can be paired. After set-up, the system automatically connects with a paired phone when the ignition is in the ACC or ON position, as long as the phone is on and in the vehicle.
Bluetooth®
controls location
Note : o nce you have pressed and released the program button on the garage
door opener’s motor and the “training light” is lit, you have 30 seconds in which to
perform step 7. Use the help of a second person for convenience to assist when
performing this step.
7. Quickly within 30 seconds of pressing and releasing the garage door opener
program button, firmly press and release the HomeLink® button you’ve just
programmed. Press and release the HomeLink® button up to three times to
complete the training.
8. Your HomeLink
® button should now be programmed. (To program the remaining
HomeLink® buttons for additional door or gate openers, follow steps 2-8 only).
14