Page 16 of 237

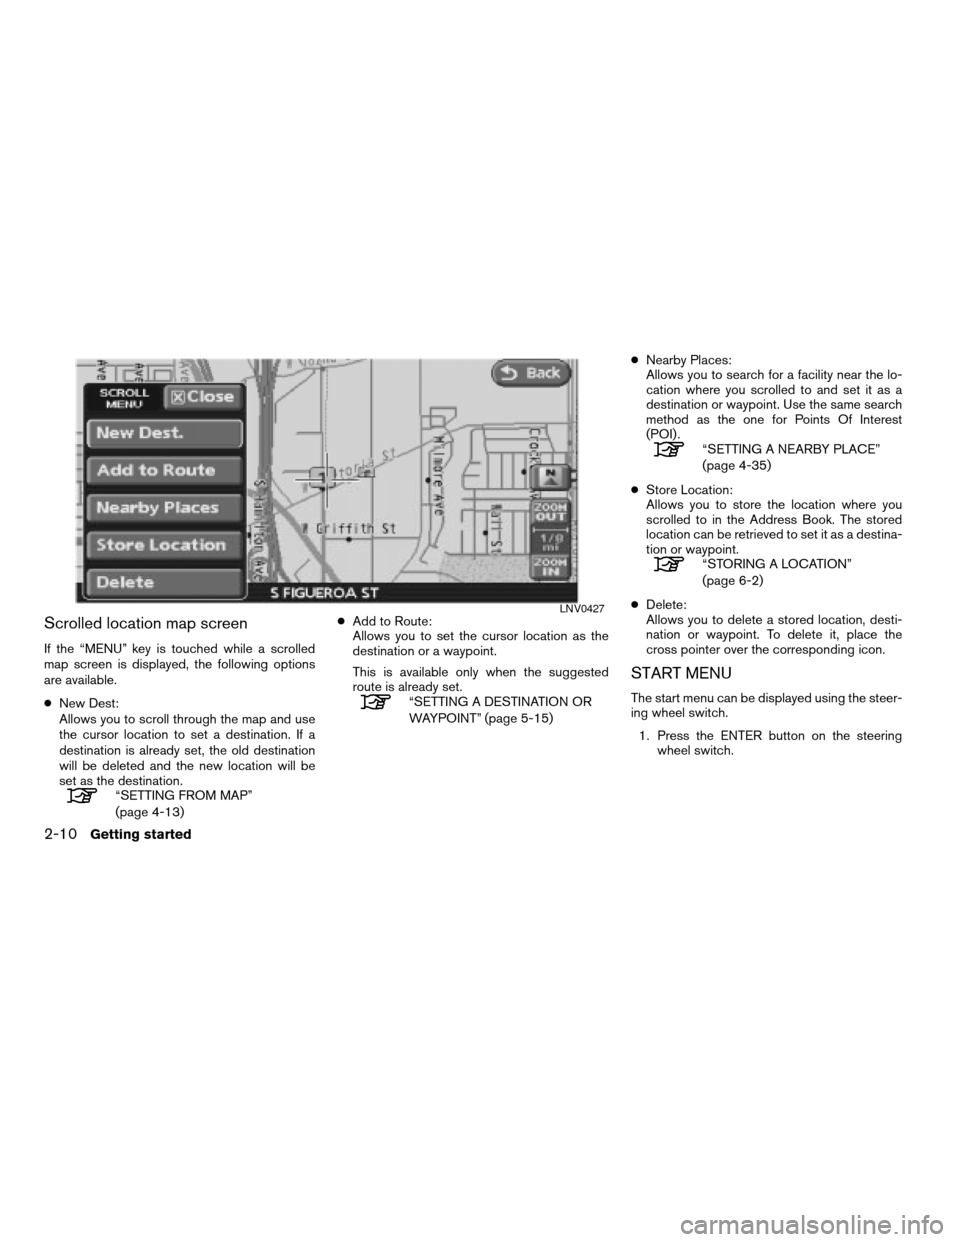
Scrolled location map screen
If the “MENU” key is touched while a scrolled
map screen is displayed, the following options
are available.
cNew Dest:
Allows you to scroll through the map and use
the cursor location to set a destination. If a
destination is already set, the old destination
will be deleted and the new location will be
set as the destination.
“SETTING FROM MAP”
(page 4-13)cAdd to Route:
Allows you to set the cursor location as the
destination or a waypoint.
This is available only when the suggested
route is already set.
“SETTING A DESTINATION OR
WAYPOINT” (page 5-15)cNearby Places:
Allows you to search for a facility near the lo-
cation where you scrolled to and set it as a
destination or waypoint. Use the same search
method as the one for Points Of Interest
(POI) .
“SETTING A NEARBY PLACE”
(page 4-35)
cStore Location:
Allows you to store the location where you
scrolled to in the Address Book. The stored
location can be retrieved to set it as a destina-
tion or waypoint.
“STORING A LOCATION”
(page 6-2)
cDelete:
Allows you to delete a stored location, desti-
nation or waypoint. To delete it, place the
cross pointer over the corresponding icon.
START MENU
The start menu can be displayed using the steer-
ing wheel switch.
1. Press the ENTER button on the steering
wheel switch.
LNV0427
2-10Getting started
ZREVIEW COPYÐ2008 Altima(alt)
Navigation System OMÐUSA_English(nna)
03/13/07Ðarosenma
X
Page 17 of 237

2. Touch the key on the screen or highlight the
preferred item and press the ENTER button.
INFO:
The ENTER button on the steering wheel switch
can be used to display the start menu only when
the map screen is displayed.
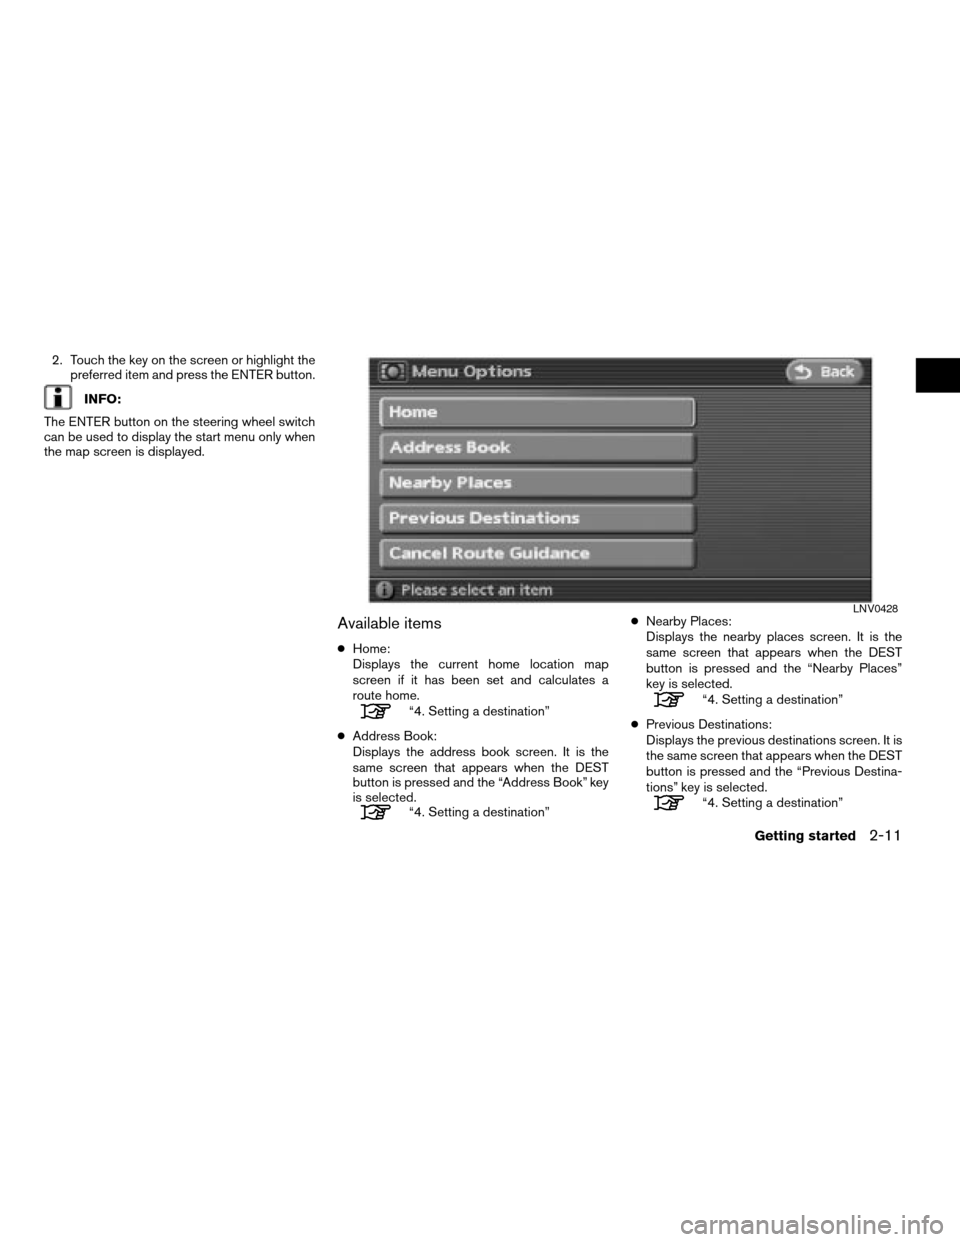
Available items
cHome:
Displays the current home location map
screen if it has been set and calculates a
route home.
“4. Setting a destination”
cAddress Book:
Displays the address book screen. It is the
same screen that appears when the DEST
button is pressed and the “Address Book” key
is selected.
“4. Setting a destination”cNearby Places:
Displays the nearby places screen. It is the
same screen that appears when the DEST
button is pressed and the “Nearby Places”
key is selected.
“4. Setting a destination”
cPrevious Destinations:
Displays the previous destinations screen. It is
the same screen that appears when the DEST
button is pressed and the “Previous Destina-
tions” key is selected.
“4. Setting a destination”
LNV0428
Getting started2-11
ZREVIEW COPYÐ2008 Altima(alt)
Navigation System OMÐUSA_English(nna)
03/13/07Ðarosenma
X
Page 19 of 237
In some cases, certain text will not be displayed
on the screen.
Park the vehicle in a safe location and then oper-
ate the navigation system.
HOW TO VIEW A MAP SCREEN
The navigation system displays various informa-
tion on the map screen.
Screen information
h1Arrow and distance:
Appears on the upper left corner of the
screen when the suggested route is set.
Indicates the distance to the next guide
point and the turning direction at that guide
point. The system can be set to not display
this item.
h2Vehicle icon:
Indicates the current vehicle location and
the direction of travel.
h3Guide point:
Indicates a guide point on the route.
h4Route:
Touch this key to access the route settings.
h5Menu:
Touch this key to access the map menu or
the map scroll menu.
LNV0431
OPERATING MAPS
Getting started2-13
ZREVIEW COPYÐ2008 Altima(alt)
Navigation System OMÐUSA_English(nna)
03/06/07Ðarosenma
X
Page 20 of 237
h6/Direction indicator:
Indicates the direction of the map. Touch
this key to switch the orientation of the map.
h7Scale indicator:
Indicates the scale of the map.
h8Remaining time and distance to
the destination:
Indicates the remaining time and distance
to the destination.
h9Suggested route:
Appears in bold yellow during route
guidance.
h10Voice:
Touch this key to repeat the voice guidance.
INFO:
cRoads with a width of 10 ft (3 m) or less may
not be displayed on the map.
cThe system may require a long time for
positioning. This is not a malfunction.
MAP SCREEN TYPES
Two types of map views are available: 2D Plan
View and 3D Birdview™.
Plan View
Plan View displays the map in a 2-dimensional
environment similar to a road map.
LNV0069
2-14Getting started
ZREVIEW COPYÐ2008 Altima(alt)
Navigation System OMÐUSA_English(nna)
03/13/07Ðarosenma
X
Page 21 of 237
Birdview™
Birdview™ displays the view from an elevated
perspective. In Birdview™, it is easy to recognize
an image of the route because it provides a pan-
oramic view over a long distance.
SWITCHING MAP VIEW
1. Touch the “MENU” key while the current lo-
cation map screen is displayed.2. Touch the “Map View” key.
LNV0070LNV0069LNV0071
Getting started2-15
ZREVIEW COPYÐ2008 Altima(alt)
Navigation System OMÐUSA_English(nna)
03/06/07Ðarosenma
X
Page 22 of 237

3. Touch the “2D” key for Plan View or touch
the “3D” key for Birdview™. The indicator of
the selected map view illuminates.
“SWITCHING THE MAP VIEW” (page 3-4)
4. Touch the “Back” key or the MAP button to
return to the current location map screen.
INFO:
cWhen you select a map view, a preview of that
view is displayed on the right side of the
screen.
cYou can also switch the map view using the
following procedure.
1. Press the SETUP button.
2. Touch the “Navigation” key.
3. Touch the “Map View” key.
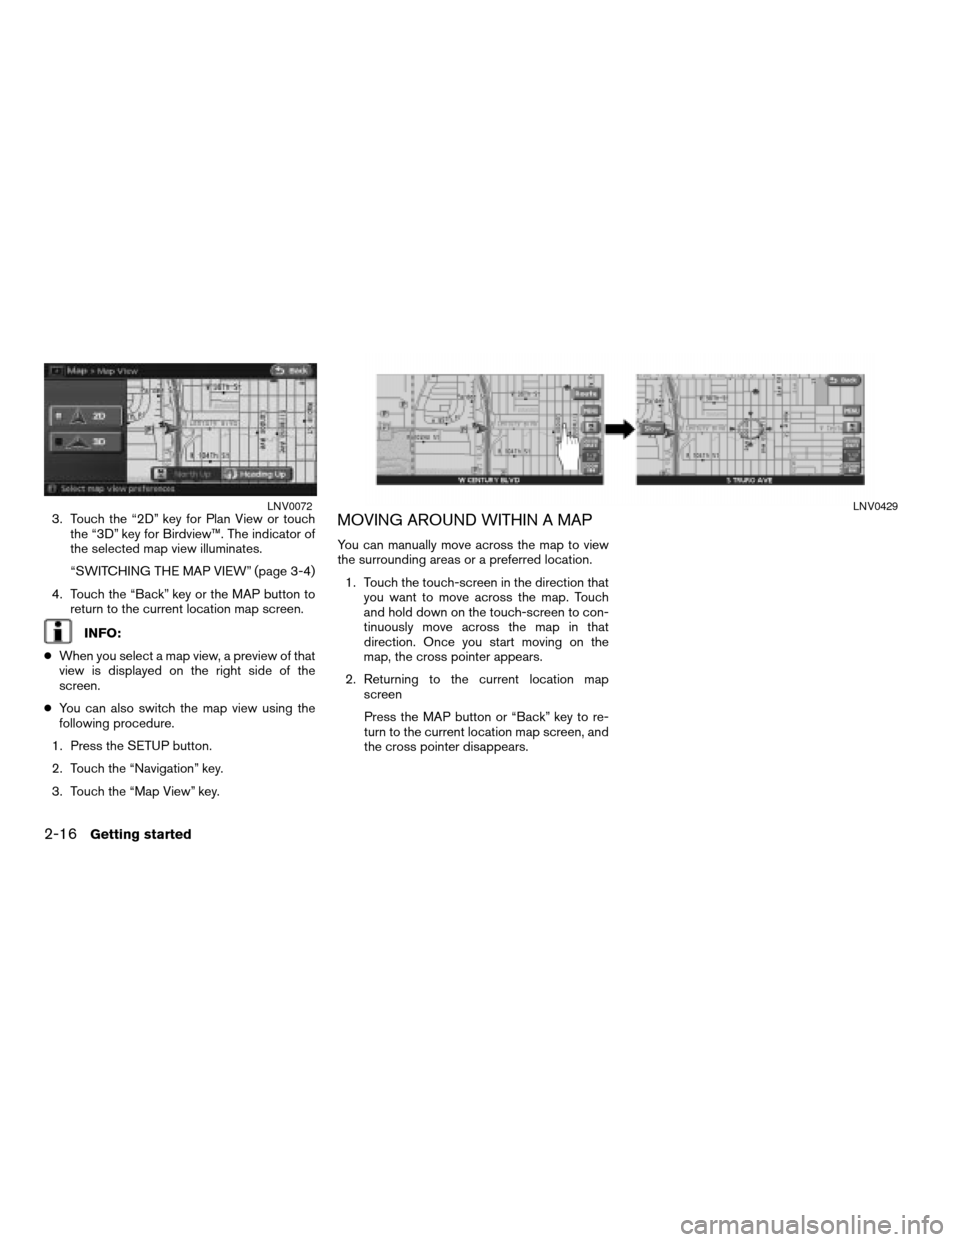
MOVING AROUND WITHIN A MAP
You can manually move across the map to view
the surrounding areas or a preferred location.
1. Touch the touch-screen in the direction that
you want to move across the map. Touch
and hold down on the touch-screen to con-
tinuously move across the map in that
direction. Once you start moving on the
map, the cross pointer appears.
2. Returning to the current location map
screen
Press the MAP button or “Back” key to re-
turn to the current location map screen, and
the cross pointer disappears.
LNV0072LNV0429
2-16Getting started
ZREVIEW COPYÐ2008 Altima(alt)
Navigation System OMÐUSA_English(nna)
03/13/07Ðarosenma
X
Page 23 of 237
CHANGING THE SCALE OF A MAP
Touch the “ZOOM IN” or “ZOOM OUT” key. The
scale numbers change on the screen.
To view the map in detail, touch “ZOOM IN” key.
To view a wider area, touch “ZOOM OUT” key.
LNV0430
Getting started2-17
ZREVIEW COPYÐ2008 Altima(alt)
Navigation System OMÐUSA_English(nna)
03/06/07Ðarosenma
X
Page 24 of 237
HOW TO STORE YOUR HOME
If your home location is already stored in the Ad-
dress Book, it can be easily retrieved to set the
route to your home.
The procedure to store your home location is
similar as the one for storing a location.
“4. Setting a destination”
Example 1 , the procedure for storing your
home location.
1. Press the DEST button.
2. Touch the “Home (Add New)” key.
INFO:
If you have already stored your home this button
may not appear.
INFO:
When you touch the “Home (Add New)” key, a
confirmation message is displayed.LNV0082LNV0083
STORING YOUR HOME
LOCATION/ADDRESS
2-18Getting started
ZREVIEW COPYÐ2008 Altima(alt)
Navigation System OMÐUSA_English(nna)
03/06/07Ðarosenma
X