2008 NISSAN ALTIMA HYBRID rear view mirror
[x] Cancel search: rear view mirrorPage 79 of 351

2 Instruments and controls
Instrument panel...................................2-2
Meters and gauges................................2-3
Speedometer and odometer.....................2-3
Power meter...................................2-4
High voltage battery status meter.................2-5
Fuel gauge....................................2-5
Compass display (if so equipped)...................2-6
Compass display...............................2-6
Warning/indicator lights and audible reminders.......2-9
Checking bulbs................................2-9
Warning lights................................2-10
Indicator lights................................2-15
Audible reminders.............................2-17
Vehicle information display.........................2-18
How to use the Vehicle Information Display.......2-18
Security systems.................................2-26
Vehicle security system.........................2-26
NISSAN vehicle immobilizer system.............2-27
Windshield wiper and washer switch...............2-28
Switch operation..............................2-28
Rear window and outside mirror (if so equipped)
defroster switch..................................2-29
Headlight and turn signal switch....................2-29Headlight control switch........................2-29
Daytime running light system (Canada only)......2-32
Instrument brightness control...................2-32
Turn signal switch.............................2-33
Fog light switch (if so equipped)................2-33
Hazard warning flasher switch.....................2-33
Horn............................................2-34
Heated seats (if so equipped)......................2-34
Power outlet.....................................2-35
Storage.........................................2-36
Map pockets..................................2-36
Seatback pockets.............................2-37
Sunglasses holder.............................2-37
Cup holders..................................2-38
Glove box....................................2-38
Console box..................................2-39
Covered storage box...........................2-40
Grocery hooks (if so equipped).................2-40
Cargo net (if so equipped)......................2-41
Windows........................................2-41
Power windows...............................2-41
Sunroof (if so equipped)...........................2-44
Interior light......................................2-45
ZREVIEW COPYÐ2008 Altima Hybrid Electric
(ahv)
Owners ManualÐUSA_English(nna)
05/31/07Ðdebbie
X
Page 85 of 351

This unit measures terrestrial magnetism and in-
dicates the direction of the vehicle’s heading.
With the ignition switch in the ON position, press
the
button as described in the chart below
to activate various features of the automatic anti-
glare rearview mirror.
Push and hold
the
button for about:Feature:
(Push button again for about 1 sec-
ond to change settings)
1 second Compass display toggles on/off
5 secondsCompass zone can be changed to
correct false compass readings
9 seconds Compass enters calibration mode
For information about the automatic anti-glare
feature, refer to “Automatic anti-glare rearview
mirror” in the “Pre-driving checks and adjust-
ments” section.Push thebutton for about 1 second when
the ignition switch is in the ON position to toggle
the compass display
s1on or off. The display will
indicate the direction of the vehicle’s heading.
N: North
E: East
S: South
W: West
If the display reads “C”, calibrate the compass by
driving the vehicle in three complete circles at
less than 5 MPH (8 km/h) .You can also calibrate the compass by driving
your vehicle on your everyday route. The com-
pass will be calibrated once it has tracked three
complete circles.
COMPASS DISPLAY
Push thebutton when the ignition switch is
in the ON position. The direction will be dis-
played.
LIC0583
COMPASS DISPLAY (if so equipped)
2-6Instruments and controls
ZREVIEW COPYÐ2008 Altima Hybrid Electric
(ahv)
Owners ManualÐUSA_English(nna)
05/31/07Ðdebbie
X
Page 108 of 351

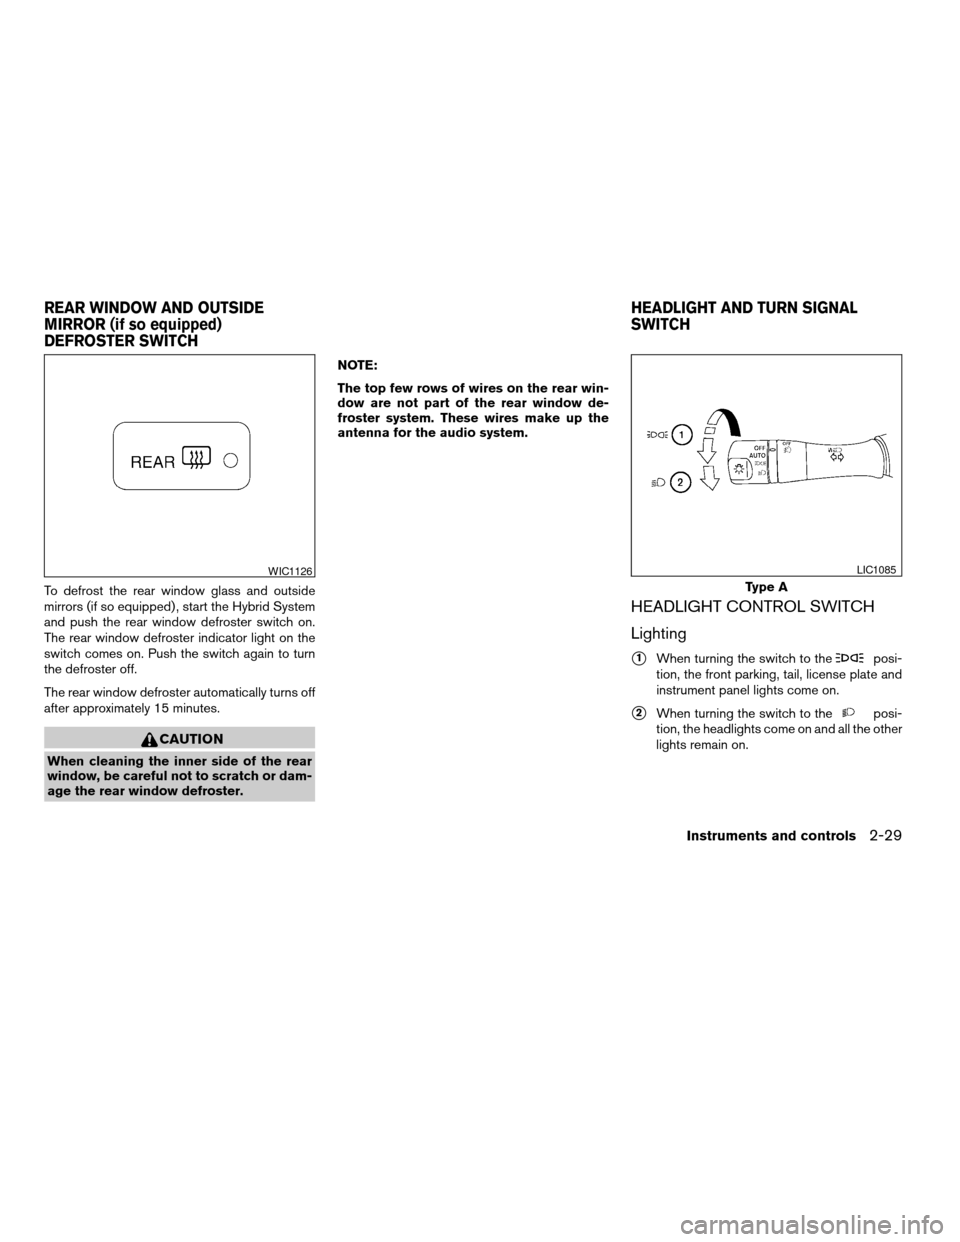
To defrost the rear window glass and outside
mirrors (if so equipped) , start the Hybrid System
and push the rear window defroster switch on.
The rear window defroster indicator light on the
switch comes on. Push the switch again to turn
the defroster off.
The rear window defroster automatically turns off
after approximately 15 minutes.
CAUTION
When cleaning the inner side of the rear
window, be careful not to scratch or dam-
age the rear window defroster.NOTE:
The top few rows of wires on the rear win-
dow are not part of the rear window de-
froster system. These wires make up the
antenna for the audio system.
HEADLIGHT CONTROL SWITCH
Lighting
s1When turning the switch to theposi-
tion, the front parking, tail, license plate and
instrument panel lights come on.
s2When turning the switch to theposi-
tion, the headlights come on and all the other
lights remain on.
WIC1126
Type A
LIC1085
REAR WINDOW AND OUTSIDE
MIRROR (if so equipped)
DEFROSTER SWITCHHEADLIGHT AND TURN SIGNAL
SWITCH
Instruments and controls2-29
ZREVIEW COPYÐ2008 Altima Hybrid Electric
(ahv)
Owners ManualÐUSA_English(nna)
05/31/07Ðdebbie
X
Page 132 of 351

3 Pre-driving checks and adjustments
Keys .............................................3-2
Intelligent Keys.................................3-2
Doors............................................3-3
Locking with key................................3-4
Locking with inside lock knob....................3-4
Locking with power door lock switch.............3-5
Child safety rear door lock.......................3-5
Intelligent Key system..............................3-6
Operating range................................3-8
Door locks/unlocks precaution...................3-8
Intelligent Key operation.........................3-9
How to use the remote keyless entry
function......................................3-12
Warning signals...............................3-15
Troubleshooting guide.........................3-16
Hood...........................................3-17
Trunk lid.........................................3-17Opener operation..............................3-17
Secondary trunk lid release.....................3-18
Interior trunk lid release........................3-19
Fuel-filler door...................................3-20
Opener operation..............................3-20
Fuel-filler cap.................................3-20
Tilting telescopic steering column..................3-21
Tilt operation..................................3-21
Telescopic operation...........................3-22
Sun visors.......................................3-22
Vanity mirrors.................................3-23
Mirrors..........................................3-23
Rearview mirror (if so equipped).................3-23
Automatic anti-glare rearview mirror
(if so equipped)...............................3-23
Outside mirrors...............................3-24
ZREVIEW COPYÐ2008 Altima Hybrid Electric
(ahv)
Owners ManualÐUSA_English(nna)
05/31/07Ðdebbie
X
Page 154 of 351

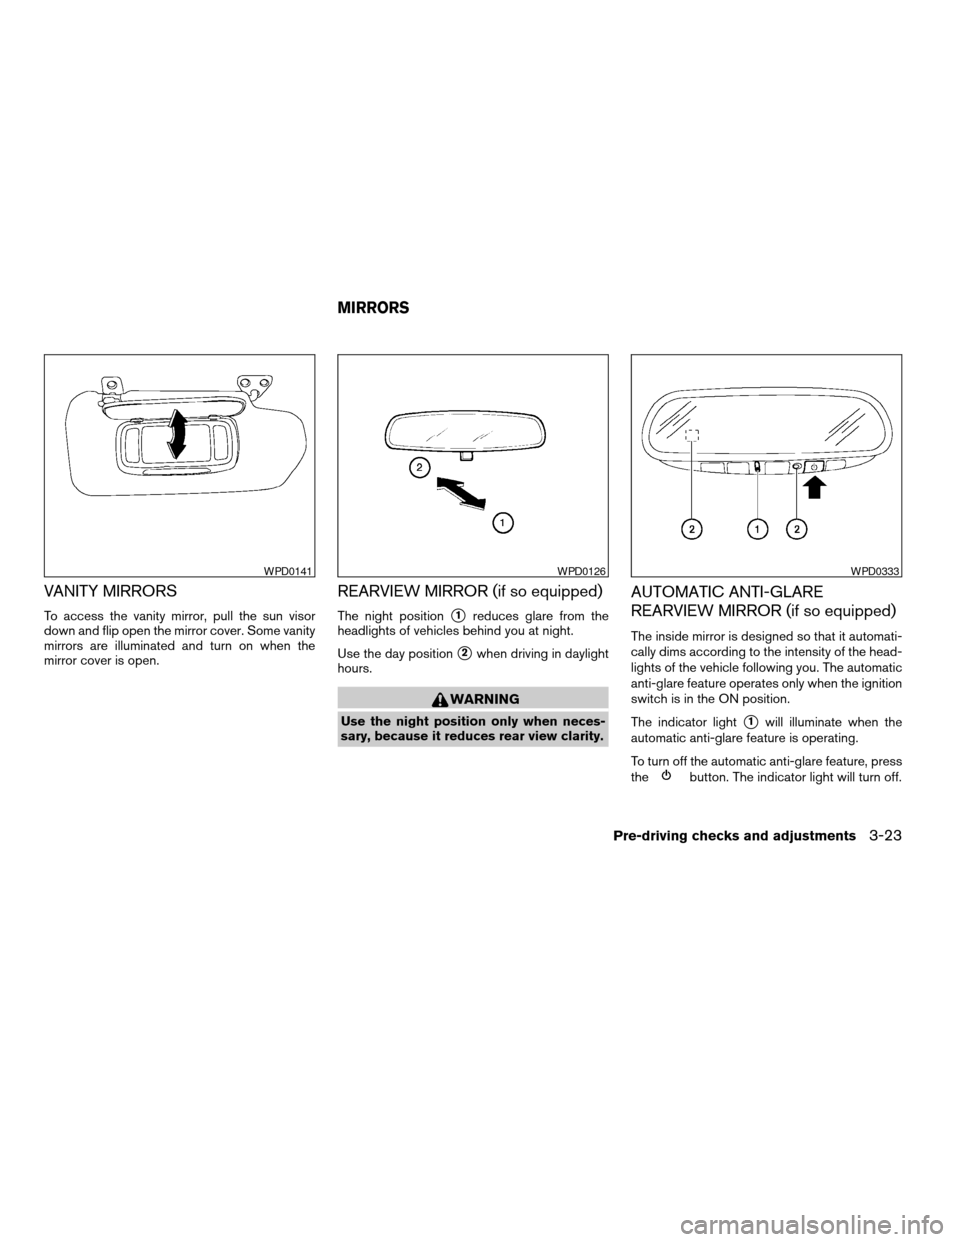
VANITY MIRRORS
To access the vanity mirror, pull the sun visor
down and flip open the mirror cover. Some vanity
mirrors are illuminated and turn on when the
mirror cover is open.
REARVIEW MIRROR (if so equipped)
The night positions1reduces glare from the
headlights of vehicles behind you at night.
Use the day position
s2when driving in daylight
hours.
WARNING
Use the night position only when neces-
sary, because it reduces rear view clarity.
AUTOMATIC ANTI-GLARE
REARVIEW MIRROR (if so equipped)
The inside mirror is designed so that it automati-
cally dims according to the intensity of the head-
lights of the vehicle following you. The automatic
anti-glare feature operates only when the ignition
switch is in the ON position.
The indicator light
s1will illuminate when the
automatic anti-glare feature is operating.
To turn off the automatic anti-glare feature, press
the
button. The indicator light will turn off.
WPD0141WPD0126WPD0333
MIRRORS
Pre-driving checks and adjustments3-23
ZREVIEW COPYÐ2008 Altima Hybrid Electric
(ahv)
Owners ManualÐUSA_English(nna)
05/31/07Ðdebbie
X
Page 156 of 351

Manual control type (if so equipped)
The outside mirror can be moved in any direction
for a better rear view.
Heated mirrors (if so equipped)
Some outside mirrors can be heated to defrost,
defog, or de-ice for improved visibility. For addi-
tional information, see “Rear window and outside
mirror (if so equipped) defroster switch” in the
“Instrument and controls” section of this manual.
Manual folding outside mirrors (if so
equipped)
Push the mirrors backward to fold them.
WPD0170WPD0056
Pre-driving checks and adjustments3-25
ZREVIEW COPYÐ2008 Altima Hybrid Electric
(ahv)
Owners ManualÐUSA_English(nna)
05/31/07Ðdebbie
X
Page 294 of 351

EXTERIOR AND INTERIOR LIGHTS
Item Wattage (W) Bulb No.*
Headlight assembly
Low (Halogen) 55 H1
High 60 HB3 (9005)
Park/Turn 27/8 1157NA
Front fog light 55 H11
Step light — 194
Rear combination light
Tail/Stop 8/27 3157KX
Turn 27 3156
Backup (reversing) 13 912
Sidemarker 5 168
License plate light 5 W5W
High-mounted stop light
Inside 18 921
Spoiler (if so equipped)See a NISSAN dealer
for assistance.
Front map light 8 B5
Rear map light 8 B5
Trunk light 3.4 158
Vanity mirror light — HTU-14V
Glove box light — —
* Always check with the Parts Department at a NISSAN dealer for the latest parts information.
Maintenance and do-it-yourself8-25
ZREVIEW COPYÐ2008 Altima Hybrid Electric
(ahv)
Owners ManualÐUSA_English(nna)
05/31/07Ðdebbie
X
Page 332 of 351

cBe certain your rearview mirrors conform to
all federal, state or local regulations. If not,
install any mirrors required for towing before
driving the vehicle.
cDetermine the overall height of the vehicle
and trailer so the required clearance is
known.
Trailer towing tips
In order to gain skill and an understanding of the
vehicle’s behavior, you should practice turning,
stopping and backing up in an area which is free
from traffic. Steering stability and braking perfor-
mance will be somewhat different than under
normal driving conditions.
cAlways secure items in the trailer to prevent
load shift while driving.
cLock the trailer hitch coupler with a pin or
lock to prevent the coupler from inadvert-
ently becoming unlatched.
cAvoid abrupt starts, acceleration or stops.
cAvoid sharp turns or lane changes.
cAlways drive your vehicle at a moderate
speed.
cWhen backing up, hold the bottom of the
steering wheel with one hand. Move your
hand in the direction in which you want thetrailer to go. Make small corrections and
back up slowly. If possible, have someone
guide you when you are backing up.
Always block the wheels on both vehicle and
trailer when parking. Parking on a slope is not
recommended; however, if you must do so:
CAUTION
If you move the shift selector lever to the P
(Park) position before blocking the
wheels and applying the parking brake,
transmission damage could occur.
1. Apply and hold the brake pedal.
2. Have someone place blocks on the downhill
side of the vehicle and trailer wheels.
3. After the wheel blocks are in place, slowly
release the brake pedal until the blocks ab-
sorb the vehicle load.
4. Apply the parking brake.
5. Shift the transmission into P (Park) .
6. Turn off the engine.
To drive away:
1. Start the vehicle.
2. Apply and hold the brake pedal.
3. Shift the transmission into gear.4. Release the parking brake.
5. Drive slowly until the vehicle and trailer are
clear from the blocks.
6. Apply and hold the brake pedal.
7. Have someone retrieve and store the blocks.
cWhen going down a hill, shift into a lower
gear and use the engine braking effect.
cIf the engine coolant rises to an extremely
high temperature when the air conditioner
system is on, turn off the air conditioner.
Coolant heat can be additionally vented by
opening the windows, switching the fan
control to high and setting the temperature
control to the HOT position.
cTrailer towing requires more fuel than normal
circumstances.
cAvoid towing a trailer for your vehicle’s first
500 miles (805 km) .
cFor the first 500 miles (805 km) that you do
tow, do not drive over 50 MPH (80 km/h) .
cHave your vehicle serviced more often than
at intervals specified in the recommended
Maintenance Schedule in the “NISSAN Ser-
vice and Maintenance Guide”.
Technical and consumer information9-21
ZREVIEW COPYÐ2008 Altima Hybrid Electric
(ahv)
Owners ManualÐUSA_English(nna)
05/31/07Ðdebbie
X