Page 22 of 32
BASIC FUNCTIONS
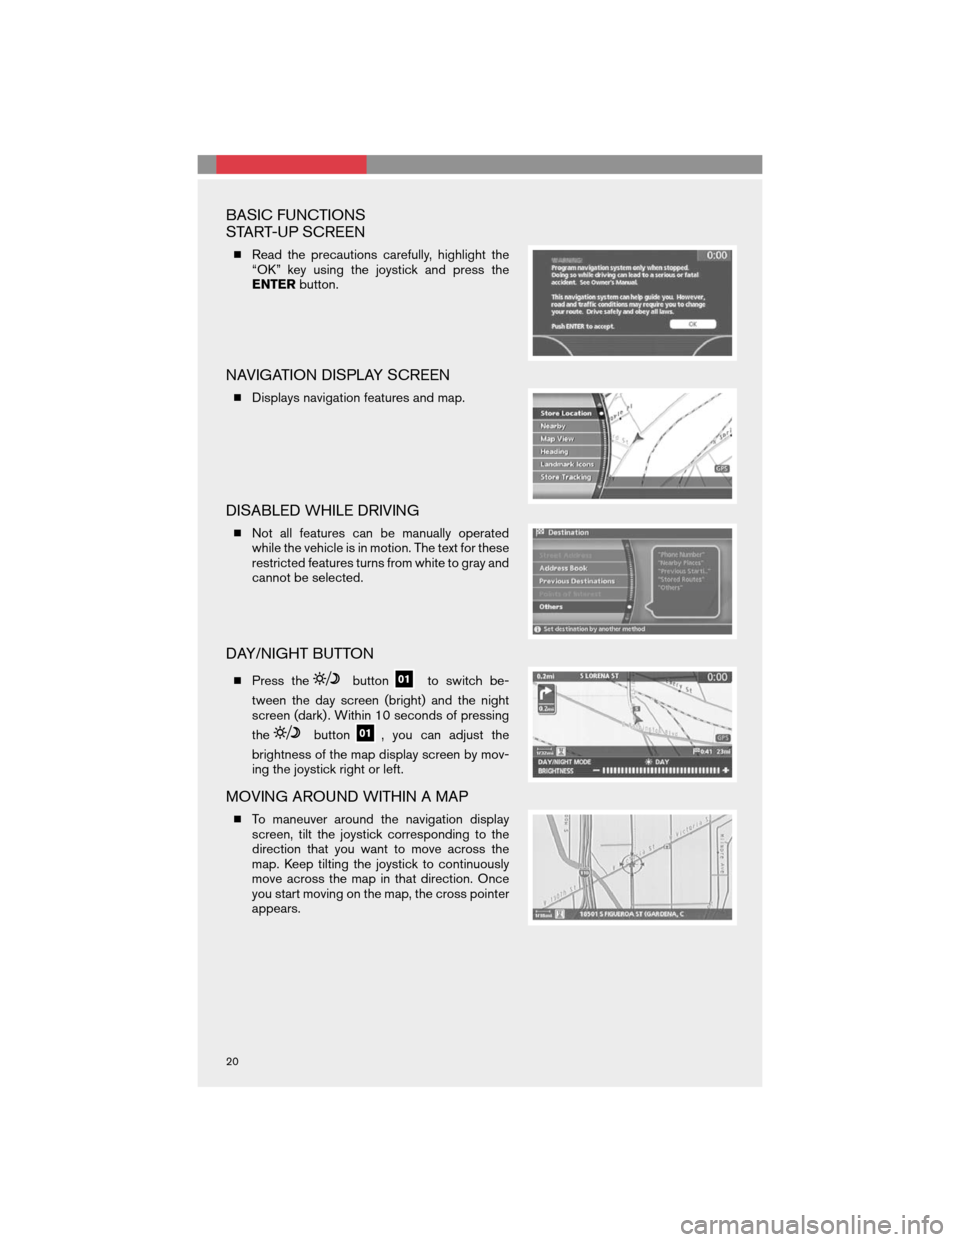
START-UP SCREEN
�Read the precautions carefully, highlight the
“OK” key using the joystick and press the
ENTERbutton.
NAVIGATION DISPLAY SCREEN
�Displays navigation features and map.
DISABLED WHILE DRIVING
�Not all features can be manually operated
while the vehicle is in motion. The text for these
restricted features turns from white to gray and
cannot be selected.
DAY/NIGHT BUTTON
�Press thebuttonto switch be-
tween the day screen (bright) and the night
screen (dark) . Within 10 seconds of pressing
the
button, you can adjust the
brightness of the map display screen by mov-
ing the joystick right or left.
MOVING AROUND WITHIN A MAP
�To maneuver around the navigation display
screen, tilt the joystick corresponding to the
direction that you want to move across the
map. Keep tilting the joystick to continuously
move across the map in that direction. Once
you start moving on the map, the cross pointer
appears.
20
Page 24 of 32
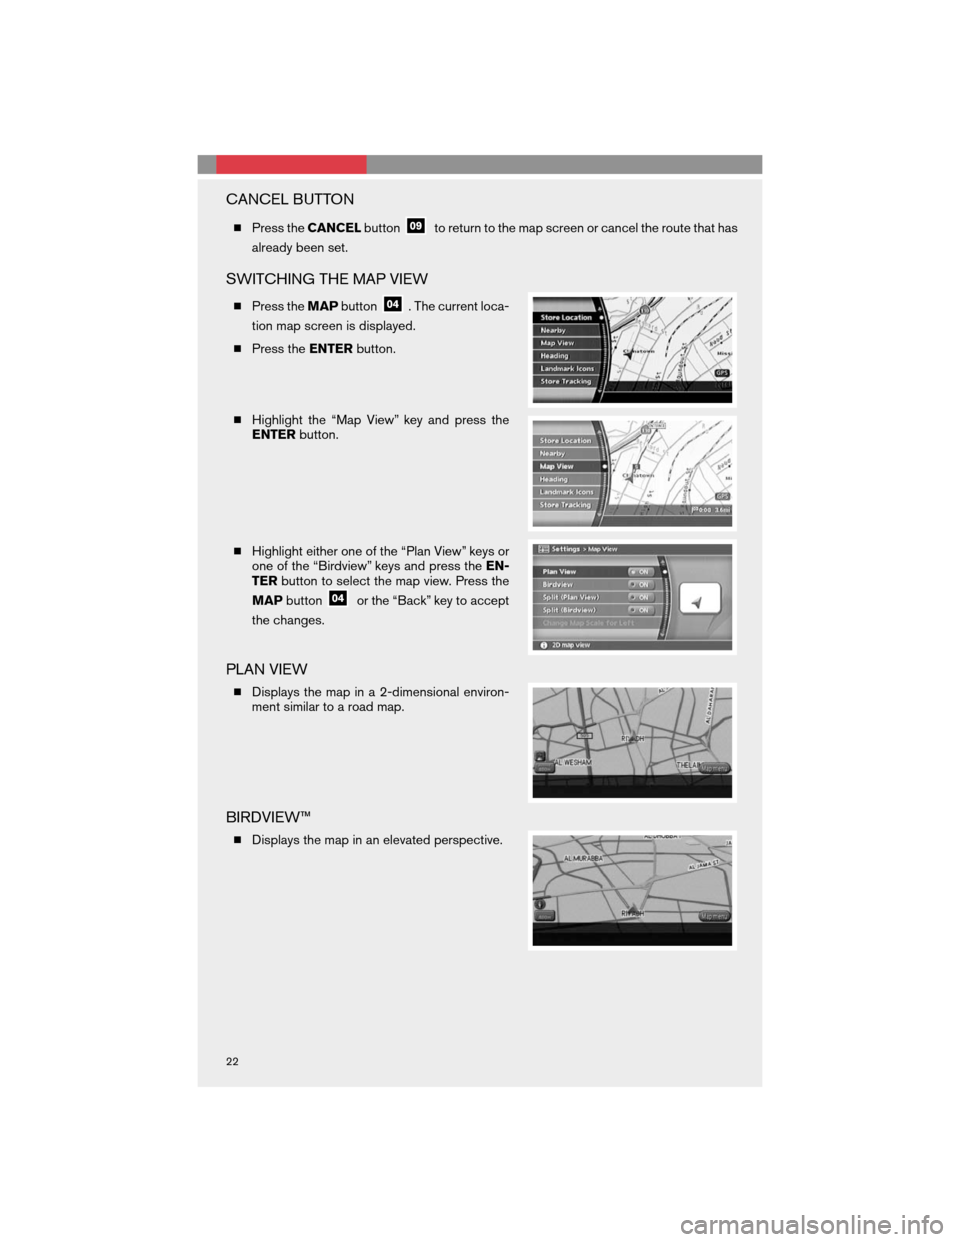
CANCEL BUTTON
�Press theCANCELbuttonto return to the map screen or cancel the route that has
already been set.
SWITCHING THE MAP VIEW
�Press theMAPbutton. The current loca-
tion map screen is displayed.
�Press theENTERbutton.
�Highlight the “Map View” key and press the
ENTERbutton.
�Highlight either one of the “Plan View” keys or
one of the “Birdview” keys and press theEN-
TERbutton to select the map view. Press the
MAPbutton
or the “Back” key to accept
the changes.
PLAN VIEW
�Displays the map in a 2-dimensional environ-
ment similar to a road map.
BIRDVIEW™
�Displays the map in an elevated perspective.
22
Page 25 of 32

SELECTING A MENU SCREEN
1. To select a preferred menu key, use the joystick to highlight the corresponding key on
the screen and press theENTERbutton.
2. Depending on the key you selected, a detailed menu screen, a character input screen
or a setting screen, etc. is displayed. On the screen displayed, make adjustments,
input information, etc. accordingly.
3. Press theBACKbutton
to return to the previous screen without applying any
changes; in some cases pressing theBACKbutton
will accept the changes
you made.
4. Press theMAPbutton
to return to the current location map screen without
applying any changes.
NOTE: Depending on the menu selected, pressing theMAPbutton
may not return you
to the current location map screen.
STORING YOUR HOME IN YOUR ADDRESS BOOK
�Press theDESTbutton.
�Highlight the “Address Book” key and press
theENTERbutton.
�Highlight the “Home (Add New)” key and
press theENTERbutton, a confirmation mes-
sage is displayed. Highlight the “YES” key and
press theENTERbutton.
�Highlight the “Street Address” key and press
theENTERbutton. A character input screen is
displayed.
�Enter the address of your home, highlight the
“OK” key and press theENTERbutton. The
map screen is displayed.
23
Page 26 of 32

�Moving the joystick right or left, adjust your
home location if necessary. After adjusting the
location, press theENTERbutton.
�Your home is displayed at the center of the
map. A confirmation message is displayed,
and the system sets your home as the destina-
tion.
�Press theMAPbutton
to return to the
current location map screen. The home icon is
displayed on the screen.
SETTING A STREET ADDRESS AS A DESTINATION
�Press theDESTbutton.
�Highlight the “Street Address” key and press
theENTERbutton. A character input screen is
displayed.
�Make sure that the correct region is selected
before inputting the name of the location.
�Enter the house number; when finished high-
light the “OK” key and press theENTERbut-
ton. If you do not know the house number,
highlight the “Skip” key and press theENTER
button.
�Enter the name of the street. After finishing the
entry, highlight the “OK” key and press the
ENTERbutton. A list of cities is displayed.
�Highlight the correct city of the destination
from the list and press theENTERbutton.
24
Page 27 of 32
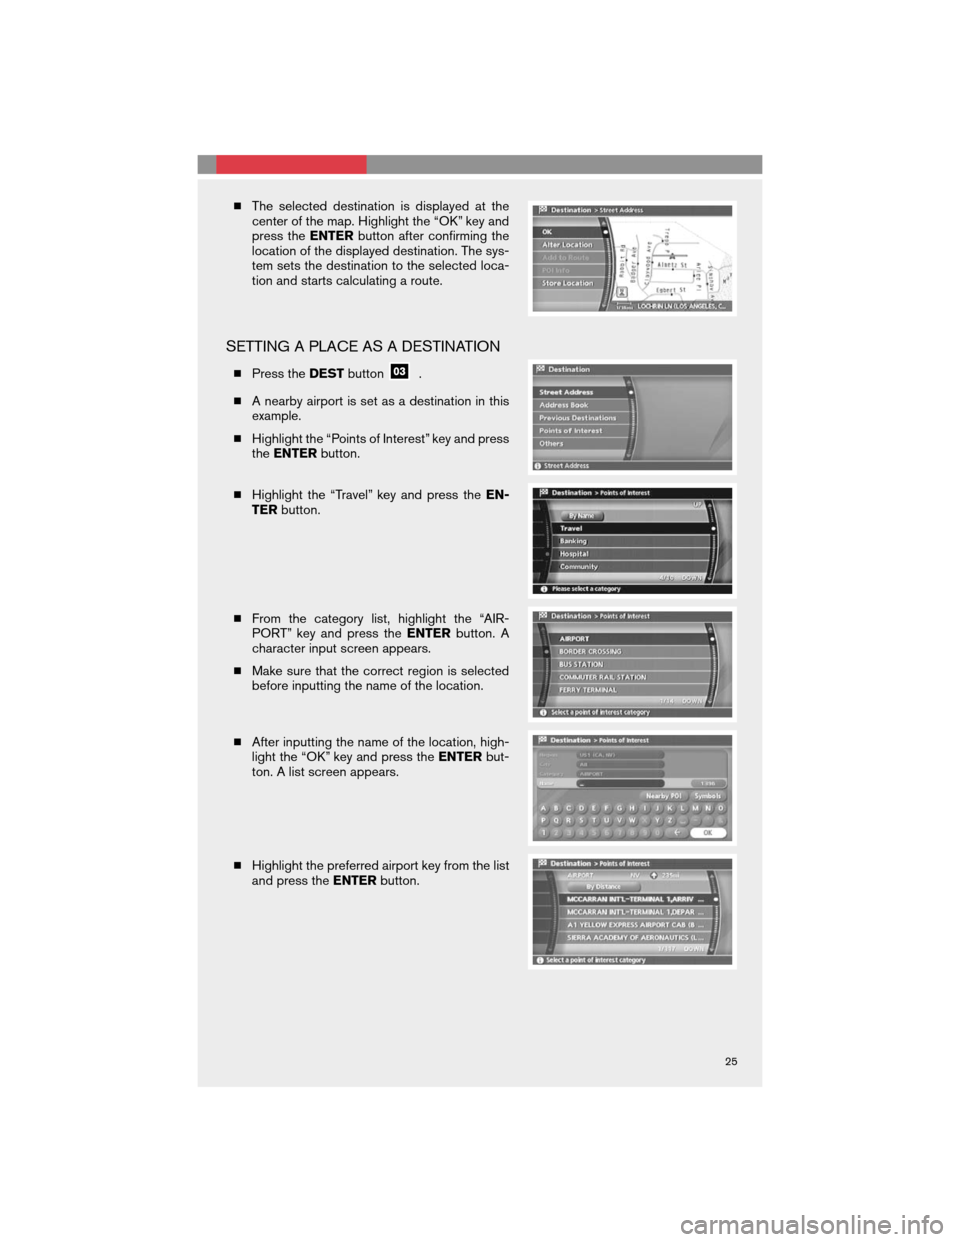
�The selected destination is displayed at the
center of the map. Highlight the “OK” key and
press theENTERbutton after confirming the
location of the displayed destination. The sys-
tem sets the destination to the selected loca-
tion and starts calculating a route.
SETTING A PLACE AS A DESTINATION
�Press theDESTbutton.
�A nearby airport is set as a destination in this
example.
�Highlight the “Points of Interest” key and press
theENTERbutton.
�Highlight the “Travel” key and press theEN-
TERbutton.
�From the category list, highlight the “AIR-
PORT” key and press theENTERbutton. A
character input screen appears.
�Make sure that the correct region is selected
before inputting the name of the location.
�After inputting the name of the location, high-
light the “OK” key and press theENTERbut-
ton. A list screen appears.
�Highlight the preferred airport key from the list
and press theENTERbutton.
25
Page 28 of 32
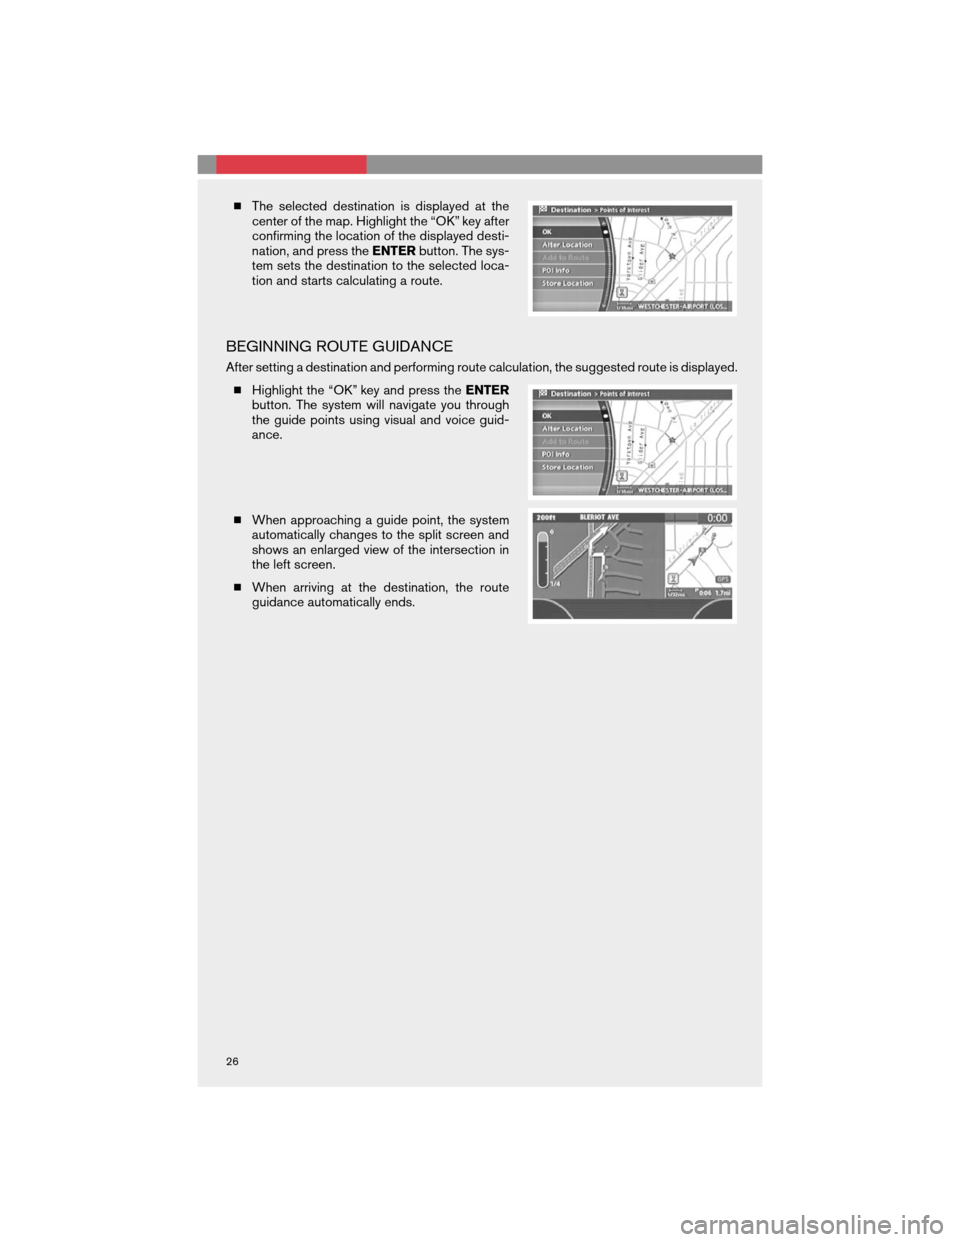
�The selected destination is displayed at the
center of the map. Highlight the “OK” key after
confirming the location of the displayed desti-
nation, and press theENTERbutton. The sys-
tem sets the destination to the selected loca-
tion and starts calculating a route.
BEGINNING ROUTE GUIDANCE
After setting a destination and performing route calculation, the suggested route is displayed.
�Highlight the “OK” key and press theENTER
button. The system will navigate you through
the guide points using visual and voice guid-
ance.
�When approaching a guide point, the system
automatically changes to the split screen and
shows an enlarged view of the intersection in
the left screen.
�When arriving at the destination, the route
guidance automatically ends.
26