Page 23 of 32
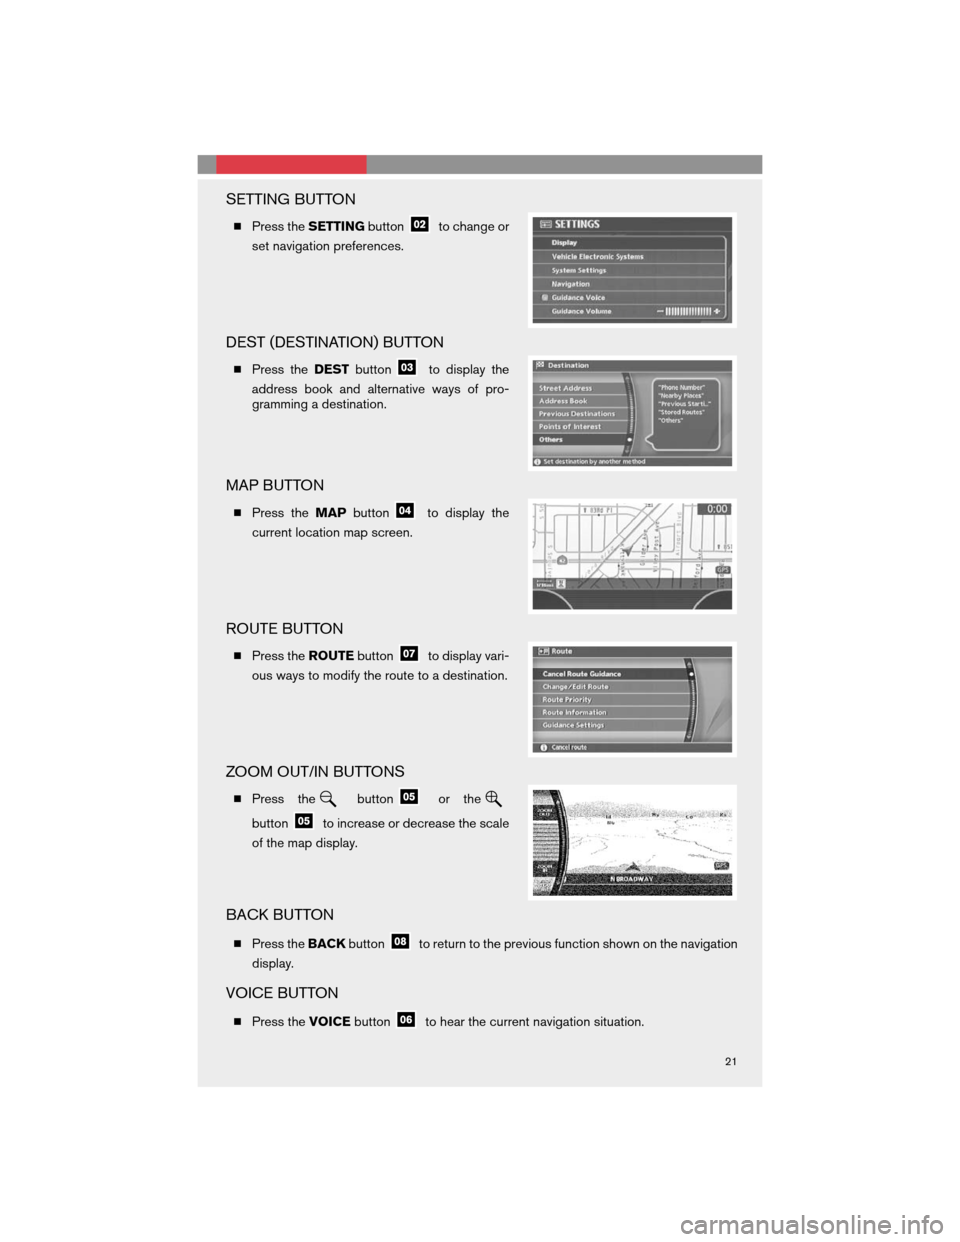
SETTING BUTTON
�Press the SETTING buttonto change or
set navigation preferences.
DEST (DESTINATION) BUTTON
� Press the DESTbuttonto display the
address book and alternative ways of pro-
gramming a destination.
MAP BUTTON
� Press the MAPbuttonto display the
current location map screen.
ROUTE BUTTON
� Press the ROUTEbuttonto display vari-
ous ways to modify the route to a destination.
ZOOM OUT/IN BUTTONS
� Press thebuttonor the
buttonto increase or decrease the scale
of the map display.
BACK BUTTON
� Press the BACKbuttonto return to the previous function shown on the navigation
display.
VOICE BUTTON
� Press the VOICEbuttonto hear the current navigation situation.
21
Page 24 of 32
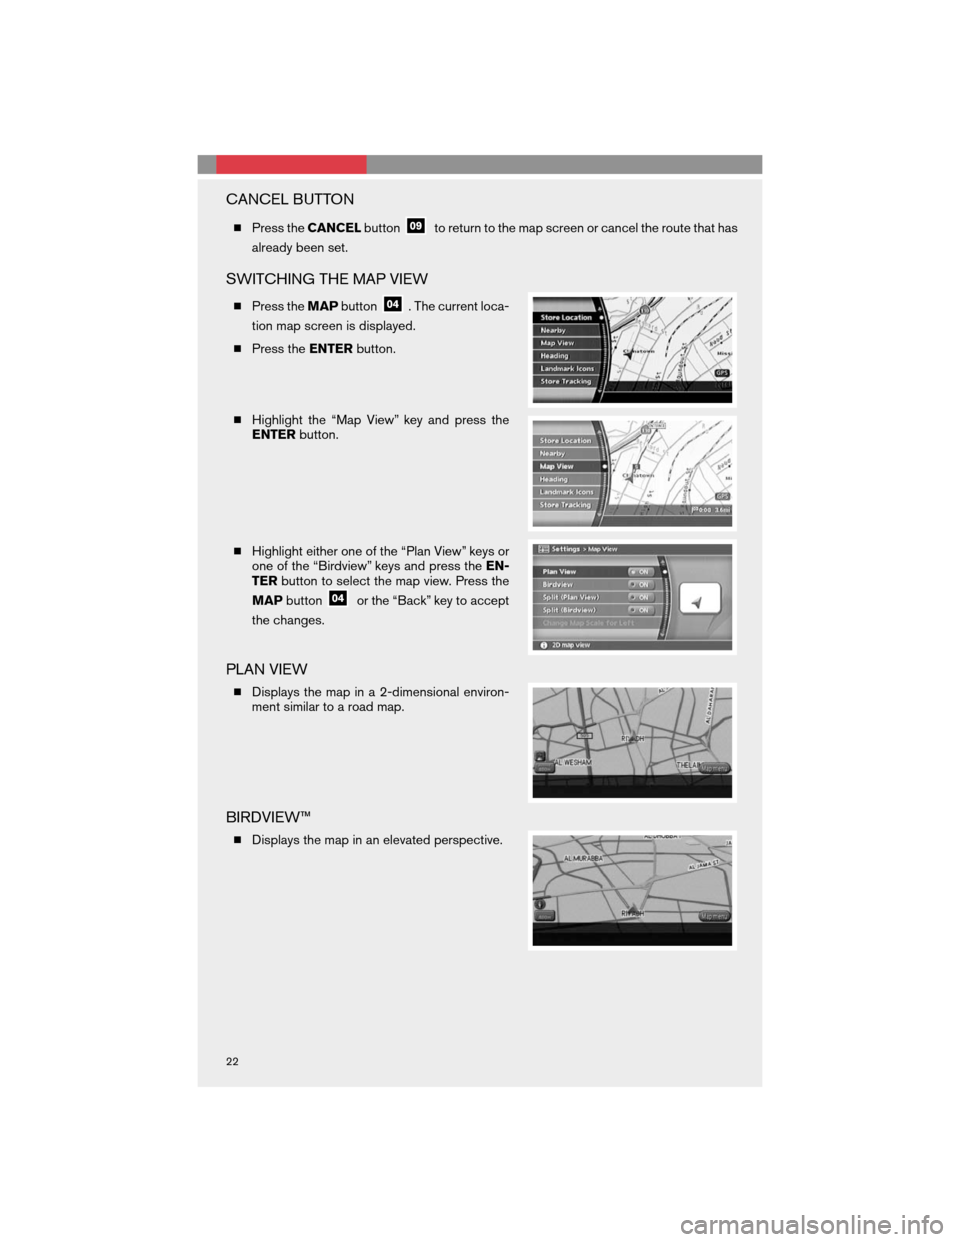
CANCEL BUTTON
�Press theCANCELbuttonto return to the map screen or cancel the route that has
already been set.
SWITCHING THE MAP VIEW
�Press theMAPbutton. The current loca-
tion map screen is displayed.
�Press theENTERbutton.
�Highlight the “Map View” key and press the
ENTERbutton.
�Highlight either one of the “Plan View” keys or
one of the “Birdview” keys and press theEN-
TERbutton to select the map view. Press the
MAPbutton
or the “Back” key to accept
the changes.
PLAN VIEW
�Displays the map in a 2-dimensional environ-
ment similar to a road map.
BIRDVIEW™
�Displays the map in an elevated perspective.
22
Page 25 of 32

SELECTING A MENU SCREEN
1. To select a preferred menu key, use the joystick to highlight the corresponding key on
the screen and press theENTERbutton.
2. Depending on the key you selected, a detailed menu screen, a character input screen
or a setting screen, etc. is displayed. On the screen displayed, make adjustments,
input information, etc. accordingly.
3. Press theBACKbutton
to return to the previous screen without applying any
changes; in some cases pressing theBACKbutton
will accept the changes
you made.
4. Press theMAPbutton
to return to the current location map screen without
applying any changes.
NOTE: Depending on the menu selected, pressing theMAPbutton
may not return you
to the current location map screen.
STORING YOUR HOME IN YOUR ADDRESS BOOK
�Press theDESTbutton.
�Highlight the “Address Book” key and press
theENTERbutton.
�Highlight the “Home (Add New)” key and
press theENTERbutton, a confirmation mes-
sage is displayed. Highlight the “YES” key and
press theENTERbutton.
�Highlight the “Street Address” key and press
theENTERbutton. A character input screen is
displayed.
�Enter the address of your home, highlight the
“OK” key and press theENTERbutton. The
map screen is displayed.
23
Page 26 of 32

�Moving the joystick right or left, adjust your
home location if necessary. After adjusting the
location, press theENTERbutton.
�Your home is displayed at the center of the
map. A confirmation message is displayed,
and the system sets your home as the destina-
tion.
�Press theMAPbutton
to return to the
current location map screen. The home icon is
displayed on the screen.
SETTING A STREET ADDRESS AS A DESTINATION
�Press theDESTbutton.
�Highlight the “Street Address” key and press
theENTERbutton. A character input screen is
displayed.
�Make sure that the correct region is selected
before inputting the name of the location.
�Enter the house number; when finished high-
light the “OK” key and press theENTERbut-
ton. If you do not know the house number,
highlight the “Skip” key and press theENTER
button.
�Enter the name of the street. After finishing the
entry, highlight the “OK” key and press the
ENTERbutton. A list of cities is displayed.
�Highlight the correct city of the destination
from the list and press theENTERbutton.
24
Page 27 of 32
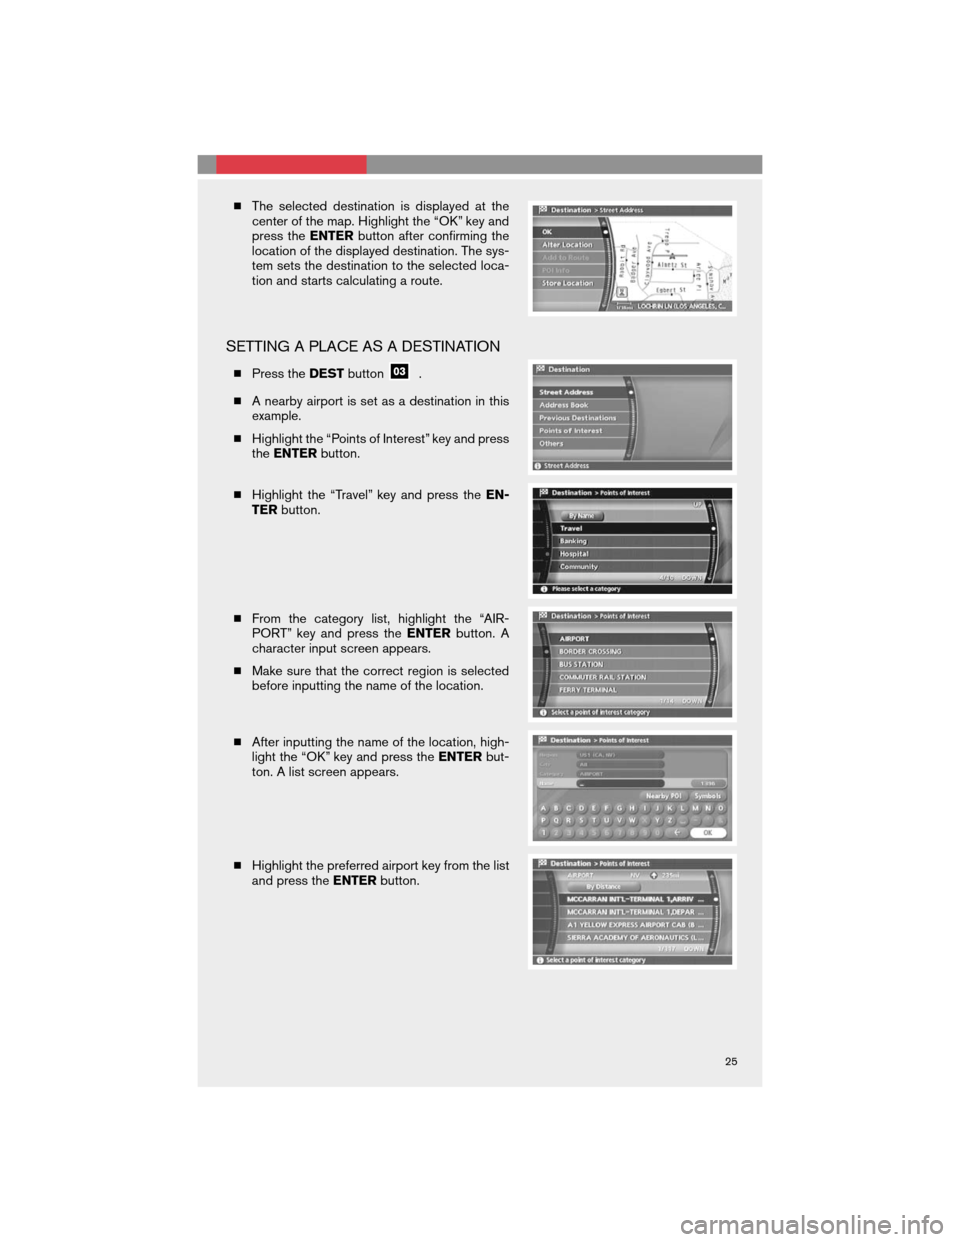
�The selected destination is displayed at the
center of the map. Highlight the “OK” key and
press theENTERbutton after confirming the
location of the displayed destination. The sys-
tem sets the destination to the selected loca-
tion and starts calculating a route.
SETTING A PLACE AS A DESTINATION
�Press theDESTbutton.
�A nearby airport is set as a destination in this
example.
�Highlight the “Points of Interest” key and press
theENTERbutton.
�Highlight the “Travel” key and press theEN-
TERbutton.
�From the category list, highlight the “AIR-
PORT” key and press theENTERbutton. A
character input screen appears.
�Make sure that the correct region is selected
before inputting the name of the location.
�After inputting the name of the location, high-
light the “OK” key and press theENTERbut-
ton. A list screen appears.
�Highlight the preferred airport key from the list
and press theENTERbutton.
25
Page 28 of 32
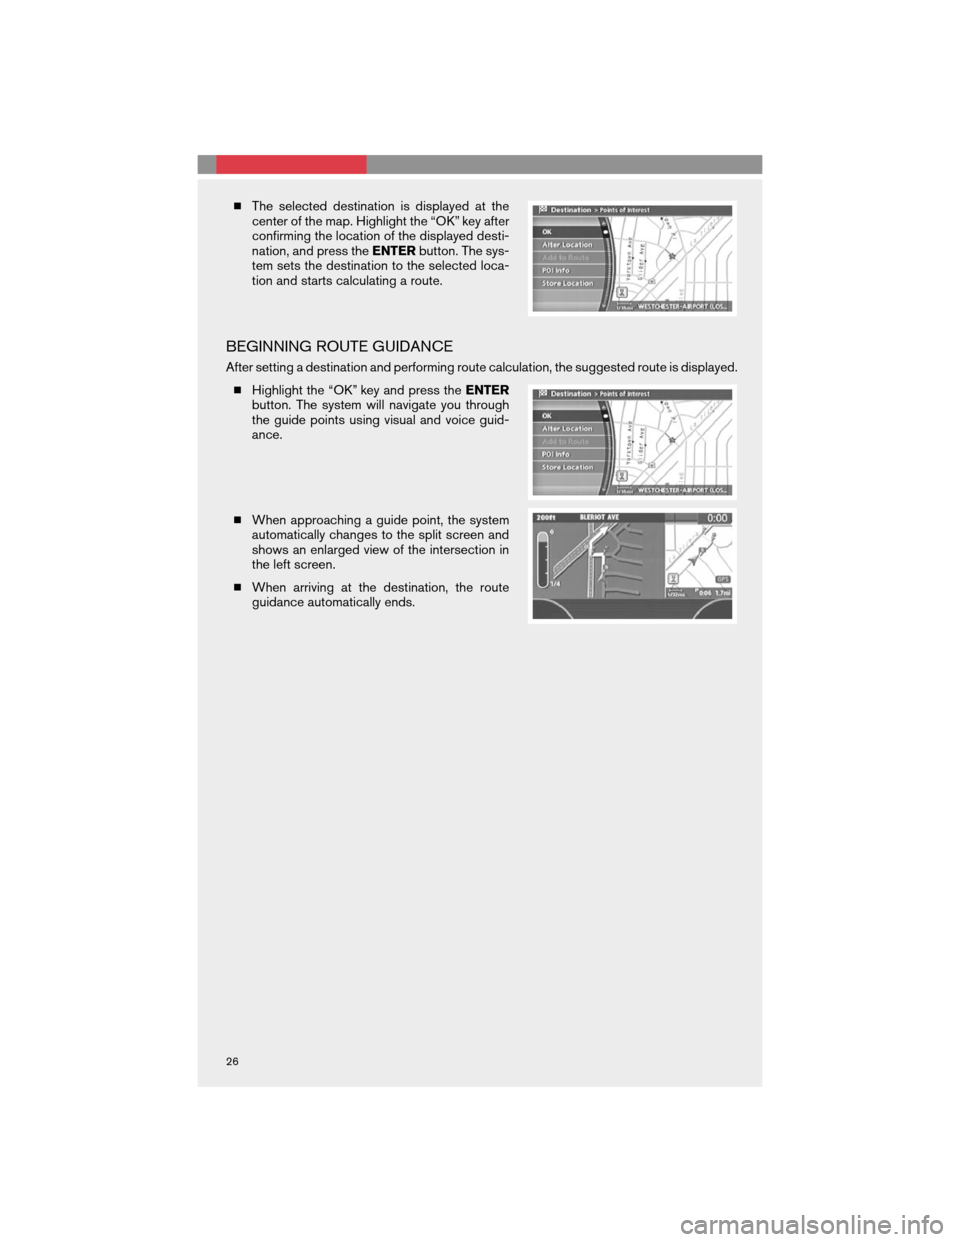
�The selected destination is displayed at the
center of the map. Highlight the “OK” key after
confirming the location of the displayed desti-
nation, and press theENTERbutton. The sys-
tem sets the destination to the selected loca-
tion and starts calculating a route.
BEGINNING ROUTE GUIDANCE
After setting a destination and performing route calculation, the suggested route is displayed.
�Highlight the “OK” key and press theENTER
button. The system will navigate you through
the guide points using visual and voice guid-
ance.
�When approaching a guide point, the system
automatically changes to the split screen and
shows an enlarged view of the intersection in
the left screen.
�When arriving at the destination, the route
guidance automatically ends.
26