Page 387 of 450
Maintenance8-45
8
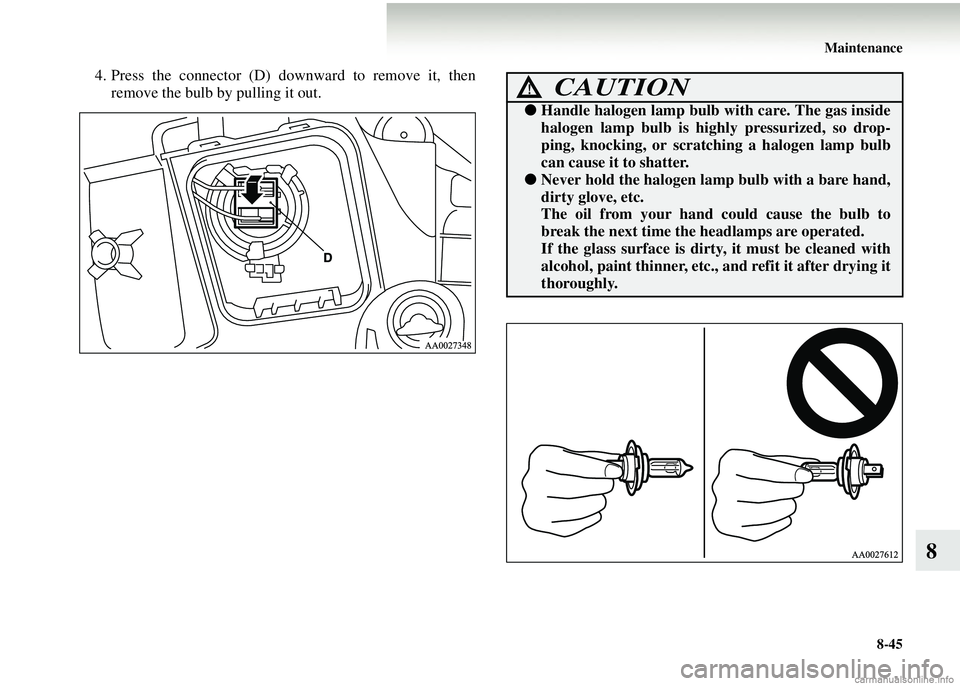
4. Press the connector (D) downward to remove it, thenremove the bulb by pulling it out.CAUTION!
● Handle halogen lamp bulb with care. The gas inside
halogen lamp bulb is highly pressurized, so drop-
ping, knocking, or scratc hing a halogen lamp bulb
can cause it to shatter.
● Never hold the halogen lamp bulb with a bare hand,
dirty glove, etc.
The oil from your hand could cause the bulb to
break the next time th e headlamps are operated.
If the glass surface is dirt y, it must be cleaned with
alcohol, paint thinner, etc., and refit it after drying it
thoroughly.
Page 388 of 450
8-46 Maintenance
8
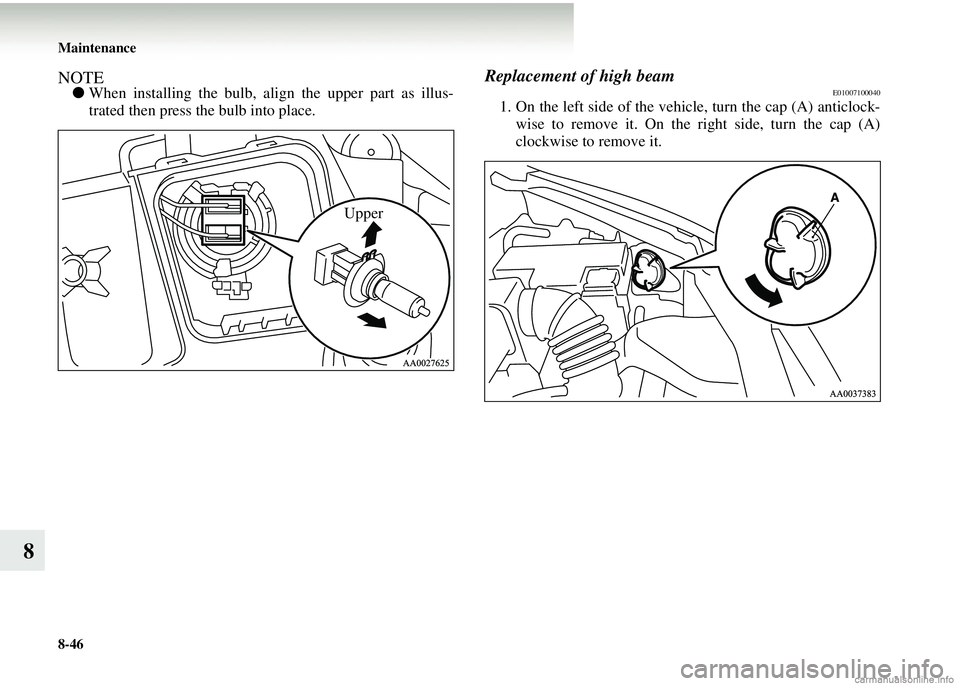
NOTE●When installing the bulb, align the upper part as illus-
trated then press the bulb into place.
Replacement of high beamE01007100040
1. On the left side of the vehi cle, turn the cap (A) anticlock-
wise to remove it. On the right side, turn the cap (A)
clockwise to remove it.
Upper
Page 389 of 450
Maintenance8-47
8
2. Press the connector (B) dow nward to remove it, then
remove the bulb by pulling it out.CAUTION!
● Handle halogen lamp bulb with care. The gas inside
halogen lamp bulb is highly pressurized, so drop-
ping, knocking, or scratc hing a halogen lamp bulb
can cause it to shatter.
● Never hold the halogen lamp bulb with a bare hand,
dirty glove, etc.
The oil from your hand could cause the bulb to
break the next time th e headlamps are operated.
If the glass surface is dirt y, it must be cleaned with
alcohol, paint thinner, etc., and refit it after drying it
thoroughly.
Page 390 of 450
8-48 Maintenance
8
NOTE●When installing the bulb, align the upper part as illus-
trated then press the bulb into place.Position lampsE01003700325
1. Remove the cap.
(Refer to “Headlamps: Re placement of high beam” on
page 8-46.)
2. Remove the socket (A) by leve ring it with a straight blade
(or minus) screwdriver. Then, remove the bulb from the
socket by pulling it out.
Upper
Page 391 of 450
Maintenance8-49
8
Front turn-signal lampsE01003800270
1. Remove the cover from the splash shield.(Refer to “Headlamps: Replacement of low beam” on
page 8-44.)
2. Turn the bulb socket anticlockwise to remove it. And remove the bulb from the socket by turning it anticlock-
wise while pressing in.
Side turn-signal lampsE01003900082
1. Remove the lamp housing by levering it towards the frontof the vehicle.
Front
Page 392 of 450
8-50 Maintenance
8
2. Remove the socket and bulb assembly together by turningit anticlockwise, and then remove the bulb by pulling out.Front fog lamps*E01004000660
3-door models
1. Remove the bumper protector (A) as follows:Pull the bottom edge of the bumper protector (B) towards
you at the end closer to the centreline of the vehicle so as
to lift the bumper protector a little at that point, then insert
a minus screwdriver into the gap and use it as a lever to
release the tab (C).
Page 394 of 450
8-52 Maintenance
8
4. Push the connector (E) to disconnect and remove the foglamp. 5. Remove the entire socket and bulb assembly (F) by turn-
ing it anticlockwise.
Page 395 of 450
Maintenance8-53
8
NOTE●When mounting the lamp unit, align the holes in the lamp
unit with the pins (G) on the vehicle body.NOTE●To install the bumper protector, first fit the endmost tabs
(H) into the holes in the body, then fit the remaining tabs
one by one, starting with the tab closest to the side of the
vehicle and working inward to wards the centreline of the
vehicle.
CAUTION!
● Handle halogen lamp bulb with care. The gas inside
halogen lamp bulb is highly pressurized, so drop-
ping, knocking, or scratc hing a halogen lamp bulb
can cause it to shatter.