Page 406 of 474
405 Practical hints
Replacing bulbs
�Fold corresponding trim to side.
�Turn the respective bulb socket coun-
terclockwise and remove.
�Press gently onto the bulb and turn
counterclockwise out of its bulb sock-
et.
�Press the new bulb gently into its bulb
socket and turn clockwise.
�Reinstall the bulb socket and turn
clockwise until it engages.
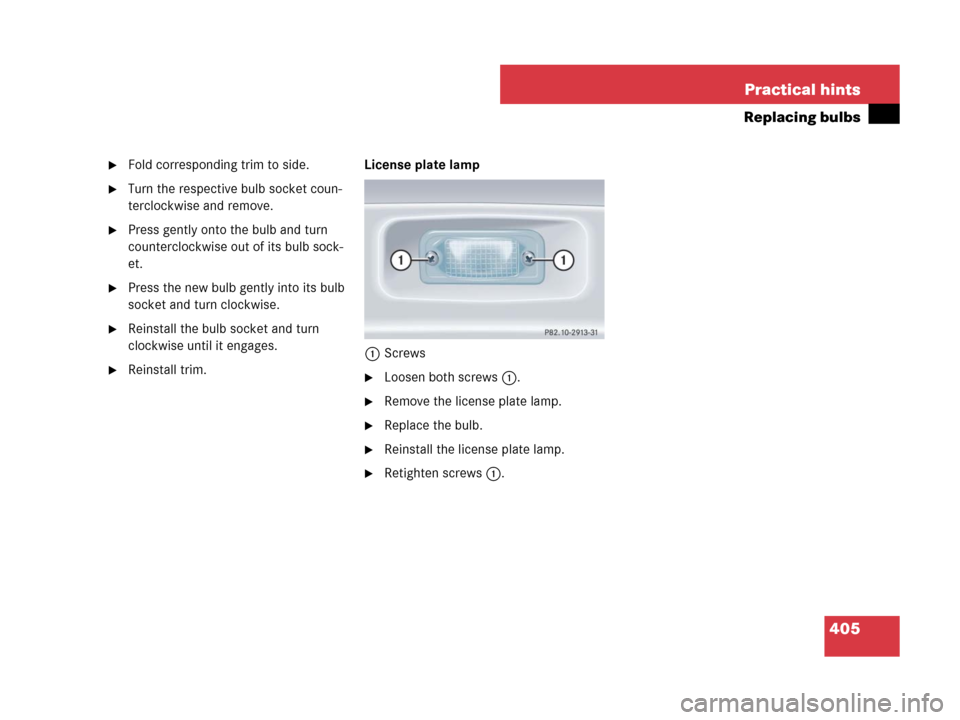
�Reinstall trim.License plate lamp
1Screws�Loosen both screws1.
�Remove the license plate lamp.
�Replace the bulb.
�Reinstall the license plate lamp.
�Retighten screws1.
Page 421 of 474

420 Practical hints
Flat tire
Lowering the vehicle
�Lower vehicle by turning the crank
counterclockwise until vehicle is
resting fully on its own weight.
�Remove the jack.
1-5 Wheel bolts
�Tighten the five wheel bolts evenly in
the direction of the arrow, following the
diagonal sequence illustrated
(1to5), until all bolts are tight.
Observe a tightening torque of
80 lb-ft (110 Nm).
�Fully collapse the jack.
�Place the vehicle tool kit, electric air
pump, and the jack back in the storage
compartment underneath the trunk
floor.
�Wrap the damaged wheel in the protec-
tive sheet provided with the vehicle
tool kit and put the wheel in the trunk.
For information on storing the spare wheel
in the trunk after it has been replaced by a
regular road wheel, see “Storing the spare
wheel with collapsible tire” (
�page 392).
Warning!G
Inflate the collapsible tire using the electric
pump (
�page 418) before lowering the
vehicle.
Warning!G
Have the tightening torque checked after
changing a wheel. The wheels could come
loose if they are not tightened to a torque of
80 lb-ft (110 Nm).
iThe flat tire may be transported in the trunk
when the retractable hardtop is closed.
Page 426 of 474
425 Practical hints
Battery
Reconnecting the battery
�Turn off all electrical consumers.
�Connect the battery positive lead2
(
�page 422) and fasten its cover.
�Connect the battery negative lead3
(
�page 422).
�Reinsert water tray 1 (�page 423).
�Push in locks2 (�page 423) and turn
one quarter turn.
!Always connect the battery in the order
described below. Otherwise the vehicle’s
electronics can be damaged.
!Never invert the terminal connections!
iThe following procedures must be carried
out following any interruption of battery power
(e.g. due to reconnection):
�Set the clock (�page 141).
�Synchronize the power windows
(
�page 239).
Page 462 of 474

461 Index
Climate control 172
Air conditioning refrigerant 452
Air conditioning, Cooling 180
Air recirculation mode 178
Air vents 172
Air volume 177
Control panel 174
Defrosting 170, 177
Residual heat utilization 181
Switching on/off 175
Temperature 175
Clock 120
Cockpit 24
Cold tire inflation pressure 331
Collapsible tire (spare wheel) 447
Collapsible wheel chock 391
COMAND* system 29
Driving instructions 287
Navigation 135
Combination switch 113
High beam flasher 113
High beam headlamps 55, 113
Low beam headlamps 55
Turn signals 55
Windshield wipers 56
Control system 121Control system menus 124
AMG 128
AUDIO 133
NAV* 135
Settings 136
Standard display 127
TEL* 149
Trip computer 148
Vehicle status message memory 135
Control system submenus
Convenience* 147
Instrument cluster 139
Lighting 143
Time/Date 141
Vehicle 146
Convenience opening/closing*
Power windows 238
Retractable hardtop 244
Coolant 456
Adding water 293
Anticorrosion/antifreeze 457
Checking coolant level 300
Messages in the multifunction
display 374–376
Technical data 452
Temperature 289Temperature gauge (Multifunction
display) 127
Corner-illuminating front fog lamps* 114
Replacing bulbs 400
Cruise control 248
Messages in the multifunction
display 362
Cup holder 255
Curb weight 331
D
Date (Control system) 142
Daytime running lamp mode 111
Setting 143
Deep water see Standing water
Defrosting
Rear window 170
Windshield (Automatic climate
control*) 189
Windshield (Climate control) 177
Delayed shut-off
Exterior lamps 144
Interior lighting 145
Department of Transportation see DOT
Difficulties
Wile driving 58
With starting the engine 52
Page 465 of 474

464 Index
G
Garage door opener* 270
Gasoline see Fuel
GAWR 331
Gear range
Automatic transmission 160
Limiting 160
Shifting into optimal 163, 165
Gear selector lever 155
Gearshift pattern 155
Position 156, 157
Shifting procedure 156
Gear selector lever one-touch gearshifting
Automatic transmission 162
Global locking/unlocking see SmartKey
Glove box 253
Good visibility 168
GPS 90, 91
Tele Aid system* 262
Gross Axle Weight Rating see GAWR
Gross Vehicle Weight Rating see GVWR
Gross Vehicle Weight see GVW
GSM network phones (Telephone*) 219
GVW 331
GVWR 332H
Hard plastic trim items, cleaning 345
Hazard warning flasher 115, 116
Head restraint height (Seats) 42
Headlamps
Bi-Xenon* 401
Cleaning system* 168, 301, 458
Night security illumination
(Control system) 144
Switching off 61
Switching on 55
Headliner, cleaning 345
Head-thorax air bag 70
Heating
Seats* 104
Steering wheel* 276
High beam
Flasher 113
Headlamps 55, 113
Headlamps, bulbs 401
High beam headlamps 109
High mounted brake lamp 402
High-performance brake system 281
Hood 294
Horn 25
Hydroplaning 284I
Identification labels see Labels
Ignition (Position in starter switch) 37
Immobilizer see Anti-theft systems
Infant and child restraint systems see
Children in the vehicle
Instrument cluster 27, 118
Clock 120
Lamps, indicator and warning 348
Overview 26
Instruments and controls see Cockpit
Interior rear view mirror see Mirrors
Intermittent/interval wiping see
Windshield wipers
J
Jack (Vehicle tool kit) 389
Lifting vehicle 414
Lowering vehicle 420
Jump starting 426
K
Key, Mechanical
Valet locking 101
Kickdown 159
Kilopascal 332
Knee bag see Air bags
Page:
< prev 1-8 9-16 17-24