Page 305 of 474

304 Operation
Tires and wheels
Contact an authorized Mercedes-Benz
Center for information on tested and
recommended rims and tires for summer
and winter operation. They can also offer
advice concerning tire service and
purchase.Important guidelines
�Only use sets of tires and rims of the
same type and make.
�Tires must be of the correct size for the
rim.
�Break in new tires for approximately
60 miles (100 km) at moderate
speeds.
�Regularly check the tires and rims for
damage. Dented or bent rims can
cause tire inflation pressure loss or
damage the tire beads.
�If vehicle is heavily loaded, check tire
inflation pressure and correct as
required.
�Do not allow your tires to wear down
too far. Adhesion properties on wet
roads are sharply reduced at tread
depths of less than
1/8in (3 mm).
�When replacing individual tires, you
should mount new tires on the front
wheels first (on vehicles with
same-sized wheels all around).
Warning!G
Replace rims or tires with the same designa-
tion, manufacturer and type as shown on the
original part. Contact an authorized
Mercedes-Benz Center for further informa-
tion. If incorrectly sized rims and tires are
mounted:
�The wheel brakes or suspension compo-
nents can be damaged.
�The operating clearance of the wheels
and the tires may no longer be correct.
Warning!G
Worn, old tires can cause accidents. If the
tire tread is badly worn, or if the tires have
sustained damage, replace them.
When replacing rims, only use genuine
Mercedes-Benz wheel bolts specified for the
particular rim type. Failure to do so can re-
sult in the bolts loosening and may lead to
an accident.
Retreaded tires are not tested or recom-
mended by Mercedes-Benz, since previous
damage cannot always be recognized on
retreads. Mercedes-Benz therefore cannot
assure the operating safety of the vehicle
when such tires are used.
Page 429 of 474

428 Practical hints
Towing the vehicle
Mercedes-Benz recommends that the vehi-
cle be transported with all wheels off the
ground using flatbed or appropriate wheel
lift/dolly equipment.
When circumstances do not permit the
recommended towing methods, the vehi-
cle may be towed with all wheels on the
ground or front wheels raised only so far as
necessary to have the vehicle moved to a
safe location where the recommended
towing methods can be employed.
!Vehicles with automatic transmission*: Do
not tow-start vehicle.
!Use flatbed or wheel lift/dolly equipment
with the SmartKey in the starter switch in
position0.
Do not tow with sling-type equipment. Towing
with sling-type equipment over bumpy roads will
damage radiator and supports.
To prevent damage during transport, do not tie
down vehicle by its chassis or suspension parts.
Use the towing eyes.
Switch off the tow-away alarm (
�page 91) and
the automatic central locking (
�page 102).
Warning!G
If circumstances require towing the vehicle
with all wheels on the ground, always tow
with a tow bar if:
�the engine will not run
�there is a malfunction in the brake
system
�there is a malfunction in the power
supply or in the vehicle’s electrical
system
This is necessary to adequately control the
towed vehicle.
Prior to towing the vehicle with all wheels on
the ground, make sure the SmartKey is in
starter switch position2.
If the SmartKey is left in starter switch
position0 for an extended period of time, it
can no longer be turned in the switch. In this
case, the steering is locked. To unlock,
remove SmartKey from starter switch and
reinsert.
Warning!G
With the engine not running, there is no
power assistance for the brake and steering
systems. In this case, it is important to keep
in mind that a considerably higher degree of
effort is necessary to brake and steer the
vehicle. Adapt your driving accordingly.
!If the vehicle is towed with the front axle
raised, the gear selector lever* must be in
positionN (manual transmission: gear shift lever
in neutral position) and the engine must be shut
off (SmartKey in starter switch position0or1).
Active braking action through the ESP
® may
otherwise seriously damage the brake system.
When towing the vehicle with all wheels on the
ground, the gear selector lever* must be in
positionN (manual transmission: gear shift lever
in neutral position) and the SmartKey must be in
starter switch position2.
When towing the vehicle with all wheels on the
ground or the front axle raised, the vehicle
may be towed only for distances up to
30 miles (50 km) and at a speed not to
exceed 30 mph (50 km/h).
Page 430 of 474

429 Practical hints
Towing the vehicle
Installing towing eye bolt
The towing eye bolt is supplied with the ve-
hicle tool kit, located in the compartment
underneath the trunk floor (
�page 389).
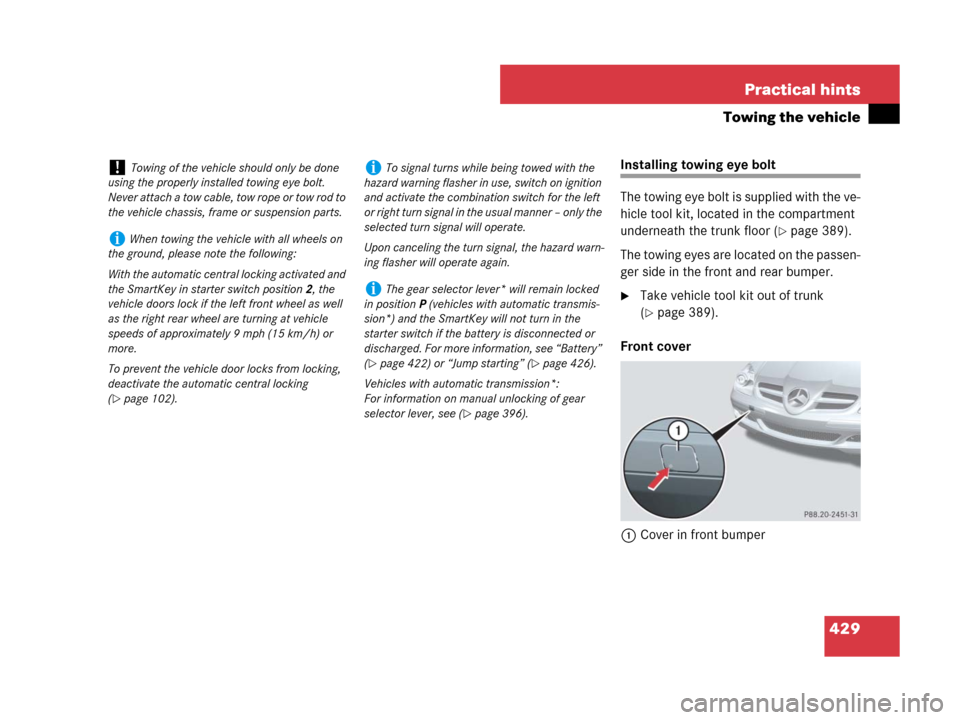
The towing eyes are located on the passen-
ger side in the front and rear bumper.
�Take vehicle tool kit out of trunk
(
�page 389).
Front cover
1Cover in front bumper
!Towing of the vehicle should only be done
using the properly installed towing eye bolt.
Never attach a tow cable, tow rope or tow rod to
the vehicle chassis, frame or suspension parts.
iWhen towing the vehicle with all wheels on
the ground, please note the following:
With the automatic central locking activated and
the SmartKey in starter switch position2, the
vehicle doors lock if the left front wheel as well
as the right rear wheel are turning at vehicle
speeds of approximately 9 mph (15 km/h) or
more.
To prevent the vehicle door locks from locking,
deactivate the automatic central locking
(
�page 102).
iTo signal turns while being towed with the
hazard warning flasher in use, switch on ignition
and activate the combination switch for the left
or right turn signal in the usual manner – only the
selected turn signal will operate.
Upon canceling the turn signal, the hazard warn-
ing flasher will operate again.
iThe gear selector lever* will remain locked
in positionP (vehicles with automatic transmis-
sion*) and the SmartKey will not turn in the
starter switch if the battery is disconnected or
discharged. For more information, see “Battery”
(
�page 422) or “Jump starting” (�page 426).
Vehicles with automatic transmission*:
For information on manual unlocking of gear
selector lever, see (
�page 396).