2008 MERCEDES-BENZ SLK ROADSTER window
[x] Cancel search: windowPage 135 of 273
Opening/closing the roof
132
i
If you open the side windows manually
after closing using the convenience closing
feature, it will remain in this position when
opened using the convenience opening fea-
ture. Switching the residual heat/auxiliary
ventilation on/off
It is possible to make use of the residual heat
of the engine to continue heating the station-
ary vehicle for up to 30 minutes after the
engine has been switched off. The heating
time depends on the set interior temperature .
i The blower will run at a low speed regard-
less of the airflow setting.
i If you activate the "residual heat" function
at high temperatures, only the ventilation
will be activated. The blower runs at
medium speed. X
Make sure that the key is in position 0in
the ignition lock or that it has been
removed.
X To switch on: press theT22
/9 23
button.
The indicator lamp in the T/9 but-
ton lights up.
X To deactivate: press theT22
/9 23
button.
The indicator lamp in the T/9 but-
ton goes out.
i The auxiliary heating/ventilation is auto-
matically deactivated after about 30
minutes, or when:
R the ignition is switched on
R the battery voltage drops Opening/closing the roo
f
For safety reasons, the roof can only be
opened and closed when the vehicle is sta-
tionary. G
Risk of accident and injury
Always open or close the roof fully before
driving .
If the roof does not open or close fully, the
roof hydraulic system is depressurised and
the roof lowers itself
R after about seven minutes if the ignition
is switched on
R after about 15 seconds if the ignition is
switched off
A warning tone sounds shortly beforehand.
The message Vario-roof lowering
appears in the multi-function display.
Lock the roof again before driving on. Oth-
erwise the unlocked roof could open durin g
the journey and cause you to lose control
of your vehicle. You or other persons could
be injured as a result.
! Never sit on the rear shelf and never store
heavy objects there. You will otherwis e
22 Vehicles with Heatmatic/Thermotronic*.
23 Vehicles with Thermatic*. Controls
* optional
171_AKB; 3; 4, en-GB
vpfaff7,
2007-11-13T10:50:25+01:00 - Seite 132
Page 136 of 273
Opening/closing the roof
133
damage the roof and the rear shelf of your
vehicle.
! When opening and closing the roof, make
sure that :
R there is sufficient upward clearance, as
the roof swings upwards
R there is sufficient clearance behind the
vehicle as the boot lid swings backwards
beyond the bumpe r
R the boot is only loaded to below the boot
separator
R the boot separator is not pushed up by
the load
R the boot separator is close d
R the boot lid is close d
R no roof rack is fitte d
R the outside temperature is above -15° C
R the roof is not dirty or we t
You will otherwise damage the roof and the
boot of your vehicle. Using the roof switch
G
Risk of injury
When opening or closing the roof, make
sure that nobody is trapped or injured by
moving parts such as the boot lid, the
hinged roof or the roof linkage .
If danger threatens, release the roof switch
immediately. The roof folding mechanism
stops immediately.
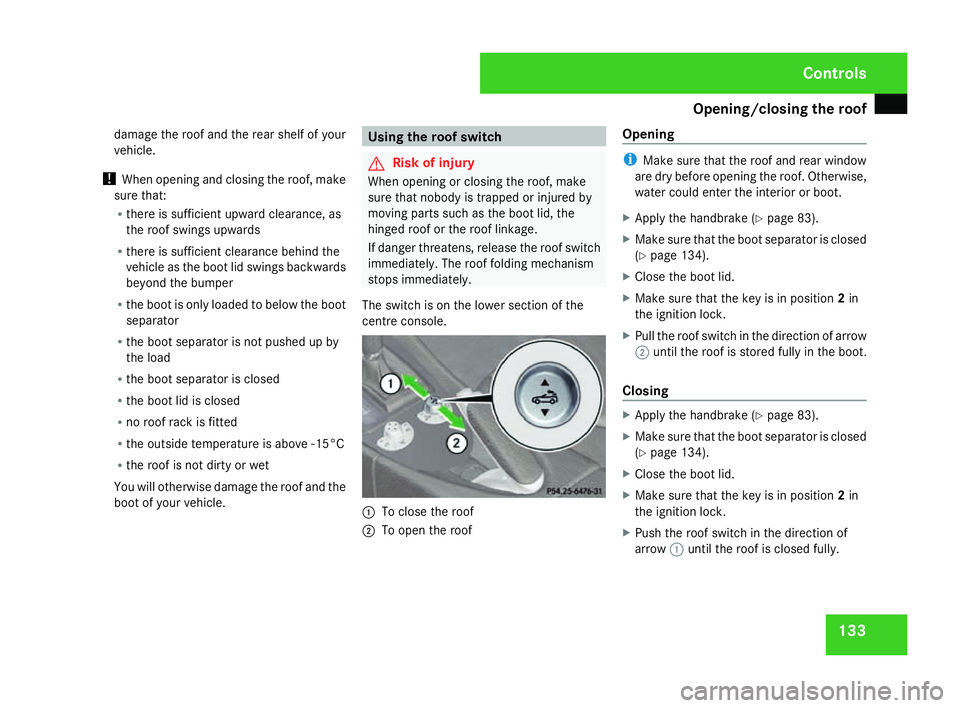
The switch is on the lower section of the
centre console. 1
To close the roof
2 To open the roof Opening i
Make sure that the roof and rear window
are dry before opening the roof. Otherwise ,
water could enter the interior or boot.
X Apply the handbrake (Y page 83).
X Make sure that the boot separator is closed
(Y page 134).
X Close the boot lid.
X Make sure that the key is in position 2in
the ignition lock .
X Pull the roof switch in the direction of arrow
2 until the roof is stored fully in the boot .
Closing X
Apply the handbrake (Y page 83).
X Make sure that the boot separator is closed
(Y page 134).
X Close the boot lid.
X Make sure that the key is in position 2in
the ignition lock .
X Push the roof switch in the direction of
arrow 1until the roof is closed fully. Controls
171_AKB; 3; 4, en-GB
vpfaff7,
2007-11-13T10:50:25+01:00 - Seite 133
Page 137 of 273
Opening/closing the roof
134 With the key
G
Risk of injury
When opening or closing the roof, make
sure that nobody is trapped or injured by
moving parts such as the boot lid, the
hinged roof or the roof linkage .
If danger threatens, immediately release
the k orj button on the key. The
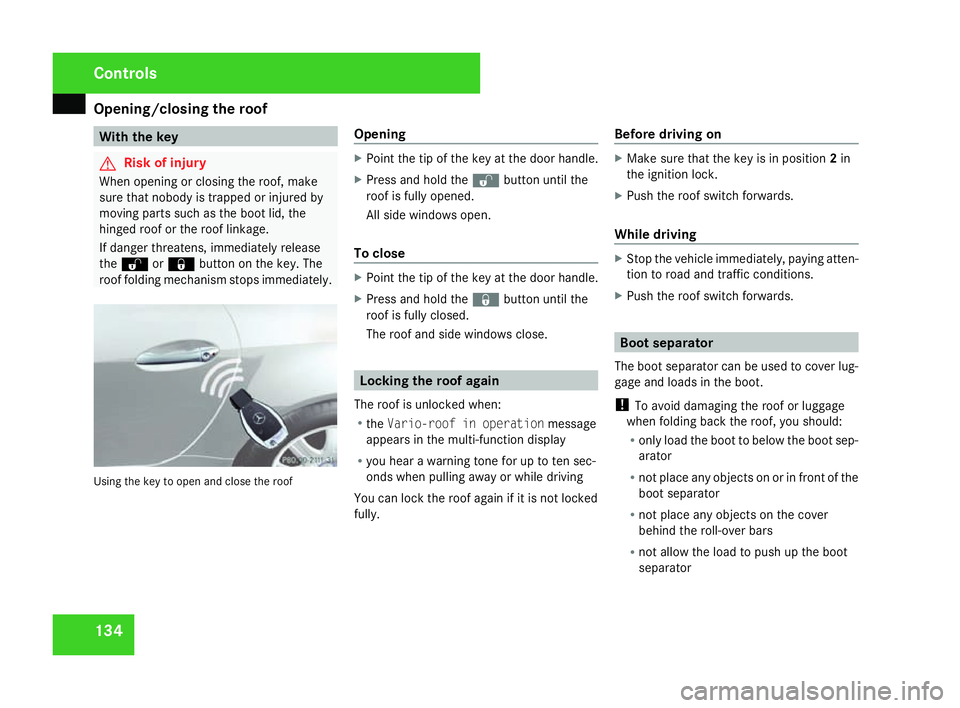
roof folding mechanism stops immediately. Using the key to open and close the roof Opening X
Point the tip of the key at the door handle.
X Press and hold the kbutton until the
roof is fully opened.
All side windows open.
To close X
Point the tip of the key at the door handle.
X Press and hold the jbutton until the
roof is fully closed.
The roof and side windows close. Locking the roof again
The roof is unlocked when:
R the Vario-roof in operatio nmessage
appears in the multi-function displa y
R you hear a warning tone for up to ten sec -
onds when pulling away or while driving
You can lock the roof again if it is not locked
fully. Before driving on X
Make sure that the key is in position 2in
the ignition lock .
X Push the roof switch forwards.
While driving X
Stop the vehicle immediately, paying atten-
tion to road and traffic conditions .
X Push the roof switch forwards. Boot separator
The boot separator can be used to cover lug-
gage and loads in the boot.
! To avoid damaging the roof or luggage
when folding back the roof, you should:
R only load the boot to below the boot sep-
arator
R not place any objects on or in front of the
boot separator
R not place any objects on the cover
behind the roll-over bars
R not allow the load to push up the boot
separator Controls
171_AKB; 3; 4, en-G
B
vpfaff7, 2007-11-13T10:50:25+01:00 - Seite 134
Page 170 of 273
Car
e 167
!
It is preferable that you use car washes
that do not use high-pressure cleaning.
With car washes that use high water pres-
sures, there is a danger that water may leak
into the vehicle.
! Do not use a touch-free automatic car
wash that uses chemical agents to wash
the vehicle.
If the vehicle is very dirty, prewash it before
cleaning it in an automatic car wash.
Vehicles with DAB radio only 25
:
X Remove the radio/telephone aerial.
! If you do not remove the radio/telephon e
aerial, the aerial or the vehicle may be dam-
aged by the automatic car wash.
! Make sure that the automatic car wash is
suitable for the size of the vehicle. Fold in
the exterior mirrors before the vehicle is
washed. There is otherwise a risk of dam-
age to the exterior mirrors.
! Make sure the side windows are com-
pletely closed, the ventilation/heater
blower is fully turned off and the wind -
screen wiper switch is set to 0. The rai n sensor may otherwise be activated, for
instance, leading to inadvertent wiper
sweeps being triggered. This could cause
damage to the vehicle.
After using an automatic car wash, wipe off
wax from the windscreen and the wiper
blades. This will prevent smears and reduce
wiping noises caused by residue on the wind-
screen.
High-pressure cleaners G
Risk of accident
Do not use high-pressure cleaners with cir-
cular-jet nozzles (dirt grinders) to clean
your vehicle or - especially - the tyres. Yo u
could otherwise damage the tyres and
cause an accident.
! Observe the instructions issued by the
equipment manufacturer concerning the
distance to be maintained between the
nozzle of the high-pressure cleaner and the
vehicle (at least 30 cm).
Move the high-pressure cleaner nozzle
around when cleaning your vehicle .
Do not aim directly at any of the following: R
Tyres
R Door joint
R Electrical components
R Battery
R Connectors
R Bulbs
R Seals
Damaged seals or electrical components
can lead to failures or leaks .
Cleaning the wiper blades and the out -
side of the windscreen G
Risk of injury
Turn the key to position 0in the ignition
lock before cleaning the windscreen or the
wiper blades. There is otherwise a risk of
the windscreen wipers being set in motion
and causing injury.
25 Only in certain countries. Operation
171_AKB; 3; 4, en-GB
vpfaff7,
2007-11-13T10:50:25+01:00 - Seite 167
Page 171 of 273
Car
e 168
X
Turn the key to position 1in the ignition
lock (Y page 59).
X Set the windscreen wipers to position Ion
the combination switch (Y page 78).
X Turn the key to position 0or remove it when
the wiper arms are vertical (Y page 59).
! Only fold the windscreen wipers away
from the windscreen when vertical, other -
wise you will damage the bonnet .
X Fold the wiper arms away from the wind-
screen until you feel them engage.
X Clean the windscreen and the wiper blades .
X Fold the windscreen wipers back agai n
before the ignition is switched on.
! Do not clean the wiper blades too often,
as otherwise the coating may come off.
This could cause wiper noise.
Cleaning the windows !
Do not use dry cloths, abrasive products,
solvents or cleaning agents containing sol-
vents to clean the inside of the windows.
Clean the insides of the windows with a
damp cloth or commercially-available glass
cleaner. Avoid touching the inside of the rear windscreen and the side windows with
hard objects, e.g. ice scrapers or rings. You
could otherwise cause damage to the win-
dows, rear window heating or aerial on the
rear window.
i Anti-glare film retrofitted to the insides of
the windows could interfere with radio or
mobile phone reception, especially if it is
conductive or metal-coated film. Informa -
tion about anti-glare film can be obtained
from any Mercedes-Benz Service Centre.
Cleaning the headlamps X
Clean the headlamp lenses with a wet
sponge.
! Only use washer fluid which is suitable
for plastic lenses. Unsuitable washer fluid
could damage the plastic lenses of th e
headlamps.
Therefore, do not use the following:
R dry cloths
R abrasive cleaning agents
R solvents
R cleaning agents containing solvent You could otherwise scratch or damage the
surface of the lenses
.
Plastic trim !
Do not use dry, coarse or hard cloths and
do not scrub. Doing so will scratch or dam-
age the surfaces.
X Wipe plastic parts with a damp, lint-free
cloth (e.g. a microfibre cloth).
X Light soiling: use a low-foaming soap (e.g .
a light liquid hand soap) diluted in water.
X Heavy soiling: use a cleaning agent that is
solvent-free and non-corrosive. Mercedes-
Benz recommends that you use a
Mercedes-Benz cleaning product for this
purpose.
Cleaning the steering wheel boss and
dashboard X
Moisten a clean lint-free cloth with water.
X Clean the plastic parts and the dashboard.
X If particularly dirty, use a mild detergent. Operation
171_AKB; 3; 4, en-GB
vpfaff7,
2007-11-13T10:50:25+01:00 - Seite 168
Page 194 of 273
Troubleshooting
19
1 Problem Possible cause/consequence Suggested solutions
The indicator lamp in the
9or
2 button of the Thermatic*/
Thermotronic *control panel is lit.
The cooling system cannot be
switched on. Cooling has been deactivated
due to a malfunction. X
Visit a qualified specialist workshop. The indicator lamp in the
¯
rear-window heating button is
flashing. The rear-window heat-
ing has switched itself off prema -
turely or cannot be switched on. There is insufficient voltag
e
because too many consumers are
switched on. X
Switch off consumers that are not required, e.g. reading lamps ,
interior lighting, etc .
The rear-window heating will automatically switch back on as soon
as there is sufficient voltage again. The
75 PASSENGER
AIRBAG OFF warning lamp on the
centre console is lit. A special Mercedes-Benz child
seat with automatic child seat
recognition has been fitted to the
front-passenger seat. The front-
passenger airbag has therefore
been disabled. Practical advice
* optional
171_AKB; 3; 4, en-GB
vpfaff7,
2007-11-13T10:50:25+01:00 - Seite 191 Z
Page 209 of 273
Troubleshooting
20
6 Windows
Problem Possible cause/consequence Suggested solutions
A side window will not close
. An object is blocking the side win-
dow and preventing it from clos-
ing
. X
Remove the object(s).
X Close the side window. You cannot see the cause. X
Close the side window with increased force or without the anti-
entrapment feature (Y page 80). Mirrors
Problem Possible cause/consequence Suggested solutions
An exterior mirror has been
pushed out of position
. Vehicles with exterior mirrors that cannot be folded in/out electri-
cally:
X
Push the mirror into the correct position manually.
Vehicles with electrically folding exterior mirrors* :
X Press the mirror-folding button* (Y page 66) repeatedly until you
hear a distinct click .
The mirror housing is engaged again and you can adjust the mirror
as usual (Y page 66). Practical advice
* optional
171_AKB; 3; 4, en-GB
vpfaff7,
2007-11-13T10:50:25+01:00 - Seite 206