2008 MERCEDES-BENZ SLK ROADSTER child seat
[x] Cancel search: child seatPage 51 of 273
Occupant safet
y48
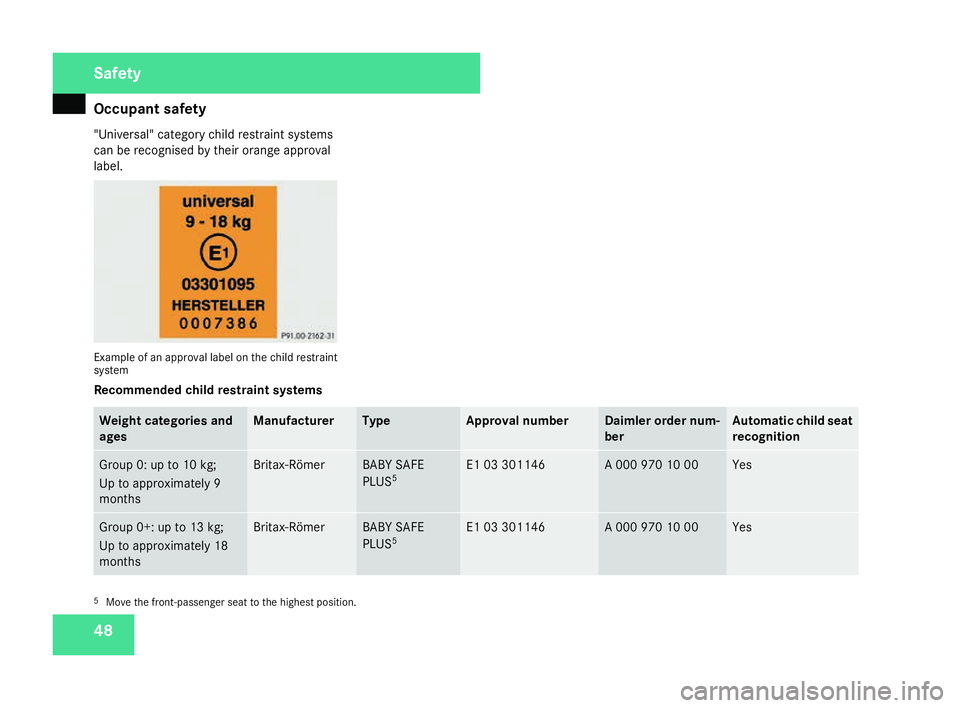
"Universal" category child restraint system
s
can be recognised by their orange approval
label . Example of an approval label on the child restraint
syste
m
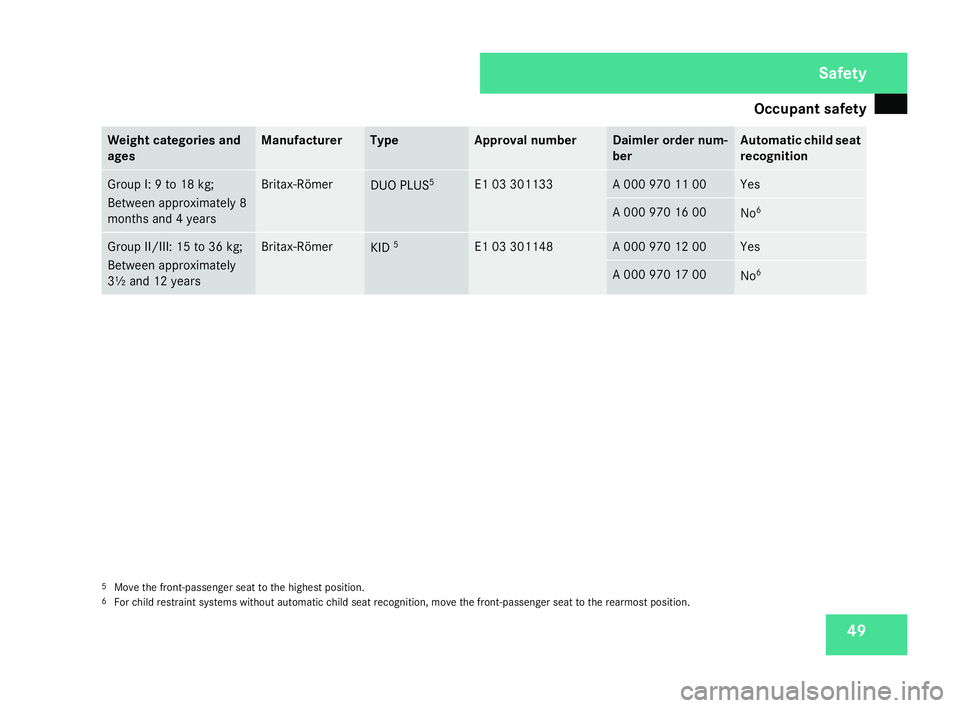
Recommended child restraint systems Weight categories and
age s Manufacture
r Type Approval numbe
r Daimler order num
-
ber Automatic child seat
recognition
Group 0: up to 10 kg;
Up to approximately
9
months Britax-Römer BABY SAFE
PLUS
5 E1 03 301146 A 000 970 10 00 Ye
s Group 0+: up to 13 kg;
Up to approximately 18
months Britax-Römer BABY SAFE
PLUS
5 E1 03 301146 A 000 970 10 00 Ye
s 5
Move the front-passenger seat to the highest position. Safety
171_AKB; 3; 4, en-GB
vpfaff7,
2007-11-13T10:50:25+01:00 - Seite 48
Page 52 of 273
Occupant safet
y 49Weight categories and
ages Manufacturer Typ
e Approval number Daimler order num
-
ber Automatic child seat
recognition
Group I: 9 to 18 kg;
Between approximately
8
months and 4 years Britax-Römer
DUO PLUS
5 E1 03 301133 A 000 970 11 00 Ye
s A 000 970 16 00
No
6 Group II/III: 15 to 36 kg;
Between approximately
3½ and 12 years Britax-Römer
KID
5 E1 03 301148 A 000 970 12 00 Ye
s A 000 970 17 00
No
6 5
Move the front-passenger seat to the highest position.
6 For child restraint systems without automatic child seat recognition, move the front-passenger seat to the rearmost position. Safety
171_AKB; 3; 4, en-GB
vpfaff7,
2007-11-13T10:50:25+01:00 - Seite 49
Page 62 of 273
Seats
59
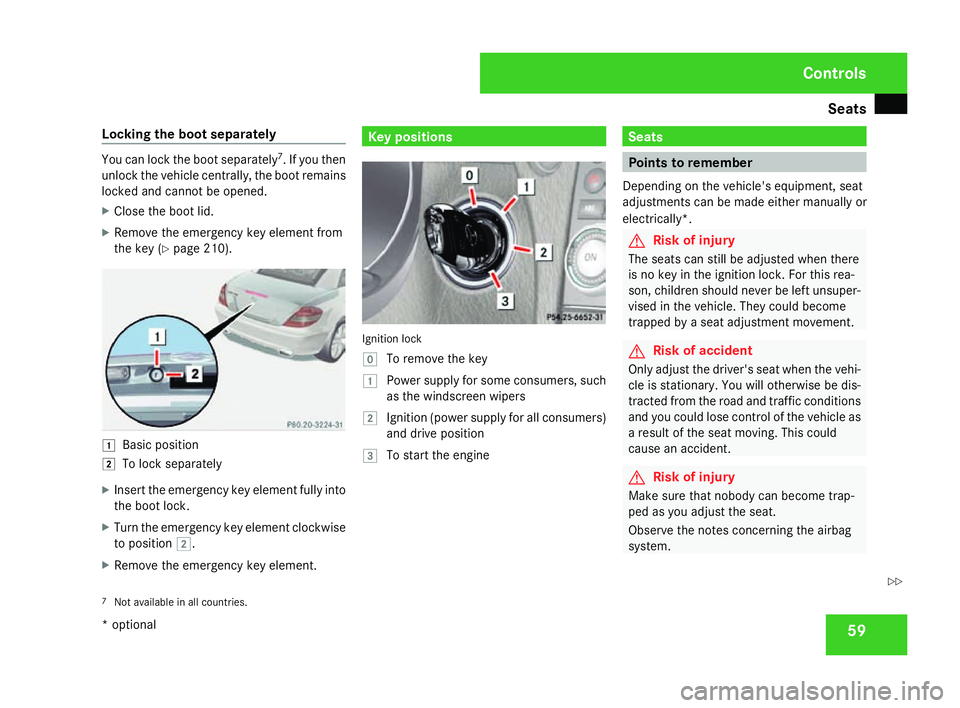
Locking the boot separately You can lock the boot separately
7
. If you then
unlock the vehicle centrally, the boot remains
locked and cannot be opened.
X Close the boot lid.
X Remove the emergency key element from
the key (Y page 210). $
Basic position
% To lock separately
X Insert the emergency key element fully into
the boot lock.
X Turn the emergency key element clockwise
to position %.
X Remove the emergency key element. Key positions
Ignition loc
k
} To remove the key
$ Power supply for some consumers, such
as the windscreen wipers
% Ignition (power supply for all consumers)
and drive positio n
& To start the engine Seats
Points to remember
Depending on the vehicle's equipment, seat
adjustments can be made either manually or
electrically*. G
Risk of injury
The seats can still be adjusted when there
is no key in the ignition lock. For this rea -
son, children should never be left unsuper-
vised in the vehicle. They could become
trapped by a seat adjustment movement. G
Risk of accident
Only adjust the driver's seat when the vehi-
cle is stationary. You will otherwise be dis-
tracted from the road and traffic conditions
and you could lose control of the vehicle as
a result of the seat moving. This could
cause an accident. G
Risk of injury
Make sure that nobody can become trap -
ped as you adjust the seat.
Observe the notes concerning the airbag
system.
7 Not available in all countries. Controls
* optional
171_AKB; 3; 4, en-GB
vpfaff7,
2007-11-13T10:50:25+01:00 - Seite 59 Z
Page 63 of 273
Seats
60 Secure children as recommended; see the
"Children in the vehicle" section.
! When you move the seats, make sure that
there are no objects in the footwell or
behind the seats. Otherwise, you could
damage the seats and the objects.
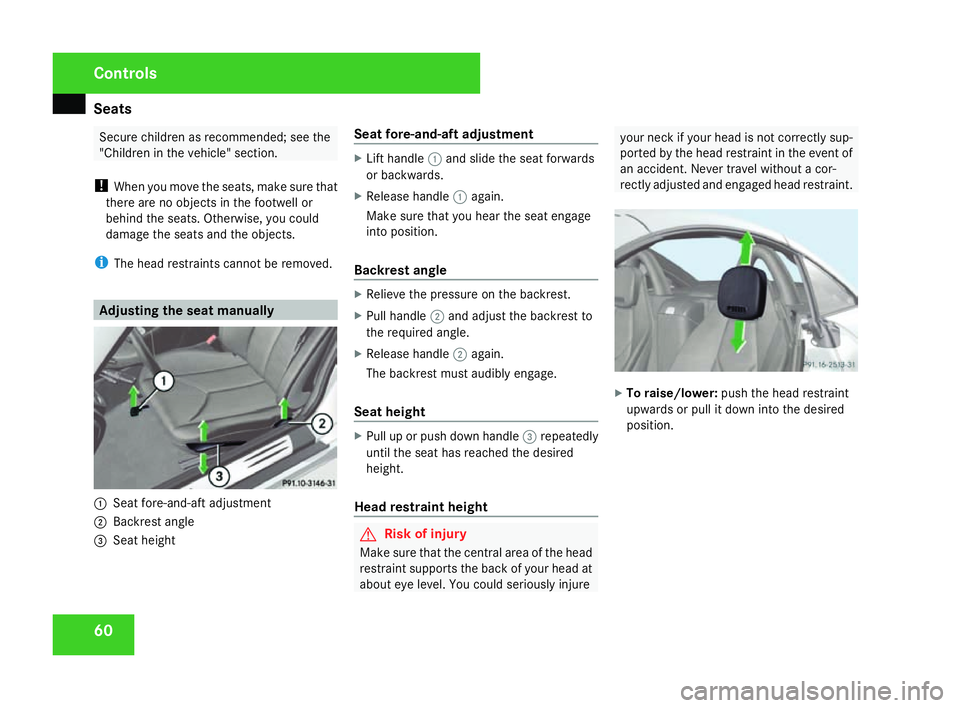
i The head restraints cannot be removed. Adjusting the seat manually
1
Seat fore-and-aft adjustment
2 Backrest angle
3 Seat height Seat fore-and-aft adjustmen
t X
Lift handle 1and slide the seat forwards
or backwards.
X Release handle 1again.
Make sure that you hear the seat engag e
into position .
Backrest angle X
Relieve the pressure on the backrest.
X Pull handle 2and adjust the backrest to
the required angle.
X Release handle 2again.
The backrest must audibly engage.
Seat height X
Pull up or push down handle 3repeatedly
until the seat has reached the desired
height.
Head restraint height G
Risk of injury
Make sure that the central area of the head
restraint supports the back of your head at
about eye level. You could seriously injure your neck if your head is not correctly sup-
ported by the head restraint in the event of
an accident. Never travel without a cor-
rectly adjusted and engaged head restraint. X
To raise/lower: push the head restraint
upwards or pull it down into the desire d
position. Controls
171_AKB; 3; 4, en-GB
vpfaff7,
2007-11-13T10:50:25+01:00 - Seite 60
Page 66 of 273
Steering wheel
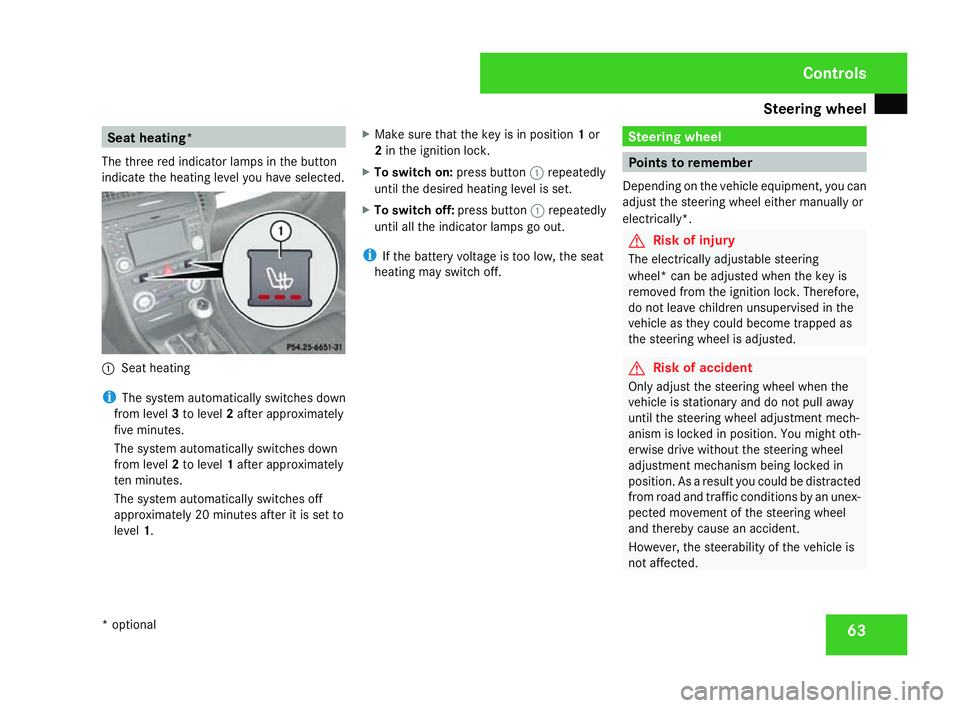
63Seat heating*
The three red indicator lamps in the button
indicate the heating level you have selected. 1
Seat heating
i The system automatically switches down
from level 3to level 2after approximately
five minutes.
The system automatically switches down
from level 2to level 1after approximately
ten minutes.
The system automatically switches off
approximately 20 minutes after it is set to
level 1. X
Make sure that the key is in position 1or
2 in the ignition lock .
X To switch on: press button1repeatedly
until the desired heating level is set.
X To switch off: press button1repeatedly
until all the indicator lamps go out.
i If the battery voltage is too low, the sea t
heating may switch off. Steering wheel
Points to remember
Depending on the vehicle equipment, you can
adjust the steering wheel either manually or
electrically*. G
Risk of injury
The electrically adjustable steering
wheel* can be adjusted when the key is
removed from the ignition lock. Therefore,
do not leave children unsupervised in the
vehicle as they could become trapped as
the steering wheel is adjusted . G
Risk of acciden
t
Only adjust the steering wheel when the
vehicle is stationary and do not pull away
until the steering wheel adjustment mech-
anism is locked in position. You might oth-
erwise drive without the steering whee l
adjustment mechanism being locked in
position. As a result you could be distracted
from road and traffic conditions by an unex -
pected movement of the steering wheel
and thereby cause an accident.
However, the steerability of the vehicle is
not affected. Controls
* optional
171_AKB; 3; 4, en-GB
vpfaff7,
2007-11-13T10:50:25+01:00 - Seite 63
Page 71 of 273
Memory functions*
68 Memory functions*
Storing settings
You can store up to three different settings
using the memory button.
The following settings are stored as a single
memory preset :
R Seat and backrest position
R Driver's side: steering-wheel positio n
R Driver's side: position of the exterior mir-
rors on the driver's and front-passenge r
sides G
Risk of injury
The memory function can also be used
when the key has been removed. For this
reason, children should never be left unsu-
pervised in the vehicle. They could other-
wise become trapped when moving the
seat or the steering wheel .G
Risk of accident
Only activate the memory function on the
driver’s side when the vehicle is stationary.
You could otherwise be distracted from the
traffic conditions by the steering wheel and
seat moving of their own accord, and as a
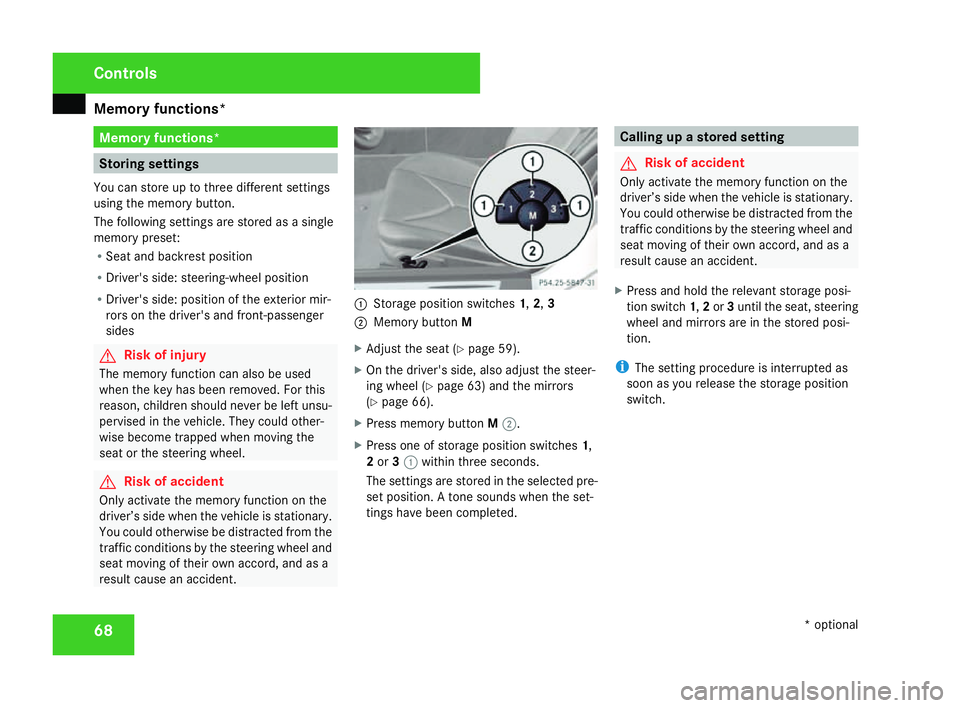
result cause an accident. 1
Storage position switches 1,2 ,3
2 Memory button M
X Adjust the seat (Y page 59).
X On the driver's side, also adjust the steer-
ing wheel (Y page 63) and the mirrors
( Y page 66).
X Press memory button M2 .
X Press one of storage position switches 1,
2 or 31 within three seconds.
The settings are stored in the selected pre-
set position. A tone sounds when the set-
tings have been completed. Calling up a stored setting
G
Risk of acciden
t
Only activate the memory function on the
driver’s side when the vehicle is stationary .
You could otherwise be distracted from the
traffic conditions by the steering wheel and
seat moving of their own accord, and as a
result cause an accident.
X Press and hold the relevant storage posi-
tion switch 1,2 or 3until the seat, steerin g
wheel and mirrors are in the stored posi-
tion .
i The setting procedure is interrupted as
soon as you release the storage position
switch. Controls
* optional
171_AKB; 3; 4, en-GB
vpfaff7,
2007-11-13T10:50:25+01:00 - Seite 68
Page 73 of 273
Seat belts
70 as low down as possible, i.e. over your
hip joints – not across your abdomen. If
necessary, push down the belt strap
slightly and then retighten it in the roll-up
direction.
R Seat belts must not be twisted and mus t
always be inside the belt loop of the seat .
R Do not route the belt strap across sharp
or fragile objects, especially if these ar e
located on or in your clothing, e.g. spec -
tacles, pencils, keys, etc. The seat belt
strap could be damaged and tear in an
accident and you or other vehicle occu -
pants could be injured.
R Only one person should use each seat
belt at any one time. Children must never
travel sitting on the lap of other occu-
pants. It would not be possible to restrain
the child in the event of a sudden change
in direction, braking or an accident. This
could result in severe or even fatal inju-
ries to the child and other occupants.
R Persons less than 1.50 m tall cannot
wear the seat belts correctly. For this
reason, secure persons less than 1.50 m
tall in specially designed, suitabl e
restraint systems . R
Children less than 1.50 m tall or under
12 years of age cannot wear the seat
belts properly. Therefore, always secure
these children in suitable child restraint
systems on suitable vehicle seats. You
can find more information under "Chil-
dren in the vehicle" in the "Safety" sec -
tion of the Owner's Manual. Follow the
manufacturer's installation instructions
when fitting the child restraint system.
R Do not secure any objects with a seat belt
if the seat belt is also being used by one
of the vehicle's occupants. G
Risk of injury
The seat belt does not offer the intended
level of protection unless the backrest is
almost vertical. Under certain circumstan-
ces this could cause severe or even fata l
injuries.
Before starting a journey, make sure that
the seat is properly adjusted and that the
backrest is almost vertical. G
Risk of injury
A dirty or damaged seat belt or a seat bel t
that has been subjected to a load in an
accident or modified no longer offers the intended level of protection. Under certai
n
circumstances this could cause severe or
even fatal injuries.
For this reason, check regularly that the
seat belts are not damaged or dirty.
Always have damaged seat belts or sea t
belts that have been subjected to a load in
an accident replaced at a qualified special-
ist workshop. Choose a qualified specialist
workshop which has the necessary special-
ist knowledge and tools for the work
required. Mercedes-Benz recommends
that you use a Mercedes-Benz Service
Centre for this purpose.
For safety reasons, Mercedes-Benz recom -
mends that you only use seat belts which
have been approved by Mercedes-Benz for
your vehicle. Controls
171_AKB; 3; 4, en-GB
vpfaff7,
2007-11-13T10:50:25+01:00 - Seite 70
Page 194 of 273
Troubleshooting
19
1 Problem Possible cause/consequence Suggested solutions
The indicator lamp in the
9or
2 button of the Thermatic*/
Thermotronic *control panel is lit.
The cooling system cannot be
switched on. Cooling has been deactivated
due to a malfunction. X
Visit a qualified specialist workshop. The indicator lamp in the
¯
rear-window heating button is
flashing. The rear-window heat-
ing has switched itself off prema -
turely or cannot be switched on. There is insufficient voltag
e
because too many consumers are
switched on. X
Switch off consumers that are not required, e.g. reading lamps ,
interior lighting, etc .
The rear-window heating will automatically switch back on as soon
as there is sufficient voltage again. The
75 PASSENGER
AIRBAG OFF warning lamp on the
centre console is lit. A special Mercedes-Benz child
seat with automatic child seat
recognition has been fitted to the
front-passenger seat. The front-
passenger airbag has therefore
been disabled. Practical advice
* optional
171_AKB; 3; 4, en-GB
vpfaff7,
2007-11-13T10:50:25+01:00 - Seite 191 Z