Page 178 of 231
178 Navigation
POIs (Points of Interest)
Selecting a POI
�Press G or g to select a POI.
�Press the Details soft key if required.
Details on the destination are shown.
�Sort soft key:
Sorts list entries either by increasing
distance or alphabetically.
�Press E.
The Route Guidance menu will appear
(
�page 151).
�In the Point of Interest menu
(
�page 177), select menu item
Different City.
�Enter a location as described in
paragraph “Entering destination
address” (
�page 137).
Selecting a POI around another
location
Page 179 of 231

179
Navigation
POIs (Points of Interest)
�After entering the location, proceed as
described in paragraph “Selecting a
POI around your current location” at
“Selecting a category” (
�page 177).
�In the POI menu (�page 176), select
menu item
Global Destinations.
The list of global destinations
categories will appear.
Now you can
�select a special destination category
(
�page 179)
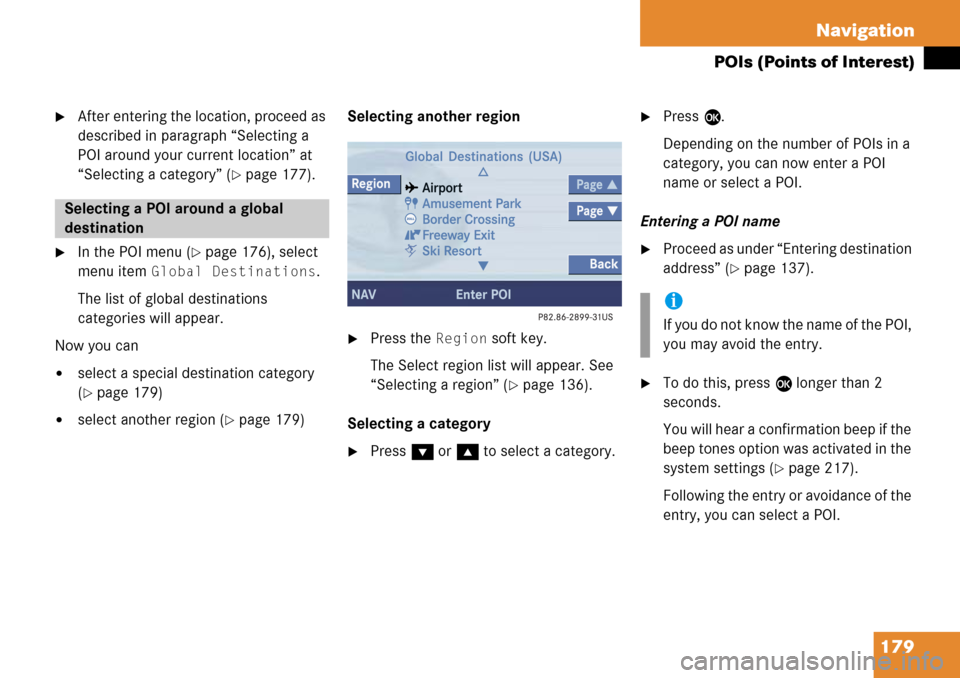
�select another region (�page 179) Selecting another region
�Press the Region soft key.
The Select region list will appear. See
“Selecting a region” (
�page 136).
Selecting a category
�Press G or g to select a category.
�Press E.
Depending on the number of POIs in a
category, you can now enter a POI
name or select a POI.
Entering a POI name
�Proceed as under “Entering destination
address” (
�page 137).
�To do this, press E longer than 2
seconds.
You will hear a confirmation beep if the
beep tones option was activated in the
system settings (
�page 217).
Following the entry or avoidance of the
entry, you can select a POI.
Selecting a POI around a global
destination
i
If you do not know the name of the POI,
you may avoid the entry.
Page 180 of 231
180 Navigation
POIs (Points of Interest)
Selecting a POI
�Press G or g to select a POI.
The list also shows the straight-line
distance to and the direction of the
Point of Interest.
�Press the Details soft key if required.
Details on the POI are shown.
�Press E.
The Route Guidance menu will appear
(
�page 151).
�Press c.
or
�In the Destination Entry menu
(
�page 136), press the Map soft key.
The full view of the map will appear.
Your current position and the special
destinations are indicated by symbols.�If required, move the map pressing
H , h , g , G ,F and f.
�If the soft key displays are hidden,
press any soft key.
The soft key displays will appear.
Selecting a POI on the map
i
You will see the symbols only if the map
scale is 0.05 mi/inch, 0.1 mi/inch,
0.2 mi/inch or 0.5 mi/inch
(
�page 153).
i
You can define which symbols will be
shown on the map (
�page 168).
i
If the system does not find any POI, the
message
No POIs Found will appear.
Page 181 of 231
181
Navigation
POIs (Points of Interest)
�Press the POIs soft key.
One of the POI is marked in color. The
name belonging to it and the distance
are shown on the status bar.�Use the Next or Prev. soft key
to select the desired POI.
�Press the Details soft key if required.
Details on the POI selected are shown.
�Press E.
The Route Guidance menu will appear
(
�page 151).
Page 182 of 231

182 Navigation
Software Updates
� Software Updates
You can update the system with a new
navigation DVD. The new DVD may include
new maps and/or new device software.
Starting an update
�Switch the COMAND on (�page 34).
DVDs are loaded and ejected at the
navigation computer. Ejecting
�Press
l.
The navigation computer ejects the
DVD.
Loading
�Insert the new navigation DVD into the
DVD slot with the label side up.
The message
Navigation Being
Activated Please Wait
will
appear. After that, the COMAND loads the
software on the DVD.
Shortly after that, the progress bar
appears. After some time, the progress
bar reaches 100%.
The update is completed. You can now
operate the navigation system again.
The message
Navigation Being
Activated Please Wait
appears after
the system is switched on:
�for a short time
The update is completed. You can now
operate the navigation system again.
�for a longer time
COMAND was unable to update the
software.
i
Updating may take several minutes.
During updating, the operation of
COMAND is restricted. You cannot
switch off the system.
After updating, the car should remain
outside under open sky for 10 minutes
with the ignition on.
i
The navigation computer is located on
the left side in the trunk (
�page 127).
i
If you do not remove the DVD from
the slot within around 15 seconds, the
COMAND will pull the DVD into the
drive.
Page 203 of 231

203
Service
Address book
If the address book entry offers
appropriate data, it may be used in other
system modes such as telephone and
navigation.
�Press
H, h , g or G t o s e l e c t t h e
desired entry (
�page 193).
�Press E.
or
�In the detail view (�page 194), press
E longer than 2 seconds.
You will hear a confirmation beep if the
beep tones option was activated in the
system settings (
�page 217).
The selection menu appears.
Selections appearing will depend on
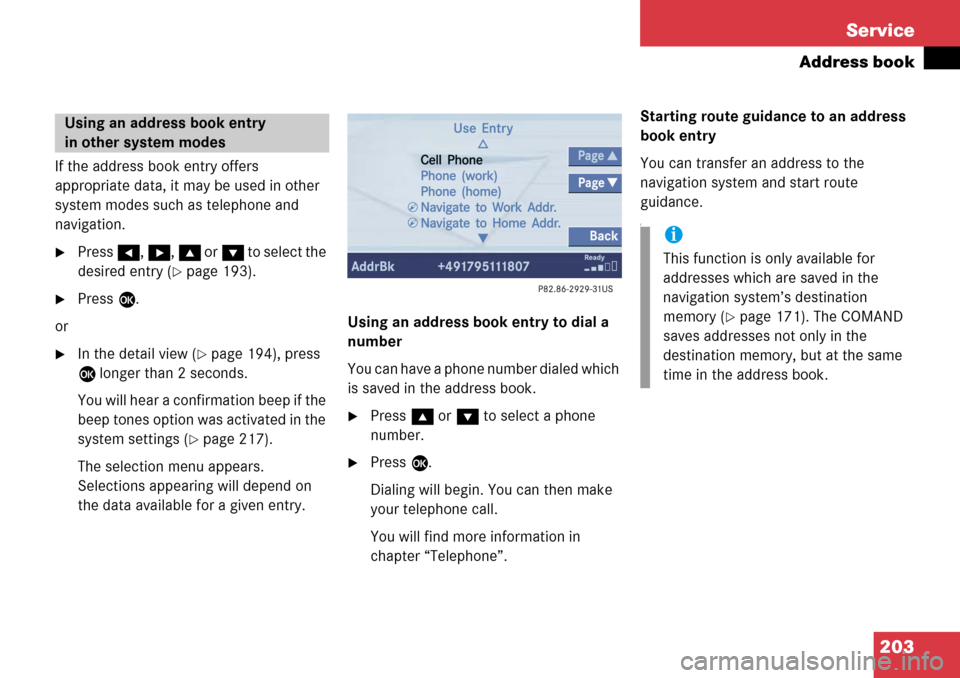
the data available for a given entry. Using an address book entry to dial a
number
You can have a phone number dialed which
is saved in the address book.
�Press
g or G to select a phone
number.
�Press E.
Dialing will begin. You can then make
your telephone call.
You will find more information in
chapter “Telephone”. Starting route guidance to an address
book entry
You can transfer an address to the
navigation system and start route
guidance.
f
Using an address book entry
in other system modes
i
This function is only available for
addresses which are saved in the
navigation system’s destination
memory (
�page 171). The COMAND
saves addresses not only in the
destination memory, but at the same
time in the address book.
Page 204 of 231
204 Service
Address book
�Press g or G to select an entry
which allows route guidance
(navigation).
�Press E.
The system changes to the navigation
system and calculates the route.
You will find more information in
chapter “Navigation”.
i
The route is calculat ed with or without
traffic routes selected for the
destination (
�page 132).
Page 207 of 231

207
Service
Tele Aid
If the Tele Aid system could not establish a
voice connection to a Mercedes-Benz
Roadside Center (e.g. the relevant cellular
phone network is not available). The
message
Call failed appears.
Terminating the connection
Roadside Assistance calls can be
terminated using the
ì button on the
multifunctional steering wheel or the K
key on COMAND. The call can also be
terminated by the Roadside Assistance
Center.
The COMAND reverts to the system last
active before a Tele Aid call was initiated. Pressing the
¡ button, a call to the
Mercedes-Benz Customer Assistance
Center will be initiated. Information
regarding the operation of your vehicle, the
nearest authorized Mercedes-Benz Center
or Mercedes-Benz USA products and
services is available to you.
Refer to your vehicle Operator’s Manual for
additional information.
After initiating an Information call, the
message
Connecting Call will appear
on display. The system is then establishing
a connection to the Mercedes-Benz
Customer Assistance Center. All audio
sources are muted.
If the connection is established, the
message
Call Connected will appear
and a voice connection between the
Roadside Assistance Center and the
vehicle occupants is established soon
after.
i
During an active Roadside Assistance
call, switching to another application
(e.g. Navigation) is possible.
Information call