Page 24 of 569
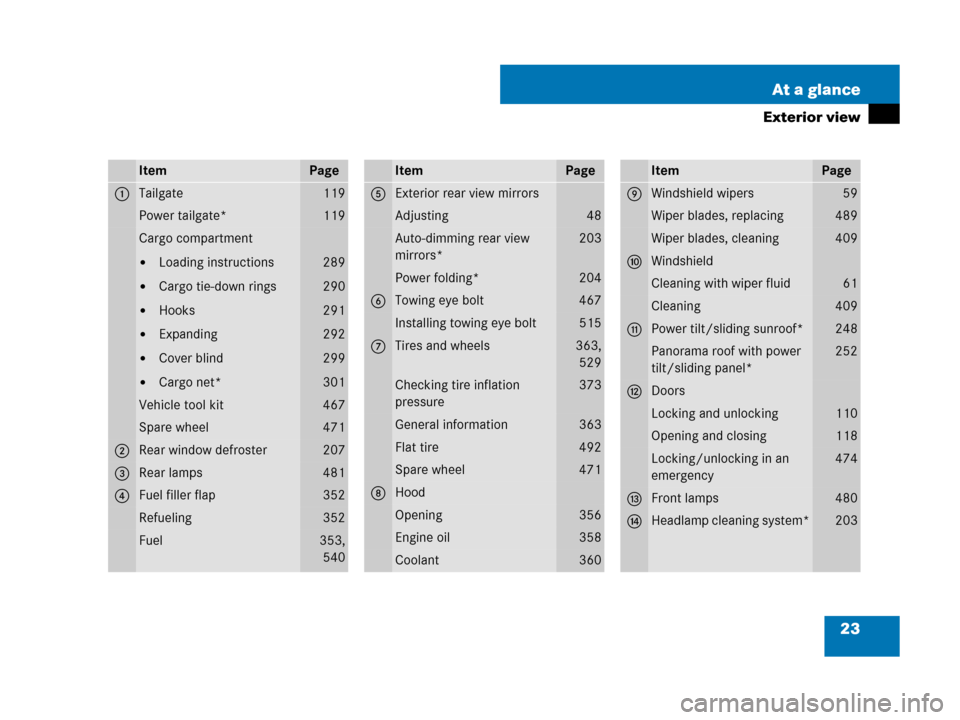
23 At a glance
Exterior view
ItemPage
1Tailgate119
Power tailgate*119
Cargo compartment
�Loading instructions
�Cargo tie-down rings
�Hooks
�Expanding
�Cover blind
�Cargo net*
289
290
291
292
299
301
Vehicle tool kit467
Spare wheel471
2Rear window defroster207
3Rear lamps481
4Fuel filler flap352
Refueling352
Fuel353,
540
ItemPage
5Exterior rear view mirrors
Adjusting48
Auto-dimming rear view
mirrors*203
Power folding*204
6Towing eye bolt467
Installing towing eye bolt515
7Tires and wheels363,
529
Checking tire inflation
pressure373
General information363
Flat tire492
Spare wheel471
8Hood
Opening356
Engine oil358
Coolant360
ItemPage
9Windshield wipers59
Wiper blades, replacing489
Wiper blades, cleaning409
aWindshield
Cleaning with wiper fluid61
Cleaning409
bPower tilt/sliding sunroof*248
Panorama roof with power
tilt/sliding panel*252
cDoors
Locking and unlocking110
Opening and closing118
Locking/unlocking in an
emergency474
dFront lamps480
eHeadlamp cleaning system*203
Page 36 of 569
35 At a glance
Storage compartments
ItemPage
1Parcel net in front
passenger footwell307
2Glove box304
3Door pocket
4Parcel net on front
passenger seat backrest307
5Door pocket
6Cup holder308
7Third-row storage
compartment304
8First aid kit, vehicle tool kit,
spare wheel467
9Third-row storage
compartment304
aCup holder308
bDoor pocket
ItemPage
cParcel net on driver’s seat
backrest307
dDoor pocket
eStorage compartment in
center console304
fAshtray311
gCupholders308
hFront armrest storage
compartment/telephone
tray304
jCup holders
Rear storage compartment
Rear seat ashtray308
304
311
kCup holders*308
lRear armrest storage
compartment*304
Page 468 of 569
467 Practical hints
Where will I find ...?
�Where will I find ...?
First aid kit
The first aid kit is stored under the cargo
compartment floor, see “Vehicle tool kit”
(
�page 467).
Vehicle tool kit
The vehicle tool kit is stored under the
cargo compartment floor.
The vehicle tool kit includes:
�Towing eye bolt
�Wheel wrench
�Alignment bolt
�Vehicle jack
�Fuse chart
�Collapsible wheel chock
�Wheel bolts for spare wheel
(if applicable, see “Mounting the spare
wheel” (
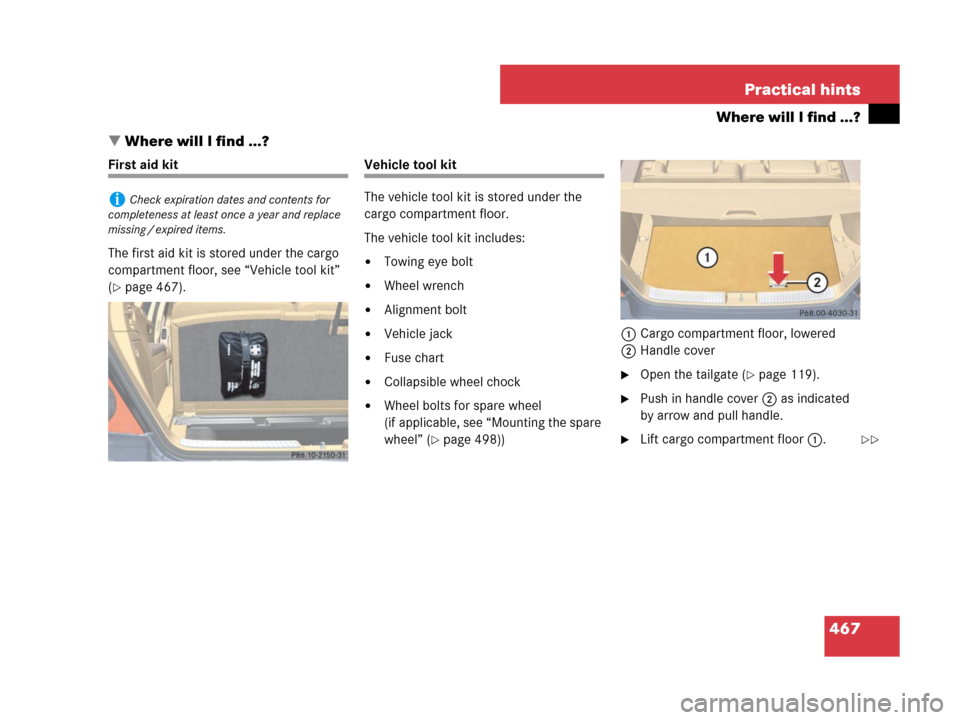
�page 498))1Cargo compartment floor, lowered
2Handle cover
�Open the tailgate (�page 119).
�Push in handle cover2 as indicated
by arrow and pull handle.
�Lift cargo compartment floor 1.
iCheck expiration dates and contents for
completeness at least once a year and replace
missing / expired items.
��
Page 470 of 569

1Wheel wrench
2Electric air pump
3Mounting direction indicator")
469 Practical hints
Where will I find ...?
Vehicle tool kit storage well casing
Example illustration1
(vehicles with scissors-type jack)
1Wheel wrench
2Electric air pump
3Mounting direction indicator
4Fuse chart
5Hook and loop fastener
6Alignment bolt
7Collapsible wheel chock
8Towing eye bolt
9Spare wheel (collapsible tire)
aSpare wheel bolts
bVehicle tool kit storage well casing
cReversible ratchet
(comes with scissors-type jack only)
dJack
�To remove jackd, loosen hook and
loop fastener 5.
�To remove the vehicle tool kit storage
well casing, proceed as described
on (
�page 472).Vehicle jack
The vehicle jack is located underneath the
storage compartment floor.�Remove vehicle jack from its storage
compartment (
�page 467).
1Appearance and alignment of the items may vary.
Warning!G
Only use the jack supplied with your vehicle
to lift the vehicle briefly for wheel changes.
If you use the jack for any other purpose,
you or others could be inju re d, as the j ac k is
designed only for the purpose of changing a
wheel.
When using the jack, observe the safety
notes in the “Mounting the spare wheel”
section (
�page 493) and the notes on the
jack.
Page 473 of 569
.
Removin")
472 Practical hints
Where will I find ...?
Your vehicle is equipped with a spare
wheel with collapsible tire. The spare
wheel is located underneath the cargo
compartment floor (
�page 467).
Removing the spare wheel
1Retaining screw
2Spare wheel
3Vehicle tool kit storage well casing
�Remove the jack from the vehicle tool
kit (
�page 469).
�Loosen retaining screw 1 by turning it
counterclockwise.
�Turn vehicle tool kit storing well
casing3 by approximately 180°.
The electric air pump (
�page 469)
points towards the rear.
�Remove vehicle tool kit storage well
casing 3.
�Remove spare wheel 2.
Reinstalling the spare wheel after use
There are two guide pins in the spare wheel
well that serve to hold the spare wheel in
place.1Guide pins
1Guide pins
2Spare wheel
iFor information on how to mount the spare
wheel, see “Mounting the spare wheel”
(
�page 493).
iIf retaining screw 1 does not come loose,
turn vehicle tool kit storing well casing 3 slightly
counterclockwise. Retaining screw 1 should
then come loose easily.
Page 498 of 569
497 Practical hints
Flat tire
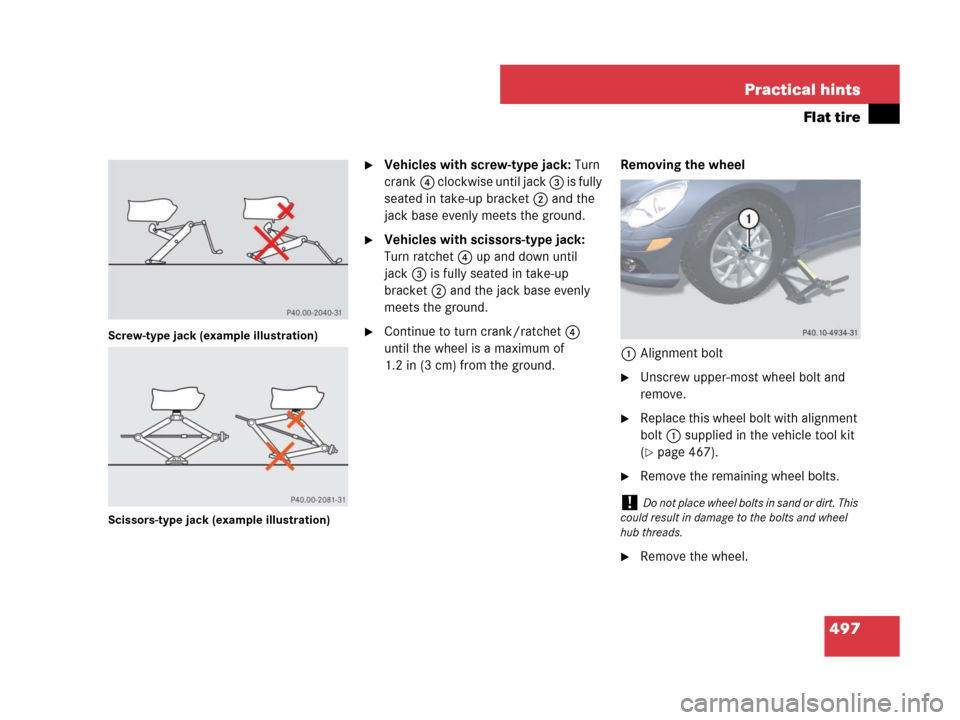
Screw-type jack (example illustration)
Scissors-type jack (example illustration)
�Vehicles with screw-type jack: Turn
crank4 clockwise until jack 3 is fully
seated in take-up bracket2 and the
jack base evenly meets the ground.
�Vehicles with scissors-type jack:
Turn ratchet 4 up and down until
jack3 is fully seated in take-up
bracket2 and the jack base evenly
meets the ground.
�Continue to turn crank/ratchet 4
until the wheel is a maximum of
1.2 in (3 cm) from the ground.Removing the wheel
1Alignment bolt
�Unscrew upper-most wheel bolt and
remove.
�Replace this wheel bolt with alignment
bolt1 supplied in the vehicle tool kit
(
�page 467).
�Remove the remaining wheel bolts.
�Remove the wheel.
!Do not place wheel bolts in sand or dirt. This
could result in damage to the bolts and wheel
hub threads.
Page 500 of 569
.
Electric air pump
1Flap
2On/off switch
3Electrical plu")
499 Practical hints
Flat tire
Inflating the collapsible tire
�Take the electric air pump out of the
vehicle tool kit storage well
(
�page 467).
Electric air pump
1Flap
2On/off switch
3Electrical plug
4Air hose with pressure gauge and vent
screw
5Union nut
�Open flap 1 on electric air pump.
�Pull out electrical plug 3 and air hose
with pressure gauge 4.
�Remove the valve cap from the
collapsible tire valve.
�Screw union nut 5 onto the
collapsible tire valve.
�Insert electrical plug 3 into a power
outlet (
�page 314).
�Turn the SmartKey in the starter switch
to position1.
�Vehicles with KEYLESS-GO*:
Press the KEYLESS-GO start/stop
button once without depressing the
brake pedal.
�Press I on electric air pump switch 2.
The electric air pump should now
switch on and inflate the collapsible
tire.
Warning!G
Inflate collapsible tire only after the wheel is
properly mounted.
Inflate the collapsible tire using the electric
air pump (
�page 467) before lowering the
vehicle.
Warning!G
Observe instructions on air pump label.
!Do not lower the vehicle before inflating the
collapsible tire. Otherwise the rim may be dam-
aged.
!The cigarette lighter (�page 312) is not de-
signed for use with the electric air pump. Use a
power outlet (
�page 314) for electric air pump
operation.
��
Page 520 of 569
519 Practical hints
Fuses
Fuse box in engine compartment
The main fuse box is located on the pas-
senger side of the engine compartment.
�Open the hood (�page 356).
1Clamp
2Main fuse box cover
�Release clamp1.
�Lift fuse box cover2 up.
�Install fuse box cover in reverse order.
�Close the hood after checking or re-
placing fuses (
�page 358).
Fuse box in cargo compartment
The fuse box is located under the cargo
compartment cover on the right-hand side
of the spare wheel well.
�Open the tailgate (�page 119).
�Lift the cargo compartment cover
(
�page 467).
�Secure cargo compartment cover with
securing hook (
�page 468).
1Cover
�Fold cover1 to the left as indicated by
the arrow.
!The fuse box cover must be installed
properly to prevent moisture and/or dirt from
entering the fuse box and possibly impairing fuse
operation.