Page 288 of 569
287 Controls in detail
Driving systems
Switching the rear view camera
on and off
�Switch on the ignition (�page 39).
�Shift the automatic transmission to
positionR (
�page 190).
The area behind the vehicle appears in
the COMAND system display.
�Shift the automatic transmission to
positionP,N orD to switch off the rear
view camera.
iThe area behind the vehicle is shown in the
COMAND system display as a mirror image, like
in the rear view mirror.
iThe image from the rear view camera will
no longer be displayed if you select another
function on the COMAND system while reverse
gear R is engaged. To display the image again,
disengage and reengage reverse gear R.
Page 312 of 569
311 Controls in detail
Useful features
Cupholders in third-row side trim
Cupholders are located in the side trims of
the third-row seats.
1Cup holderAshtrays
Your vehicle is equipped with an ashtray
and a cigarette lighter (
�page 313)
located in the front center console and an
ashtray located in front of the second-row
seats (
�page 312).
Ashtray in the front center console
Opening the ashtray
1Cover
2Chrome label
�Tab lightly on chrome label 2 of
cover1.
Cover 1 swings open.
Removing ashtray insert
Warning!G
Remove ashtray insert only with vehicle
standing still. Set the parking brake to
secure vehicle from movement. Set auto-
matic transmission toP. With the automatic
transmission set toP, turn off the engine.
Page 344 of 569

343 Operation
Driving instructions
ParkingTires
Warning!G
Do not park this vehicle in areas where com-
bustible materials such as grass, hay or
leaves can come into contact with the hot
exhaust system, as these materials could be
ignited and cause a vehicle fire.
To reduce the risk of personal injury or dam-
age to the vehicle drivetrain as a result of
vehicle movement, before turning off the en-
gine and leaving the vehicle always:
�Keep right foot on brake pedal.
�Firmly depress parking brake pedal.
�Shift the automatic transmission to
positionP.
�Slowly release brake pedal.
�When parked on an incline, turn front
wheel towards the road curb.
�Turn the SmartKey in the starter switch
to position0 and remove the SmartKey
from the starter switch, or press the
start/stop button (vehicles with
KEYLESS-GO*).
�Take the SmartKey or the SmartKey with
KEYLESS-GO* and lock vehicle when
leaving.
Warning!G
If you feel a sudden significant vibration or
ride disturbance, or you suspect that possi-
ble damage to your vehicle has occurred,
you should turn on the hazard warning
flashers, carefully slow down, and drive with
caution to an area which is a safe distance
from the road.
Inspect the tires and the vehicle underbody
for possible damage. If the vehicle or tires
appear unsafe, have the vehicle towed to
the nearest Mercedes-Benz Light Truck
Center or tire dealer for repairs.
Page 347 of 569

346 Operation
Driving instructions
Winter driving instructions
The most important rule for slippery or icy
roads is to drive sensibly and to avoid
abrupt acceleration, braking and steering
maneuvers. Do not use the cruise control
system under such conditions.
When the vehicle is in danger of skidding,
shift the automatic transmission to
positionN. Try to keep the vehicle under
control by corrective steering action.Road salts and chemicals can adversely af-
fect braking efficiency. Increased pedal
force may become necessary to produce
the normal brake effect.
Depressing the brake pedal periodically
when traveling at length on salt-strewn
roads can bring road-salt-impaired braking
efficiency back to normal.
If the vehicle is parked after being driven
on salt-treated roads, the braking
efficiency should be tested as soon as
possible after driving is resumed.
For more information, see “Winter driving”
(
�page 398).
iFor information on driving with snow chains,
see “Snow chains” (
�page 399).
Warning!G
On slippery road surfaces, never downshift
in order to obtain braking action. This could
result in drive wheel slip and reduced vehi-
cle control. Your vehicle’s ABS will not pre-
vent this type of control loss.
Warning!G
Make sure not to endanger any other road
users when carrying out these braking
maneuvers.
Warning!G
If the vehicle becomes stuck in snow, make
sure that snow is kept clear of the exhaust
pipe and from around the vehicle with the
engine running. Otherwise, deadly carbon
monoxide (CO) gases may enter vehicle
interior resulting in unconsciousness and
death.
To assure sufficient fresh air ventilation,
open a window slightly on the side of the
vehicle not facing the wind.
Warning!G
The outside temperature indicator is not
designed to serve as an ice-warning device
and is therefore unsuitable for that purpose.
Indicated temperatures just above the freez-
ing point do not guarantee that the road sur-
face is free of ice.
Page 361 of 569

360 Operation
Engine compartment
Be careful not to spill any oil when adding.
Avoid environmental damage caused by oil
entering the ground or water.
�Screw filler cap1 back on filler neck.
For more information on engine oil, see
“Technical data” section (
�page 536) and
(
�page 538).
Transmission fluid level
The transmission fluid level does not need
to be checked. If you notice transmission
fluid loss or gear shifting malfunctions,
have an authorized Mercedes-Benz Light
Truck Center check the automatic trans-
mission.Coolant level
The engine coolant is a mixture of water
and anticorrosion/antifreeze. To check
the coolant level, the vehicle must be
parked on level ground.
!Excess oil must be siphoned or drained off.
It could cause damage to the engine or
emission control system not covered by the
Mercedes-Benz Limited Warranty.
Warning!G
In order to avoid any potentially serious
burns:
�Use extreme caution when opening the
hood if there are any signs of steam or
coolant leaking from the cooling system,
or if the coolant temperature display
indicates that the coolant is overheated.
�Do not remove pressure cap on coolant
reservoir if coolant temperature is
above 158°F (70°C). Allow engine to
cool down before removing cap. The
coolant reservoir contains hot fluid and
is under pressure.
�Using a rag, slowly open the cap approx-
imately 1/2turn to relieve excess pres-
sure. If opened immediately, scalding
��
Page 382 of 569

381 Operation
Tires and wheels
Tire inflation pressure warnings
If the system detects a significant loss of
tire inflation pressure in one or more than
one tire, a message appears in the multi-
function display.
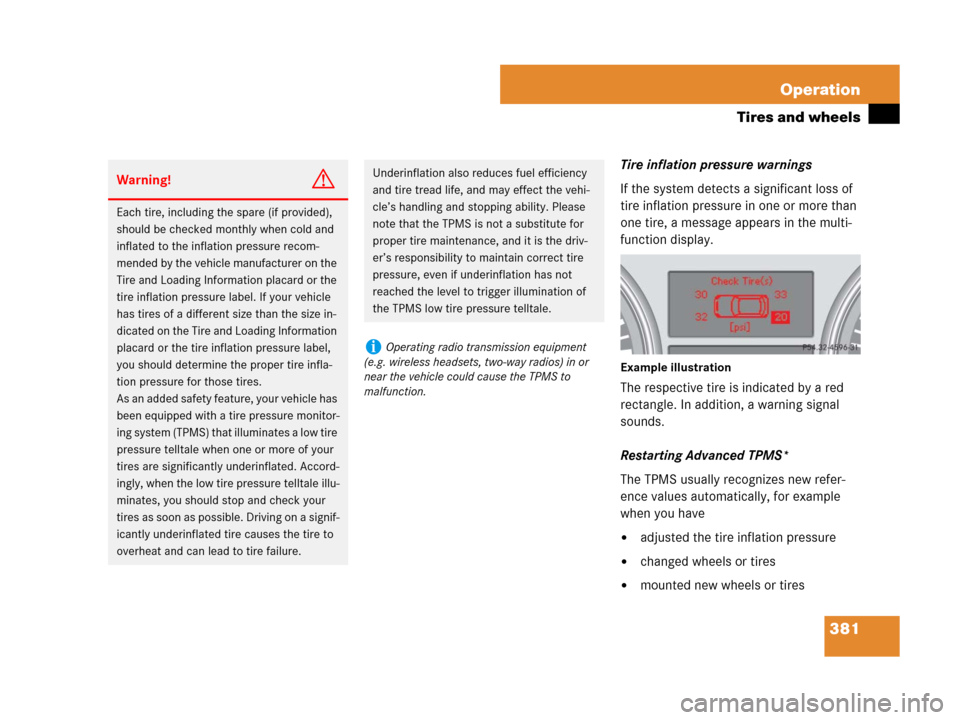
Example illustration
The respective tire is indicated by a red
rectangle. In addition, a warning signal
sounds.
Restarting Advanced TPMS*
The TPMS usually recognizes new refer-
ence values automatically, for example
when you have
�adjusted the tire inflation pressure
�changed wheels or tires
�mounted new wheels or tires
Warning!G
Each tire, including the spare (if provided),
should be checked monthly when cold and
inflated to the inflation pressure recom-
mended by the vehicle manufacturer on the
Tire and Loading Information placard or the
tire inflation pressure label. If your vehicle
has tires of a different size than the size in-
dicated on the Tire and Loading Information
placard or the tire inflation pressure label,
you should determine the proper tire infla-
tion pressure for those tires.
As an added safety feature, your vehicle has
been equipped with a tire pressure monitor-
ing system (TPMS) that illuminates a low tire
pressure telltale when one or more of your
tires are significantly underinflated. Accord-
ingly, when the low tire pressure telltale illu-
minates, you should stop and check your
tires as soon as possible. Driving on a signif-
icantly underinflated tire causes the tire to
overheat and can lead to tire failure.
Underinflation also reduces fuel efficiency
and tire tread life, and may effect the vehi-
cle’s handling and stopping ability. Please
note that the TPMS is not a substitute for
proper tire maintenance, and it is the driv-
er’s responsibility to maintain correct tire
pressure, even if underinflation has not
reached the level to trigger illumination of
the TPMS low tire pressure telltale.
iOperating radio transmission equipment
(e.g. wireless headsets, two-way radios) in or
near the vehicle could cause the TPMS to
malfunction.
Page 394 of 569

393 Operation
Tires and wheels
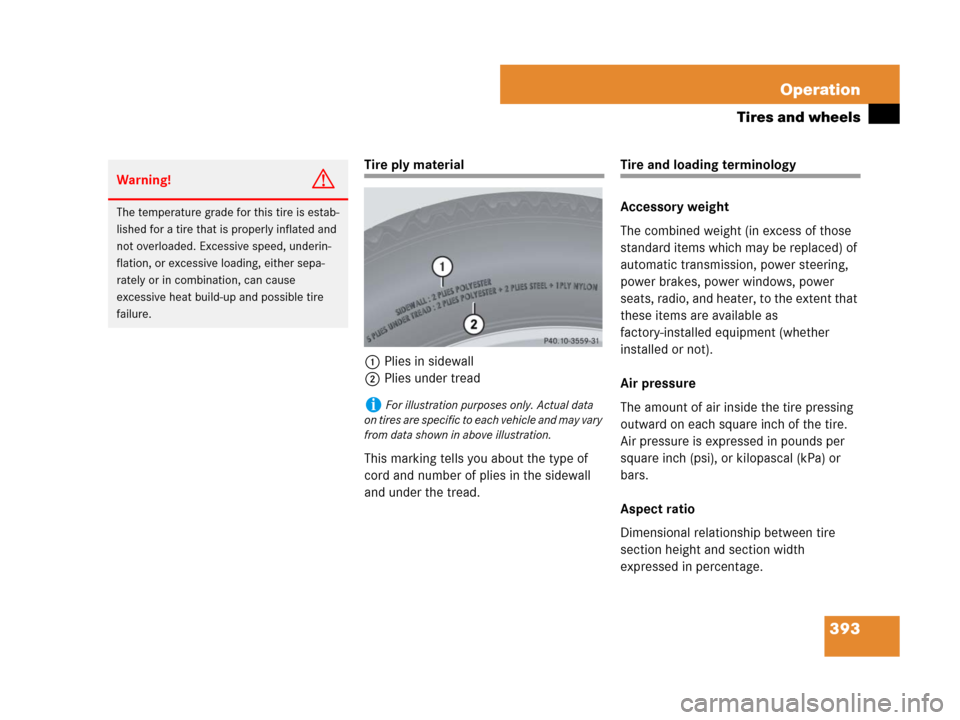
Tire ply material
1Plies in sidewall
2Plies under tread
This marking tells you about the type of
cord and number of plies in the sidewall
and under the tread.Tire and loading terminology
Accessory weight
The combined weight (in excess of those
standard items which may be replaced) of
automatic transmission, power steering,
power brakes, power windows, power
seats, radio, and heater, to the extent that
these items are available as
factory-installed equipment (whether
installed or not).
Air pressure
The amount of air inside the tire pressing
outward on each square inch of the tire.
Air pressure is expressed in pounds per
square inch (psi), or kilopascal (kPa) or
bars.
Aspect ratio
Dimensional relationship between tire
section height and section width
expressed in percentage.
Warning!G
The temperature grade for this tire is estab-
lished for a tire that is properly inflated and
not overloaded. Excessive speed, underin-
flation, or excessive loading, either sepa-
rately or in combination, can cause
excessive heat build-up and possible tire
failure.
iFor illustration purposes only. Actual data
on tires are specific to each vehicle and may vary
from data shown in above illustration.
Page 407 of 569

406 Operation
Vehicle care
When taking the vehicle through an auto-
matic conveyor type car wash, observe the
following instructions.Vehicles with SmartKey:
�With the vehicle at a standstill and the
ignition switched on shift the
automatic transmission to neutral
positionN.
�If engaged, release the parking brake
(
�page 56).
�Switch off the ignition and leave the
SmartKey in the starter switch.
Vehicles with KEYLESS-GO*:
�With the vehicle at a standstill, depress
the brake pedal and keep it pressed.
�With the ignition switched on shift the
automatic transmission to park
positionP.
�Release the brake pedal.
�Remove the KEYLESS-GO* start/stop
button from the starter switch
(
�page 41).
�Insert the SmartKey with
KEYLESS-GO* into the starter switch.
�Switch on the ignition.
�Depress the brake pedal.
�Shift the automatic transmission to
neutral positionN.
�Release the brake pedal.
�If engaged, release the parking brake
(
�page 56).
�Switch off the ignition and leave the
SmartKey with KEYLESS-GO* in the
starter switch.
Warning!G
When leaving the SmartKey or SmartKey
with KEYLESS-GO* in the starter switch, do
not leave children unattended in the vehicle.
It is possible for children to switch on the
ignition which could result in unsupervised
use of vehicle equipment.
A child’s unsupervised access to a vehicle
could result in an accident and/or serious
personal injury.
iAfter running the vehicle through an auto-
matic car wash, wipe any wax off of the wind-
shield (
�page 409). This will prevent smears
and reduce wiping noise which can be caused by
residual wax on the windshield.
When leaving the car wash, make sure that the
mirrors are folded out. Otherwise they may
vibrate.